
I stood there in my dimly lit basement, the smell of old dust and stagnant air hitting my nose as I spun those heavy walnut cabinets around. I was ready for a transcendent listening session, but what I saw instead was a crusty, chalky green mess where the copper should have been. It looked like a science experiment gone wrong, and my heart sank because I knew that ‘Statue of Liberty’ look was literally choking my signal. If you have ever peeked behind your receiver and felt that immediate ‘oh no’ moment when you saw the green fuzz, you are not alone. Have you ever let that corrosion sit for months, wondering why your audio suddenly felt thin? I definitely did, and it was a mistake I won’t repeat. [image_placeholder_1]
Stop Letting Corrosion Muffle Your Music
People often think that a little bit of green on their wires doesn’t matter, but that oxidation is a high-resistance barrier that sits right between your amp and your ears. Back when I was first getting into high-end audio, I made the amateur mistake of trying to scrape it off with a dry kitchen sponge. Not only did it not work, but I ended up scratching the soft copper so badly that the oxidation came back twice as fast. Proper cleaning is about chemical balance, not brute force. Learning the trick to making vintage speakers sound modern again starts with ensuring every single electron has a clear path through those terminals. Even if you have debated whether is gold-plated hardware really worth the extra cash, the reality is that most of us are working with raw copper or brass, and those materials are essentially magnets for moisture and oxygen. When they react, you get copper carbonate. According to the chemical experts at the Copper Development Association, this patina is a non-conductive layer that can significantly increase the impedance of your connection. This is often the reason your subwoofer makes a humming sound when nothing is playing or why your left channel suddenly sounds quieter than your right.
Is This Green Gunk Actually Worth the Cleaning Effort?
You might be tempted to just buy new wires and call it a day, but the terminals on the back of your expensive speakers or your vintage amplifier aren’t so easily replaced. If you leave that green crust to fester, it can eventually lead to permanent pitting in the metal. I’ve seen beautiful Marantz receivers from the 70s lose their value because the owner let the terminals rot. By taking fifteen minutes to clean them properly, you aren’t just fixing a sound issue; you are performing essential maintenance that preserves your gear. This process can even help how to fix the crackling noise when you turn your amp volume if the oxidation has managed to creep into the internal wiring. Today, I am going to walk you through the safe, household-remedy way to dissolve that green death and bring back the mirror-like shine to your copper.
Mix Your Own Copper Rescue Solution
To start, you do not need a specialized ‘audiophile’ spray that costs thirty dollars a bottle. I grab a small plastic cup and mix about two tablespoons of white vinegar with a teaspoon of salt. This creates a mild acidic solution that aggressively attacks copper carbonate. One time, I was working on a pair of thrifted Advents and the wire ends were so green they were practically brittle. I dipped the bare wire into my little ‘shot glass’ of solution and watched the green vanish in real-time. It is like magic, but be warned: I once knocked that cup over onto my shag carpet, and let us just say the room smelled like a pickle factory for a week. Keep your workspace stable and use a container with a wide base to avoid my mistakes. If you find that the terminal itself is wobbly while you are cleaning, it might be a good time to learn how to repair a loose speaker terminal in under five minutes. A clean connection is useless if the post is rattling against the chassis and breaking contact every time the bass hits.
Give Those Terminals a Proper Chemical Bath
Once your solution is ready, soak the affected copper for about thirty to sixty seconds. You will see the liquid turn a slight blue tint as the copper acetate forms. This is the ‘meat’ of the process where the resistance-heavy barrier is dissolved. If you are dealing with the terminals on the back of the amp rather than just the wire ends, use a Q-tip or a soft toothbrush dipped in the solution. Scrub gently but firmly. I have seen enthusiasts try to sand their terminals down, but that is a disaster; you are just removing conductive material and creating more surface area for future rust. This careful chemical approach is just as essential as knowing the best way to clean your ear tips for better noise isolation when dealing with portable gear. Clean surfaces equal better signal transmission, period. 
Neutralize the Acid or Pay the Price Later
After the copper transitions from a dull, sickly green to a bright, shiny pinkish hue, you must stop the reaction. If you do not neutralize that acid, the vinegar will continue to eat the metal until there is nothing left. Mix a second cup with warm water and a tablespoon of baking soda. This basic solution stops the chemical reaction dead in its tracks. Dip the wires or wipe the terminals thoroughly with this mixture. If your wires are exceptionally long, remember that why cheap speaker wire causes signal loss over 50 feet is often exacerbated by this very corrosion creeping under the insulation.
Seal the Deal to Prevent Future Green Gunk
Finally, you need to protect that raw copper. Oxygen is the enemy, and it is everywhere. Once the terminals are dry, I apply a tiny amount of DeoxIT or even a thin layer of technical-grade petroleum jelly to seal the metal from the air. I have often wondered if the truth about gold-plated audio connectors for home stereos is simply that they save us from this maintenance headache. Gold does not oxidize, but for those of us sticking with high-quality raw copper, this periodic bath is the price of admission for high-fidelity sound.
Why your ‘cleaned’ terminals might still be failing you
Most audiophiles assume that once the copper is pink and shiny, the signal path is perfect. However, here is the contrarian truth: a purely visual cleaning is often insufficient because of ‘constriction resistance.’ Even if a terminal looks clean to the naked eye, microscopic contaminants can significantly reduce the actual contact area where the metal meets the wire. According to the foundational research of Dr. Ragnar Holm in his book ‘Electric Contacts,’ the actual area of electrical contact is often a tiny fraction of the apparent physical area. If you haven’t fully removed the chemical film from your cleaning solution, you are essentially bottlenecking your amplifier’s output. This is often the real reason your amp is getting hot to the touch; it’s working overtime to push current through a high-resistance junction. 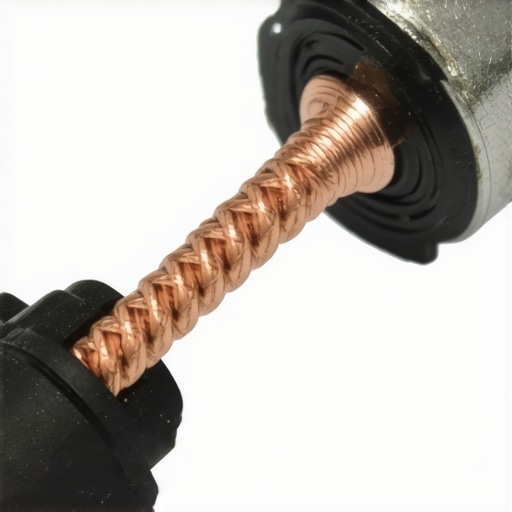
Does microscopic residue actually ruin your soundstage?
It absolutely can. When you have a thin film of oxidation or leftover cleaning acid, it doesn’t just block volume; it can introduce non-linearities in the signal. This is a common advanced mistake that leads people to believe they have a blown driver or a failing crossover. Before you go searching for how to use a 9v battery to check your speaker polarity, ensure your contact points are chemically neutral. If the left channel has slightly more residue than the right, your phantom center will shift, and you will spend hours tweaking your room acoustics for a problem that exists entirely inside your binding posts.
The dangerous trap of using household lubricants on audio gear
The biggest ‘oops’ factor I see in the vintage community is the use of WD-40 or similar household oils to ‘protect’ terminals. While these products are great for a squeaky door hinge, they are a disaster for high-fidelity audio. These oils are non-conductive and, over time, they attract dust and pet hair, forming a gummy sludge that is harder to remove than the original corrosion. If you want to step up your game, look into the real performance benefit of using balanced xlr cables, which are designed to minimize these kinds of physical contact issues entirely. For those of us with standard terminals, stick to dedicated contact cleaners or the vinegar-and-salt method, followed by a meticulous rinse. This attention to detail is why some people’s gear lasts forty years while others’ ends up in the scrap heap. Have you ever fallen into this trap and used a generic lubricant on your gear? Let me know in the comments. It is a learning curve we have all been on, much like figuring out why your expensive headphones sound thin on a basic smartphone—it almost always comes down to the integrity of the signal path and the power delivery at the very end of the chain.
I have spent thousands of hours tinkering with vintage gear, and if there is one thing I have learned, it is that environmental control is your best friend. If you live in a humid area, your terminals will oxidize faster than a cheap car in a salt mine. I personally keep a desiccant pack inside my larger speaker cabinets—yes, those little ‘do not eat’ silica bags. They help keep the internal wiring dry and the crossovers free from moisture-induced drift. If you are looking at a larger setup, maybe you are wondering about the best way to position rear speakers for a 5.1 system. While you are back there, check the tension on the screws. Thermal expansion and contraction from your amp heating and cooling can actually loosen binding posts over time, creating a physical gap that kills your bass response.
What I keep in my audio first-aid kit
I do not just use vinegar; that is for emergencies. For my ‘good’ stuff, I swear by a specialized contact cleaner like DeoxIT D5. I use it because it does not just clean; it contains a deoxidizer that chemically bonds with the metal to prevent future buildup. I also keep a set of ESD-safe brushes—the ones with the stiff black bristles. They will not generate static that could potentially zap a sensitive component or a DAC chip. If you have ever wondered why your surround sound receiver keeps clicking into protect mode, it is often because a tiny stray wire strand or a bit of conductive debris is bridging the terminals. A quick brush-down and a blast of compressed air can save you a three-hundred-dollar repair bill. 
How do I keep my audio gear sounding new for years?
Consistency beats intensity every single time. Every six months, I do a ‘walk-around.’ I unplug every RCA cable, wipe the tips with an isopropyl-soaked microfiber, and plug them back in. This ‘wiping’ action of the connector itself helps break through any micro-oxidation that has formed. I also check the heat vents. If you notice why your new amplifier gets hot after only twenty minutes, it is likely a dust buildup or lack of airflow. According to the technical guidelines from the Audio Engineering Society (AES) on equipment longevity, maintaining a stable temperature and low humidity is the single most effective way to prevent component failure. For vinyl lovers, maintaining the signal path means you also need to know how to properly ground your turntable to stop that buzzing noise, as even a clean terminal can’t fix a ground loop hum.
Why the future of audio maintenance is smarter than you think
Looking ahead, I think we are going to see ‘smart terminals’ that can actually measure contact resistance in real-time and alert your smartphone when it is time for a cleaning. We already have technology explaining why your smart speaker is actually listening to your room acoustics, so integrated diagnostics for physical connections are the logical next step. Until then, you have to be the diagnostic tool. If you notice your why your headphones sound slightly different in each ear, do not just adjust the balance knob; check the jack for lint or oxidation. Before you buy a single new piece of gear, I want you to try this: pull your speakers out from the wall and check those connections right now. If they are not shiny, do the vinegar-and-salt bath I mentioned. You might find that 3 budget upgrades that make cheap speakers sound expensive start with exactly zero dollars and a little bit of elbow grease.
I stood there in my dimly lit basement, the smell of old dust and stagnant air hitting my nose as I spun those heavy walnut cabinets around. I was ready for a transcendent listening session, but what I saw instead was a crusty, chalky green mess where the copper should have been. It looked like a science experiment gone wrong, and my heart sank because I knew that ‘Statue of Liberty’ look was literally choking my signal. If you have ever peeked behind your receiver and felt that immediate ‘oh no’ moment when you saw the green fuzz, you are not alone. Have you ever let that corrosion sit for months, wondering why your audio suddenly felt thin? I definitely did, and it was a mistake I won’t repeat. [image_placeholder_1]
Stop Letting Corrosion Muffle Your Music
People often think that a little bit of green on their wires doesn’t matter, but that oxidation is a high-resistance barrier that sits right between your amp and your ears. Back when I was first getting into high-end audio, I made the amateur mistake of trying to scrape it off with a dry kitchen sponge. Not only did it not work, but I ended up scratching the soft copper so badly that the oxidation came back twice as fast. Proper cleaning is about chemical balance, not brute force. Learning the trick to making vintage speakers sound modern again starts with ensuring every single electron has a clear path through those terminals. Even if you have debated whether is gold-plated hardware really worth the extra cash, the reality is that most of us are working with raw copper or brass, and those materials are essentially magnets for moisture and oxygen. When they react, you get copper carbonate. According to the chemical experts at the Copper Development Association, this patina is a non-conductive layer that can significantly increase the impedance of your connection. This is often the reason your subwoofer makes a humming sound when nothing is playing or why your left channel suddenly sounds quieter than your right.
Is This Green Gunk Actually Worth the Cleaning Effort?
You might be tempted to just buy new wires and call it a day, but the terminals on the back of your expensive speakers or your vintage amplifier aren’t so easily replaced. If you leave that green crust to fester, it can eventually lead to permanent pitting in the metal. I’ve seen beautiful Marantz receivers from the 70s lose their value because the owner let the terminals rot. By taking fifteen minutes to clean them properly, you aren’t just fixing a sound issue; you are performing essential maintenance that preserves your gear. This process can even help how to fix the crackling noise when you turn your amp volume if the oxidation has managed to creep into the internal wiring. Today, I am going to walk you through the safe, household-remedy way to dissolve that green death and bring back the mirror-like shine to your copper.
Mix Your Own Copper Rescue Solution
To start, you do not need a specialized ‘audiophile’ spray that costs thirty dollars a bottle. I grab a small plastic cup and mix about two tablespoons of white vinegar with a teaspoon of salt. This creates a mild acidic solution that aggressively attacks copper carbonate. One time, I was working on a pair of thrifted Advents and the wire ends were so green they were practically brittle. I dipped the bare wire into my little ‘shot glass’ of solution and watched the green vanish in real-time. It is like magic, but be warned: I once knocked that cup over onto my shag carpet, and let us just say the room smelled like a pickle factory for a week. Keep your workspace stable and use a container with a wide base to avoid my mistakes. If you find that the terminal itself is wobbly while you are cleaning, it might be a good time to learn how to repair a loose speaker terminal in under five minutes. A clean connection is useless if the post is rattling against the chassis and breaking contact every time the bass hits.
Give Those Terminals a Proper Chemical Bath
Once your solution is ready, soak the affected copper for about thirty to sixty seconds. You will see the liquid turn a slight blue tint as the copper acetate forms. This is the ‘meat’ of the process where the resistance-heavy barrier is dissolved. If you are dealing with the terminals on the back of the amp rather than just the wire ends, use a Q-tip or a soft toothbrush dipped in the solution. Scrub gently but firmly. I have seen enthusiasts try to sand their terminals down, but that is a disaster; you are just removing conductive material and creating more surface area for future rust. This careful chemical approach is just as essential as knowing the best way to clean your ear tips for better noise isolation when dealing with portable gear. Clean surfaces equal better signal transmission, period.
Neutralize the Acid or Pay the Price Later
After the copper transitions from a dull, sickly green to a bright, shiny pinkish hue, you must stop the reaction. If you do not neutralize that acid, the vinegar will continue to eat the metal until there is nothing left. Mix a second cup with warm water and a tablespoon of baking soda. This basic solution stops the chemical reaction dead in its tracks. Dip the wires or wipe the terminals thoroughly with this mixture. If your wires are exceptionally long, remember that why cheap speaker wire causes signal loss over 50 feet is often exacerbated by this very corrosion creeping under the insulation.
Seal the Deal to Prevent Future Green Gunk
Finally, you need to protect that raw copper. Oxygen is the enemy, and it is everywhere. Once the terminals are dry, I apply a tiny amount of DeoxIT or even a thin layer of technical-grade petroleum jelly to seal the metal from the air. I have often wondered if the truth about gold-plated audio connectors for home stereos is simply that they save us from this maintenance headache. Gold does not oxidize, but for those of us sticking with high-quality raw copper, this periodic bath is the price of admission for high-fidelity sound.
Why your ‘cleaned’ terminals might still be failing you
Most audiophiles assume that once the copper is pink and shiny, the signal path is perfect. However, here is the contrarian truth: a purely visual cleaning is often insufficient because of ‘constriction resistance.’ Even if a terminal looks clean to the naked eye, microscopic contaminants can significantly reduce the actual contact area where the metal meets the wire. According to the foundational research of Dr. Ragnar Holm in his book ‘Electric Contacts,’ the actual area of electrical contact is often a tiny fraction of the apparent physical area. If you haven’t fully removed the chemical film from your cleaning solution, you are essentially bottlenecking your amplifier’s output. This is often the real reason your amp is getting hot to the touch; it’s working overtime to push current through a high-resistance junction.
Does microscopic residue actually ruin your soundstage?
It absolutely can. When you have a thin film of oxidation or leftover cleaning acid, it doesn’t just block volume; it can introduce non-linearities in the signal. This is a common advanced mistake that leads people to believe they have a blown driver or a failing crossover. Before you go searching for how to use a 9v battery to check your speaker polarity, ensure your contact points are chemically neutral. If the left channel has slightly more residue than the right, your phantom center will shift, and you will spend hours tweaking your room acoustics for a problem that exists entirely inside your binding posts.
The dangerous trap of using household lubricants on audio gear
The biggest ‘oops’ factor I see in the vintage community is the use of WD-40 or similar household oils to ‘protect’ terminals. While these products are great for a squeaky door hinge, they are a disaster for high-fidelity audio. These oils are non-conductive and, over time, they attract dust and pet hair, forming a gummy sludge that is harder to remove than the original corrosion. If you want to step up your game, look into the real performance benefit of using balanced xlr cables, which are designed to minimize these kinds of physical contact issues entirely. For those of us with standard terminals, stick to dedicated contact cleaners or the vinegar-and-salt method, followed by a meticulous rinse. This attention to detail is why some people’s gear lasts forty years while others’ ends up in the scrap heap. Have you ever fallen into this trap and used a generic lubricant on your gear? Let me know in the comments. It is a learning curve we have all been on, much like figuring out why your expensive headphones sound thin on a basic smartphone—it almost always comes down to the integrity of the signal path and the power delivery at the very end of the chain.
I have spent thousands of hours tinkering with vintage gear, and if there is one thing I have learned, it is that environmental control is your best friend. If you live in a humid area, your terminals will oxidize faster than a cheap car in a salt mine. I personally keep a desiccant pack inside my larger speaker cabinets—yes, those little ‘do not eat’ silica bags. They help keep the internal wiring dry and the crossovers free from moisture-induced drift. If you are looking at a larger setup, maybe you are wondering about the best way to position rear speakers for a 5.1 system. While you are back there, check the tension on the screws. Thermal expansion and contraction from your amp heating and cooling can actually loosen binding posts over time, creating a physical gap that kills your bass response.
What I keep in my audio first-aid kit
I do not just use vinegar; that is for emergencies. For my ‘good’ stuff, I swear by a specialized contact cleaner like DeoxIT D5. I use it because it does not just clean; it contains a deoxidizer that chemically bonds with the metal to prevent future buildup. I also keep a set of ESD-safe brushes—the ones with the stiff black bristles. They will not generate static that could potentially zap a sensitive component or a DAC chip. If you have ever wondered why your surround sound receiver keeps clicking into protect mode, it is often because a tiny stray wire strand or a bit of conductive debris is bridging the terminals. A quick brush-down and a blast of compressed air can save you a three-hundred-dollar repair bill.
How do I keep my audio gear sounding new for years?
Consistency beats intensity every single time. Every six months, I do a ‘walk-around.’ I unplug every RCA cable, wipe the tips with an isopropyl-soaked microfiber, and plug them back in. This ‘wiping’ action of the connector itself helps break through any micro-oxidation that has formed. I also check the heat vents. If you notice why your new amplifier gets hot after only twenty minutes, it is likely a dust buildup or lack of airflow. According to the technical guidelines from the Audio Engineering Society (AES) on equipment longevity, maintaining a stable temperature and low humidity is the single most effective way to prevent component failure. For vinyl lovers, maintaining the signal path means you also need to know how to properly ground your turntable to stop that buzzing noise, as even a clean terminal can’t fix a ground loop hum.
Why the future of audio maintenance is smarter than you think
Looking ahead, I think we are going to see ‘smart terminals’ that can actually measure contact resistance in real-time and alert your smartphone when it is time for a cleaning. We already have technology explaining why your smart speaker is actually listening to your room acoustics, so integrated diagnostics for physical connections are the logical next step. Until then, you have to be the diagnostic tool. If you notice your why your headphones sound slightly different in each ear, do not just adjust the balance knob; check the jack for lint or oxidation. Before you buy a single new piece of gear, I want you to try this: pull your speakers out from the wall and check those connections right now. If they are not shiny, do the vinegar-and-salt bath I mentioned. You might find that 3 budget upgrades that make cheap speakers sound expensive start with exactly zero dollars and a little bit of elbow grease.
Lessons from a decade of hunting green fuzz
Over the years, I’ve realized that the ‘Statue of Liberty’ effect is often a warning sign of a deeper issue. First, if you see the green color creeping up inside the plastic insulation, cut the wire back. Capillary action can suck moisture inches deep into the cable, and you cannot clean what you cannot reach. Secondly, never underestimate the ‘Sniff Test.’ If your terminals still smell like vinegar after rinsing, you haven’t used enough baking soda to neutralize the reaction. Finally, before you start troubleshooting complex issues or wondering how to tell if your headphones have a blown driver, always double-check the tightness of your binding posts; vibration is a slow-motion thief of sound quality.
My personal inventory for a crystal-clear signal
To keep my system at peak performance, I rely on a few specific tools. I always keep a bottle of DeoxIT D5 handy for delicate vintage equipment, as it’s far safer than DIY mixtures for silver-plated components. I also suggest investing in a simple digital multimeter to check the continuity of your cleaned cables—it’s a much more reliable diagnostic than the old-school trick of how to use a 9v battery to check your speaker polarity. For high-powered setups, I even look at the 50-amp that drives high impedance cans without a struggle to ensure my power delivery matches the cleanliness of my signal path. I also recommend following the official AES white papers on metal-to-metal contact to understand the physics behind your music.
Rediscover the music you already own
It is incredibly satisfying to take a muddy, neglected system and bring it back to life with just a few household items. Cleaning your terminals isn’t just about the science; it is about the feeling you get when the soundstage opens up and you hear a detail in a favorite song that was previously buried in the noise. While you are optimizing your gear, don’t forget that physical setup matters too—ensuring why your center channel should always be at ear level can be the final touch after your connections are polished. Now, go take a look behind your setup and see what’s hiding there. Have you ever noticed a sudden drop in volume or clarity only to find that green fuzz on your wires? Let me know your cleaning stories in the comments below.