
I still remember the smell of electrical ozone and burning adhesive wafting from my living room corner. I had just purchased a gorgeous set of bi-wireable tower speakers, and in my infinite, impatient wisdom, I decided to hook them up to two separate amplifiers. I turned the volume knob up, anticipating audio nirvana. Instead, a loud crack echoed through the room, and my expensive tweeters were instantly fried. It was a costly, heartbreaking mistake born from a fundamental misunderstanding of how speaker crossovers and dual amplification interact. If you are looking to squeeze every ounce of detail out of your system, bi-amping is incredibly rewarding, but you have to do it right.
Why Bi-Amping Can Quickly Go Terribly Wrong
Today, we are going to lay out the absolute safest way to wire your bi-amped speakers so you can enjoy pristine sound separation without sending your precious drivers to an early grave. When you bi-amp, you are sending separate signals to the high-frequency and low-frequency drivers. The reward is breathtaking clarity and effortless dynamics. The risk, however, is a catastrophic short circuit if you forget one crucial step. I made that rookie mistake years ago because I did not remove the brass jumper straps on the back of my terminal cup. Doing this essentially connected the outputs of two different amplifiers together, causing them to fight each other to the death.
Is bi-amping actually worth the hassle and risk?
Many audiophiles wonder if bi-amping truly delivers a noticeable sonic upgrade or if it is just a placebo effect. According to a detailed technical analysis by Sound & Vision, active bi-amping can drastically reduce intermodulation distortion because the amplifier driving the woofer does not have to reproduce the delicate high frequencies. However, to get these benefits safely, you must understand your gear. Just like learning the difference between gain and volume on your amplifier, knowing how your speaker’s internal crossover separates frequencies is vital before you start plugging in extra speaker cables. Have you ever accidentally damaged a piece of audio gear during a late-night system upgrade? Let me know in the comments below! Let us dive into the physical connections so you can get this configured safely.
First Remove the Metal Jumper Straps
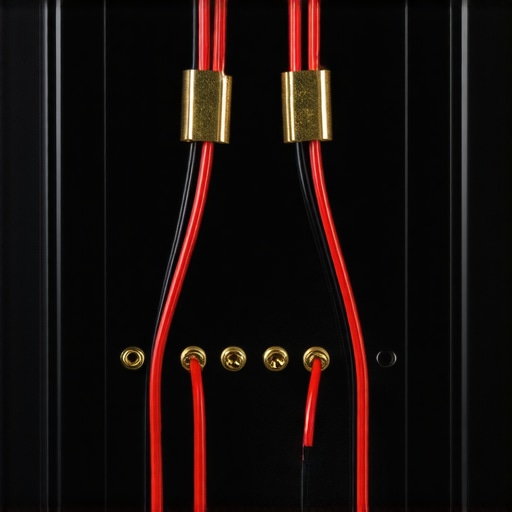
Before you touch a single speaker wire, you must locate and remove the brass or gold-plated jumper straps on the back of your speaker terminals. These metal plates connect the top binding posts to the bottom binding posts. If you leave them on while connecting two separate amplifiers, you are essentially wiring the outputs of those two amplifiers directly into each other. This creates a massive electrical short circuit that will instantly trigger your receiver’s protection mode, or worse, melt your amp’s output transistors. I once rushed this exact process on a vintage Harman Kardon system and watched smoke roll out of the chassis. To avoid catastrophic damage, completely unscrew the plastic terminal caps, slide the metal straps out, and store them in a safe place.
Keep Your Channels in Phase and Labeled
Once those physical bridges are gone, your speaker behaves as two independent electrical units. The top terminals feed the delicate tweeter, while the bottom terminals feed the rugged woofer. Now, run two separate runs of high-quality speaker cable from your amplifier channels to the speaker. Keep your polarity absolutely consistent: positive to positive, negative to negative. If you cross these wires, your drivers will fight each other, causing a hollow, thin acoustic output where the bass completely disappears. You can easily diagnose this issue by learning the easy way to test if your speakers are out of phase. I always recommend using colored electrical tape to label each cable run at both ends so you do not accidentally plug a high-power bass channel into your sensitive high-frequency terminals.
Select the Right Amplification Strategy
You have two main choices when configuring your amplifiers: passive bi-amping or active bi-amping. Passive bi-amping utilizes your speaker’s internal crossovers to filter out the unwanted frequencies. This is the simplest method because you can use a single multi-channel home theater receiver or two identical stereo power amplifiers. If your receiver keeps shutting down during high-volume playback, check out the reason your home theater receiver keeps shutting off randomly to make sure you are not overloading the power supply with improper impedance loads.
The Power of Active External Crossovers
For the ultimate sonic upgrade, active bi-amping bypasses the passive internal crossovers altogether. In this setup, you place an electronic crossover between your preamplifier and your power amplifiers. The electronic crossover splits the signal beforehand, meaning the amplifier driving your woofer never receives high frequencies, and the amplifier driving your tweeter never receives low frequencies. This results in incredible dynamic range and zero intermodulation distortion. However, because you are bypassing the safety net of the speaker’s built-in passive crossover, a single wiring mistake can send a low-frequency bass note directly to your tweeters, blowing them instantly. Make sure your active crossover points are set precisely to the manufacturer’s recommended specifications before turning on the power switch.
Everyone says passive bi-amping is the ultimate shortcut to audio heaven, but in my experience, most people are just wasting expensive speaker wire. The prevailing audiophile myth is that simply hooking up two separate channels from a home theater receiver to a single speaker magically doubles your available headroom and separates your frequencies. It does not. When you use a passive crossover, both amplifiers still receive the full-bandwidth audio signal from your source. The woofer’s amplifier still reproduces the high-frequency voltage peaks, and the tweeter’s amplifier still swings the low-frequency voltage, even if no current flows because of the crossover’s high impedance at those frequencies. You are not actually saving your amplifiers any voltage-clipping stress.
The Hidden Passive Load Trap
The real danger here—what I call the passive load trap—occurs when you use mismatched amplifiers. If you mix a warm tube amp on your high-frequency terminals with a high-power solid-state amp on your low-frequency terminals, you will destroy your system’s imaging. Because different amplifiers have different input sensitivities and phase characteristics, your drivers will play out of sync and at mismatched volume levels. For those using a single AV receiver to bi-amp, you are still drawing from the exact same power transformer inside the chassis. If that power supply is strained, bi-amping will not give you more clean power. In fact, you might find why your receiver shuts off when you turn the volume up is actually due to the power supply hitting its thermal limit sooner from driving those extra output stages simultaneously.
Why do so many audiophiles swear they hear a massive difference?
A rigorous engineering study published by the Audio Engineering Society (AES) confirms that unless you use an active line-level crossover before the amplification stage, any perceived improvements in passive setups are almost entirely subjective or caused by minor level mismatches that trick the brain into hearing “more detail.” When you run two different cable paths, you slightly alter the total impedance loop, which can subtly change the frequency response of your speaker by a fraction of a decibel. It is not “purer sound”; it is a subtle, uncontrolled hardware equalization effect. If you want a real, measurable upgrade that actually reduces distortion, your money is far better spent on room acoustics or simple physical tweaks. For example, learning why your desktop speakers need isolation pads to stop desk vibration will do more to clean up your midrange clarity than spending hundreds on secondary speaker runs.
Before you run out and buy another set of expensive cables, ask yourself if you are treating the symptom rather than the cause. Have you ever fallen into this bi-amping trap, expecting night-and-day differences only to be met with subtle disappointment? Let me know in the comments below!
Now that we have busted the common myths surrounding passive bi-amping, it is time to look at what it actually takes to maintain, tune, and scale a true, active dual-amplifier system. The truth is, high-performance audio systems are not ‘set-it-and-forget-it’ setups. Because active bi-amping involves splitting your audio frequencies at the line level before they ever hit your power stages, keeping the hardware in peak condition is vital. If your connections degrade or your amplifiers run unevenly, you will quickly lose that razor-sharp imaging you worked so hard to achieve.
How do I maintain an active bi-amped system over time?
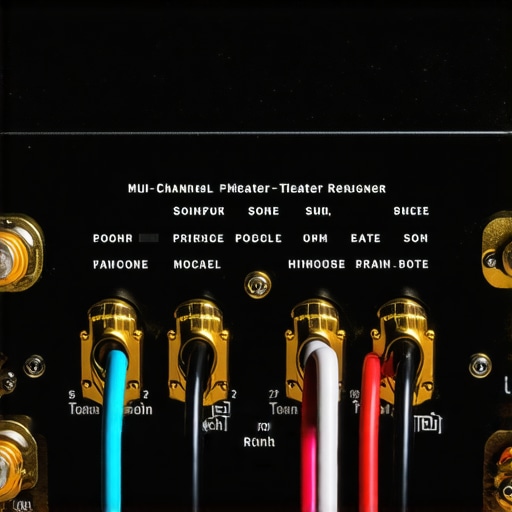
To keep an active system sounding pristine, you must periodically check the thermal health and electrical connections of your equipment. Because you are using multiple amplifiers—often with different chassis designs and power draws—you need to monitor how hard each unit is working. I highly recommend learning how to tell if your amp is running too hot, as heat is the absolute number-one killer of sensitive output transistors. Once every six months, I power down the entire system, unplug the mains, and use a high-quality electronic contact cleaner on all raw wire connections and RCA jacks. Over time, micro-oxidation builds up on bare copper and brass terminals, adding resistive load and slowly dulling your high frequencies.
Beyond cleaning physical connections, you need to watch out for structural changes in your components. If you are using a vintage stereo amplifier for your high-frequency drivers, keep a close eye on physical signs of wear. Knowing how to tell if your amp’s capacitors are failing will save you from a catastrophic DC voltage leak that could instantly vaporize your speaker voice coils. According to the official technical whitepapers from Linkwitz Lab, active crossover filters require highly precise resistance values; as capacitors age and drift in value, your crossover frequency points shift, ruining your system’s phase alignment.
The Future of Multi-Amplification and DSP Control
Where is this all heading? The future of high-end home audio is rapidly moving away from bulky analog active crossovers and towards digital signal processing (DSP). We are starting to see smart, multi-channel amplifiers with integrated DSP that let you adjust crossover slopes, delay times, and driver EQ profiles directly from a laptop or smartphone. This digital integration eliminates the risk of component drift and makes active bi-amping infinitely safer and more accessible for the average home listener.
If you want to experience the true potential of your speakers today without buying more amplifiers, I urge you to try one advanced calibration step: physically isolate your cabinets. Eliminating cabinet resonance is the quickest way to hear what your drivers are actually doing. Give this a shot and hear the difference for yourself!
My Hardest Lessons From the Audio Workbench
Over the years of tweaking, breaking, and rebuilding systems, I have gathered a few critical truths about dual amplification that you won’t find in a standard product manual. First, never assume your amplifiers are perfectly matched in gain. Even two identical models from the same manufacturer can have minor component tolerances that lead to a slight output mismatch. Second, always label your cables at both ends; it takes only one distracted second to plug a high-power bass channel into a delicate tweeter terminal. Finally, you must organize your power distribution before tackling multi-amp setups. To prevent safety hazards and heavy line noise, check out why you should never use a power strip for your high-end amplifier and switch to a dedicated wall outlet or power conditioner instead.
The Gear and References I Rely On
When you are dealing with complex wiring schemes, relying on the right resources makes all the difference. I recommend checking out the technical papers on Linkwitz Lab for deep dives into active crossover design. For physical cable management, standard color-coded heat shrink tubing is my go-to tool to prevent channel confusion. If you are struggling with messy cabinet layouts, using the best way to label your messy home theater cables will save you hours of tracing wires. Finally, for basic electrical testing, a reliable digital multimeter is indispensable for checking continuity and ensuring your speaker jumper straps are fully disconnected before applying power.
Take the First Step Safely
Do not let the fear of a wiring mistake keep you from achieving the ultimate in system dynamics and resolution. Bi-amping, when done with patience and care, unlocks a level of mid-range purity and effortless bass that single-cable runs simply cannot match. Take your time, double-check your connections, keep your channels in phase, and prepare to hear your favorite albums in a whole new light. Have you ever run into phase issues or accidentally left your jumper straps on during a system upgrade? Let me know in the comments below!