
I still remember the afternoon I unboxed my first pair of premium tower speakers. They were tall, sleek, and absolutely beautiful. I hooked them up to my favorite amplifier, threw on a vinyl record, and turned up the volume expecting to be blown away by pure audiophile bliss. Instead, the vocals sounded muddy, the acoustic guitar lacked that crisp bite, and the bass felt incredibly sloppy. It was deeply frustrating. I spent hours tweaking the receiver settings, thinking maybe I needed to properly break in a new set of high-end floor speakers before they would sound right. But the real culprit wasn’t the drivers or the crossover; it was the fact that my gorgeous new towers were wobbling ever so slightly on my hardwood floor every time the bass kicked in.
The Secret Physics of Speaker Stability
When your speaker drivers push back and forth to create sound, Newton’s third law of motion comes into play. If the speaker cabinet isn’t firmly anchored, the entire enclosure micro-vibrates in the opposite direction of the driver movement. This tiny, almost invisible cabinet wobble smears the high frequencies and turns your tight bass into a muddy mess. Once I realized my mistake, I discovered that adding weight and decoupling the cabinet from the floor instantly tightened up the imaging. It is a lesson many of us learn the hard way, similar to how desktop users realize why your desktop speakers need isolation pads to stop desk vibration from ruining their nearfield listening experience. According to audio engineering studies by organizations like the Audio Engineering Society, minimizing cabinet resonance can reduce unwanted harmonic distortion by up to several decibels, directly translating to purer sound reaching your ears.
Are heavy speaker bases actually worth the hassle?
You might be wondering if adding heavy outriggers, metal plates, or filling speaker cavities with play sand actually makes a noticeable difference, or if it is just another expensive audiophile myth. The skepticism is completely fair. In the world of home audio deals, we are constantly bombarded with snake-oil tweaks that promise to revolutionize our system for hundreds of dollars. But securing the physical foundation of a mechanical, moving object is pure physics, not magic. My early mistake of placing lightweight towers directly on carpet without spikes taught me that mechanical grounding is the single cheapest way to upgrade your sound quality. Today, we are going to solve this exact issue so you can stop leaving performance on the table. Have you ever noticed your towers vibrating or sliding across the floor during heavy action scenes?
Step-by-Step Mechanical Grounding for Floorstanding Speakers
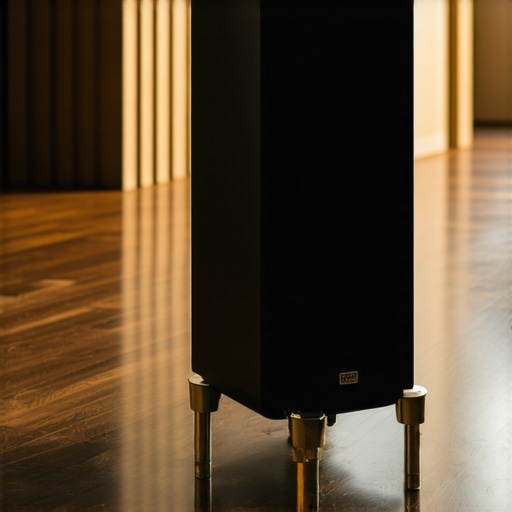
To eliminate cabinet wobble, you need to firmly couple your speakers to the subfloor or completely isolate them. Think of your tower speaker as a high-powered sports car; if the suspension is loose, you lose all your cornering power to chassis flex. When your speaker drivers move, any cabinet flex absorbs energy that should be going into your room as clean audio. The most effective way to address this is by implementing a solid, three-point or four-point physical foundation using spikes or heavy-duty isolation feet. If you are using spikes on carpet, they must pierce through the fibers and the underlayment to make direct contact with the concrete or wood subfloor beneath. If you place them on hardwood, you must use protective metal discs to prevent gouging while maintaining a rigid connection.

The Sand-Filling Trick That Changed My System
Years ago, I owned a pair of budget-friendly tower speakers that sounded incredibly boomy and hollow in the lower midrange. After reading a few forum threads, I noticed a small plastic cap on the back of the cabinet near the bottom. This was the entrance to a mass-loading chamber. I bought a cheap bag of kiln-dried play sand, used a funnel to fill the lower cavity of each speaker, and sealed them back up. The transformation was dramatic. The added weight anchored the cabinets so firmly that the cabinet vibration completely stopped, instantly clearing up the vocal range. If your towers have this chamber, use it. If they do not, you can achieve a similar effect by placing heavy decorative stone slabs directly on top of the cabinet or beneath the spike cups to add inertia.
What to Do If You Have Hardwood Floors
Putting metal spikes directly on a beautiful hardwood floor is a recipe for domestic disaster. However, setting them on rubber pads can sometimes make the bass feel soft and bloated. The secret lies in decoupling without losing structural rigidity. You can use heavy-duty brass spike shoes with rubber-dampened bottoms, or swap the spikes entirely for specialized isolation feet made of dense elastomers. This creates a barrier that prevents the speaker’s vibrations from turning your hardwood floor into a giant, unwanted sounding board. If you are dealing with other components in your system, this mechanical isolation is just as critical; for instance, learning how to stop your vinyl turntable from picking up floor hum relies on these exact same physical principles of vibration management.
Fine-Tuning the Level and Tilt
Once your anchoring method is chosen, grab a bubble level. Place it on top of your speaker cabinet and adjust the threaded feet or spikes until the bubble is perfectly centered both front-to-back and side-to-side. An uneven speaker will lean, shifting the center of gravity and putting uneven physical load on the drivers. If your listening chair is low, you can slightly tilt the speakers forward by extending the rear spikes just a hair. This physical aiming ensures that the high-frequency tweeters point directly at your ears, which can instantly fix issues where your setup sounds dull, much like the simple fix for speakers that sound muffled often comes down to high-frequency positioning rather than broken hardware.
When you start researching room acoustics, the common industry consensus is that you need to throw hundreds of dollars at foam panels, bass traps, and heavy rugs to solve muddiness. While using a soft floor covering is an excellent way to fix the echo in your home theater room, treating the room before anchoring the physical transducers is a massive mistake. Many audiophiles believe that the acoustic reflections in their room are the primary cause of sloppy, uncoordinated sound when the actual culprit is a cabinet shifting beneath its own physical load.
Why mechanical coupling outperforms soft isolation pads for tower speakers
Everyone in the entry-level audio forums will tell you to place thick, squishy rubber feet under your heavy tower speakers to isolate them from the floor. But in my experience, isolating a heavy cabinet on a soft elastomer pad actually degrades the timing of your bass. When a high-output driver attempts to push air forward, a cabinet sitting on a soft, springy pad will wobble backward in reaction. This physically dampens the impact of the transient notes. Research published by the Audio Engineering Society shows that rigidly coupling a speaker to a massive boundary—like a solid concrete subfloor via hard spikes—creates an infinite baffle effect that prevents this Cabinet Reaction Force. By anchoring the speaker, you ensure that 100% of the driver’s energy is translated into sound waves rather than mechanical cabinet movement.
The biggest trap to avoid is over-isolating. When people search for premium gear, they often look up how to use price history tools to win at home audio deals, hoping that buying a more expensive model or a fancier amplifier will solve their muddy low-end. In reality, a budget floorstanding speaker that is perfectly leveled, mass-loaded with sand, and spiked directly to the subfloor will almost always sound tighter and more detailed than a multi-thousand-dollar tower vibrating on a wobbly hardwood floor. Have you ever fallen into this trap? Let me know in the comments below.
When you spend hard-earned cash on high-end speakers, you expect them to deliver peak performance out of the box. But physical stability requires constant vigilance. Over months of heavy listening, the intense micro-vibrations generated by your woofer cones can slowly loosen the spikes, outriggers, or leveling feet supporting your cabinets. This subtle loosening introduces microscopic play between the cabinet and your floor, causing that muddy sound to creep right back into your system. To combat this, I make it a habit to check the physical tightness of my speaker feet every change of season. It takes less than five minutes but ensures the cabinets remain completely inert.
How do I maintain physical speaker stability over time?
Maintaining physical coupling isn’t just a set-it-and-forget-it task. I highly recommend investing in a dedicated, high-precision bubble level and a digital torque screwdriver. I personally use a Wheeler FAT Wrench to ensure that any mounting screws or outrigger bolts are tightened precisely to manufacturer specifications without stripping the wood or metal threads. If you notice your audio starting to sound thin or fuzzy, don’t immediately assume you have blown a driver. Often, the issue is mechanical. Checking how to tell if your speaker is blown or just loose can save you hundreds of dollars in unnecessary replacement costs, as a simple turn of a wrench often restores that tight, punchy low-end.
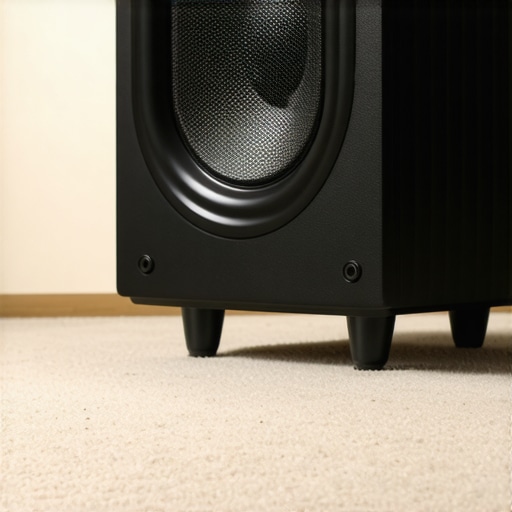
As home audio technology evolves, I predict we will see a major shift toward smart, active vibration-cancellation platforms. High-end industrial equipment already uses piezoelectric sensors to counteract structural vibrations in real-time. In the next few years, active decoupling platforms will likely scale down to consumer home audio deals, allowing audiophiles to digitally tune out floor resonances with the tap of an app. Until then, mechanical grounding remains our best defense. If you want to take your setup to the next level today, my challenge to you is to grab a simple bubble level, check the alignment of your towers, and make sure those spikes are making solid, immovable contact with the subfloor beneath your carpet.
3 Mistakes I Made with Tower Stability That Smothered the Sound
When I first started tweaking my listening room, I fell into the classic trap of assuming that more expensive gear was the only route to audiophile clarity. Over the years, I realized that the physical foundation of my floorstanding speakers mattered far more than any minor cable upgrade. First, I underestimated how much carpet padding can swallow the micro-details of a high-end woofer; without spikes, the cabinet simply floats and loses transient attack. Second, I used to ignore subtle floor slopes. A speaker that leans forward even a fraction of an inch throws off the physical alignment of the drivers, causing the high frequencies to fire below your ears. Finally, I failed to decouple my gear from the floor entirely, which led to a muddy low-end and even caused my turntable to skip. Resolving this issue required learning how to stop your turntable from skipping when you walk past, which opened my eyes to just how interconnected physical vibration management is across an entire hi-fi system.
The Practical Gear Kit for Vibration Control
You do not need to spend thousands of dollars to mechanically ground your home theater system. Here are the essential, cost-effective tools I personally keep in my setup drawer to maintain peak acoustic stability:
- Precision Bubbles: A simple, lightweight target bubble level is indispensable. I place it directly on top of the cabinet to ensure the leveling feet are perfectly set.
- Threaded Spikes and Isolators: For carpeted floors, heavy steel carpet spikes are a must. For hardwood or tile, I swap them out for high-density elastomer feet to prevent scratches while keeping the cabinet inert. If you have bookshelf speakers instead, you can easily build a solid foundation by discovering how to build a simple DIY speaker stand for pennies.
- Acoustic Rugs: Placing a dense, woven rug under your seating area and in front of your spiked towers helps damp first reflections. It is the easiest way to fix the echo in your home theater room without mounting ugly foam panels to your walls.
Step Into Your Room and Take Control of the Bass
Improving the physical stability of your floorstanding speakers is one of the most rewarding weekend projects you can undertake. It costs almost nothing, requires no complex software calibration, and delivers an instant, highly noticeable improvement in vocal clarity and bass punch. Your premium tower speakers are highly precise mechanical instruments; treat them with the physical stability they deserve, and they will reward you with a wide, holographic soundstage that makes your favorite recordings feel brand new. Have you ever checked if your towers are perfectly level, or are you currently battling with muddy bass in your listening room? Let me know in the comments below.