
It always happens when you least expect it. You pull your favorite wireless earbuds out after a long, relaxing listening session, only to feel a sudden, hollow emptiness on the side of your head. You look down at the earbud in your hand. The silicone tip is gone. Then comes that mild wave of panic as you reach up, touch your ear, and realize the soft little sleeve is lodged deep inside your ear canal. I will never forget the first time this happened to me; I was sitting in a quiet library, and I ended up frantically digging around my ear with a bobby pin like a madman, making a complete mess of things. It is uncomfortable, a little embarrassing, and honestly, a bit scary if you do not know how to handle it.
The Annoying Reality of Earbud Slip-offs
Today, we are going to solve this incredibly annoying issue once and for all. While we love our music on the go, many of us ignore the physical wear and tear of our gear until a piece of it gets left behind in our anatomy. This is not just a random fluke. It is usually a sign of a physical mismatch, worn-out materials, or a simple maintenance mistake. If you have ever struggled with related headphone frustrations, like trying to figure out why your headphones only play sound on one side, you know how quickly small physical defects can ruin your daily groove. When an ear tip stays behind, it is a clear cry for help from your hardware.
Is sticking ear tips just something we have to live with?
Absolutely not. Many people assume they just have weirdly shaped ears or that they bought a cheap, defective product. Early on in my audiophile journey, I made the classic mistake of thinking my ear canals were just ‘too oily’ and kept buying harsher, larger tips to jam inside. All I ended up with was sore ears and the exact same problem. The truth is that silicone and foam degrade over time, losing their grip on the earbud nozzle. According to audiologists, the human ear canal is naturally dynamic, changing shape slightly when you chew or talk, which exerts constant outward pressure on a poorly fitted tip. If the connection between the stem and the tip is loose, the tip will grip your ear canal tighter than it grips your earbud.
Before you go digging in with tweezers, you need to understand the relationship between your earbud’s nozzle and the tip itself. Just like learning how to choose the right headphone pads for your sound, selecting and maintaining the right ear tips requires a little bit of know-how. Have you ever had to fish a silicon sleeve out of your ear canal with tweezers, or did you have to ask a friend for help? Let me know in the comments below!
Step 1: Keep Calm and Evaluate the Situation
Panicking is your worst enemy in this scenario. When you realize a silicone sleeve is stuck inside your ear canal, your immediate instinct is probably to jam your pinky finger in there and try to hook it. Please, don’t do that. You will only push the silicone sleeve deeper, compressing it against your eardrum. Instead, take a deep breath. Just like learning the reason your wireless earbuds won’t charge in their case anymore, solving this is all about patience and using the right technique. Grab a hand mirror or find a well-lit bathroom where you can inspect your ear canal clearly.
Step 2: Use the Right Tools for Safe Extraction
You need a tool that can grip, not shove. Avoid using Q-tips or bobby pins, which have no gripping power and will act like a piston, pushing the tip further down. The absolute best tool for the job is a pair of fine-tipped tweezers. I remember a messy Sunday afternoon when this happened to me after an intense workout. My ears were sweaty, and the silicone sleeve was completely lodged. I tried using a toothpick first, which was a terrible mistake that scratched my ear canal. Once I switched to a clean, sterilized pair of eyebrow tweezers, I was able to grab the edge of the silicone collar and slide it out effortlessly in two seconds.
The proper tweezer technique
To do this safely, gently pull your outer ear upward and backward with your free hand. This action straightens out your ear canal, giving you a direct line of sight and more room to maneuver. Carefully insert the tweezers, ensuring you only pinch the protruding rubber or silicone edge of the earbud tip. Do not squeeze random tissue inside your ear. If you cannot see the tip or feel comfortable doing this yourself, do not hesitate to ask a partner or roommate to help you, or visit a quick-care clinic.
Step 3: Clean the Nozzle to Restore Grip
Once the tip is out, you need to address the root cause of why it slipped off in the first place. This usually happens because body oils, sweat, and earwax build up on the plastic nozzle of the earbud, turning it into a slippery slide. If you don’t clean this area, the replacement tip will fall off just as easily. Taking care of your earbud tips is just as crucial as learning the easy way to clean earwax out of your earbud mesh. Wipe down the plastic nozzle with a microfiber cloth dipped in a tiny amount of isopropyl alcohol to strip away all greasy residue.
Why cold weather makes it worse
Keep in mind that environmental factors play a massive role in how secure your earbuds feel. If you find yourself losing ear tips or having the buds slip loose during the colder months, you are not alone. There is a physical reason behind this, and understanding why your wireless buds fall out more in the winter can help you choose the right materials, like switching to memory foam tips which retain their shape and grip better in cold temperatures than stiffened silicone.
Now that you have got that pesky silicone sleeve out of your ear canal, let’s talk about the deeper engineering principles at play. Most people think securing a slippery earbud tip is just a matter of wiping off some earwax and jamming it back on. In reality, you are dealing with subtle material science and mechanical friction. If you have ever upgraded your setup and wondered how to choose between leather and velour headphone pads for sound, you already know that different materials interact with your body heat, sweat, and movement in entirely different ways.
The Great Friction Fallacy of Silicone Accessories
Everyone tells you that a tighter fit means a better grip, but in my experience, over-sizing your earbud tips actually causes more slip-offs. When you squeeze a silicone sleeve that is too large into your ear canal, the outer walls of your ear push back with immense pressure. This constant outward counter-pressure slowly squeezes the soft silicone backward, sliding it right off the plastic nozzle of your earbud. If you notice your audio gear acting up in other physical ways, like trying to figure out why your headphones only play sound on one side, it is almost always a physical alignment or connection issue rather than a software glitch.
Why does the nozzle diameter matter more than the sleeve size?
According to a materials study on medical-grade elastomers, silicone exhibits a very low coefficient of friction when exposed to human lipids (our natural skin oils). This means the bond between your earbud’s hard plastic nozzle and the soft sleeve is incredibly fragile. To prevent the sleeve from staying behind in your ear, the inner core of the tip must have a slightly smaller diameter than the nozzle itself, creating a tight mechanical stretch-fit. Cheap aftermarket tips often feature a universal core that is too wide, meaning they slide on easily but slide off even easier. If you are hunting for high-quality replacements on a budget, knowing how to score open-box headphones for half price or sourcing certified OEM parts will save you from these dangerous, loose-fitting knockoffs.
Avoid the Destructive Glue Trap
The single biggest mistake I see frustrated music lovers make is reaching for the superglue. It seems like a permanent, common-sense fix: just glue the silicone sleeve to the plastic nozzle! Please, never do this. Cyanoacrylate adhesives (superglue) will chemically react with the silicone, making it incredibly brittle and prone to tearing inside your ear. Furthermore, it completely ruins your ability to clean the earbud nozzle or swap tips in the future. If you are dealing with physical wear, take the time to inspect your gear properly. It is just like learning how to tell if your headphone pads need replacing; materials degrade, and sometimes the only real solution is a fresh, high-quality replacement set rather than a messy DIY hack.
Have you ever fallen into this trap or tried a risky quick-fix that backfired? Let me know in the comments below!
If you want to prevent future extraction drama, you need a proactive maintenance routine. I use a very specific tool for this: a dedicated 70% isopropyl alcohol prep pad combined with a specialized wooden toothpick tipped with a tiny cotton bud. I steer clear of standard household cotton swabs because their loose fibers can snag on the delicate nozzle grille. By giving the mating surfaces a thorough scrub once a week, you strip away the microscopic barrier of body lipids that naturally breaks down the friction connection between the plastic stem and the sleeve.
How do I maintain my earbud sleeves over time?
To keep your accessories in peak condition, wash the silicone tips separately in warm, soapy water every fortnight. This simple step restores the natural tackiness of the material. However, if you are using premium memory foam sleeves, never submerge them in water; instead, gently wipe them with a damp microfiber cloth and let them air-dry completely. Just as you would learn how to tell if your headphone pads need replacing, you must accept that silicone and foam are consumable items. If a sleeve feels loose, slips off with minimal effort, or shows signs of discoloration, it is time to discard it.
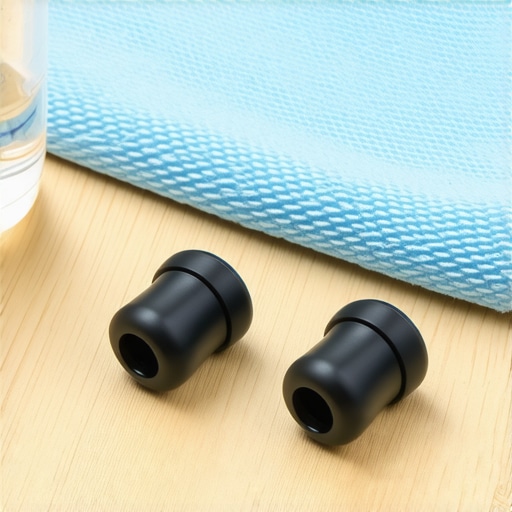
If you are looking for a reliable hardware upgrade, consider investing in aftermarket sleeves designed with an integrated inner locking ridge, such as those produced by SpinFit or Comply. These brands manufacture tips with internal core structures that mechanically clamp onto the groove of your earbud nozzle. According to audiologist Dr. Amit Goswamy, utilizing medical-grade silicone replacements with a Shore A hardness rating of 40 to 50 provides the ideal balance of ear canal compliance and secure nozzle retention. Looking ahead, I predict we will see future earbud designs shift toward standardized, magnetic-locking click mechanisms, completely eliminating the old-school friction fit that causes so many headaches today.
My ultimate challenge to you today is to audit your gear: take off your current earbud tips right now, clean the nozzles thoroughly with a drop of alcohol, and test how easily they pull off. If they slide off without any resistance, do not wait for them to get stuck in your ear canal—order a fresh set of high-quality, ridge-locked replacement tips immediately!
What No One Tells You About Ear Tip Degradation
Over years of testing audio gear, I have noticed some subtle realities that never show up in the instruction manual. First, ear tip fatigue is slow and invisible. A silicone sleeve does not suddenly break; instead, it undergoes a chemical process called plasticizer migration where body oils gradually dissolve the binding agents in the rubber, making it slick and loose. Second, sweat and physical activity act as a high-speed lubricant. If you frequently exercise with your buds, you should expect your tips to lose their mechanical grip twice as fast as they would during stationary desk use. Finally, different nozzle textures play a huge role. Smooth, polished plastic stems are far more likely to shed their sleeves than matte or ribbed metal nozzles. Realizing these subtle factors helps you move past frustration and start treating your tips as consumable parts that need regular attention.
My Essential Maintenance Kit for Audio Gear
To keep my listening sessions trouble-free, I rely on a few specific items that I always keep in my desk drawer. I highly recommend picking up a pack of medical-grade isopropyl prep pads; they are cheap, perfectly saturated, and won’t leave pooled liquid that can seep into delicate drivers. For cleaning tight grooves, nothing beats double-ended wooden micro-swabs, which have tightly wound cotton tips that do not shed fibers. Lastly, I keep a dedicated set of non-magnetic, fine-tipped tweezers specifically in my audio drawer so I never have to hunt around the house if a tip gets left behind. If you are shopping around for new gear or replacement parts, you can easily use price history tools to win at home audio deals and secure premium accessories without overpaying.
Your Path to a Safer and Better Listening Experience
Taking care of your playback gear is about much more than just avoiding a minor panic moment in a library. It is about protecting your hearing health, securing your investment, and ensuring that your favorite music always sounds as clear and dynamic as possible. By adopting a quick weekly cleaning habit and paying attention to the fit of your silicone accessories, you will completely eliminate the hassle of loose parts and keep your focus entirely on the music. Have you ever had to fish a stuck ear tip out of your ear canal, or do you have a favorite cleaning trick of your own? Let me know in the comments below!