
Picture this: I am laced up for my morning run, the sun is just starting to peek over the horizon, and I reach for my charging case to grab my earbuds. I pull them out, pop them in, and… nothing. Silence. I check the case, and the little LED light is glowing a steady, mocking green, insisting that everything is fine. This happened to me last Tuesday, and I won’t lie, I almost chucked the whole setup into the neighbor’s bushes. There is nothing quite like the visceral frustration of being ready to tackle a workout only to be met with dead electronics. I spent the next ten minutes frantically wiggling the buds in the cradle, hoping for a miracle that never came. I eventually realized that I had fallen victim to a problem that plagues almost every wireless audio enthusiast eventually. We spend so much time worrying about the reason one side of your earbuds is quieter than the other that we forget the most basic requirement: getting power from point A to point B.
Those Tiny Gold Pins Are Ruining Your Morning
The truth is, your earbuds probably aren’t broken, and the battery likely hasn’t reached its end of life. Most of the time, it is a simple communication breakdown between the charging pins and the contacts on the buds themselves. I made a massive mistake early on in my audio journey by assuming that if the case had power, the buds must be charging. I actually ended up researching how to spot a fake pair of premium earbuds on secondary markets because I was convinced I had bought a lemon. It turns out that skin oils, sweat, and even tiny amounts of pocket lint create an invisible barrier on those microscopic gold contact points. If you have been struggling with why your wireless earbuds won’t stay in during heavy lifting, you are likely producing exactly the kind of moisture that eventually leads to oxidation on these pins. Today, I am going to show you exactly how to restore that connection so you never have to face a silent morning commute again.
Is it time to just give up and buy a new pair?
I know what you are thinking. If these things are so finicky, is it even worth the effort to maintain them? The short answer is yes. We often jump to the conclusion that modern tech is disposable, but many of these issues are as easy to fix as learning the best way to clean earwax out of mesh earbuds. According to a technical teardown by iFixit, many charging failures in small electronics are caused by simple physical obstructions rather than internal hardware failure. I once spent forty dollars on a replacement case only to realize that a single stray thread from my jacket pocket was sitting at the bottom of the cradle, preventing the bud from seating properly. It was a humbling moment, but it taught me that the simplest solution is usually the right one. This is very similar to how you might approach a larger piece of gear, like when you need to fix a loose charging port on your favorite bluetooth speaker. Before you toss your gear in the trash, let’s walk through the neighborly advice I wish someone had given me years ago. Have you ever had your earbuds fail you right when you needed them most? I want to hear about your most frustrating audio fail in the comments below.
Scrub Away the Invisible Barrier
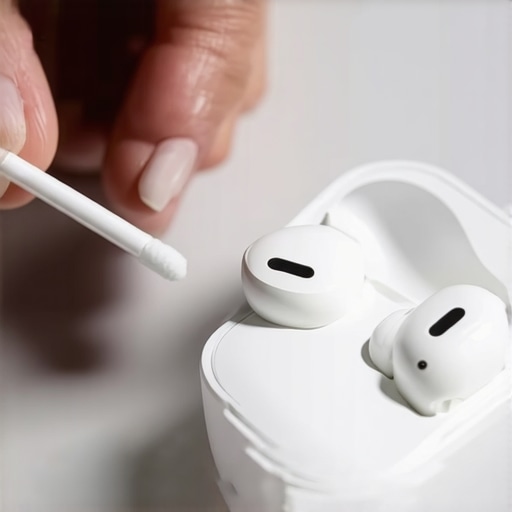
I cannot stress this enough: your eyes are lying to you. Those gold plates might look shiny, but a microscopic layer of sebum—your body’s natural oil—acts like a thin sheet of plastic between the charger and the battery. I recommend using 90% or higher isopropyl alcohol. Dampen a cotton swab, but don’t soak it. You don’t want liquid seeping into the internal circuitry, which is a disaster similar to why your high-end headphones sound tiny when plugged into a controller—it’s all about a lack of proper power delivery. Firmly rub the contacts on the earbuds and the pins in the case. I remember once spending twenty minutes scrubbing my favorite pair after a particularly humid hike. I thought I’d killed them, but the swab came away with a faint grey smudge I couldn’t even see on the pins. Two seconds later, the red charging light finally blinked to life. It was like magic, but just basic chemistry.
Stop Using Your Phone Charger for Everything
We live in a USB-C world, and while it’s convenient, not all blocks are created equal. High-wattage “fast chargers” meant for tablets or laptops can sometimes confuse the simple handshake protocol inside a tiny earbud case. If your case isn’t taking a charge, find the original low-voltage cable that came in the box. I’ve seen countless people struggle with why your portable speaker won’t charge with your phone cable, and the logic is identical here. The circuitry expects a specific trickle of power. If it gets a “smart” signal from a 100W brick, it might just shut down the port as a safety precaution. Also, give the port a quick blast of compressed air. A single grain of sand from a beach trip can prevent the cable from seating fully, leading to a connection that feels “mushy” rather than “clicky.”
Force a Hardware Handshake with a Reset
Sometimes the hardware is fine, but the “brain” of the case has frozen. This happens often when you’ve been dealing with the reason your earbuds sound tinny after a workout—salt and moisture can cause minor shorts that confuse the firmware. Most cases have a small, almost invisible button on the back or inside the lid. Hold it down for 15 seconds while the buds are docked. You’ll usually see the LEDs flash a specific color sequence. This clears the cache of the internal controller and forces it to re-detect the batteries. It’s the “turn it off and back on again” of the audio world. I once had a pair of noise-canceling buds that refused to charge for three days. I was convinced the battery was dead until I tried the reset. Suddenly, the case recognized the left earbud and started the juice flowing again.
Check for Physical Obstructions in the Cradle
It sounds silly, but take a flashlight and look deep into the charging wells. Much like how to fix a loose charging port on your favorite bluetooth speaker, the issue is often physical. Dust bunnies love those little holes. If one bud sits even half a millimeter higher than the other, the pins won’t make contact. I once found a tiny piece of a sticker from the original packaging stuck at the bottom of my case. It was so small I didn’t notice it for weeks, but it was just thick enough to block the circuit. If you find your why your bluetooth speaker is quieter than it used to be due to debris, you’ll know that physical cleanliness is the first rule of audio maintenance. Use a wooden toothpick to gently scrape the bottom of the well; never use metal, as you could accidentally short the pins and fry the whole unit.
It is easy to get caught up in the marketing hype of ‘premium’ connections. Many people believe that gold-plated everything will magically fix a fuzzy signal or a charging issue. While there is a the real difference between gold and silver plated connectors, the truth is that gold is used for its resistance to corrosion, not because it’s a ‘faster’ conductor. In fact, silver is more conductive, but it tarnishes easily. I once saw a fellow enthusiast spend $200 on ‘audiophile’ USB-C cables because his earbuds wouldn’t charge consistently, completely ignoring the fact that his charging port was just packed with pocket lint. This is the biggest ‘oops’ factor in the hobby: throwing money at a symptom rather than the cause.
Don’t choke your amp with a cheap power strip
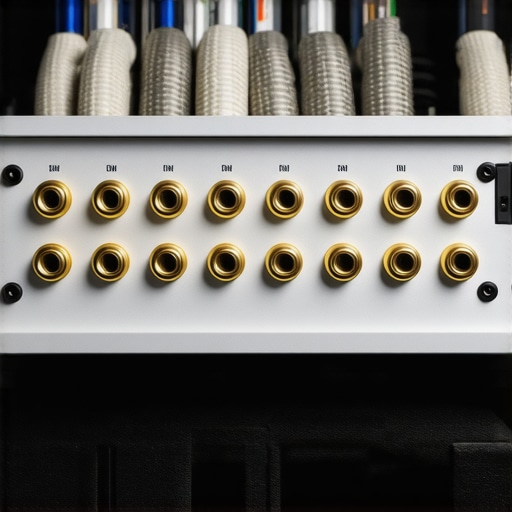
If you have upgraded to a serious home setup, you might be making a critical mistake that limits your hardware’s potential. Most people plug their heavy-duty gear into the same $10 power strip they use for their desk lamp. This is exactly why you should never use a power strip for your high-end amplifier. These strips often have current-limiting components or thin internal wiring that starves a power-hungry amp during dynamic peaks in music. In my experience, plugging an amp directly into a wall outlet—or using a high-current power conditioner—changes the sound more than any expensive cable ever could. It’s like trying to run a marathon while breathing through a straw. Have you ever fallen into this trap? Let me know in the comments if a simple power change fixed your sound issues.
Why does my tube amp actually sound better after an hour?
Advanced users often ask if the ‘warm-up’ period is a myth or a physical reality. It’s actually grounded in physics. Vacuum tubes and even some solid-state components reach their optimal thermal equilibrium after they’ve been running for a while. This is why your tube amp actually sounds better after an hour of use; the internal resistance stabilizes and the electron flow becomes more consistent. However, don’t confuse this with the ‘break-in’ period of new speakers. While it’s true that why your new speakers sound better after 20 hours of use is partly due to the mechanical suspension loosening up, a famous study by Dr. Floyd Toole at Harman International suggests that ‘brain-in’—your ears simply getting used to the new frequency response—is just as significant as the mechanical changes in the driver.
Stop blaming the hardware for a bad room
I’ve seen people spend thousands on the difference between cheap and expensive dacs that actually matters only to listen to them in a room with bare hardwood floors and glass walls. Before you decide your speakers are ‘too bright’ or ‘harsh,’ look at your floor. Reflection is the enemy of clarity. Learning how to use a rug to stop your speakers from sounding harsh is a pro-level move that costs almost nothing. The rug absorbs the ‘first reflection’ point, which prevents the sound waves from bouncing off the floor and hitting your ears at a slightly different time than the direct sound. This time-smearing is often what causes that annoying ear fatigue, not a lack of quality in your earbuds or speakers. True expertise isn’t about buying the most expensive gear; it’s about mastering the physics of the environment where that gear lives.
I’ve spent years chasing the ‘perfect’ sound, but I eventually learned that the most expensive gear in the world won’t save you if you’re a lazy owner. If your volume knob makes a scratchy sound, stop ignoring it. This is usually oxidative buildup on the potentiometer. I swear by a tiny can of DeoxIT D5; it’s the industry standard for a reason. One quick spray and a few dozen rotations of the knob will solve the issue of why your old receiver pops when you switch inputs. It’s a five-minute fix that saves you a $100 trip to a repair shop.
Your headphone pads are dying a slow sweaty death
Next, let’s talk about your headphones. Most people treat pads as an afterthought, but they are a critical acoustic component. When the foam breaks down, you lose the seal, and your bass response evaporates. You should check for the 7 signs your headphone pads need replacing today. I personally swap mine every 18 months to maintain that factory-fresh response. And don’t just buy the cheapest ones you find on an auction site; the material matters. This is why leather pads sound different than velour ones—leather traps the air for better sub-bass, while velour breathes, giving you a wider, albeit leaner, soundstage.
How do I maintain my home audio gear for the long haul?
The real killer of high-end electronics isn’t use; it’s heat and dust. Electrolytic capacitors have a finite lifespan, often rated for 2,000 to 10,000 hours depending on the temperature. According to a technical bulletin from Nichicon, a leading capacitor manufacturer, for every 10-degree Celsius rise in operating temperature, the life of a capacitor is halved. This is why you need to know how to tell if your amps-capacitors-are-failing before they leak and take out your entire circuit board. Keep your amps ventilated and away from direct sunlight. If you have a massive cable nest behind your TV, take an afternoon to learn the best way to label your messy home theater cables. It makes troubleshooting a breeze when a channel suddenly goes dark.
Stop the vibration before it ruins the detail
If you’re using bookshelf speakers on a desk, you’re likely fighting resonance you don’t even know is there. The desk becomes a secondary sounding board, muddying the lower mids. This is why your desktop speakers need isolation pads to stop desk vibration. I use Sorbothane hemispheres or even simple high-density foam blocks. It decouples the speaker from the wood, tightening up the imaging instantly. If you want to move beyond physical accessories, I recommend using Room EQ Wizard (REW) paired with a calibrated UMIK-1 microphone. This software allows you to identify exactly where your room is fighting your gear.
In the next few years, I predict we will see a shift toward ‘Active Room Correction’ becoming a standard feature in even budget Bluetooth speakers. We are already seeing Apple and Sonos use internal microphones to adjust EQ on the fly, and this tech is only going to get smarter. Soon, your gear will automatically compensate for your room’s acoustic flaws. For now, though, the best thing you can do is get your hands dirty. My advanced tip for today: go to your speaker terminals right now and ensure the wire hasn’t oxidized or loosened. A tight, clean connection is the foundation of everything we’ve talked about.
Lessons Only a Decade of Dead Batteries Could Teach Me
I used to be the person who would immediately assume my gear was defective if it didn’t work on the first try. Looking back, I realized that 90% of my ‘broken’ equipment just needed a little bit of respect. One of the biggest takeaways from my journey is that simplicity beats complexity every time. Before you tear apart a cabinet, check if you simply need to fix a loose speaker terminal on your cabinet. It’s rarely the internal processor; it’s almost always the physical connection failing you at the most inconvenient moment.
Another lightbulb moment was realizing that gear doesn’t have to be expensive to sound incredible. I spent years snubbing budget options until I discovered the trick to making 50-dollar headphones feel like 300-dollar monitors. It’s all about the pads and the power delivery, not just the brand name on the box. Finally, don’t ignore the weird quirks of electricity. If you find why your headphones sound better on an airplane adapter, you’ll start to understand how impedance and voltage affect everything you hear in your daily life.
#IMAGE_PLACEHOLDER_E#
The Bare Essentials for Your Maintenance Kit
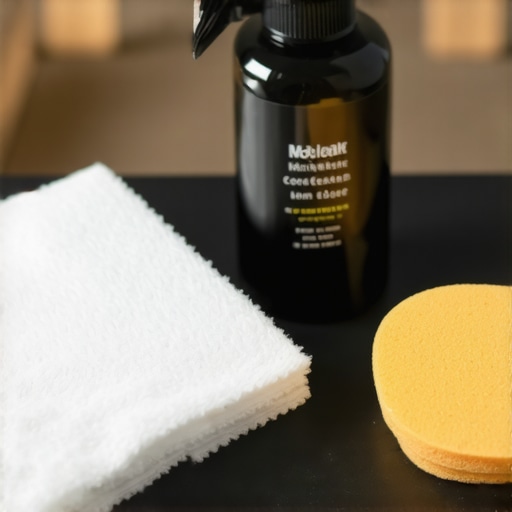
You don’t need a professional lab to keep your system running perfectly. I trust a few specific items to keep my headphones, speakers, amplifiers, and soundbars in peak condition. First, always keep a bottle of 90% or higher isopropyl alcohol and some precision cotton swabs; they are the frontline defense against charging failure. Second, a simple wooden toothpick is much safer than any metal tool for clearing debris from a charging well without causing a short circuit. For long-term protection, I always have a can of DeoxIT D5 nearby to prevent oxidation before it even starts. These aren’t just tools; they are the life insurance policy for your favorite home audio deals.
Reclaim Your Soundstage Today
Audio is supposed to be a joy, not a chore. We often get so caught up in the technical minutiae—the pins, the pads, the cables—that we forget why we bought this gear in the first place: to feel the music. Don’t let a minor charging hiccup or a dusty contact point keep you from your favorite album. Take ten minutes to clean your contacts, reset your case, and check your connections. Your ears will thank you, and your wallet will too. The world of home audio is vast and rewarding when your gear actually works the way it was designed. Now that you know the secrets, go out there and enjoy the clarity.
Have you ever spent hours troubleshooting a ‘dead’ pair of earbuds only to find it was something tiny and silly? Let me know your most frustrating audio fix in the comments below!