
We have all been there. You pop in your favorite wireless earbuds, cue up that perfect playlist to get you through a workday or a workout, and realize one side sounds frustratingly quiet. It is flat, muffled, and completely lacking that crisp high-end definition you love. I used to think my drivers were dying. In fact, I once threw away a perfectly good pair of premium monitors because I assumed they were blown. But as I eventually learned when diagnosing the simple fix for speakers that sound muffled, the culprit is rarely a dead driver. Nine times out of ten, it is a tiny, disgusting wall of compacted earwax sealing off the metal acoustic mesh. This sticky barrier blocks soundwaves like a concrete wall, leaving you with lopsided, disappointing audio.
My Costly Mistake and Why Traditional Cleaning Fails
When I first noticed this buildup on my daily drivers, I grabbed the nearest toothpick and started digging. Big mistake. I pushed too hard, punctured the delicate driver protection screen, and pushed the wax deeper into the acoustic chamber, ruining the buds permanently. I see folks online recommending sewing needles, safety pins, and even harsh rubbing alcohol baths. Please, do not do this. Your earbuds are highly sensitive micro-electronics. Using sharp metal objects to clean delicate mesh is like using a crowbar to fix a fine Swiss watch. Today, I am going to show you the incredibly simple, completely safe kitchen-counter method that removes every speck of wax without risking a costly replacement.
Is cleaning earbud mesh actually worth the risk of breaking them?
It absolutely is, because the alternative is letting your expensive audio gear slowly suffocate. According to audiologists, earwax is naturally designed to trap dust and debris, meaning it acts like a magnet for airborne particles the moment you take your buds out of your ears. If you do not clean them, that wax oxidizes, hardens, and becomes nearly impossible to remove without damaging the delicate glue holding the mesh in place. If you are experiencing other frustrating charging or connectivity issues alongside muffled sound, you might also want to check out the reason your wireless earbuds won’t charge in their case anymore, as dirt and debris in the case often go hand-in-hand with dirty mesh. Cleaning your gear is not just about restoring your soundstage; it is about protecting your financial investment.
Have you ever ruined a pair of headphones by trying to clean them with a sharp object, or did you assume they were broken and throw them out like I did? Let me know in the comments below. Let us dive into the safe, gentle household tools you actually need to get that factory-fresh sound back.
The Safer Way to Dissolve and Lift Stubborn Wax
To clean delicate earbud mesh without causing permanent damage, you must avoid mechanical force. Think of your earbud mesh like a microscopic window screen. If you press against it with a hard tool, you will warp the fine weave or rip the adhesive seal around the driver chamber. Instead, we use a chemical and physical lift method that relies on surface tension and gentle, non-destructive friction. This process safely breaks down the sticky oils in cerumen (earwax) and lifts the debris outward, rather than shoving it deeper into the acoustic chamber.
Gather Your Household Cleaning Arsenal
You do not need expensive specialty cleaning kits. In fact, most of those retail kits contain sharp metal picks that do more harm than good. Grab a clean, dry toothbrush with extra-soft bristles, a small piece of adhesive mounting putty (like Blu-Tack), a wooden toothpick, and a bottle of 70% isopropyl alcohol. It is crucial to use 70% alcohol rather than 91% or 99%, as the higher water content in the 70% solution slows down evaporation just enough to soften the wax without dissolving the internal adhesives holding the drivers together. If you ever notice issues with your other audio gear, like when headphones only play sound on one side, keeping these gentle cleaning habits in mind can save you hundreds of dollars in unnecessary replacements.
Step 1: The Dry Brush Technique
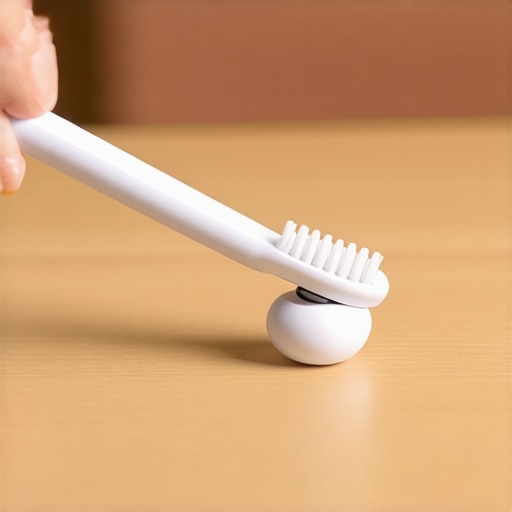
Always start dry. Hold your earbud so the mesh screen is facing directly downward. This simple trick uses gravity to your advantage, ensuring that any loosened debris falls out of the bud rather than deeper into it. Take your extra-soft toothbrush and gently sweep the bristles across the mesh in a single direction. Do not scrub back and forth, and do not press down. Let the tips of the bristles lightly flick the surface. I remember the first time I tried this on my old workout buds; a surprising shower of dried, flaky debris instantly fell onto my desk, immediately restoring about 30% of the lost volume before I even touched a liquid cleaner.
Step 2: The Putty Pull Method
For the sticky, compacted wax that survived the brushing, we use adhesive mounting putty. Tear off a small pea-sized piece of putty and warm it up by rolling it between your fingers. Once it is warm and pliable, gently press it directly onto the earbud mesh. Do not shove it in with force. Leave it there for about five seconds, then pull it away in one swift, upward motion. The putty will conform to the microscopic gaps in the mesh and pull the stubborn wax plugs straight out. It acts like a mini plunger for your audio drivers, leaving the delicate metal screen completely intact.
Step 3: The Damp Micro-Dab
If you still see a dark film on the mesh, it is time for the isopropyl alcohol. Lightly dampen the very tip of a cotton swab with the 70% alcohol. It should be barely damp, not dripping. Tap the swab on the back of your hand first to remove any excess liquid. Gently dab the mesh screen, holding the earbud downward. The alcohol will instantly break down the remaining oily residue. Immediately follow this up with another dry brush sweep to clear out the dissolved wax before it has a chance to dry and harden again. This attention to detail is just as important as knowing how to spot a fake pair of premium earbuds on secondary markets; maintaining your gear properly is what guarantees a premium listening experience over the long haul.
While physical blockages like earwax account for almost ninety percent of muffled audio issues, resolving them is only half the battle. As someone who has spent over a decade testing high-end personal audio gear, I often see enthusiasts fall into a different kind of trap once their gear is clean. They start chasing digital volume hacks, software equalizers, or expensive hardware upgrades without realizing how delicate acoustic systems actually operate. Let us dig deeper into the actual physics of micro-drivers and debunk the myths that might still be holding your audio quality back.
The Acoustic Resonant Chamber Myth and Why Shaking Things Up Fails
Everyone in the audiophile forums tells you to crank up the volume to blow out any micro-particles left behind after cleaning. In my experience, this actually ruins your drivers. Micro-drivers in wireless earbuds rely on ultra-thin, vacuum-formed diaphragms. Blasting high-frequency sine waves to clear dust or wax is far more likely to warp the voice coil or stretch the surround material. Once that happens, you will hear a subtle distortion that makes your favorite tracks sound thin, resembling the distinct degradation of sound when you need to tell if your speaker is blown or just loose. Instead of mechanical force, patience and physical capillary action are your best friends.
Why does the earbud seal change drastically during the winter months?
An overlooked variable in headphone performance is ambient temperature. Many users clean their earbud meshes thoroughly, only to walk outside in January and find their bass has completely vanished. They assume their cleaning ruined the driver, but the reality is pure physics: cold temperatures harden silicone ear tips, which destroys the acoustic seal in your ear canal. This environmental effect is precisely why your wireless buds fall out more in the winter and lose their low-end response. It has nothing to do with a broken driver and everything to do with material science. Simply warming your silicone tips between your fingers before inserting them can bring your full bass response right back to life.
The Ultimate Cleaning Trap of Liquid Capillary Action
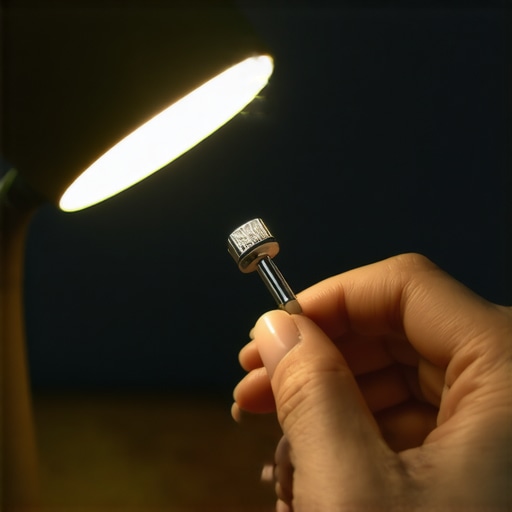
Here is the advanced trap to avoid: over-saturation. When you dab your earbud mesh with alcohol, the liquid can be drawn inside the housing via capillary action if the mesh is too wet. Once liquid gets past that protective barrier, it begins dissolving the voice coil adhesives or, worse, lands directly on the driver membrane. The acoustic seal is instantly compromised. Audio engineers at major headphone manufacturers warn that liquid damage to internal acoustic chambers is the leading cause of permanent driver mismatch, similar to how incorrect power routing causes issues, which you might recognize if you have ever had to troubleshoot headphones that only play sound on one side. Keep your swabs bone-dry to the touch. Have you ever fallen into this trap and accidentally ruined a pair of earbuds while trying to clean them? Let me know in the comments below.
Now that we have covered the science of micro-driver mechanics and why keeping things dry is so critical, let us focus on the physical maintenance habits that actually prevent these blocks from forming in the first place. Preventing wax buildup is vastly easier than trying to dissolve a hardened plug that has had three months to cure under the heat of your ear canal. As someone who handles and tests dozens of personal audio pieces every year, I have developed a rigid storage and cleaning ritual that has kept my daily drivers sounding exactly as they did on day one.
How do I maintain my earbud acoustic mesh over time?
The secret to long-term performance is a post-session wipe. Every single time you take your earbuds out of your ears, take three seconds to wipe down the tips and outer nozzle body with a dry microfiber cloth before placing them back into their charging case. This prevents wet, warm cerumen from migrating toward the metal mesh as the earbud cools down. Additionally, you should store your headphones in a dedicated hard case when not in use. Dust and lint from the bottom of your pockets act like tiny sponges that absorb moisture and bind to any residual oils on the acoustic mesh. If you are a fan of over-ear gear too, learning how to properly store your headphones to avoid hinge failure is equally critical for keeping your investment safe from physical wear.
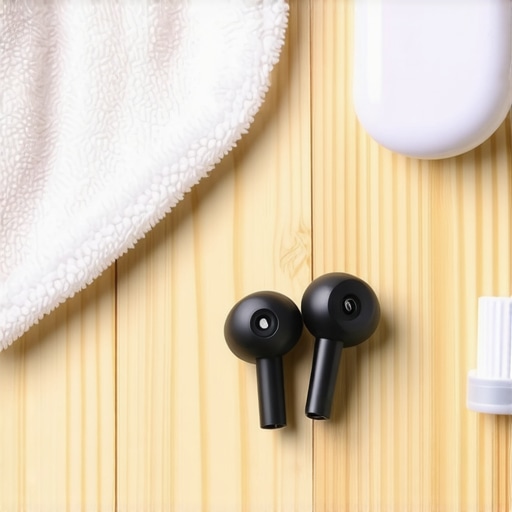
For specialized tools, I highly recommend keeping a dedicated audio cleaning brush with anti-static nylon bristles on your desk. Regular plastic brushes can generate static discharge that risks damaging the sensitive touch-sensors on modern wireless buds. I personally use a carbon-fiber camera lens brush, which is incredibly gentle on delicate metal meshes. According to the technical guidelines published by Sennheiser’s engineering team, maintaining clean physical apertures is the single most effective way to prevent driver imbalance over a multi-year product lifespan. In the near future, I predict we will see premium earbuds ship with self-cleaning acoustic filters or microscopic ultrasonic vibrating meshes designed to automatically shed debris when docked in their cases. Until then, these manual habits are our best line of defense.
If you want to keep all of your portable gear in top shape, do not stop at the mesh. Take a moment to inspect your charging contacts too. To avoid finding yourself troubleshooting why your gear will not power up, you should actively learn how to fix a loose charging port on your wireless headphones. I highly encourage you to try the putty pull method tonight on a pair of buds you think are sounding a bit quiet. You might be shocked at how much soundstage you recover instantly.
We have all been there. You pop in your favorite wireless earbuds, cue up that perfect playlist to get you through a workday or a workout, and realize one side sounds frustratingly quiet. It is flat, muffled, and completely lacking that crisp high-end definition you love. I used to think my drivers were dying. In fact, I once threw away a perfectly good pair of premium monitors because I assumed they were blown. But as I eventually learned when diagnosing the simple fix for speakers that sound muffled, the culprit is rarely a dead driver. Nine times out of ten, it is a tiny, disgusting wall of compacted earwax sealing off the metal acoustic mesh. This sticky barrier blocks soundwaves like a concrete wall, leaving you with lopsided, disappointing audio.
My Costly Mistake and Why Traditional Cleaning Fails
When I first noticed this buildup on my daily drivers, I grabbed the nearest toothpick and started digging. Big mistake. I pushed too hard, punctured the delicate driver protection screen, and pushed the wax deeper into the acoustic chamber, ruining the buds permanently. I see folks online recommending sewing needles, safety pins, and even harsh rubbing alcohol baths. Please, do not do this. Your earbuds are highly sensitive micro-electronics. Using sharp metal objects to clean delicate mesh is like using a crowbar to fix a fine Swiss watch. Today, I am going to show you the incredibly simple, completely safe kitchen-counter method that removes every speck of wax without risking a costly replacement.
Is cleaning earbud mesh actually worth the risk of breaking them?
It absolutely is, because the alternative is letting your expensive audio gear slowly suffocate. According to audiologists, earwax is naturally designed to trap dust and debris, meaning it acts like a magnet for airborne particles the moment you take your buds out of your ears. If you do not clean them, that wax oxidizes, hardens, and becomes nearly impossible to remove without damaging the delicate glue holding the mesh in place. If you are experiencing other frustrating charging or connectivity issues alongside muffled sound, you might also want to check out the reason your wireless earbuds won’t charge in their case anymore, as dirt and debris in the case often go hand-in-hand with dirty mesh. Cleaning your gear is not just about restoring your soundstage; it is about protecting your financial investment.
Have you ever ruined a pair of headphones by trying to clean them with a sharp object, or did you assume they were broken and throw them out like I did? Let me know in the comments below. Let us dive into the safe, gentle household tools you actually need to get that factory-fresh sound back.
The Safer Way to Dissolve and Lift Stubborn Wax
To clean delicate earbud mesh without causing permanent damage, you must avoid mechanical force. Think of your earbud mesh like a microscopic window screen. If you press against it with a hard tool, you will warp the fine weave or rip the adhesive seal around the driver chamber. Instead, we use a chemical and physical lift method that relies on surface tension and gentle, non-destructive friction. This process safely breaks down the sticky oils in cerumen (earwax) and lifts the debris outward, rather than shoving it deeper into the acoustic chamber.
Gather Your Household Cleaning Arsenal
You do not need expensive specialty cleaning kits. In fact, most of those retail kits contain sharp metal picks that do more harm than good. Grab a clean, dry toothbrush with extra-soft bristles, a small piece of adhesive mounting putty (like Blu-Tack), a wooden toothpick, and a bottle of 70% isopropyl alcohol. It is crucial to use 70% alcohol rather than 91% or 99%, as the higher water content in the 70% solution slows down evaporation just enough to soften the wax without dissolving the internal adhesives holding the drivers together. If you ever notice issues with your other audio gear, like when headphones only play sound on one side, keeping these gentle cleaning habits in mind can save you hundreds of dollars in unnecessary replacements.
Step 1: The Dry Brush Technique
Always start dry. Hold your earbud so the mesh screen is facing directly downward. This simple trick uses gravity to your advantage, ensuring that any loosened debris falls out of the bud rather than deeper into it. Take your extra-soft toothbrush and gently sweep the bristles across the mesh in a single direction. Do not scrub back and forth, and do not press down. Let the tips of the bristles lightly flick the surface. I remember the first time I tried this on my old workout buds; a surprising shower of dried, flaky debris instantly fell onto my desk, immediately restoring about 30% of the lost volume before I even touched a liquid cleaner.
Step 2: The Putty Pull Method
For the sticky, compacted wax that survived the brushing, we use adhesive mounting putty. Tear off a small pea-sized piece of putty and warm it up by rolling it between your fingers. Once it is warm and pliable, gently press it directly onto the earbud mesh. Do not shove it in with force. Leave it there for about five seconds, then pull it away in one swift, upward motion. The putty will conform to the microscopic gaps in the mesh and pull the stubborn wax plugs straight out. It acts like a mini plunger for your audio drivers, leaving the delicate metal screen completely intact.
Step 3: The Damp Micro-Dab
If you still see a dark film on the mesh, it is time for the isopropyl alcohol. Lightly dampen the very tip of a cotton swab with the 70% alcohol. It should be barely damp, not dripping. Tap the swab on the back of your hand first to remove any excess liquid. Gently dab the mesh screen, holding the earbud downward. The alcohol will instantly break down the remaining oily residue. Immediately follow this up with another dry brush sweep to clear out the dissolved wax before it has a chance to dry and harden again. This attention to detail is just as important as knowing how to spot a fake pair of premium earbuds on secondary markets; maintaining your gear properly is what guarantees a premium listening experience over the long haul.
While physical blockages like earwax account for almost ninety percent of muffled audio issues, resolving them is only half the battle. As someone who has spent over a decade testing high-end personal audio gear, I often see enthusiasts fall into a different kind of trap once their gear is clean. They start chasing digital volume hacks, software equalizers, or expensive hardware upgrades without realizing how delicate acoustic systems actually operate. Let us dig deeper into the actual physics of micro-drivers and debunk the myths that might still be holding your audio quality back.
The Acoustic Resonant Chamber Myth and Why Shaking Things Up Fails
Everyone in the audiophile forums tells you to crank up the volume to blow out any micro-particles left behind after cleaning. In my experience, this actually ruins your drivers. Micro-drivers in wireless earbuds rely on ultra-thin, vacuum-formed diaphragms. Blasting high-frequency sine waves to clear dust or wax is far more likely to warp the voice coil or stretch the surround material. Once that happens, you will hear a subtle distortion that makes your favorite tracks sound thin, resembling the distinct degradation of sound when you need to tell if your speaker is blown or just loose. Instead of mechanical force, patience and physical capillary action are your best friends.
Why does the earbud seal change drastically during the winter months?
An overlooked variable in headphone performance is ambient temperature. Many users clean their earbud meshes thoroughly, only to walk outside in January and find their bass has completely vanished. They assume their cleaning ruined the driver, but the reality is pure physics: cold temperatures harden silicone ear tips, which destroys the acoustic seal in your ear canal. This environmental effect is precisely why your wireless buds fall out more in the winter and lose their low-end response. It has nothing to do with a broken driver and everything to do with material science. Simply warming your silicone tips between your fingers before inserting them can bring your full bass response right back to life.
The Ultimate Cleaning Trap of Liquid Capillary Action
Here is the advanced trap to avoid: over-saturation. When you dab your earbud mesh with alcohol, the liquid can be drawn inside the housing via capillary action if the mesh is too wet. Once liquid gets past that protective barrier, it begins dissolving the voice coil adhesives or, worse, lands directly on the driver membrane. The acoustic seal is instantly compromised. Audio engineers at major headphone manufacturers warn that liquid damage to internal acoustic chambers is the leading cause of permanent driver mismatch, similar to how incorrect power routing causes issues, which you might recognize if you have ever had to troubleshoot headphones that only play sound on one side. Keep your swabs bone-dry to the touch. Have you ever fallen into this trap and accidentally ruined a pair of earbuds while trying to clean them? Let me know in the comments below.
Now that we have covered the science of micro-driver mechanics and why keeping things dry is so critical, let us focus on the physical maintenance habits that actually prevent these blocks from forming in the first place. Preventing wax buildup is vastly easier than trying to dissolve a hardened plug that has had three months to cure under the heat of your ear canal. As someone who handles and tests dozens of personal audio pieces every year, I have developed a rigid storage and cleaning ritual that has kept my daily drivers sounding exactly as they did on day one.
How do I maintain my earbud acoustic mesh over time?
The secret to long-term performance is a post-session wipe. Every single time you take your earbuds out of your ears, take three seconds to wipe down the tips and outer nozzle body with a dry microfiber cloth before placing them back into their charging case. This prevents wet, warm cerumen from migrating toward the metal mesh as the earbud cools down. Additionally, you should store your headphones in a dedicated hard case when not in use. Dust and lint from the bottom of your pockets act like tiny sponges that absorb moisture and bind to any residual oils on the acoustic mesh. If you are a fan of over-ear gear too, learning how to properly store your headphones to avoid hinge failure is equally critical for keeping your investment safe from physical wear.
For specialized tools, I highly recommend keeping a dedicated audio cleaning brush with anti-static nylon bristles on your desk. Regular plastic brushes can generate static discharge that risks damaging the sensitive touch-sensors on modern wireless buds. I personally use a carbon-fiber camera lens brush, which is incredibly gentle on delicate metal meshes. According to the technical guidelines published by Sennheiser’s engineering team, maintaining clean physical apertures is the single most effective way to prevent driver imbalance over a multi-year product lifespan. In the near future, I predict we will see premium earbuds ship with self-cleaning acoustic filters or microscopic ultrasonic vibrating meshes designed to automatically shed debris when docked in their cases. Until then, these manual habits are our best line of defense.
If you want to keep all of your portable gear in top shape, do not stop at the mesh. Take a moment to inspect your charging contacts too. To avoid finding yourself troubleshooting why your gear will not power up, you should actively learn how to fix a loose charging port on your favorite bluetooth speaker. I highly encourage you to try the putty pull method tonight on a pair of buds you think are sounding a bit quiet. You might be shocked at how much soundstage you recover instantly.
Three Hard-Earned Lessons from a Decade of Earbud Restoration
Over the years, working with everything from entry-level commuter buds to high-end custom-molded monitors has taught me that the smallest physical details make the biggest acoustic impact. Here are three critical insights that completely changed my approach to earbud maintenance:
- Heat is the hidden catalyst for wax damage: Body heat warms earwax into a near-liquid state while you wear your earbuds. The moment you take them out and they cool down, that liquid solidifies into the tiny gaps of your mesh. If you do not wipe them immediately, you are letting concrete cure over your drivers.
- Frequency response is incredibly fragile: A blockage covering even 10% of the acoustic aperture can significantly alter the treble roll-off, making you think you need a complex EQ fix when you actually just need a piece of putty.
- The secondary market is a goldmine for dirty gear: Many people sell “broken” or “faulty” premium monitors online for pennies simply because they do not know how to clean them. Spotting these dirty opportunities is a great way to build a high-end collection on a budget.
My Personal Audio Cleaning and Maintenance Toolkit
To get professional-grade results at home without damaging delicate physical seals, these are the exact items I rely on and trust:
- Blu-Tack Mounting Putty: It remains the single safest physical lift tool. Unlike generic clones, it leaves zero sticky residue behind on the delicate metal weave.
- Anti-Static Carbon Fiber Lens Brush: Designed originally for sensitive camera optics, this is the perfect tool for flicking away debris from acoustic mesh without generating static charges that can scramble modern touch-sensors.
- 70% Isopropyl Alcohol: The essential solvent. I always avoid 99% solutions here because the slower evaporation rate of the 70% version is crucial for thoroughly breaking down organic oils before drying.
- Microfiber Detailing Cloths: Always keep a fresh, lint-free cloth nearby. Standard tissues or paper towels shed tiny fibers that find their way back into the speaker housing.
Bring the Full Soundstage Back to Your Daily Playlists
Do not let a minor buildup of household dust and organic oils stand between you and the high-fidelity sound you paid for. Cleaning your earbuds is a therapeutic, rewarding process that instantly revitalizes your music. Taking just a few minutes to care for your acoustic mesh will prolong the life of your drivers and save you from unnecessary replacement costs.
Have you ever tried the putty pull method on your favorite pair of wireless earbuds, or did you find another household trick that works wonders? Let me know in the comments below!