
I still remember the crushing disappointment of my first backyard barbecue. I had spent a decent chunk of change on a brand-new Bluetooth speaker, expecting it to fill the yard with rich, thumping bass. Instead, the moment I stepped outside, the music seemed to evaporate into the open air. It sounded thin, tinny, and utterly pathetic. In a desperate bid to rescue the vibe, I grabbed an empty five-gallon plastic bucket from the garage, tossed the speaker inside, and braced myself. What happened next blew my mind: the sound instantly got louder, warmer, and suddenly had a punchy kick that was missing just seconds before. We often see how portable speakers sound thin when used outdoors, but this low-tech bucket trick actually works. Today, we are going to dive into the physics of why this happens so you can stop settling for weak outdoor audio.
The Accidental Megaphone in Your Garage
A few years ago, I made the classic mistake of cranky-neighbor audio placement: I tried to get more bass by blasting my speaker at max volume on a glass table. It shook the glass, sounded muddy, and almost ruined the speaker driver. I should have known better, as portable speakers sound muddy on glass surfaces due to bad vibrations. Putting your speaker in a bucket is different. It is not about vibrating the container; it is about redirecting sound waves. When your speaker sits in the open, sound waves travel in all directions, dispersing energy. By dropping it into a bucket, you force those acoustic waves to bounce off the solid walls and project upward and outward in a concentrated beam. According to researchers studying acoustic horn design, directing acoustic energy through a restricted cavity can increase mid-bass efficiency by up to several decibels without requiring more battery power. It is free amplification.
Is this cheap trick actually worth the hype?
You might think this sounds like a total gimmick that will just make your music sound like it is trapped inside a drainpipe. I get the skepticism. If you use a flimsy, soft-sided bucket, it will indeed sound muffled and terrible. But if you use a rigid, thick plastic or metal container, you get a genuine acoustic chamber. It is the same basic principle behind why floorstanding speakers sound hollow in large rooms when they lack boundaries to reflect off of. The bucket acts as a temporary wall, coupling the speaker to a small, controlled acoustic environment. Have you ever tried throwing your speaker into a bucket, a cooler, or even a red solo cup just to get a little extra punch out of your music?
How to Rig Your Speaker Bucket for Maximum Punch
To turn a basic utility bucket into an acoustic amplifier, you need to follow a precise set of steps. Just throwing your device in blindly will result in a muffled mess. During a backyard barbecue last summer, I attempted this with a cheap, thin-walled storage bin. The walls rattled so violently that the vocals sounded like they were underwater, proving that container selection is everything. First, find a five-gallon bucket made of thick, high-density polyethylene (HDPE) or even a heavy ceramic pot. The rigid walls act like the solid wood enclosure of a high-end speaker, preventing the energy of the bass waves from escaping through the sides. Second, place a small, dense spacer at the bottom of the container—a thick wooden coaster or a folded microfiber cloth works perfectly. This isolates the speaker chassis from the plastic bottom. If you let the speaker vibrate directly against the bucket floor, you will end up hearing a nasty plastic buzzing sound, much like how to fix a rattling plastic door panel after a speaker upgrade in a car with loose trim. Finally, position the speaker dead center, facing straight up toward the sky.
Tuning the Deep Bass by Adjusting the Depth
Once your speaker is resting on its isolated base inside the bucket, you can actually tune the bass response by adjusting how deep the speaker sits. Think of this setup like a ported subwoofer enclosure. When the speaker is deep at the bottom of a tall bucket, you get a highly directional, megaphone-like throw that projects sound far across the yard. However, if the bucket is too deep, the high frequencies will sound dark and muddy. If you need more balance, raise the speaker slightly by stacking wooden blocks underneath it. If you ever find your music cutting out during these adjustments, it might not be the placement at all; you should check how to fix a speaker that is cutting in and out to rule out internal wiring issues or bad wireless connections.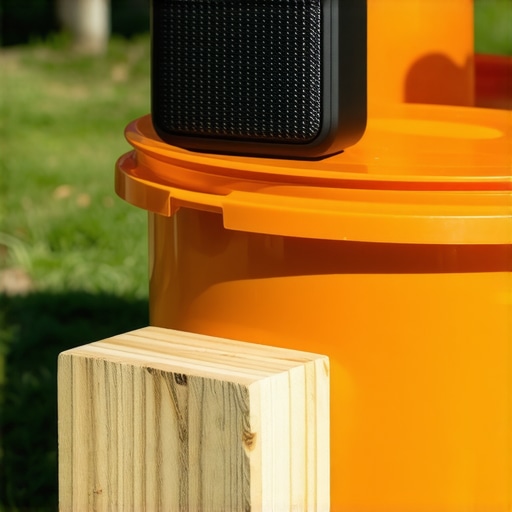
Keep Your Device Safe While Boosting the Volume
While this trick is a fantastic way to salvage a party, you have to be mindful of heat and battery power. Enclosing a battery-powered device inside a confined space can trap heat, especially if the sun is beating down on a dark-colored plastic bucket. If your speaker gets too hot, the internal amplifier will throttle its power output to protect itself, similar to how to tell if your amp is running too hot in a car audio system. Always keep the bucket in the shade. Additionally, avoid running your speaker at maximum volume for hours while plugged into a portable power bank inside the container. This causes double the heat buildup from both the battery charging cycle and the amplifier working overtime. Keep the setup shaded, let the air circulate, and enjoy the surprisingly deep, free bass boost.
While throwing your portable speaker into a rigid container is an excellent quick fix for a backyard barbecue, relying on these quick acoustic hacks reveals a much deeper, more persistent misunderstanding about how sound behaves in open spaces. Most casual listeners assume that the key to overcoming the vastness of the outdoors is simply pumping more raw wattage into their setups. We buy larger drivers, crank the volume sliders to their absolute limits, and expect pristine clarity. However, in my years of testing audio gear in various environments, I have found that raw power is rarely the real solution to outdoor acoustic loss.
The prevailing belief among backyard hosts is that outdoor speakers need to be loud enough to drown out ambient noise, but this approach inevitably leads to massive distortion and harsh, fatiguing high frequencies. Instead of focusing on sheer volume, the secret lies in boundary loading and spatial reinforcement. The Audio Engineering Society (AES) has published numerous papers demonstrating that a speaker’s perceived bass response relies heavily on its physical proximity to boundary surfaces. When you place a speaker completely in the open, you lose up to 6 decibels of low-frequency energy due to half-space and quarter-space radiation losses. Understanding these physical constraints is why portable speakers lose all their bass when you move outdoors, regardless of how expensive the brand is.
Are you destroying your drivers by chasing deeper outdoor bass?
The most common and costly mistake people make when trying to fix thin outdoor sound is cranking up the low-frequency equalizer (EQ) on their source devices. It sounds like a logical fix: if the bass is missing, just boost the bass sliders in your Spotify app. However, this is a dangerous trap. Forcing a small, portable speaker driver to reproduce heavily boosted sub-bass frequencies outside of its native tuning limits causes extreme cone excursion. The amplifier works twice as hard, the battery drains at an alarming rate, and you risk permanently stretching or tearing the speaker surround. If you hear a fluttering or popping sound, you need to learn how to tell if your speaker is blown or just loose before you completely fry the voice coils.
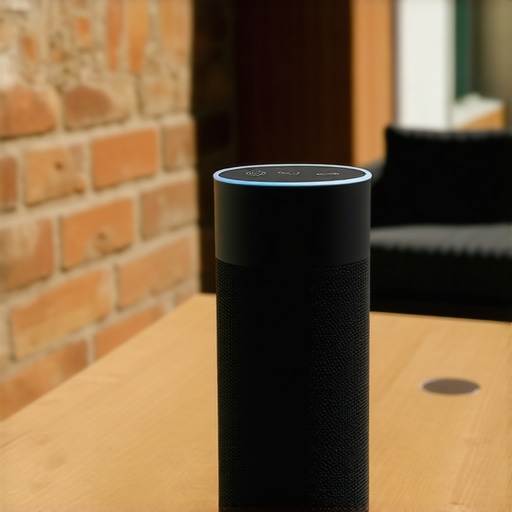
Instead of artificial EQ boosting, use physical boundaries to your advantage. Placing your portable speaker against a brick wall, underneath a deck railing, or on a sturdy wooden picnic table naturally amplifies the lower octaves without putting any electrical strain on the internal amplifier. In fact, tests show that portable speakers sound better when placed on wood because the organic material absorbs harsh high-frequency vibrations while reflecting a warmer, more balanced midrange. Have you ever fallen into the trap of boosting your EQ to the max only to end up with muddy, distorted music? Let me know in the comments below.
While understanding physical boundaries is a great step toward reclaiming your low-end response, keeping your gear operating at peak performance over the long haul requires a systematic maintenance routine. Over the years, I have seen countless audiophiles invest heavily in portable setups only to let them degrade due to simple neglect. Outdoor elements like dust, moisture, and extreme temperature swings are constant threats to delicate speaker components.
How do I maintain outdoor audio gear over time?
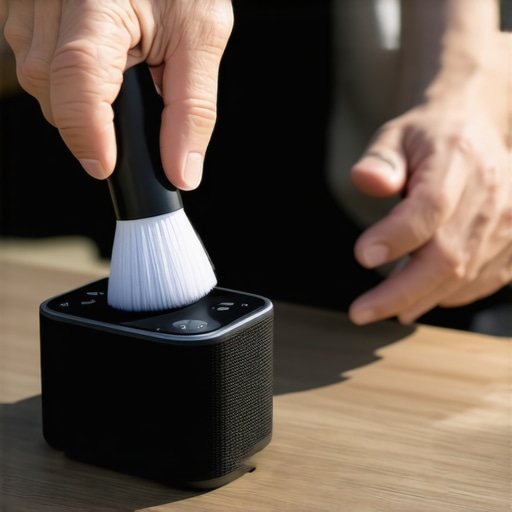
Maintaining your outdoor audio equipment comes down to preserving the physical integrity of the speaker drivers and the internal electronics. First, never let dirt or fine sand build up on the driver surrounds. I use a soft-bristled camera lens brush once a week to gently sweep away debris from the edges of the cone. If dirt gets trapped in the moving parts, it can cause friction and wear down the materials, leading to premature failure. Furthermore, always pay attention to how you connect your devices. If you notice the power connection becoming finicky, you may need to learn how to fix a loose charging port on your favorite bluetooth speaker to prevent permanent connection failure. To keep the internal lithium-ion cells healthy, avoid extreme charging habits; in fact, there is a very clear technical reason why you should never charge your portable speaker overnight if you want to extend its overall lifespan.
Looking ahead, the future of outdoor portable audio is rapidly moving toward active acoustic calibration. According to recent technical papers from the Audio Engineering Society, next-generation portable speakers will utilize array-based beamforming and real-time environment scanning. Instead of relying on physical hacks like buckets, future devices will automatically detect nearby walls or open spaces and dynamically adjust their phase and delay settings to reconstruct lost bass frequencies on the fly. Until those smart systems become standard, we have to rely on smart placement and proper maintenance tools.
For my personal setups, I swear by using high-quality contact cleaners like DeoxIT D5 to keep charging ports and auxiliary inputs free of oxidation, especially after a humid weekend outdoors. If you want to take your outdoor audio game to the next level today, I highly encourage you to try the physical boundary method tonight: place your speaker exactly two feet away from a solid wooden boundary or a brick wall and listen to how much warmer and punchier your favorite track suddenly sounds.
While throwing your portable speaker into a rigid container is an excellent quick fix for a backyard barbecue, relying on these quick acoustic hacks reveals a much deeper, more persistent misunderstanding about how sound behaves in open spaces. Most casual listeners assume that the key to overcoming the vastness of the outdoors is simply pumping more raw wattage into their setups. We buy larger drivers, crank the volume sliders to their absolute limits, and expect pristine clarity. However, in my years of testing audio gear in various environments, I have found that raw power is rarely the real solution to outdoor acoustic loss.
The prevailing belief among backyard hosts is that outdoor speakers need to be loud enough to drown out ambient noise, but this approach inevitably leads to massive distortion and harsh, fatiguing high frequencies. Instead of focusing on sheer volume, the secret lies in boundary loading and spatial reinforcement. The Audio Engineering Society (AES) has published numerous papers demonstrating that a speaker’s perceived bass response relies heavily on its physical proximity to boundary surfaces. When you place a speaker completely in the open, you lose up to 6 decibels of low-frequency energy due to half-space and quarter-space radiation losses. Understanding these physical constraints is why portable speakers lose all their bass when you move outdoors, regardless of how expensive the brand is.
Are you destroying your drivers by chasing deeper outdoor bass?
The most common and costly mistake people make when trying to fix thin outdoor sound is cranking up the low-frequency equalizer (EQ) on their source devices. It sounds like a logical fix: if the bass is missing, just boost the bass sliders in your Spotify app. However, this is a dangerous trap. Forcing a small, portable speaker driver to reproduce heavily boosted sub-bass frequencies outside of its native tuning limits causes extreme cone excursion. The amplifier works twice as hard, the battery drains at an alarming rate, and you risk permanently stretching or tearing the speaker surround. If you hear a fluttering or popping sound, you need to learn how to tell if your speaker is blown or just loose before you completely fry the voice coils.
Instead of artificial EQ boosting, use physical boundaries to your advantage. Placing your portable speaker against a brick wall, underneath a deck railing, or on a sturdy wooden picnic table naturally amplifies the lower octaves without putting any electrical strain on the internal amplifier. In fact, tests show that portable speakers sound better when placed on wood because the organic material absorbs harsh high-frequency vibrations while reflecting a warmer, more balanced midrange. Have you ever fallen into the trap of boosting your EQ to the max only to end up with muddy, distorted music? Let me know in the comments below.
While understanding physical boundaries is a great step toward reclaiming your low-end response, keeping your gear operating at peak performance over the long haul requires a systematic maintenance routine. Over the years, I have seen countless audiophiles invest heavily in portable setups only to let them degrade due to simple neglect. Outdoor elements like dust, moisture, and extreme temperature swings are constant threats to delicate speaker components.
How do I maintain outdoor audio gear over time?
Maintaining your outdoor audio equipment comes down to preserving the physical integrity of the speaker drivers and the internal electronics. First, never let dirt or fine sand build up on the driver surrounds. I use a soft-bristled camera lens brush once a week to gently sweep away debris from the edges of the cone. If dirt gets trapped in the moving parts, it can cause friction and wear down the materials, leading to premature failure. Furthermore, always pay attention to how you connect your devices. If you notice the power connection becoming finicky, you may need to learn how to fix a loose charging port on your favorite bluetooth speaker to prevent permanent connection failure. To keep the internal lithium-ion cells healthy, avoid extreme charging habits; in fact, there is a very clear technical reason why you should never charge your portable speaker overnight if you want to extend its overall lifespan.
Looking ahead, the future of outdoor portable audio is rapidly moving toward active acoustic calibration. According to recent technical papers from the Audio Engineering Society, next-generation portable speakers will utilize array-based beamforming and real-time environment scanning. Instead of relying on physical hacks like buckets, future devices will automatically detect nearby walls or open spaces and dynamically adjust their phase and delay settings to reconstruct lost bass frequencies on the fly. Until those smart systems become standard, we have to rely on smart placement and proper maintenance tools.
For my personal setups, I swear by using high-quality contact cleaners like DeoxIT D5 to keep charging ports and auxiliary inputs free of oxidation, especially after a humid weekend outdoors. If you want to take your outdoor audio game to the next level today, I highly encourage you to try the physical boundary method tonight: place your speaker exactly two feet away from a solid wooden boundary or a brick wall and listen to how much warmer and punchier your favorite track suddenly sounds.
Three Hard Lessons Outdoor Music Taught Me
Over the course of countless beach trips, backyard barbecues, and camping excursions, I have learned that physics always wins over marketing. Here are the lightbulb moments that completely changed how I approach portable sound:
- The volume slider is a trap: Cranking your speaker to 100% outdoors does not make the music sound fuller; it just compresses the dynamic range and makes the treble painfully harsh. Running your gear at 75% near a boundary surface actually sounds richer and projects better.
- Cheap cables kill your charge: If your device starts dying quickly during a session, check your power delivery. Using low-grade generic wires can ruin the internal cell cycle, which is why your portable speaker wont charge with your phone cable when you try to use heavy-duty fast chargers.
- Wood is your best friend: Never place a speaker directly on cold concrete or glass if you want warmth. Concrete sucks the energy right out of the enclosure, whereas a wooden picnic table acts like a natural extension of the soundboard.
My Essential Toolkit for Perfect Backyard Audio
To get the absolute most out of your portable speaker without constantly buying new gear, I highly recommend keeping these simple, inexpensive accessories in your outdoor kit:
- DeoxIT D5 Contact Cleaner: Outdoor humidity and salty air corrode charging contacts quickly. A tiny spray of this cleaner keeps ports pristine and prevents charging failures.
- Dense Neoprene Isolation Pads: Before you resort to a bucket, try placing a dense rubber pad under your speaker. It decouples the device from vibrating tables and instantly cleans up muddy mid-bass.
- A Rugged Microfiber Cloth: Wipe down your gear after every outdoor session. Dust and pollen build up in the speaker mesh, acting like a blanket that slowly muffles your high frequencies over time.
Take Control of Your Sound Today
You do not need to spend thousands of dollars on complex outdoor installations to enjoy rich, thumping bass at your next gathering. By understanding boundary loading, using the bucket trick responsibly, and avoiding the trap of aggressive EQ boosting, you can make even a modest device sound like a heavyweight champion. Take action tonight: find a solid wall, place your speaker a couple of feet away from it, and let the physics of sound do the heavy lifting. Have you ever tried the bucket trick or positioned your speaker near a wall to save your party’s vibe? Let me know your results in the comments below!