
I remember the exact moment my heart sank. I was spinning a pristine copy of Aja on my vintage setup when a subtle, buzzy distortion started creeping into the low end. I pulled off the fabric covers, and there it was: a tiny, jagged half-inch tear right in the foam surround of my favorite woofer. My first instinct was to panic and start shopping for expensive replacements. But then I remembered a trick an old hi-fi tech taught me years ago about using the right kind of adhesive to breathe new life into a dying driver. It’s a common scare; you start wondering if you need to tell if your drivers are actually blown or if they can be saved. Today, I’m going to show you exactly how to patch those small nicks before they turn into full-blown structural failures. We aren’t just slapping tape on it; we are performing a precise surgical fix that preserves the flexibility your speaker needs to breathe.
Stop the Panic Before You Order New Drivers
It is incredibly tempting to think that once the surround—that ring of foam or rubber around the cone—starts to go, the speaker is trash. I made that exact mistake early on by trying to ‘reinforce’ a small tear with hot glue. Big mistake. The glue dried rock-hard, restricted the cone movement, and actually caused the foam to crack further right next to the repair. You need something that stays pliable. According to technical guides from experts at Parts Express, maintaining the compliance of the surround is the most critical factor in preserving the speaker’s original resonant frequency. If you’ve already checked to make sure it isn’t just your speaker grills rattling, then a dab of the right glue is your best friend.
Is a Glue Repair Actually Just a Temporary Band-Aid?
Many people worry that glue won’t hold up under the pressure of heavy bass hits. I used to be one of them. However, if the tear is small—less than an inch—and hasn’t reached the frame yet, a professional-grade flexible adhesive like E6000 or a specialized speaker repair glue can actually be stronger than the surrounding foam. It’s about catching it early. It’s a lot like knowing how to safely remove a pushed-in dust cap; it looks intimidating, but with a steady hand, it’s a routine maintenance task. Have you ever noticed a tiny buzz in your setup and feared the worst? Tell me about your ‘oh no’ moments in the comments below. We’re going to get that woofer back to its punchy, clean self without spending a fortune on a full re-foam kit.
Prep Your Surface Like a Surgeon
Before you even touch that tube of glue, you have to get the area clinical-level clean. Any lingering dust or old foam fragments will prevent the adhesive from bonding, leading to a patch that peels off the moment you play a track with heavy sub-bass. Use a Q-tip lightly dipped in 70% isopropyl alcohol. You aren’t soaking the speaker; you’re just wiping the edges of the tear. Think of it like preparing a scraped knee for a bandage—if the skin is dirty, the Band-Aid won’t stick. This is especially true if you are dealing with older components where foam rot is just starting. If you’ve been wondering why your car door panels buzz with every bass hit, it’s often because the bond between the surround and the frame is failing, not just a simple tear. Cleaning ensures the glue becomes part of the speaker material rather than just sitting on top of it.
Apply the Adhesive Without Overdoing It
The golden rule of speaker repair is that ‘less is more.’ I once tried to fix a small nick on a subwoofer from a set I bought while finding legitimate high-end gear at local thrift stores. I was over-zealous and squeezed a huge glob of silicone right onto the foam. The weight of the dried glue actually threw the cone out of balance, causing a physical scraping sound every time the bass hit. It was a mess, and I ended up having to strip the whole thing down. Don’t be like me. Instead, use a toothpick or a small artist’s brush to apply a thin, even layer of flexible adhesive to both sides of the tear. 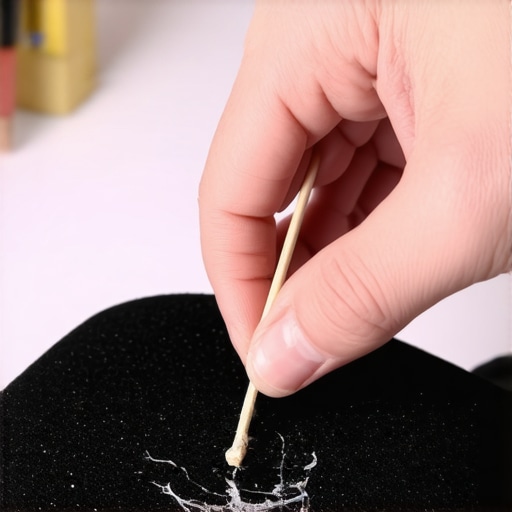
Give Your Woofer Time to Breathe
Once the edges are joined, resist the urge to ‘test’ the speaker immediately. I know the temptation to crank the volume to see if it holds is strong, especially when you’re excited to get back to your music. However, the chemical bond needs at least 24 hours to reach full strength. If you push the driver too early, the air pressure created by the cone movement will simply blow the wet glue out of the gap. This process is actually easier and more satisfying than how to repair a loose speaker terminal in under five minutes because you can visually see the speaker returning to its original structural integrity as the adhesive clears.
The Toothpick Trick for Precision
If the tear is in a tight spot, use a second toothpick to gently hold the edges of the foam in alignment while the first toothpick applies the glue. It’s like building a tiny suspension bridge. You want the edges to meet perfectly without overlapping. If they overlap, you create a stiff spot that will eventually lead to a new crack. This is the same level of care you’d take when learning the best way to test speakers at a garage sale without an amp—it’s all about the subtle physical cues the hardware gives you. A smooth, flat seam is the goal.
Why Flexibility is Non-Negotiable
The reason we avoid superglue or standard hardware store epoxy is simple: physics. A speaker driver is a piston. It needs to move back and forth hundreds of times per second. If your repair site is brittle, it acts like a speed bump on a highway. Every time the cone moves, it hits that stiff patch, which degrades the sound and eventually tears the surrounding healthy material. Using a specialized speaker glue ensures that the repair moves with the music, not against it, preserving the natural excursion of the woofer.Let’s push past the basics because there is a persistent myth in the audiophile community that once a driver is wounded, it has lost its soul. I’ve seen guys dump a pair of vintage JBLs just because they didn’t want to deal with a repair, assuming a brand-new budget driver would be an upgrade. It’s the same logic that leads people to believe expensive speaker cables are mostly a marketing trick while they ignore the actual mechanical components in front of them. In truth, a high-end driver with a surgical patch will almost always outperform a cheap drop-in replacement because the original motor assembly—the magnet and voice coil—is built to much tighter tolerances. Don’t trade a vintage high-performance unit for a brand-new budget model just for the sake of aesthetics.
The Vinegar Trap That Can Kill Your Voice Coil
Here is the oops moment I want you to avoid at all costs. When looking for that flexible adhesive, stay far away from standard RTV silicone used for automotive gaskets. You’ll know it by the sharp, vinegar-like smell. That scent comes from acetic acid, and as it cures, those fumes can actually corrode the delicate copper leads of your voice coil or the tinsel leads. If you’ve ever wondered how to fix a speaker driver that is frozen and won’t move, sometimes it is the result of past repairs that used the wrong chemistry, leading to internal corrosion and seizing. Always stick to acid-free or specialized speaker adhesives to keep the internals pristine. 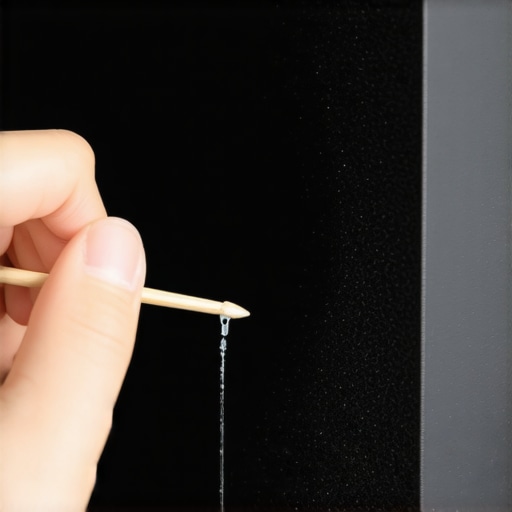
Can a tiny glue patch actually ruin your speaker’s factory tuning?
It’s a sophisticated question for the discerning ear: does adding mass to the cone change the sound? Technically, yes. Adding glue increases the moving mass of the driver, which can slightly lower the resonant frequency. However, expert research from the Audio Engineering Society and psychoacoustics pioneers like Dr. Floyd Toole suggests that for small repairs, these shifts are well below the threshold of human hearing. The real danger isn’t the weight; it is the stiffness. If your repair makes the surround less compliant, you will hear it in the mid-bass. This mechanical integrity is a far more impactful fix than wondering is gold-plated hardware really worth the extra cash. Have you ever fallen into the trap of over-repairing a piece of gear only to make it worse? Let me know in the comments below.Once you have mastered the surround patch, you start realizing that a speaker’s health is about the entire ecosystem surrounding it. I keep a ‘save-your-gear’ kit in my junk drawer that has saved me thousands over the years. The undisputed MVP of that kit is a can of DeoxIT D5 contact cleaner. If you have ever had to fix a scratchy volume slider on your radio, you know that standard household lubricants are a death sentence. DeoxIT actually chemically cleans the oxidation off the metal contacts without leaving a sticky residue. It is the only thing I trust when I am trying to stop the crackling noise when you turn your amp volume up. This isn’t just about cleaning; it’s about restoring the electrical path to its factory state to ensure the signal remains pure from the source to the driver.
Three Tools for Your Audiophile Emergency Kit
Beyond contact cleaner, you need a way to verify the electrical integrity of your work. The 9V battery trick is my favorite bit of low-tech magic. Before you screw that driver back into its cabinet, use a 9V battery to check your speaker polarity. A quick tap on the terminals should make the cone move outward. If it sucks inward, you have wired it out of phase, and your bass will vanish the moment you play it alongside another speaker. Pair this with a decent multimeter to check the resistance (ohms) of your voice coil. If you see a reading of 0 or a very high number, the coil is shorted or broken, and no amount of glue on the surround will save it. Finally, keep a set of precision screwdrivers nearby. You would be surprised how many ‘blown’ speakers are actually just loose mounting screws. Tightening these can often repair a loose speaker terminal or stop a chassis rattle that you mistook for driver failure. 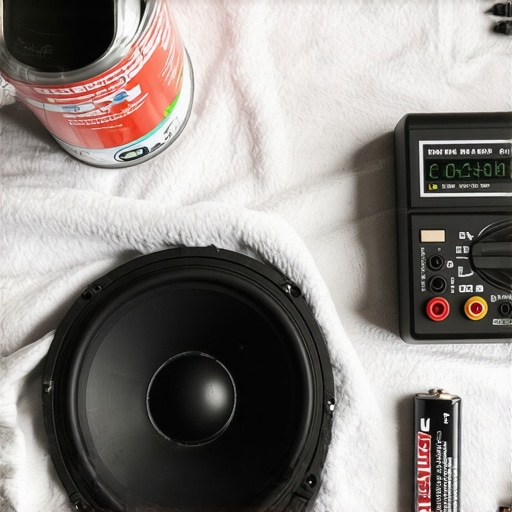
Give Your Amp the Air It Needs
Heat is the silent killer of vintage and modern audio gear alike. I have seen enthusiasts tuck their high-current amplifiers into tight cabinets only to wonder why their amplifier is getting hot to the touch. Electronics have a lifespan that is directly tied to their operating temperature. If your setup is crowded, you are essentially baking the capacitors, which leads to that annoying ‘hum’ or causes the amplifier to make a popping sound when you turn it on. I recommend leaving at least three inches of clearance above any component with heat vents. If you can’t provide that space, a silent 120mm USB fan can be a life-saver for your hardware.
How Do I Keep My Hi-Fi System Running Long-Term?
Maintaining your system isn’t a one-time event; it’s a seasonal habit. Every six months, I do a ‘walk-around.’ I check the speaker wire connections for oxidation, ensure the surround glue is still pliable, and use a soft brush to remove dust from heat sinks. As highlighted in the foundational research by A.N. Thiele and Richard H. Small in their 1971 AES papers on speaker parameters, the mechanical compliance of the driver is a living variable. Changes in humidity and temperature affect how your gear performs. Looking forward, I expect we will soon see smart amplifiers that can ‘read’ the mechanical resistance of a repaired driver and adjust the internal DSP in real-time. We already see the beginning of this trend with how smart speakers listen to your room acoustics to tune their output. For now, the best tool you have is your own ears and a steady hand. I highly encourage you to try the 9V battery phase test on your current setup; it’s the easiest way to ensure your speakers are working together instead of fighting each other.
Stop Fearing the Glue and Start Saving Your Gear
One of the most profound shifts in my journey as an audiophile was realizing that most vintage drivers are far more resilient than we give them credit for. I used to think a tear meant the ‘soul’ of the driver was gone, but the reality is that a well-executed patch preserves the character of the original engineering. If you find yourself constantly second-guessing the output, remember that balance issues aren’t always about the physical cone. Sometimes you have to investigate how to fix one headphone side being louder than the other to determine if the issue is actually the driver or just the signal path. I’ve learned that a minor repair today prevents a total structural failure a year from now. Don’t wait for the buzz to become a rattle; address the tiny imperfections before they degrade the entire listening experience. #IMAGE_PLACE_HOLDER_E#
What I Keep in My Professional Audio First-Aid Kit
To keep your system running at peak performance, you need more than just a tube of adhesive. I’ve found that maintaining the ecosystem around the speaker is just as important as fixing the driver itself. My toolkit always includes a high-quality multimeter to check for voice coil shorts and a dedicated cleaner for electrical contacts. You also have to look at the health of your power supply; I’ve seen enthusiasts overlook why your car audio system drains your battery overnight while they are busy obsessing over a tiny nick in a woofer surround. Everything is connected. I also strongly recommend keeping an eye on your heat management, especially if your amplifier gets hot enough to burn your hand. Heat can warp voice coil formers, making even the best-glued surround repair useless if the internal components are cooking. Finally, for the best possible sound after a repair, consider the simple rug trick that instantly improves your room acoustics to help that repaired driver blend perfectly into your space.
Give Your Music the Second Life It Deserves
There is a unique satisfaction that comes from hearing a speaker you rescued yourself. When you perform a successful speaker driver repair, you aren’t just saving money; you are becoming a steward of high-quality audio history. These components were built to last decades, and with a steady hand and the right flexible adhesive, they can continue to deliver that signature punch for many more years. Don’t be intimidated by the technical specs—start with a small patch, let it cure, and trust the process. Your ears will thank you for the effort. What was the first piece of gear you successfully brought back from the brink? Let me know in the comments below.