
I remember the day I finally unboxed my first high-end soundbar. I’d spent weeks reading reviews, convinced that this sleek, three-foot piece of plastic would replace my bulky old towers. I plugged it in, fired up The Dark Side of the Moon, and waited for that legendary sonic wash to hit me. Instead, it felt like the band was playing from inside a cardboard tube. The drums lacked punch, the vocals felt squashed, and the wide soundstage I loved had shrunk to the size of a dinner plate. It was a visceral letdown. I realized right then that while my soundbar was great for making Michael Bay explosions rattle the windows, it was absolutely suffocating the music I loved. Today, I’m going to show you exactly why this happens and how you can stop settling for mediocre audio in your living room.
The Physics of Why a Single Bar Can’t Beat Two Towers
The biggest mistake I made early on was believing the marketing hype about ‘virtual surround’ and ‘room-filling sound.’ I spent hours tweaking EQ settings, thinking I could just upgrade the sound through software, but you can’t fight physics. Soundbars are designed to be thin and disappear under your TV, which means they use tiny drivers. A traditional stereo set uses larger drivers in separate cabinets, allowing for what we call ‘stereo separation.’ When your left and right channels are only two feet apart inside a single chassis, you lose the 3D ‘image’ of the music. According to research from the Audio Engineering Society (AES), true stereo imaging requires an equilateral triangle between the listener and the two speakers—something a soundbar physically cannot achieve. This is often why your TV speakers might even feel clearer for basic tasks than a poorly designed bar that tries to do too much with too little space.
Are soundbars actually just a compromise we’ve been forced to accept?
The truth is, soundbars are a compromise of convenience over quality. They solve the problem of ‘where do I put these big boxes?’ but they create the problem of ‘why does this sound so thin?’ If you’ve ever noticed that your soundbar dialogue is lagging or the music feels like it’s lacking ‘air,’ you’re hearing the limitations of those small enclosures. When I transitioned back to a dedicated amp, I had to learn the difference between active and passive speakers all over again to find the right balance for my room. Have you ever felt like your favorite album sounded ‘smaller’ or less exciting after you switched to a soundbar setup? Let me know in the comments, because I felt like I was losing my mind until I plugged my old speakers back in. To really get that theater-quality sound out of a small living room, we need to look at how sound actually moves in a space, rather than just how many speakers we can cram into one bar.
Stop Placing Your Speakers Where They Look Best
I once spent an entire Saturday morning crawling on my hands and knees around my living room while a 50Hz test tone hummed through my system. My wife thought I’d finally lost it, but I was performing the ‘subwoofer crawl.’ I found the one specific spot—just four inches from a bookshelf—where the bass didn’t just boom, it actually had texture and rhythm. Most people treat speakers like furniture, tucking them into corners or hiding them inside cabinets. If you want clarity, you have to stop placing your speakers directly on the floor. Hard surfaces reflect sound waves instantly, creating a muddy mess that masks the fine details of a recording. Think of your speakers like flashlights; if you point them at the floor, you only see a blur. If you point them at your eyes, you see the light. In audio, your ears are the target.
Nail the Ear-Level Sweet Spot
The most common mistake I see in home theaters is the ‘above-the-fireplace’ syndrome. Your tweeters—the small drivers responsible for high frequencies—are highly directional. If they are firing at your shins or three feet above your head, the sound will feel muffled. This is especially critical for your dialogue; your center channel should always be at ear level to ensure that voices feel like they are coming from the actors’ mouths rather than the floorboards. If you’re stuck with a low stand, tilt the speaker upward using foam wedges. I did this with a pair of vintage towers and the difference was night and day; suddenly, the ‘hiss’ of a snare drum felt crisp again. 
Turn Your Floor into an Acoustic Asset
Your room is basically a giant echo chamber. Sound waves bounce off hard walls and ceilings like billiard balls. One of the biggest ‘secrets’ of audiophiles isn’t expensive cables; it’s a simple rug trick that kills the first reflection point. By placing a thick rug between your seating position and your speakers, you soak up the stray waves that usually bounce off the floor and arrive at your ears a few milliseconds late. This ‘late’ sound is what causes that annoying ‘boxy’ or hollow feeling in your music. When I added a dense wool rug to my hardwood-floor listening room, the stereo image snapped into focus as if I’d just put on a pair of glasses.
Control the Low-End Chaos
Subwoofers are the hardest part of the equation because low frequencies are long and stubborn. They love to pile up in corners, creating ‘standing waves’ that make the room shake without actually sounding like music. To get tight, punchy bass, you need to position your subwoofer where it complements the room’s natural acoustics rather than fighting them. If you live in an apartment, you also have to worry about the fact that your subwoofer rattles your neighbors’ walls through mechanical vibration. I solved this by using an isolation platform—essentially a high-density foam sandwich—that decoupled the sub from the floor. The bass stayed in my room, and the complaints from downstairs finally stopped.
Eliminate the Noise You Didn’t Know You Had
Sometimes the problem isn’t the speakers; it’s the electricity and the connections. If you’ve ever heard a low hum through your speakers, it’s often a grounding issue. You must ground your turntable and check that your components aren’t creating a ground loop. Also, don’t overlook the basics of wiring. I once spent an hour troubleshooting a ‘weak’ left channel only to realize I had the wires out of phase. You can actually use a 9V battery to check your speaker polarity safely. If the speaker cone moves out when you touch the battery to the wires, you’ve got it right. If it pulls in, you’re literally sucking the life out of your soundstage by making the speakers fight each other. Fixing these small technical gremlins is often more effective than buying a brand-new amplifier.
The Massive Lie About Amplifier Wattage
One of the biggest lies in the audio world is that a massive wattage number guarantees better sound. I’ve seen people pass up a refined 40-watt Class A amplifier for a 200-watt mass-market receiver, only to wonder why their music sounds ‘brittle’ and lacks soul. In reality, most bookshelf speakers are incredibly efficient, and unless you’re trying to fill a literal ballroom, high wattage often just leads to more heat and audible distortion. This is the ultimate ‘Oops’ factor of home audio: buying for the spec sheet rather than the actual performance. If you aren’t careful with ventilation in your media console, you’ll quickly find out why your amplifier gets hot enough to burn your hand. Excessive heat doesn’t just damage the internal components; it can actually shift the bias of the transistors, making your music sound muddy and flat before eventually triggering a thermal shutdown. Have you ever fallen into this trap of hiding your gear in a cabinet? Let me know in the comments.
Stop Chasing Gold and Start Chasing Shielding
Another common myth involves ‘gold-plating’ every single connection in your chain. While it certainly helps prevent corrosion over decades, the truth about gold-plated audio connectors for home stereos is that they won’t magically fix a signal that is already being degraded by poor cable shielding or ground loops. The real nuance that pros look for isn’t the color of the plug, but the topology of the connection. For instance, the real performance benefit of using balanced XLR cables isn’t about better ‘tone,’ but about common-mode rejection—the ability to cancel out noise picked up over long cable runs. This becomes vital when you consider why your phono preamp needs to be far away from the power amp. The massive transformers in your power amp create electromagnetic fields that can induce a 60Hz hum directly into your turntable’s low-voltage signal.
Why does my expensive DAC keep making clicking noises?
If you’ve invested hundreds in a dedicated digital-to-analog converter, it can be infuriating to hear technical glitches during your favorite track. Often, why your digital-to-analog converter is making a clicking sound comes down to sample rate switching or ‘clock jitter.’ According to research by Harman International on listener fatigue, human ears are surprisingly sensitive to these micro-timing errors that occur when a DAC loses its ‘lock’ on a digital signal. It’s the same reason your high-res audio stream keeps buffering on Wi-Fi; high-end audio requires a stable, high-bandwidth environment that most home networks simply aren’t optimized to handle. Even your mobile setup isn’t immune to these nuances. Many people assume they can just plug high-impedance studio cans into their phone and get the same results as a desktop rig, but the truth about using your phone to power high-end headphones is that you’re likely clipping the signal and losing the dynamic range you paid for. 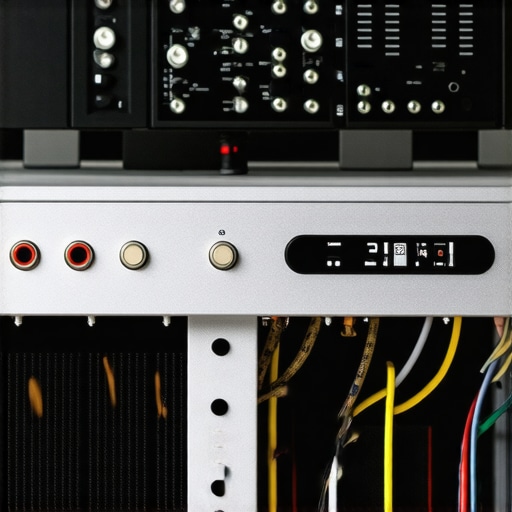 Once you’ve sorted out the power and the signal, the real battle begins: entropy. I’ve seen too many people spend thousands on a setup only to let it degrade because they didn’t know how to maintain the physical components. The most common call I get from friends is about a ‘scratchy’ sound when they turn the knob on an old receiver. Most people assume the unit is dying, but usually, it’s just dust and oxidation. I always keep a can of DeoxIT D5 on my workbench. According to the technical bulletins from Caig Laboratories, oxidation on potentiometers can introduce micro-distortion and signal dropouts that mimic actual hardware failure. If you want to save your gear, you need to learn how to fix the crackling noise when you turn your amp volume before you even think about buying a replacement. It is often as simple as a five-second spray into the housing of the dial.
Spray Away Your Audio Problems
It isn’t just the volume knobs that need love; it’s every physical interface. If you’re running a vintage setup, you’ll likely encounter the easy way to fix a scratchy volume slider on your radio or receiver using specialized contact cleaners. When I’m restoring a thrift store find, I also check the physical integrity of the drivers. If a child or a curious cat has ruined your aesthetics, don’t panic—knowing how to safely remove a pushed in speaker dust cap with a vacuum or a piece of tape can save you from a costly professional repair. These small maintenance tasks are the trick to making vintage speakers sound modern again without replacing the actual components. 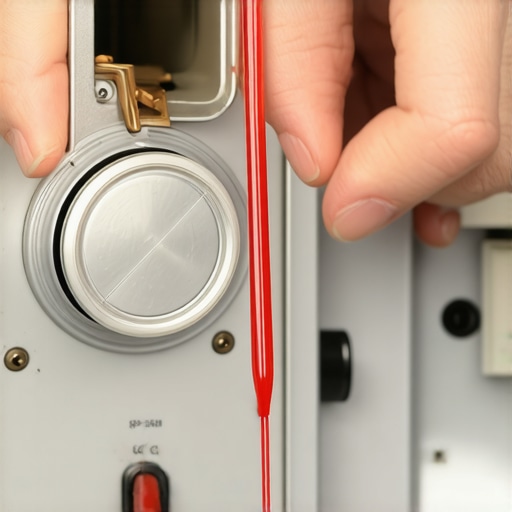
How do I keep my gear alive for decades?
Long-term maintenance is about environment as much as it is about cleaning. Heat is the ultimate enemy of capacitors and transistors. This is why I always preach about airflow; you’ve already seen why your amplifier gets hot enough to burn your hand when tucked away, but long-term exposure to that heat dries out the electrolytic fluid in your caps, leading to a loss of bass and ‘speed’ in your audio. For headphone users, maintenance is even more personal. Skin oils are surprisingly acidic and will eat through synthetic leather over time. If you notice your ears are getting itchy or the soundstage is shifting, check your pads. I’ve found that knowing why your headphone pads are peeling and how to replace them is the single best way to keep a pair of high-end cans for ten years or more. You can easily how to replace the foam pads on your favorite headphones with third-party velour or sheepskin options that often sound better than the originals.
The Future of Your Listening Room
Looking ahead, the trend is moving away from manual ‘tweaking’ and toward AI-driven room correction. We are entering an era where why your smart speaker is actually listening to your room acoustics isn’t a conspiracy, but a feature designed to fix the very physics problems I mentioned earlier. Digital Signal Processing (DSP) will soon be able to compensate for poor speaker placement or even a lack of rugs by ‘pre-distorting’ the signal to cancel out room echoes. However, until that tech is perfect, nothing beats a well-maintained analog chain. I challenge you to go to your gear tonight, grab a microfiber cloth, and check for heat buildup or dust in your terminals. A little bit of ‘preventative’ audio health goes a long way.
Three Lessons from a Decade of Blown Drivers and Muddy Bass
After years of chasing the perfect sound, I’ve realized that the most expensive component in your room is actually the room itself. You can buy the world’s best towers, but if you don’t address the reflections, you’re only hearing 50% of what you paid for. First, never underestimate the power of the used market; I’ve found that finding legitimate high-end gear at local thrift stores is often more rewarding than buying entry-level new gear. Second, don’t let a small technical glitch scare you away from a great deal. If a volume knob feels gritty, you can easily how to fix the crackling noise when you turn your amp volume with a simple cleaning. Finally, trust your ears over the marketing department. If a system sounds good to you, it is good, regardless of whether it’s a vintage analog setup or you are trying to how to sync two different bluetooth speakers for a party.
The Tools That Saved My Vintage Collection
I keep a small ‘survival kit’ for my audio gear that has saved me thousands in repair fees. Beyond a good microfiber cloth and a can of contact cleaner, I always carry a simple multimeter. Before you commit to any purchase at a garage sale or flea market, you must know the best way to test a used receiver before you buy it to ensure the internal transformers are still healthy. I also rely heavily on a digital SPL meter app to balance my channels; it is far more precise than human hearing for spotting a 3dB drop in a left-channel tweeter. If you’ve ever been frustrated by a mysterious buzz, remember that why your subwoofer makes a humming sound even when off is usually a simple ground loop that can be solved with a five-dollar adapter rather than a new sub. #IMAGE_PLACEHOLDER_E#
Reclaim the Joy of Pure Sound
At the end of the day, high-end audio should serve the music, not the other way around. It is easy to get caught up in the technical specs and the ‘oops’ factors of home audio, but the goal is always that moment when the speakers disappear and it’s just you and the performance. Take the time to set up your room correctly, keep your connections clean, and stop worrying about the gold-plating. Once the technical hurdles are cleared, you can finally enjoy the depth and detail that standard TV speakers simply cannot reach. Your journey into high-fidelity sound is a marathon, not a sprint, so enjoy every step of the sonic discovery. What was the one upgrade or adjustment that finally made your music ‘click’ for you? Let me know in the comments below.