
I reached into my closet last week to pull out a pair of classic bookshelf speakers I hadn’t touched in years. I was expecting a little dust, maybe a cobweb or two. What I got instead was a nasty surprise. My thumb literally stuck to the rubber surround like I’d just dipped it into a vat of half-melted gummy bears. It’s that dreaded sticky rubber syndrome, and if you’ve ever experienced it, you know exactly how heartbreaking it feels to see your gear literally melting away.
Why Your Good Speakers Suddenly Feel Like a Sticky Trap
It isn’t just you, and it’s not because you’re a messy person. This tacky mess is usually caused by plasticizer migration—a chemical process where the agents used to keep the rubber flexible start to seep out of the material. This often happens due to high humidity, heat, or just plain old age. Early in my hobbyist days, I made the absolute bone-headed mistake of thinking I could just scrub it off with high-concentration rubbing alcohol. I thought I was being a genius, but all I did was strip the protective oils, leaving the rubber brittle and prone to cracking within a month. I should have been looking for the trick to making vintage speakers sound modern again rather than trying to chemically peel them. Today, I’m going to show you how to neutralize that stickiness without destroying the structural integrity of the surround. We want to clean the surface, not dissolve the component.
Does Cleaning the Rubber Make It Brittle and Prone to Cracking?
This is the number one question I get from folks who are terrified of touching their drivers. According to the Polymer Science Learning Center, environmental factors like UV light and ozone are the real enemies of elastomers, not a gentle, targeted cleaning. If you leave that sticky residue, it actually attracts more abrasive dust and grime which can weight down the cone and ruin your sound. While you’re at it, you might want to check for other issues, like how to safely remove a pushed in speaker dust cap, because once you start detailing one part, you’ll notice everything else. Have you ever reached for a piece of gear only to have it stick to your hand like flypaper? Let me know if you’ve tried the ‘alcohol’ method and regretted it like I did. We’re going to fix this properly, using patience and the right household items that won’t cost you a fortune at a repair shop. If the stickiness has already led to structural damage, you can learn how to fix a small rip in a speaker surround with glue before you start the cleaning process.
The Safe Way to De-Gunk Your Drivers
To get that nasty tackiness off your speaker surrounds, you need to approach it like a surgeon, not a demolition crew. The goal is to remove the migrated plasticizers on the surface without leaching out the chemicals that are still doing their job inside the rubber. I start by mixing a very weak solution of warm water and a single drop of mild dish soap. Use a microfiber cloth—not a paper towel, which will just shred and leave white lint stuck to the rubber like a cheap bandage. Wring it out until it is barely damp. If you see water dripping, you’ve gone too far.
Start with the Mildest Possible Solution
Gently wipe the perimeter of the surround in a circular motion. I remember working on an old pair of Infinity speakers where I got way too overzealous with a spray bottle. A bead of soapy water ran right down the cone and started soaking into the paper. I spent ten minutes with a hair dryer on the ‘cool’ setting, sweating bullets that I’d warped the driver. It taught me that control is everything. You aren’t trying to soak the material; you’re just lifting the surface grime. This is a similar level of care to the best way to clean your ear tips for better noise isolation, where a gentle touch prevents permanent damage to delicate parts. 
Neutralize the Stickiness with a Simple Kitchen Staple
If the soap and water don’t fully kill the stickiness, don’t reach for the chemicals. Reach for cornstarch or high-quality talcum powder. Think of the rubber surround like a piece of pizza dough; if it’s too sticky to handle, you add a light dusting of flour. Dip a dry, soft makeup brush into the powder and lightly dust the rubber. Let it sit for a minute, then gently blow off the excess. The powder bonds to the sticky molecules and creates a smooth, non-tacky barrier. This doesn’t just fix the feel; it prevents dust from weighing down the cone. While you’re performing this maintenance, it’s a good time to ensure you aren’t undoing your hard work with poor setup habits, so stop placing your speakers directly on the floor for better bass and better air circulation.
Keep Liquid Away from the Delicate Internals
The biggest danger during this process is moisture reaching the voice coil or the gap. If liquid seeps behind the dust cap, you could end up with corrosion that eventually leads to a scratchy sound. If you’ve ever had to figure out how to tell if your headphones have a blown driver, you know how frustrating it is to deal with internal damage that could have been avoided. Always work with the speaker facing slightly downward if possible, so gravity pulls any accidental moisture away from the center of the driver. This ensures your why your bookshelf speakers need more power than you think isn’t wasted on a driver that’s physically compromised by cleaning fluids. If the surround feels significantly smoother but still looks a bit dull, resist the urge to use automotive ‘protectant’ sprays, as these often contain silicone that can accelerate the breakdown of certain vintage rubbers.
Don’t Fall for the Shiny Protectant Trap
Most people see a dull, cleaned rubber surround and immediately want to reach for a bottle of automotive tire shine or ‘protectant.’ This is the single biggest mistake you can make in speaker maintenance. While those products make the rubber look brand new for a week, they often contain silicone or petroleum-based distillates that act as a slow-acting solvent on vintage elastomers. I’ve seen beautiful high-end drivers turn to mush because someone wanted that showroom glisten. The contrarian truth is that healthy rubber should look matte, not glossy. If you want your gear to last, you have to prioritize chemical stability over aesthetics. If you’ve already noticed the sound is off, you might be wondering why your headphones sound slightly different in each ear, which is often the first sign that the physical compliance of your drivers is no longer symmetrical.
Can a Dirty Surround Actually Change the Frequency Response?
Advanced hobbyists often argue that adding anything—even a micro-layer of powder—to a surround increases the ‘moving mass’ of the driver and alters the sound. However, the reality is quite the opposite. According to materials research published in the International Journal of Adhesion and Adhesives, the accumulation of sticky plasticizers and airborne pollutants creates ‘stiction’ within the rubber’s molecular structure. This actually increases the resonant frequency (Fs) of the driver, making your bass sound tight and thin. Cleaning that gunk off restores the original flexibility the engineers intended. While you’re at it, it’s a good time to how to spot a blown tweeter before it ruins your crossover, as physical degradation in the woofer often masks issues happening higher up the frequency range. 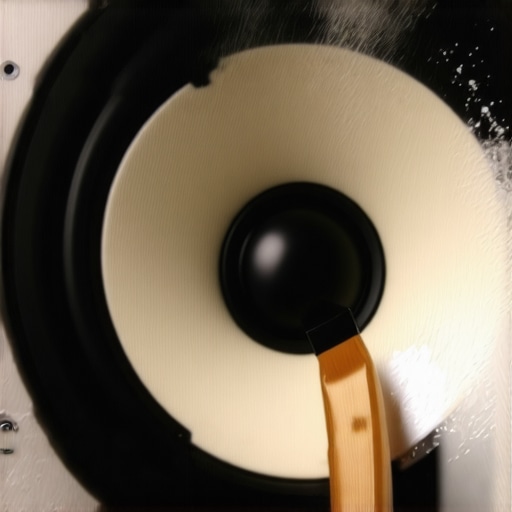
The Stealthy Danger of Household Degreasers
The ‘Oops’ factor usually hits when someone reaches for a kitchen degreaser to speed up the process. These chemicals are designed to break down organic fats, and unfortunately, many vintage rubber surrounds are organic-based polymers. You might think you’re just cleaning the surface, but you’re actually triggering a process called ‘leaching,’ where the essential oils that keep the rubber from cracking are pulled out. This is a common issue that mirrors why your headphone pads are peeling and how to replace them—once the outer layer is compromised, the structural integrity follows quickly. If you’ve ever used a ‘miracle cleaner’ on your gear and watched it crumble a month later, you know exactly what I’m talking about. Have you ever fallen into this trap and tried to ‘restore’ a piece of gear only to make it worse? Let me know in the comments.
Why Clean Components Matter for High-Performance Power
It might seem like a small detail, but a driver that moves freely requires less effort from your amplifier to maintain control. When your surrounds are gunked up and stiff, the amp has to work harder to overcome that physical resistance, which can contribute to the real reason your amp is getting hot to the touch during long listening sessions. This is especially true if why your expensive headphones sound thin on a basic smartphone is a concern; when the hardware is struggling against its own physical limitations, no amount of clean power can fix the resulting distortion. Taking the time to properly neutralize that stickiness ensures your system remains as efficient as the day it left the factory.Once you’ve tackled the surface stickiness, you need to look at the rest of the signal chain. I never perform a deep clean without my ‘go-to’ toolkit: a can of DeoxIT D5 and a set of anti-static precision swabs. If you’ve gone through the trouble of degunking the drivers, don’t ignore the connections. I’ve seen systems where the owner spent hours on the cones only to have a loose connection ruin the sound. Knowing how to repair a loose speaker terminal in under five minutes is just as important as the cleaning itself. While you have the speaker open or accessible, I always recommend a quick check to ensure the phase is correct. You can easily learn how to use a 9v battery to check your speaker polarity, which is the fastest way to verify you didn’t mix up any wires during your maintenance session.
Grab These Tools for Your Audio Survival Kit
My personal philosophy is that you shouldn’t wait for a crisis to maintain your gear. I keep a dedicated drawer for things like microfiber cloths, distilled water, and a specialized contact cleaner. This proactive approach prevents the ‘melt’ from starting in the first place. For those of you running vinyl setups, remember that your turntable is a precision instrument. If you notice things are getting sluggish, it might be the reason your turntable speed keeps drifting mid-record, which often stems from lack of lubrication or dust buildup in the motor housing. 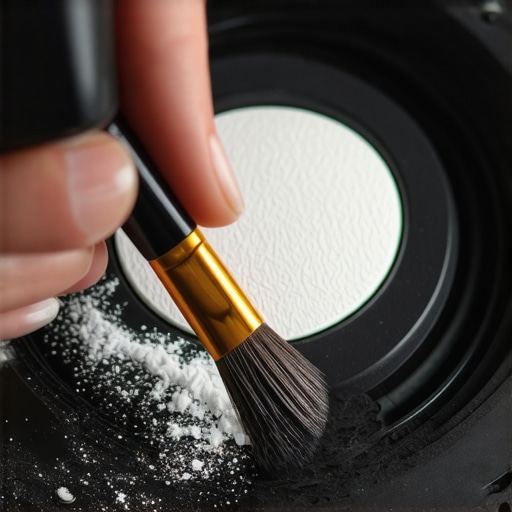
How can I keep my audio gear in peak condition for years?
The secret is environmental control and regular inspections. High humidity is the primary catalyst for plasticizer migration in rubber. According to technical documentation from Bose Corporation regarding environmental stress testing, elastomers are highly sensitive to fluctuating temperatures and moisture levels. I keep a small hygrometer in my listening room to ensure the humidity stays between 40% and 55%. Beyond the rubber, you should also keep an eye on your wiring. If you see your cables turning that tell-tale dull color, it’s time to learn how to clean green oxidization off your copper speaker terminals to maintain a low-resistance path for your signal.
Protect Your Components from Heat and Noise
Maintenance isn’t just about the speakers themselves; it’s about the physical layout of your components. If you have a turntable setup, you must be aware that electronic noise can creep into your signal just as easily as dust creeps into a driver. This is specifically why your phono preamp needs to be far away from the power amp—the massive transformers in the power amp can induce hum in the sensitive phono stage. By keeping your rack organized and clean, you reduce heat buildup and EMI interference.
The Future of Worry-Free Audio Materials
Looking ahead, the industry is finally moving away from the unstable rubber compounds of the 80s and 90s. We’re seeing a shift toward advanced thermoplastic elastomers (TPE) and synthetic foams that are chemically engineered to resist UV degradation and plasticizer leaching. In ten years, ‘sticky rubber syndrome’ might be a term only vintage collectors remember. But until then, we have to stay vigilant. I want you to go grab a soft brush and try the talcum powder trick on one of your older bookshelf speakers tonight. You’ll be amazed at how much smoother the surface feels and how much better you’ll sleep knowing your gear isn’t slowly melting into a puddle.
Lessons from My Biggest Speaker Restoration Mistakes
After years of tinkering with vintage audio, I’ve realized that humidity is the silent killer of elastomers. I used to think a cool basement was the perfect spot for my gear, but the damp air was actually accelerating the breakdown of the polymers. Now, I keep a small digital hygrometer in my room to ensure the air stays between 40% and 55% relative humidity. Another ‘lightbulb moment’ was discovering that stickiness isn’t always a death sentence; it’s often just the material reaching a chemical tipping point that can be stabilized with the powder method. If you are dealing with other material failures, like why your headphone pads are peeling and how to replace them, you’ll know that early intervention is the only way to prevent a total mess. Lastly, never underestimate the power of a gentle touch; scrubbing the rubber too hard can cause micro-tears that eventually lead to full-blown structural failure.
The Daily Carry Toolkit for Audio Maintenance
I’ve narrowed down my restoration kit to a few non-negotiable items that every enthusiast should have on hand. First is a high-quality makeup brush—specifically a ‘kabuki’ style brush—for applying talcum or cornstarch without scratching the cone. I also keep a bottle of distilled water; tap water contains minerals that can leave a white, crusty residue on your clean rubber. Once the surrounds are handled, I always take a look at the electrical path. It is incredibly common to find that how to clean green oxidization off your copper speaker terminals is the next logical step in your maintenance routine. This kit has saved me hundreds of dollars in professional repair fees and kept my vintage drivers moving freely. #IMAGE_PLACEHOLDER_E#
Restore Your Sound Instead of Replacing Your Gear
There is a profound sense of satisfaction that comes from rescuing a pair of high-end speakers from the ‘melting’ stage. Taking the time to neutralize the rubber surrounds ensures your system remains efficient, preventing issues like the real reason your amp is getting hot to the touch due to physical resistance in the drivers. We live in a throw-away culture, but your vintage audio equipment was built to last for decades if you give it the right care. When your hardware is in top shape, you won’t have to worry about why your bookshelf speakers need more power than you think just to overcome physical gunk. Go grab your toolkit and give those old drivers a second chance at life. Have you ever successfully rescued a piece of gear that everyone else told you to throw away? Let me know in the comments below.