
It was a rainy Tuesday night, and I finally had the house to myself. I had just finished setting up a classic silver-faced receiver I’d found at a local estate sale—the kind that weighs forty pounds and glows with those gorgeous amber lights. I dropped the needle on a pristine pressing of Rumours, settled into my favorite chair, and reached out to give the volume a little nudge. CRACKLE. A sound like frying bacon erupted from my speakers, followed by the left channel cutting out entirely. My heart sank. I thought I had bought a lemon, or worse, that I was about to spend hundreds on a professional repair. But that gritty, nails-on-a-chalkboard sound whenever you touch the controls isn’t usually a sign of a dead amp; it is just a sign of age. That awful noise ruins the immersion and makes your high-end gear feel like a piece of junk, but I promise you that we can fix this together in about fifteen minutes. Today, I am going to show you how a simple can of electrical contact cleaner can bring that buttery-smooth, dead-silent operation back to your favorite gear without a trip to the repair shop.
That Gritty Crackle is Killing Your Groove
When I first started tinkering with audio gear, especially when I was trying to figure out why your vintage speakers are losing their punch over time, I made a massive rookie mistake. I thought lubricant was lubricant, and I sprayed some standard household WD-40 directly into a volume potentiometer. Please, do not do that. Standard lubricants attract dust like a magnet and eventually turn into a sticky, conductive sludge that can permanently ruin the component. You need dedicated electrical contact cleaner, which is designed to evaporate completely while leaving the metal surfaces clean. If you have already managed to clean dust out of your headphone jack and still hear static, or if you are looking for the trick to making vintage speakers sound modern again, cleaning the internal contacts of your amplifier is the most effective maintenance task you can perform. It is the difference between a system that sounds like a budget radio and one that feels like a premium sanctuary.
Is This Spray Actually Worth the Hype?
You might be skeptical that a quick blast of chemicals can solve a hardware issue. However, the science is solid. According to Audio Engineering Society technical papers, the primary culprit for signal degradation in analog controls is oxidation—a microscopic layer of non-conductive “rust” that forms on metal contacts over decades. When you use a high-quality contact cleaner, you aren’t just washing away dirt; you are chemically breaking down that oxide layer and flushing out the microscopic debris that causes friction and signal dropouts. It is a literal fountain of youth for old electronics. Have you ever reached for a dial only to be met with a deafening pop that made you jump out of your skin? Tell me about your loudest “gear fail” in the comments—I need to know I am not the only one who has been jumpscared by a dirty knob. Now, let’s get the screwdrivers out and look at how to actually get inside the casing safely.
Open the Hood and Locate the Culprits
Before you even touch a screwdriver, pull the plug. It sounds obvious, but I have seen seasoned hobbyists forget this and end up dealing with a situation where they have to figure out how to fix a receiver that wont turn on after a power surge or a short circuit. Once the power is disconnected, remove the outer casing. Usually, this involves a few Phillips-head screws on the sides and back. Slide the cover off carefully, and you will see the skeleton of your machine. What we are looking for are the potentiometers—or ‘pots’ for short. These are the round, metal-can components located directly behind your volume, bass, and treble knobs. Think of a potentiometer like a circular racetrack; the ‘wiper’ is a car that moves around it to change the resistance. When dust or oxidation gets on that track, the car hits a bump, and you hear that awful crackle.
Spot the Small Openings in the Metal Casing
You cannot just spray the cleaner on the outside of the knob and hope for the best. You need to get the liquid inside the metal housing of the pot. Look closely at the back of the component; there is almost always a small notch or hole designed for ventilation. That is your target. While you are in there, keep an eye out for other issues, like the real reason your amp is getting hot to the touch, which is often blocked airflow or dust-caked heat sinks. If you see green crust on any metal parts, you might also need to learn how to clean green oxidization off your copper speaker terminals to ensure the rest of your signal path is clear.
The Spray and Twist Technique That Actually Works
Once you have identified the access hole, attach the thin straw to your can of contact cleaner. Give it one or two very short, half-second bursts. You don’t need to drown the component; a little goes a long way. Immediately after spraying, grab the knob on the front of the unit and rotate it back and forth through its full range of motion about thirty to fifty times. This mechanical action is what actually scrubs the contacts clean using the chemical as a solvent. I remember a specific night working on an old Sansui receiver where I thought I had failed because the first spray didn’t do much. I realized I was being too gentle. You really have to ‘work’ that knob to break up the years of stubborn grime.
Don’t Ignore the Switches and Selectors
It is a common mistake to only clean the volume knob. Those toggle switches for ‘Tape Monitor,’ ‘Mono/Stereo,’ and the ‘Input Selector’ are just as likely to cause channel dropouts. In fact, if your expensive receiver makes a clicking sound when it starts or cuts out randomly, a dirty selector switch is often the silent assassin. Treat every single moving part on the faceplate with the same spray-and-exercise routine. After you have finished with all the controls, leave the unit open and wait at least ten to fifteen minutes. Even though high-quality cleaner evaporates quickly, you want to be 100% sure the vapors have dissipated before you introduce electricity back into the system. This patience is the difference between a successful restoration and a blown fuse.
The nuance between cleaning and conditioning
While most people think a quick spray of generic contact cleaner is a total cure-all, there is a hidden trap that even experienced audiophiles fall into: the difference between cleaning and protecting. If you use a heavy-duty degreaser on a carbon-track potentiometer, you might actually strip away the necessary lubricants that keep the dial moving smoothly. This leads to a dry, scratchy feel that eventually grinds down the internal components. In my experience, the ‘more is better’ approach is the fastest way to ruin a rare piece of gear. You want a cleaner that leaves a microscopic protective layer to prevent future oxidation. If you have ever wondered is gold-plated hardware really worth the extra cash, the answer is often found in how those metals resist the very oxidation we are fighting right now. Gold doesn’t oxidize, but your internal pot wipers certainly do.
Does your amp actually have enough headroom to breathe?
Once you have cleared the static, you might notice your system still feels a bit thin. A common myth in the audio world is that any amplifier can drive any speaker as long as the ‘watts’ match up. This is a massive oversimplification. I have found that headroom is far more important than the number on the box. If you are trying to figure out how to tell if your amplifier has enough headroom for your speakers, you need to look at transient response. As Dr. Floyd Toole, a renowned expert in acoustics and former President of the Audio Engineering Society, points out in his research, the interaction between a speaker’s impedance and an amplifier’s power delivery is what defines ‘musicality,’ not just raw volume. This is often why your bookshelf speakers need more power than you think; they are often less efficient than their massive floorstanding cousins. 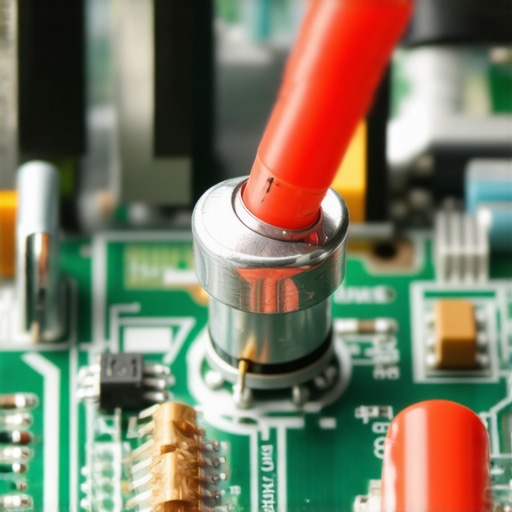
The trap of the ‘magic’ fix-all cable
Everyone wants to believe that a $500 silver-plated cable will fix a muddy soundstage, but I am going to be the bearer of bad news: cables are the last 1% of your system’s performance. If your controls are dirty or your room acoustics are a mess, a fancy wire won’t save you. People often obsess over the real performance benefit of using balanced XLR cables when their primary issue is actually a poor ground loop or a dusty signal path. Before you spend a month’s rent on boutique wiring, ensure your internal contacts are pristine. I once spent three hours troubleshooting a ‘broken’ subwoofer only to realize I was falling for a common mistake; I should have been looking for the simple paper test for finding air leaks in your speaker cabinet instead of blaming the electronics. Have you ever fallen into this trap of buying new gear to fix a problem that just needed a little maintenance? Let me know in the comments—I have definitely been there, buying a new DAC when I really just needed a $10 can of cleaner.
The Three Tools You Actually Need in Your Junk Drawer
I always keep a digital multimeter and a fine-tip soldering iron nearby because they are the front line of defense against gear failure. While some people use the old-school trick of how to use a 9v battery to check your speaker polarity, a multimeter gives you the precise ohms reading you need to ensure your crossovers aren’t failing. If you do find a loose wire, don’t just twist it back together. According to the Kester Solder Connection technical guide, a eutectic 63/37 solder alloy is the gold standard for audio repairs because it solidifies instantly, preventing the ‘cold joints’ that cause intermittent signal loss in vibration-heavy environments. This precision is what keeps a vintage amp running for another thirty years instead of ending up in a landfill.
How Do I Keep My Setup Sounding This Good for Years?
Maintenance isn’t just about the electronics inside the box; it is about the physical health of your drivers and cushions. If you catch a tear early, you can learn how to fix a small rip in a speaker surround with glue before the entire cone becomes uncentered. Similarly, I see so many people throw away great cans because the leather is peeling. Knowing why your headphone pads are flaking and how to prevent it—mostly by keeping them away from direct sunlight and skin oils—can save you a hundred dollars in replacement parts. I make it a habit to wipe down my gear with a dry microfiber cloth every Sunday evening; it sounds obsessive, but dust is a thermal insulator that slowly cooks your internal capacitors.
Stop Letting Your Cables Dictate the Living Room Decor
As your system grows, the ‘spaghetti’ behind the console becomes a nightmare. I’ve found that the best way to hide bulky subwoofer cables along a baseboard is to use paintable D-line trunking, which keeps the signal away from power cords to prevent hum. While you are organizing, pay attention to your speaker placement. I can’t stress enough the reason your speaker stands need to be filled with sand; it kills the ringing resonances that muddy your mid-range. If you are running long distances to rear speakers, remember why cheap speaker wire causes signal loss over 50 feet and upgrade to a thicker gauge to preserve your damping factor. Keeping your signal path clean and your physical hardware stable is the ‘secret sauce’ that makes a mid-range system sound world-class.
The Future of Your Listening Room is Retrofitted
I predict we are moving toward a ‘right to repair’ renaissance in home audio. In the next few years, we will likely see more modular components where you can swap out a Bluetooth module without tossing the entire amplifier. We are already seeing high-end brands offer ‘legacy’ support for gear made in the 70s because they realize that sustainability is the new luxury. My advanced tip for you this week? Take ten minutes to fill your hollow speaker stands with dry play-sand; it is the single cheapest way to tighten up your low-end response and make your speakers feel like they cost twice as much.
Lessons My Ears Had to Learn the Hard Way
During my years of restoring vintage gear, I have realized that the first blast of electrical contact cleaner is only the beginning. The biggest ‘lightbulb moment’ for me was realizing that humidity is the primary driver of oxidation; if you keep your gear in a damp basement, you are fighting a losing battle. I also learned the hard way that you must always test your source material before tearing an amp apart. Sometimes you might think your volume pot is failing when you are actually hearing why your vinyl records sound distorted at the end of the side due to a misaligned cartridge. Finally, remember that mechanical wear is different from chemical oxidation. If a pot is physically ‘loose’ or wobbling, no amount of cleaner will fix a broken shaft. Always verify the physical integrity of your components before assuming they just need a chemical bath.
My Go-To Toolkit for Audio Restoration
When it comes to maintaining a high-end system, I rely on a few non-negotiable tools. First, I always keep a bottle of DeoxIT Gold for use after the initial cleaning to provide long-term conditioning for gold-plated connections. Second, a high-CRI headlamp is essential for seeing inside dark chassis; you cannot clean what you cannot see. Third, I highly recommend the book The Master Handbook of Acoustics by F. Alton Everest. It helped me realize that even the cleanest electronics can’t fix a bad room. Once your internals are silent, you can use that knowledge to learn how to find the sweet spot for your speakers in a rectangular room to truly elevate your listening experience. #IMAGE_PLACEHOLDER_E#
The Reward of a Silent Volume Dial
There is a profound sense of satisfaction that comes from hearing only the music—no hiss, no pops, and no sudden channel dropouts. Bringing a piece of history back to life with a simple can of electrical contact cleaner is more than just maintenance; it is an act of preservation. Now that you have the skills to handle these basic repairs, you can confidently start finding legitimate high-end gear at local thrift stores without the fear that a ‘scratchy’ knob means the unit is junk. You have the power to rescue classic audio gems and keep them singing for another generation. Have you ever found a piece of ‘broken’ gear at a thrift store and brought it back to life with a simple cleaning? Let me know your best scores in the comments below!