
I stood in my garage, sweating over a 1987 Sony ES player that I’d just snagged at a garage sale. I had spent months hunting for this specific model, dreaming of the warm, detailed sound of its legendary DAC. But when I finally hit play, the machine just emitted a rhythmic click-thump, click-thump before giving up entirely. It felt like a punch to the gut. I had seen this happen dozens of times—the ‘No Disc’ error is the ultimate heartbreak for any vintage audio enthusiast. I almost relegated it to the ‘for parts’ bin, but I decided to give it one last chance. That was the moment I realized most of these ‘dead’ machines aren’t actually broken; they are just blinded by decades of dust, pet hair, and cigarette smoke. Today, I am going to show you how to peel back the cover and clear that fog so your favorite albums can finally breathe again.
Stop Junking Your Best Audio Gear Because of a Little Dust
It is a crying shame how many high-end players end up in landfills because of a minor skip. We live in a world where people think a single error code means the laser diode is burnt out, but that is rarely the case. In my early days, I made a massive mistake that I still regret: I used one of those ‘lens cleaning CDs’ with the tiny abrasive brushes. I thought I was being smart, but those brushes actually swiped the grit across the delicate plastic lens, leaving micro-scratches that made the player even fussier than before. It’s a bit like realizing the 20 dollar upgrade that makes an old turntable sound like new—it is often the simplest, manual intervention that yields the best results. Cleaning a lens manually with a Q-tip and high-purity isopropyl alcohol is much safer and more effective. If you have already mastered things like how to fix a scratchy volume knob on an old amp, you definitely have the steady hands required for this. Much like why your vintage speakers are losing their punch over time, these optical systems just need a bit of focused maintenance to return to their former glory. Have you ever rescued a piece of gear that everyone else said was trash, or are you currently staring at a skipping player and wondering if it’s worth the effort?
Will sticking a Q-tip in there actually ruin the laser?
This is the biggest fear I hear from my neighbors and friends. They worry that the moment they touch the ‘eye’ of the player, it is game over. While you do need to be gentle, these assemblies are more resilient than you’d think. According to technical bulletins from the original Philips and Sony engineering teams, the suspension wire of the lens is designed to move to allow for focus, meaning a light touch won’t snap it. The real danger isn’t the pressure; it’s using the wrong chemicals. Never use window cleaner or harsh solvents. High-grade (90% or higher) Isopropyl alcohol is the gold standard because it evaporates instantly without leaving a film. It is the same kind of careful attention you’d give when you are trying to figure out why your vintage receivers lights are flickering with the music. You aren’t just cleaning; you’re performing a delicate restoration of a mechanical marvel. [image placeholder]
Kill the Power Before You Touch a Screw
Before you even think about grabbing a screwdriver, unplug the unit. It sounds obvious, but internal power supplies in vintage gear can hold a nasty charge. Once the hood is off, you are looking for the optical pickup—the little glass ‘eye’ that sits on a rail. I remember working on a Marantz CD-63 that refused to read anything but the most pristine discs. I spent an hour worrying I’d need a whole new transport mechanism, only to find a single, greasy fingerprint on the lens from a previous owner’s botched attempt at repair. If you have already learned how to fix a scratchy volume dial with electrical contact cleaner, you know that the right chemical is everything. For a laser lens, never use contact cleaner or Windex; you need 90% or higher Isopropyl alcohol. Anything less has too much water, which can leave streaks or, worse, seep into the delicate focus coils below the lens.
The Swab and Alcohol Technique
Take a high-quality cotton swab—the kind that doesn’t shed fibers—and dampen it with a single drop of alcohol. You want it moist, not dripping. Gently place the swab on the lens and rotate it in a soft, circular motion. Do not press down hard. Think of it like how to clean your headphone ear pads without ruining the leather; you want to lift the grime, not scrub it into the surface. After one or two rotations, use the dry end of the swab to soak up the remaining moisture. Much like why you should never use compressed air to clean a silk dome tweeter, you must avoid the temptation to ‘blow’ the lens dry with your breath or canned air. Your breath contains moisture and oils, and canned air is often too cold and forceful, which can knock the lens out of its delicate alignment. 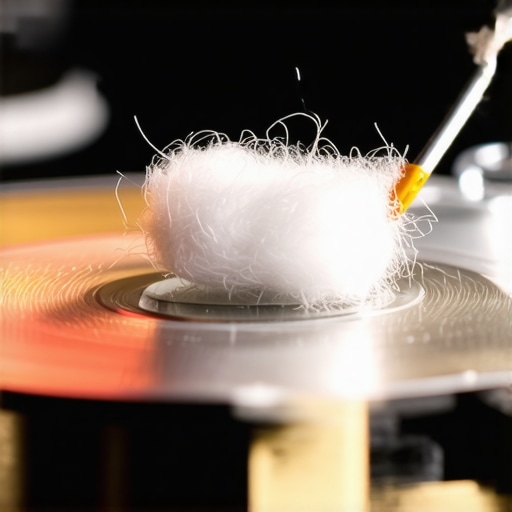
Why the Rail and Motor Deserve Your Attention Too
Sometimes the ‘No Disc’ error isn’t the lens being dirty, but the laser assembly being stuck. If the old factory grease has turned into a sticky paste, the motor can’t slide the laser to the beginning of the disc. I once had an old Denon that skipped every time I reached the third track. It turned out a tiny clump of pet hair was caught in the worm gear. While you have the case open, look at the metal rails the laser slides on. If the grease looks yellow or crusty, wipe it away and apply a tiny amount of white lithium grease. This is as essential for smooth playback as the 20 dollar upgrade that makes an old turntable sound like new is for a record player. If the mechanical movement is jittery, no amount of lens cleaning will fix your audio drops.
Distinguish Between a Dirty Lens and a Dead Component
Before you give up, make sure the problem isn’t actually elsewhere in your signal chain. It is easy to blame the player when you might actually be dealing with how to tell if your speaker is actually blown or just rattling or even how to test your headphones for a blown driver at home. If the player spins the disc, attempts to focus (you’ll see the lens move up and down slightly), and then fails, cleaning usually does the trick. If the disc doesn’t spin at all, you might be looking at a dead spindle motor or a stretched belt, which is a different beast entirely. Always verify that your cables are secure, as a loose RCA can mimic the sound of a skipping disc by cutting the signal in and out.
The Potentiometer Trap That Kills Lasers Instantly
Many amateur restorers fall into the most dangerous trap in vintage audio: the laser power potentiometer. You see it on every forum—someone suggests turning that tiny screw on the laser assembly to ‘boost’ the signal. In my experience, this is the quickest way to turn a repairable player into a paperweight. While it might provide a temporary fix, you are essentially overdriving the laser diode, shortening its remaining life from years to hours. It’s a similar logic to the secret to choosing the right ohm rating for your amp; you have to work within the component’s design limits or face a total blowout. If a clean lens doesn’t fix the issue, the problem is almost always electronic or mechanical, not a lack of ‘raw power’ from the laser.
Why does my player still skip after the deepest clean possible?
If you have scrubbed the lens and greased the rails but still hear that maddening stutter, you need to look at the power supply. A common myth is that digital audio is immune to power fluctuations, but that couldn’t be further from the truth. Aging electrolytic capacitors can leak or drift in value, introducing ‘ripple’ into the laser’s servo circuit. This causes the focus motor to chatter because it isn’t getting a clean DC signal. It is the same frustration you feel when trying to figure out how to get rid of ground loop hum in your audio setup—the source of the noise is often miles away from where you actually hear it. A study by the Audio Engineering Society (AES) on optical pickup longevity suggests that the semiconductor laser diode itself is remarkably robust; it’s the supporting analog components that usually give up first. 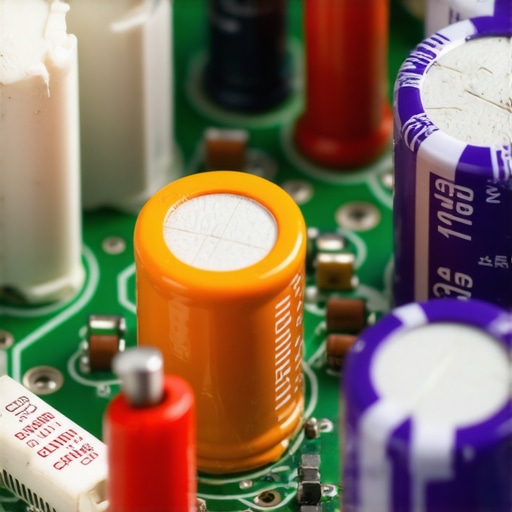
Stop Blaming the Laser and Check the Capacitors
Before you hunt for an expensive replacement transport, check for bulging or leaking cans on the main board. Knowing how to tell if your speakers capacitor is starting to fail is a skill that translates perfectly here. If the voltage filtering is off, the player’s ‘brain’ can’t keep the laser on the track, no matter how clean the glass is. This is the nuance that separates a ‘parts’ flipper from a true enthusiast. Many people assume that because a unit is ‘high-end,’ it is immune to these basic failures, but why your high-end DAC sounds exactly like your laptops headphone jack often comes down to the same realization: implementation and power quality matter more than the badge on the front. Have you ever fallen into this trap of ‘blindly’ adjusting internal screws or assuming a component was dead just because it was old? Let me know in the comments.Once you’ve cleared the fog from that lens, the battle for long-term reliability shifts to your toolkit. I don’t care how many ‘vintage finds’ you snag if you don’t have a can of DeoxIT D5 and a set of Japanese Industrial Standard (JIS) screwdrivers. Using a standard Phillips head on a 1980s Japanese player is a recipe for stripped heads and a whole lot of cursing. I personally rely on my Wiha precision set because the tips actually bite into the metal rather than camming out. If you’ve already tackled how to fix a scratchy volume knob on an old amp, you know that the right chemical—not just any generic cleaner—is the difference between a fix that lasts and one that ruins the board.
How do I keep my restored gear running for another decade?
Maintenance isn’t a one-and-done event; it’s a habit. I keep my stack in a well-ventilated rack because heat is the silent killer of electrolytic capacitors. If you notice why your vintage amp gets hot even when you aren’t playing music, you’re likely looking at a bias issue that needs addressing before it cooks your new repairs. Every six months, I do a ‘dust-and-check’—I use a soft makeup brush to whisk away debris from the vents and check my RCA connections for oxidation. For the truly obsessive, the 5 dollar fix for humming speakers and ground loops often involves just tightening a chassis screw or swapping a budget cable that’s gone microphonic. 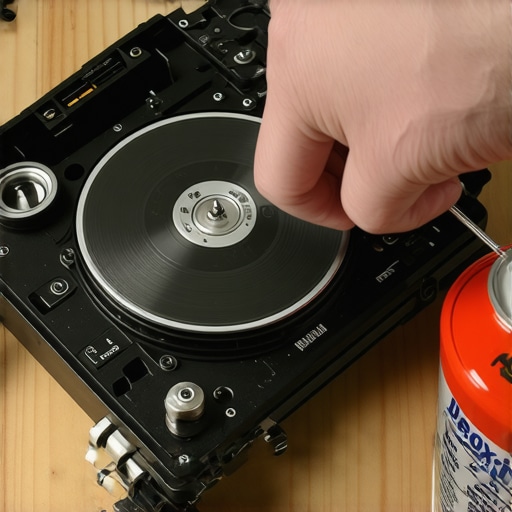 In the official service manual for the Sony KSS-240A optical pickup, technicians are explicitly warned that static discharge from a human finger can blow the laser diode instantly. This is why I always wear an anti-static wrist strap when I’m deep in the guts of a player. Looking ahead, I suspect we’ll see more enthusiasts using 3D printers to replace those brittle nylon gears that eventually crack in old tray mechanisms. For now, your best bet is a tiny dab of white lithium grease on the rails. If your player is still acting up, it might be time to look at why your vintage receiver makes a loud hum with no music playing to ensure your amp isn’t the one introducing noise into the system. My challenge to you: open up your primary player this weekend, check the rails for ‘crusty’ old grease, and give them a fresh wipe. You’ll be amazed at how much quieter the mechanical operation becomes.
The Hardest Lessons I Learned Tinkering With Optical Transports
Over the years, I have realized that the most common mistake isn’t lack of skill, but lack of patience. One huge ‘lightbulb moment’ for me was discovering that external light can mess with the laser’s ability to focus while the tray is open. If you are working under a bright desk lamp, the sensor might get overwhelmed by the ambient photons. Always dim the lights when you’re doing your final testing to ensure the diode can ‘see’ the disc clearly. Another lesson is that one cleaning isn’t always enough; sometimes smoke residue or persistent films from a previous owner’s home require a second pass with a fresh Q-tip. Finally, always look for physical obstructions first. Just like eliminating frustrating hums, the solution is often a simple mechanical fix rather than a complex electronic one. If you’ve spent any time spotting failing capacitors in other gear, you know that a meticulous visual inspection catches 90% of problems before you ever need an oscilloscope.
The Essential Toolkit for Every Vintage Audio Buff
You don’t need a professional lab to get high-end results, but generic tools will let you down every time. I swear by my Japanese Industrial Standard (JIS) screwdrivers because they don’t strip the soft brass screws found in older Sony and Marantz units. I also keep a bottle of 99% anhydrous isopropyl alcohol—the stuff from the local pharmacy has too much water content and can leave residue. For lubricating the rails, a syringe of white lithium grease is much better than a spray, as it allows for surgical precision placement. It’s similar to the 20 dollar upgrade that makes an old turntable sound like new; the right small investment in quality supplies saves you hundreds in professional repair bills later. I also recommend a high-CRI headlamp so you can see into the dark corners of the transport without casting shadows with your own hands.
[image placeholder]
Time to Resurrect Your Favorite Albums
There is nothing quite like the feeling of a ‘dead’ player finally reading a Table of Contents (TOC) and showing you those track numbers after years of silence. It’s a victory for sustainability, for your wallet, and for your ears. Don’t let these mechanical marvels become e-waste just because they need a ten-minute cleaning. Whether you are working on a legendary Sony ES series or a budget bookshelf unit, the principles of optical maintenance remain the same. Go grab that skipping vintage CD player, take the cover off, and give that lens the clarity it deserves. Your music collection is waiting to be heard with the warmth and detail only these classic machines can provide.
Have you ever successfully revived a piece of gear that everyone else said was trash? Let me know in the comments below!