
I was sitting in my favorite worn-out armchair, spinning a pristine pressing of Steely Dan’s ‘Aja,’ when I realized Donald Fagen’s voice sounded weirdly muffled. It wasn’t the recording. It was my gear. I leaned in, ear inches from the cabinet, and realized my left tweeter was outputting nothing but a faint, rhythmic static. I made the classic rookie mistake: I figured it was ‘fine for now’ and just turned the balance knob a bit to the right. Big error. Two hours later, the heat from the shorted voice coil had migrated down the wire and started melting the solder on my crossover board. I could actually smell the ozone. Today, I’m going to show you exactly how to spot these red flags so you don’t end up with a pile of melted plastic and regret. We’ll look at the auditory ‘tells’ and the physical checks that save your amp from a slow death. [IMAGE_PLACEHOLDER]
Silence is Rarely Golden When it Comes to Treble
When a tweeter fails, it’s not always a clean break. Sometimes it goes out in a blaze of glory, but more often, it dies a slow, agonizing death that puts your entire speaker at risk. Most people think a blown tweeter just means less ‘zip’ in the music. The reality is much scarier for your hardware. A compromised voice coil can create an electrical short. According to research published by the Audio Engineering Society, voice coil temperatures in small high-frequency drivers can exceed 200 degrees Celsius under stress, which is more than enough to degrade the adhesive and insulation. These fluctuations can cause passive crossover components, particularly the resistors and capacitors, to overheat and fail prematurely. I’ve seen this lead to frustrating situations where a surround sound receiver keeps clicking into protect mode because it’s sensing that dangerous drop in impedance. If you ignore it, you aren’t just losing your high-end; you’re actively cooking your electronics from the inside out.
Is My Tweeter Actually Blown or am I Just Paranoid?
It’s easy to second-guess yourself, especially if the distortion is subtle. You might think it’s just a bad streaming connection or maybe you’re just having an ‘off’ ear day. But if you start hearing a ‘crackle’ that matches the beat, or if one speaker suddenly sounds like it has a cold, you need to act. Have you ever noticed one of your speakers sounding ‘darker’ than the other out of nowhere? If so, you’re already in the danger zone. Detecting a failing driver in a cabinet is a bit more involved than how to tell if your headphones have a blown driver, mostly because the other drivers in the box try to mask the sound. Before you go out and buy replacement parts, you should definitely know the best way to test a used receiver and speakers to confirm exactly where the signal chain is breaking down. Trust me, catching a faulty coil now is the difference between a cheap DIY repair and a total system overhaul. Let’s get into the nitty-gritty of the ‘Paper Test’ and how to use your own ears as a diagnostic tool.First, let’s talk about the paper strip trick. It sounds primitive, but it’s the fastest way to see movement you can’t easily hear. Cut a thin ribbon of tissue paper—about the width of a pencil. Hold it gently in front of the tweeter while playing a track with heavy percussion or high-frequency synth. If the paper stays dead still while the woofer is jumping, you’ve got a signal blockage or a dead coil. I remember doing this with a pair of old floorstanders I found at a garage sale. I was convinced the amp was failing, but the paper didn’t even flutter. The driver was totally dead.
Try This Cardboard Tube Hack to Isolate the Sound
The biggest challenge is that your ears are easily fooled by the woofer’s upper range. If you want to be sure, grab an empty paper towel or toilet paper roll. Place one end against your ear and the other directly against the tweeter face. This creates a physical ‘tunnel’ that blocks out the lower frequencies from the rest of the cabinet. If you hear a muddy, distorted mess or—worse—absolute silence, you’ve found your culprit. Sometimes you might find that the driver isn’t blown, but simply stuck. If you encounter this, you should look into how to fix a speaker driver that is frozen and wont move before tossing it. 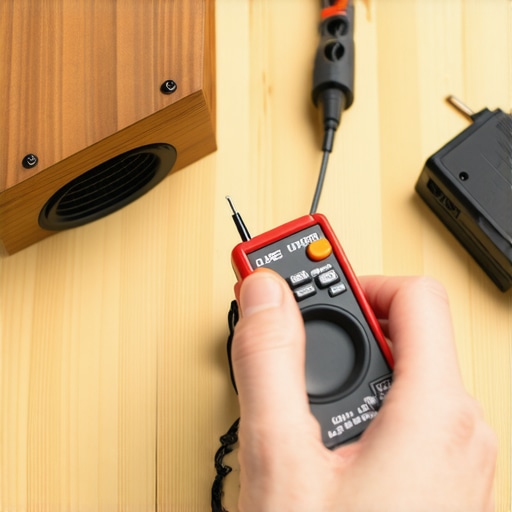
Measure the Coil Resistance to End the Guesswork
If the auditory checks fail, you have to get scientific. This means removing the driver from the cabinet. Be careful here; some cabinets are sealed tight, so you might need to know how to remove the back of a sealed speaker cabinet safely. Once the tweeter is out, disconnect the wires and touch your multimeter probes to the terminals. A healthy 8-ohm tweeter should read somewhere between 5 and 7 ohms. If the screen shows ‘OL’ (Open Loop) or infinite resistance, the wire inside is snapped.
Why Overpowering Kills Your High-End
Most people blow tweeters because they don’t understand the difference between peak and rms power. They crank the volume until the amp starts clipping, which sends a square-wave-like signal to the tweeter. This generates massive heat. It’s the same reason why your new amplifier gets hot after only twenty minutes when pushed too hard. That heat has nowhere to go but the delicate voice coil, melting the lacquer and causing a permanent short. If you’ve been pushing your gear to the limit, that ‘burnt’ smell I mentioned earlier is the smell of a coil that’s been hit with too much ‘peak’ and not enough ‘clean’ power.Let’s dig deeper into a nuance that even some seasoned audiophiles get wrong: the low-power safety myth. Most people believe that using a 20-watt amp with 100-watt speakers is a safe way to prevent damage. In my experience, the opposite is true. When a low-power amplifier is pushed beyond its limits to reach a certain volume, it starts clipping. This chops off the tops of the audio waves, turning them into high-frequency-heavy square waves. These square waves carry far more energy than the tweeter’s voice coil can dissipate. This is often the real reason your amp is getting hot to the touch right before you hear that sickening silence from your high-end drivers. According to research published in the Journal of the Audio Engineering Society, clipping can increase the average power delivered to a tweeter by up to 10 times its normal rating, causing instantaneous thermal failure. 
The Expensive Trap of Shiny Connectors
Here is a common oops factor: spending a fortune on boutique cables while ignoring the oxidation on your internal components. I’ve seen people replace perfectly good tweeters because they thought they were blown, when in reality, the signal was just dying at a corroded terminal. Before you buy new gear, ask yourself is gold plated hardware really worth the extra cash for your specific setup? Often, a simple cleaning of your existing copper leads is all you need. If you are hearing distortion, check your potentiometers too. Knowing how to fix the crackling noise when you turn your amp volume can save you from misdiagnosing a blown tweeter that is actually just suffering from a dirty signal path.
Can a Glitching DAC Actually Fry Your Drivers?
Advanced listeners often ask if the digital side of the chain can cause physical driver failure. The answer is a resounding yes. If your source has a high DC offset or if your digital-to-analog converter is making a clicking sound, those sharp impulses can manifest as pop transients that act like a hammer blow to the delicate tweeter diaphragm. It is not just about the volume; it is about the integrity of the signal from start to finish. Have you ever fallen into the trap of thinking a smaller amp would be safer for your speakers? Let me know in the comments.
Don’t Let Crusty Terminals Kill Your Sound
I’ve spent years chasing ghosts in my signal chain only to realize that the problem was a tiny layer of green gunk on my wires. If you want to keep your system pristine, you need to be proactive about cleaning. I swear by DeoxIT D5; it’s not just a cleaner, it’s a rejuvenator that treats the metal surface to prevent future corrosion. You should regularly check your connections, especially if you live in humid climates. Knowing how to clean green oxidization off your copper speaker terminals is arguably more important than buying new cables. I make it a habit to do a full ‘pull-and-plug’ every six months—unplugging every RCA and speaker wire, spraying the contacts, and reseating them. This simple ritual ensures that the electrical resistance stays low and your amp doesn’t have to work overtime just to push through a layer of filth.
How do I maintain my audio gear over time?
Maintenance isn’t just about cleaning; it’s about environment. Heat is the ultimate enemy of capacitors and voice coils. If your gear is crammed into a tight cabinet, you are begging for a failure. I’ve felt cases where the amplifier gets hot enough to burn your hand, which is a massive red flag. Always leave at least three inches of clearance above any heat-producing component. Also, don’t overlook your low-end setup. Proper placement isn’t just for sound quality; it prevents vibrations from rattling sensitive internal components. I always follow the best way to position your subwoofer for clearer lows to minimize structural feedback that can loosen connections over time. If you’re a vinyl head, you also need to ensure you properly ground your turntable to stop that buzzing noise, as that constant low-level hum is actually wasting energy and generating unnecessary heat in your amp’s power supply.
The Hidden Danger of Thermal Compression
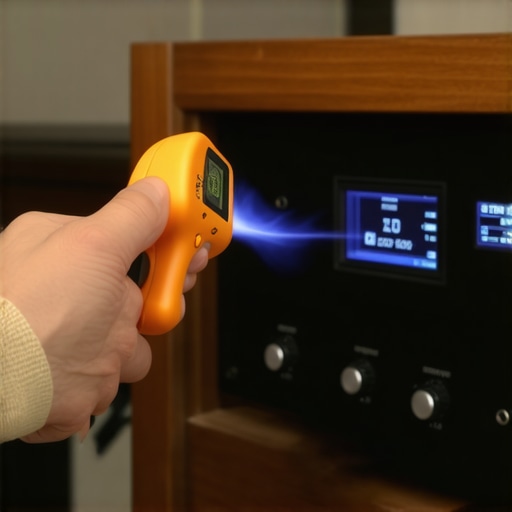
One specific technical detail often missed is what engineers call ‘thermal compression.’ According to technical documentation from Harman International, as a voice coil heats up, its resistance increases, which means it draws less power from the amp and loses efficiency. This creates a vicious cycle where the listener turns up the volume to compensate, further heating the coil. This is why a speaker might sound great at the start of a party but muddy by midnight. In the future, I expect we will see ‘smart’ amplifiers with real-time impedance tracking that automatically adjusts the gain to prevent this thermal runaway before it even starts. For now, my best advice is to invest in a cheap infrared thermometer. Aim it at your speaker vents during a heavy session; if you see temperatures spiking over 50 degrees Celsius on the exterior, it is time to back off. Your challenge for this weekend: Grab your multimeter, pull your favorite pair of speakers out, and check the DC resistance of each driver. If they aren’t within 10% of each other, you’ve got work to do.
Lessons My Melted Voice Coils Taught Me
Looking back at that day with my Steely Dan record, I realized that audio gear is a lot like a high-performance engine. If you ignore the check engine light—or in this case, the crackling tweeter—you’re basically asking for a total breakdown. One thing I’ve learned is that why gold plated connectors arent always better usually comes down to the quality of the base metal; if the core is cheap, the plating won’t save you from heat-related signal loss. Also, never underestimate the power of a clean signal path. A tiny bit of grime can trick you into thinking your hardware is failing when it just needs a quick scrub. Lastly, remember that your ears adjust to distortion over time, so always use a reference track you know by heart to ‘reset’ your hearing. Knowing the difference between peak and rms power explained simply is the best defense against overdriving your gear into an early grave.
The Three Essentials I Keep in My Audio Go-Bag
If you want to move beyond guessing and start diagnosing like a pro, you need a few staples. First, a decent digital multimeter is non-negotiable for checking DC resistance; it turns guesswork into hard data. Second, I always keep a bottle of high-quality contact cleaner nearby because I’ve found that how to repair a loose speaker terminal in under five minutes often just requires tightening the nut and cleaning the post. Third, I highly recommend keeping a dedicated ‘burn-in’ or test disc that includes frequency sweeps from 20Hz to 20kHz. I trust these tools because they’ve saved me hundreds of dollars in unnecessary replacements by showing me the real reason your amp is getting hot to the touch before the damage becomes irreversible.
Restore the Sparkle to Your Sound Today
There is nothing quite like the feeling of fixing a piece of gear yourself and hearing that crisp, clear high-end return to your room. Don’t let the fear of a blown tweeter keep you from enjoying your collection at its best. Audio is a journey of constant learning and occasional soldering, but the reward is a system that sounds exactly how the artist intended. Go check your connections, listen closely to those high frequencies, and keep your gear breathing easy. Have you ever accidentally cooked a driver by pushing your volume too high during a party? Let me know in the comments below!