
I remember the look on my wife’s face when I finally finished setting up my dream surround sound system. The speakers were perfectly placed, but the floor looked like a frantic game of Tetris played with thick, black copper-filled snakes. I’d spent hours figuring out how to mount speakers on a wall without seeing the wires, but the floor was a different beast entirely. I tripped over the left rear cable three times before the first movie trailer even finished. It was ugly, it was a trip hazard, and honestly, it felt like a defeat. I knew I had to find a way to fix it before my living room became a permanent safety hazard.
Stop Tripping Over Your Audio Setup
We buy these beautiful systems to immerse ourselves in cinema, not to create a suburban obstacle course. If you live in a house with wall-to-wall carpeting, the temptation is to just let the wires lie there and “deal with it later.” I’ve been there. In my first apartment, I actually tried to hide the wires by taping them down with clear packing tape. Not only did it look like a crime scene, but it also ruined the carpet fibers when I eventually pulled it up. You shouldn’t have to choose between great sound and a room that doesn’t look like a construction site. Today, I’m going to share the techniques I used to get that pro-installed look without actually hiring a professional or ripping up my floorboards. Whether you are dealing with thick shag or low-pile office carpet, there is a way to make those cables vanish. Have you ever felt like your living room is just too cluttered for a real 5.1 setup? It is a common frustration, but it is one that has a very simple fix.
Is Wireless Really the Only Way Out?
I get asked this all the time. Many people think they have to ditch their wired speakers for a Bluetooth alternative. I’ll be blunt: wireless kits often introduce latency, and knowing why your wireless sub keeps disconnecting is a headache you don’t want to add to your weekend plans. Plus, those speakers still need a power cord. You are just trading one wire for another. Physical copper wire is still the gold standard for reliability and sound quality. [IMAGE_PLACEHOLDER] But before you give up and go back to a basic soundbar, you need to see how easy the tuck and hide method really is. It’s about working with the anatomy of your room, specifically that tiny gap between the baseboard and the carpet tack strip. According to the National Electrical Code, running low-voltage Class 2 wires like speaker cables is generally safe for concealed spaces, provided they aren’t subjected to physical damage. For instance, if you’ve already spent time learning how to use a rug to stop your speakers from sounding harsh, the last thing you want is a bulging cable ruining the acoustic profile of your floor. I’ve made every mistake in the book, from using staples that pierced the insulation to trying to run thick 12-gauge wire under a door that wouldn’t close afterward. We’re going to avoid all of that and make sure your rear surround speakers look as good as they sound.
Master the Art of the Edge Tuck
The secret to a professional-looking home theater isn’t necessarily the gear itself, but the absence of visual clutter. When I first started, I thought I had to pull up the entire carpet to hide my runs. I was wrong. The most effective method is the ‘edge tuck.’ Most wall-to-wall carpeting is held down by tack strips, leaving a tiny, narrow gulley between the strip and the baseboard. This is your highway for audio cables. It is wide enough for standard 16-gauge or even 14-gauge wire, and once tucked, the carpet’s natural tension holds everything in place. If you are struggling with a different room type, you might need to look at how to hide audio cables in a room with concrete walls, but for carpet, the edge tuck is king.
Grab a Plastic Putty Knife and Skip the Screwdriver
Your choice of tools determines whether you finish in twenty minutes or spend the afternoon ruining your baseboards. Never use a metal flathead screwdriver. I learned this the hard way during a late-night install in my first home. I was being impatient and used a heavy-duty screwdriver to wedge a cable into the corner. I slipped, gouged the white paint on the trim, and actually nicked the wire’s insulation. I ended up having to learn how to use a multimeter to find a short in your speaker wires before I could even listen to the first track. Use a wide, plastic putty knife or a dedicated ‘tuck tool.’ It spreads the pressure across a larger surface area, protecting the carpet backing and your paint job while you guide the wire into the gap. 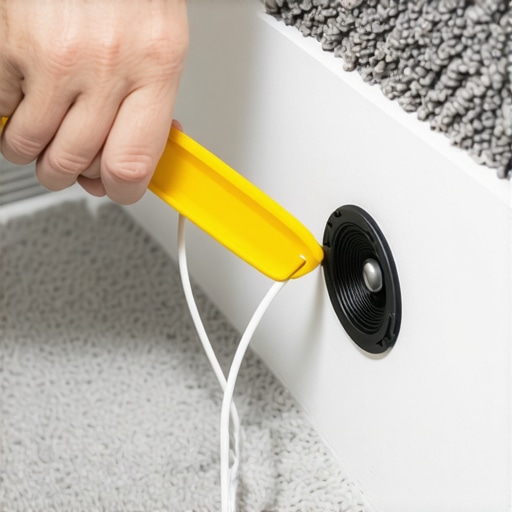
Avoid the Sharp Teeth of the Tack Strip
As you work your way around the perimeter, you’ll feel the tack strip—those tiny wooden slats with sharp nails pointing upward to grip the carpet. You want the wire to sit *below* the level of the carpet pile but *beside* the tack strip, not on top of it. If the wire sits on top of the nails, every footstep in that corner risks piercing the cable. This is especially important if you are trying to solve why your soundbar dialogue is still muddy; a damaged cable can cause intermittent signals or resistance issues that degrade audio clarity before it even reaches the speaker. I always use my fingers to gently pull the carpet edge back just a fraction of an inch, drop the wire in, and then use the plastic knife to seat it firmly.
Handle Doorways Without Creating a Lump
The biggest challenge is always the transition between rooms. When a wire has to cross a doorway, you can’t just tuck it. I once tried to just lay the wire under a transition strip, and within a week, the constant foot traffic had flattened the copper so much the speaker started cutting out. If you have a metal or wooden transition plate (a threshold), unscrew it and see if there is a channel underneath. Most modern transitions have enough of a hollow space to accommodate a wire or two. If not, you may need to go over the door frame using adhesive-backed ‘ghost wire’ or flat adhesive cables. Once you have everything routed and reconnected, don’t forget to use the easy way to test if your speakers are out of phase to ensure your polarities didn’t get swapped during the move. There is nothing more frustrating than a clean-looking room that produces a hollow, thin sound because of a simple wiring mistake.
Most enthusiasts assume that once the wire is out of sight, the job is done. But here is the nuance that separates a DIY job from a masterclass: cable tension. Everyone tells you to jam that wire as deep as possible into the baseboard gap. In my experience, ‘tight’ is actually your enemy. When you force a cable into a 90-degree bend or compress the insulation too tightly against a tack strip, you risk changing the cable’s capacitance. While it might sound like audiophile voodoo, physical deformation of the dielectric material (the plastic coating) can subtly shift the impedance. I’ve seen setups where a perfectly good 14-gauge wire started acting like a high-pass filter because it was pinched too hard in a corner.
Will Squishing Your Wires Ruin the Audio Quality?
The short answer is: not immediately, but it is a ticking time bomb. The ‘Oops’ factor here is the long-term degradation of the copper. If you’ve used a metal tool and slightly nicked the jacket, moisture in the air—or even a spilled drink on the carpet—can lead to oxidation that travels up the wire. This is often the real culprit when people wonder why their soundbar dialogue is still muddy or why one channel sounds slightly quieter. A damaged cable increases resistance, and according to signal integrity research shared by members of the Audio Engineering Society, even small variations in conductor geometry can impact the damping factor of your amplifier. 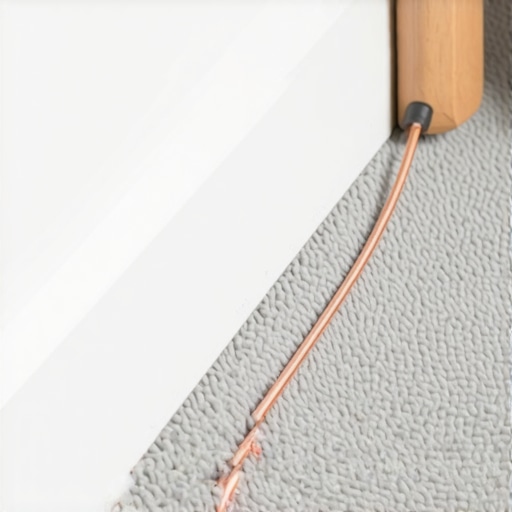
Another trap is ignoring the power cables. I once ran my speaker wires parallel to a heavy-duty vacuum cleaner’s power cord tucked under the same stretch of carpet. The result? A nasty hum every time the motor was nearby. If you encounter this, you’ll need to figure out how to find the source of a ground loop in home theater systems before you start ripping the carpet back up. Always try to cross power and signal cables at a 90-degree angle rather than running them side-by-side for long distances. It’s also worth noting that if you are working with older equipment, the physical stress of moving things around can highlight internal issues; for instance, you might suddenly notice how to tell if your speaker capacitors are starting to leak if the system hasn’t been touched in years.
Before you consider your project finished, give your system some time to settle. Some enthusiasts swear by ‘burn-in’ periods, and while that is a debated topic, knowing why your new speakers sound better after 20 hours of use can help you distinguish between a wiring issue and a simple break-in period. Have you ever fallen into the trap of over-tightening your cables or accidentally nicking a wire during a ‘hide-and-seek’ install? Let me know in the comments below—I’ve probably made the same mistake at least once!
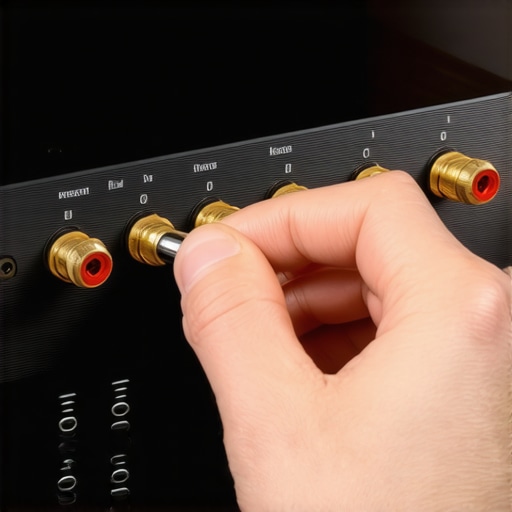
I’ve spent years tinkering with these setups, and if there is one thing I’ve learned, it’s that a ‘set it and forget it’ mentality is the fastest way to degraded sound quality. Every six months, I pull my receiver out and do a full audit. My secret weapon isn’t a fancy new cable; it is a can of DeoxIT D5. It is not just a cleaner; it is a chemical rejuvenator that I swear by for keeping connections stable. Most people assume gold-plated connectors are invincible, but atmospheric pollutants and humidity still create a microscopic film that chokes your signal over time. I personally use it on every RCA jack and speaker terminal because it reduces contact resistance significantly. In fact, technical papers from the Audio Engineering Society (AES) have frequently highlighted contact resistance as a primary culprit for non-linear distortion in low-voltage audio circuits. If you’ve noticed your system lacks that initial ‘punch’ it had on day one, you should definitely learn how to clean gold-plated connectors without ruining the finish. It is a five-minute job that yields immediate, audible results in the clarity of your high-end frequencies.
How do I keep my audio setup running perfectly for years?
Beyond chemical cleaning, long-term maintenance means monitoring the physical health of your hidden components. I always keep a digital multimeter in my media console—specifically a model with a fast continuity beeper. Cables hidden under carpets are subject to environmental stressors you cannot see, like heavy furniture being moved or the subtle settling of floorboards. If a chair leg accidentally pinches a wire, you might have a partial short that stresses your amplifier’s output stage without blowing a fuse immediately. I periodically check the resistance of my hidden runs to ensure they still match the original install specifications. This is also the best time to listen for ‘red flags’ from your hardware. For instance, if you hear an unusual mechanical sound when adjusting levels, it might be time to investigate why your receiver clicks when you change the volume. If you are running a vintage setup alongside your modern carpet-tucked wires, I would also suggest looking for signs of aging, such as knowing how to tell if your speaker capacitors are starting to leak. Heat is the ultimate enemy of fidelity, and caught early, these issues are easy fixes; ignored, they can take down your entire speaker array.
The Future of Hiding Wires Might Mean No Wires at All
The landscape of home audio is shifting rapidly, and while we are currently masters of the ‘edge tuck’ method, I predict the next five years will change the game entirely. I believe WISA (Wireless Speaker and Audio) technology is finally reaching a tipping point where it will become a standard in every mid-range receiver. We are moving toward a world where 24-bit/96kHz audio can be transmitted across a room with zero perceptible latency, eventually making these carpet-tucking tricks a nostalgic DIY skill rather than a necessity for high-end sound. However, until that wireless future is perfectly stable and affordable, the physical copper connection remains the king of reliability and cost-effectiveness. I want you to try one specific advanced tip this weekend: grab a dedicated contact cleaner and treat your main speaker connections. You will be surprised at how much ‘shimmer’ returns to the high end of your favorite tracks. If you are feeling extra thorough, use the easy way to test if your speakers are out of phase just to make sure no wires got internally swapped during your maintenance session. Your ears—and your amplifier—will thank you for the extra attention to detail.
Hard-Won Lessons from my Messiest Installs
The first time I attempted this, I underestimated how much static electricity a plush carpet can generate during an install. If you are walking around in socks while handling bare copper, you are asking for a discharge that could potentially harm sensitive electronics. I have also learned the hard way that labeling both ends of your cables before they vanish under the baseboard is the only way to keep your sanity. There is nothing more frustrating than finishing a perfect ‘edge tuck’ only to realize you have no idea which wire is the left surround and which is the right.
I also discovered that flat speaker wire isn’t always the magic bullet people claim it is. While it is great for running up a wall, standard round 16-gauge wire is often more durable when squeezed against a carpet tack strip. I once used a thin ribbon cable that actually sheared in half after a few weeks of heavy foot traffic near the corner. It is much better to have a bit of ‘meat’ to the insulation when you are working in high-traffic zones. Also, never pull a cable tight to save length; a little slack allows the wire to settle without straining the terminals.
The Essential Toolkit for a Clean Setup
You do not need a professional’s budget, but you do need the right tools to avoid damaging your home. I never start an install without a set of nylon interior trim tools. They are technically made for car dashboards, but they are far superior to a metal putty knife because they won’t scratch your paint or snag the carpet fibers. I also keep a reliable multimeter nearby; if you accidentally nicked a wire while tucking it, it is vital to find a short in your speaker wires before you power up your receiver and risk blowing a fuse.
If your room has mixed flooring, you might hit a wall—literally. When the carpet ends and you are faced with masonry, you will need to know how to hide audio cables in a room with concrete walls to keep your theater looking professional. I also suggest keeping a dedicated contact cleaner in your kit. Treating the tips of your wires before they are tucked away ensures a lifetime of signal purity and prevents the oxidation that leads to muddy sound.
Your Reward is Pure Cinema
Once that final inch of wire is hidden and your room looks like it was designed by a minimalist architect, you will realize the effort was worth it. You have bypassed the frustration of why your bluetooth audio lags while watching movies by sticking with a rock-solid physical connection. Now, sit back, turn the volume up, and discover why your home theater sounds better with the lights off. You have conquered the clutter and reclaimed your living space. Dimming the lights removes the visual distractions and lets your ears fully engage with the soundstage you just meticulously wired. Have you ever run into a doorway transition that simply refused to cooperate during an install? Let me know your biggest cable management headache in the comments below!