
I remember sitting on my couch, remote gripped tight, feeling completely defeated. I’d just finished setting up a brand-new system, expecting cinematic bliss, but instead, I found myself leaning forward, straining to catch a single word of dialogue. It was like the actors were whispering through a thick, wet wool blanket while the background explosions were loud enough to rattle my windows. I kept cranking the volume up to hear the speech, only to dive for the ‘mute’ button the second an action scene started. If you’ve ever felt like you’re playing a frantic game of ‘volume tag’ just to get through a thirty-minute sitcom, I know exactly how frustrating that is. We’re told that these sleek bars are the ultimate upgrade, but the truth is often buried in settings and physics that the manufacturers don’t mention on the box. Today, I’m going to pull back the curtain on why your audio is failing you and give you the real-world fixes to get those voices sounding sharp again.
Stop blaming your ears and look at your room instead
It’s easy to think you’re losing your hearing or that you just bought a dud, but most of the time, the hardware is fine—it’s the environment that’s the enemy. Early in my journey, I made the classic rookie mistake of thinking a more expensive cable would solve everything. I wasted money on a ‘premium’ connection when the real issue was how my bar was interacting with my coffee table and the walls. For instance, I’ve seen many folks struggle with why your soundbar sounds thin in a room with high ceilings, which can swallow up those mid-range frequencies where human speech lives. According to research by the audio experts at Dolby, dialogue is the most critical element of any film, yet it is often the first thing to suffer when room acoustics are ignored.
Is a more expensive soundbar actually the answer?
You might be tempted to just go out and buy a thousand-dollar unit, thinking power equals clarity. But honestly? If you don’t fix the placement and the internal processing, a bigger bar might just make the mud louder. I’ve heard cheap bookshelf speakers outperform massive bars simply because they were positioned correctly. Sometimes the fix is as simple as how to fix the lip-sync delay on your soundbar using HDMI settings, which can subconsciously make dialogue feel ‘off’ and harder to process. Before you give up on your current gear, have you checked if your bar is tucked too far back into a cabinet or how to stop your soundbar from blocking your tv remote sensor while also suffocating its own drivers? Tell me, have you ever found yourself turning on subtitles just to understand a show in your own language? Because that was my ‘rock bottom’ moment that led me to find these solutions.
Move the Bar to the Edge
The most common mistake I see is people tucking their soundbar deep into a TV cabinet or pushing it all the way back against the wall. Think of your soundbar like a flashlight; if you put it inside a box, the light bounces off the sides and creates shadows. When a speaker is recessed, the sound waves hit the shelf surface first, creating early reflections that muddy the high frequencies where human speech lives. I once spent an hour trying to figure out why my cousin’s high-end setup sounded like a tin can, only to realize he had it shoved six inches back on a glass shelf. Pulling it forward to the very front edge made it instantly clearer. If you’re using a smaller setup, you might even notice that why your bluetooth speaker sounds much fuller on a wooden table because the surface helps resonate the low-end, but for dialogue, we want direct paths, not bounced ones. 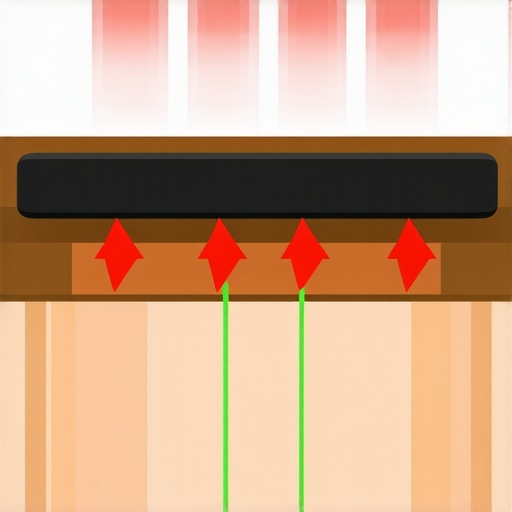
Kill the Hard Surface Echo
If your room has hardwood floors, a glass coffee table, and bare walls, you’re basically living inside a giant bell. Every time an actor speaks, that sound bounces off your floor and hits your ears a millisecond after the direct sound, blurring the words together. You don’t need expensive acoustic panels to fix this. Throwing down a thick area rug between you and the TV can work miracles. I’ve written before about why you should use a rug to fix a bright sounding room, and it remains the single cheapest ‘pro’ tip in the audio world. It absorbs those nasty floor reflections that ruin clarity.
Nix the Digital Compression
Most modern TVs and soundbars come with a setting called ‘Dynamic Range Compression’ (DRC) or ‘Night Mode.’ It’s meant to make loud sounds quieter and quiet sounds louder, but it often does a terrible job of prioritizing voices. It squashes the life out of the audio, making everything sound like flat, gray mush. Dive into your soundbar’s app or remote settings and turn off any ‘Auto Volume’ features. If you still have trouble, check how to fix the audio delay on your soundbar, because if the audio is even slightly behind the movement of the actor’s lips, your brain will struggle to decode the speech, making it feel ‘muffled’ even if the frequency is fine.
Align Your Subwoofer Phase
If you have a separate subwoofer, it might actually be fighting your soundbar. This happened to me last year—I felt like the dialogue was being drowned out by a constant, low-frequency hum. I realized my subwoofer was ‘out of phase’ with my main bar. Imagine two people pushing a car; if one pushes from the front and one from the back, the car goes nowhere. That’s what happens when speakers are out of sync. You can learn how to tell if your speakers are out of phase in 30-seconds and then use the toggle on the back of your sub to fix it. Once I did this, I used the how to match your subwoofer phase with your main speakers technique to ensure the bass punch and the vocal clarity were working together, not against each other.
Silence the Electrical Hum
Sometimes that ‘muffled’ feeling is actually a faint background buzz masking the delicate high-end details. In my old apartment, I had a nasty hiss that drove me crazy until I realized I had a ground loop. I finally learned how to get rid of ground loop hum in your audio setup by separating my power cables from my audio cables. If you’re hearing a persistent buzz, the 5-fix for humming speakers and ground loops might be all you need to lower the noise floor and let the dialogue shine. Also, if you’re using tiny speakers, make sure you’re using the best crossover frequency for small satellite home theater speakers so your little drivers aren’t trying to play bass they can’t handle, which causes distortion.Beyond the basic crossover settings, there’s a deeper psychological trap I see audiophiles fall into constantly: the ‘break-in’ period myth. Everyone tells you that you need 100 hours of pink noise before your speakers sound ‘right.’ In reality, while there is a slight mechanical change in the speaker’s spider and surround, it happens within the first few minutes of use. What’s actually breaking in is your brain. This is known as psychoacoustic adaptation. Research by Dr. Floyd Toole, a legend in the field of acoustics at Harman International, suggests that our ears are remarkably good at ‘tuning out’ the flaws of a system over time, which is why we think the sound is improving when we’ve simply just gotten used to it. Don’t waste weeks ‘breaking in’ a system that sounds bad; the truth about speaker break-in periods is that if it doesn’t sound good within the first hour, it’s likely an EQ or placement issue.
Don’t Fall for the High-Wattage Marketing Trap
Many people assume a ‘100W’ receiver will solve their clarity issues. However, manufacturers often juice these numbers by testing only one channel at a specific frequency. When you actually try to drive a full 5.1 system, that power drops significantly. This is where the secret to choosing the right ohm rating for your amp becomes critical. If your speakers have an impedance that dips low and your amp isn’t designed to provide high current, you’ll experience ‘clipping.’ Clipping creates a harsh, distorted sound that specifically ruins the high-frequency clarity of human voices. It’s also the primary reason why your receiver’s protection mode keeps triggering at high volume. 
Does your receiver’s auto-setup make your gear sound cheap?
Most modern receivers come with a calibration microphone, and while it’s a great starting point, it’s a common ‘oops’ factor for muffled sound. These ‘room correction’ algorithms often try to flatten the response so much that they suck the ‘life’ and ‘presence’ out of the center channel to compensate for room echoes. I always recommend going into the manual settings and boosting the center channel by 2 or 3 decibels above the rest. Also, check if you’re using the right connections; if you’ve ever wondered why your headphones sound quiet on your laptop but loud on your phone, it’s often an issue of the internal DAC/Amp quality, not the drivers themselves. In a home theater, ensuring you understand the difference between balanced and unbalanced cables for home studios can prevent the low-level floor noise that masks dialogue.
Why Floorstanders Might Be Ruining Your Experience
People love the look of massive tower speakers, but in many rooms, they are the enemy of clarity. Large speakers are designed to move a lot of air, and if you don’t know why your floorstanding speakers need more breathing room from the wall, the resulting bass build-up can completely drown out your mids. This is the ‘masking effect,’ where loud, low frequencies prevent your brain from hearing quieter, high-frequency sounds like consonants in speech. Another hidden nuance often ignored is the ‘Circle of Confusion.’ Most people overlook the simplest things, like the surface the speaker sits on. For example, why your bluetooth speaker sounds much fuller on a wooden table is due to mechanical coupling, but that same coupling can cause a soundbar to rattle a thin stand, creating ‘phantom’ noises. I’ve even seen cases where a vintage amp gets hot even when you aren’t playing music, which is often a sign of failing capacitors distorting the sound. Have you ever fallen into the trap of buying gear based on the box specs rather than your room’s needs? Let me know in the comments.It’s one thing to get your system sounding great on day one, but keeping it that way is where the real work begins. I’ve seen incredible setups degrade into static-filled nightmares because of simple neglect or the slow creep of oxidation. One tool I swear by isn’t a thousand-dollar microphone—it’s actually just an app on my smartphone. You can learn how to use your phone to measure your rooms frequency response to see exactly where your furniture is eating your treble or where a new couch has created a bass trap. If things start sounding ‘fuzzy’ and it’s not the room, I reach for a multimeter. Mastering how to use a multimeter to find a short in your speaker wires has saved me hundreds of dollars by allowing me to identify a tiny frayed strand touching the chassis rather than tossing out a perfectly good receiver.
Don’t Let Dirty Connections Muffle Your Mids
Most people overlook the physical health of their cables until they hear a loud pop or lose a channel entirely. I make it a habit every six months to unplug everything and check for corrosion. Knowing how to clean gold-plated connectors without ruining the finish is vital because even a microscopic layer of oil from your skin or dust from the air can increase resistance. As Douglas Self points out in his technical manual, Small Signal Audio Design, maintaining a low-impedance, ultra-clean path in the signal chain is non-negotiable if you want to preserve the full dynamic range and signal-to-noise ratio of high-fidelity recordings. If you’re dealing with older equipment, you might also need to learn how to fix a scratchy volume knob on an old amp using specialized contact cleaners like DeoxIT D5, which dissolves oxidation without leaving a conductive residue.
How do I keep my high-end audio gear sounding new for years?
The biggest killer of audio electronics isn’t high volume—it’s heat and component aging. For those of us who love vintage or high-current gear, you have to be proactive. Learning how to tell if your speaker capacitors are starting to leak can prevent a catastrophic failure that might otherwise take out your entire power stage. If the physical parts of the speaker are failing, don’t panic; I’ve seen miracles performed by those who know how to revive old speakers with new foam surrounds. This simple mechanical repair can restore the compliance of the driver and bring back that tight, punchy bass you thought was gone forever. 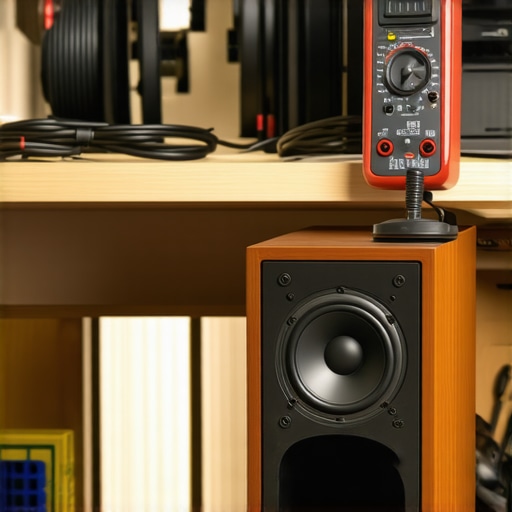
The Future of Precision Room Calibration
Looking ahead, I see the industry shifting toward AI-powered adaptive EQ that adjusts in real-time based on your exact position in the room. We are moving away from static calibrations toward systems that ‘learn’ your environment and compensate for people moving around or doors opening. But until that tech is in every soundbar, the most effective upgrade is still a hands-on approach and regular maintenance. My challenge to you: tonight, grab a multimeter or a room-analysis app and find just one ‘dead zone’ or ‘weak link’ in your signal chain. You might be surprised to find that your ‘muffled’ sound was just one dirty connection away from being fixed. Give it a shot and see if that dialogue doesn’t suddenly pop back to life.
The Most Expensive Audio Myths I Finally Stopped Believing
After years of tinkering with everything from budget systems to high-end receivers, I’ve realized that the most expensive solution is rarely the most effective one. I used to think a perfectly flat frequency response was the holy grail, but in a real living room, ‘flat’ often sounds thin and lifeless. Boosting those specific frequencies where the human voice lives—usually between 1kHz and 5kHz—is almost always necessary regardless of what the box says. Another lightbulb moment was realizing that the truth about speaker break-in periods is mostly psychological; if your dialogue sounds like it’s coming through a sock, no amount of ‘burning in’ the drivers is going to fix a fundamental placement error or a bad crossover setting. I also learned that software calibration is a tool, not a miracle worker. If your speakers are fighting the room’s physics, even the smartest AI won’t be able to reconstruct the missing detail in an actor’s performance.
What I Keep in My Modern Audio Troubleshooting Kit
I don’t believe in buying gear just for the sake of it, but there are a few essentials that have saved my sanity more times than I can count. First, I always keep a multimeter nearby; it is the only way to be 100% sure you aren’t fighting a ghost in the machine. Mastering how to use a multimeter to find a short in your speaker wires is a skill that pays for itself the first time it prevents you from unnecessarily replacing a perfectly good receiver. For room analysis, I’ve stopped guessing and started measuring. You don’t need a professional lab; simply knowing how to use your phone to measure your rooms frequency response gives you visual proof of where your furniture might be swallowing your treble. Finally, I never neglect the physical health of the signal path. Maintaining a clean connection by knowing how to clean gold-plated connectors without ruining the finish ensures that your high frequencies aren’t being choked by microscopic layers of dust or oxidation.
#IMAGE_PLACEHOLDER_E#
Your Next Move Toward Dialogue Perfection
Sound is half of the movie-going experience, yet we often settle for ‘good enough’ when it comes to clarity. Don’t let your soundbars or home theater speakers remain in a state of muffled mediocrity. Whether it’s applying the 5-fix for humming speakers and ground loops or finally getting your crossovers dialed in, the effort you put in today will pay off every time you hit ‘play.’ You deserve to hear every whisper and nuance without having to ride the volume button like a panicked DJ. If you find your equipment is aging, don’t be afraid to get your hands dirty and learn how to revive old speakers with new foam surrounds; it’s one of the most satisfying DIY projects in the hobby. Have you ever discovered a surprisingly simple fix that instantly made your speakers sound twice as expensive? Let me know in the comments below!