
I will never forget the Friday night I unboxed my first high-end soundbar. I had spent weeks researching, looking for that perfect balance of crisp dialogue and thumping bass. I finally got it hooked up, sat back on my couch with a bowl of popcorn, and realized I could not turn the volume down. My gorgeous new speaker was about half an inch too tall. It was sitting right in front of my TV’s infrared eye. To get the remote to work, I had to stand up and hold the remote at a 45-degree angle toward the ceiling like I was summoning a storm. It was ridiculous. I felt like a tech expert who had been defeated by a plastic box. It is a classic home theater fail that nobody tells you about until the box is already open and the cables are messy. You probably know that feeling. You spend good money on audio gear, only for it to break the basic functionality of your television. It is frustrating, it is ugly, and it is a total mood-killer during a movie marathon. Today, I am going to walk you through the fixes I have learned through trial and error—some high-tech, some very DIY—so you can finally put your feet up and keep them there.
Stop Stretching Your Arm Just to Mute the TV
The core of the problem is simple physics. Most TV remotes use infrared light, and as the Consumer Technology Association points out, IR light requires a direct line of sight; it cannot pass through your soundbar’s casing or that fancy acoustic mesh. I made the classic rookie mistake of trying to boost the TV height by stacking it on a pile of old hardcover books. It worked for ten minutes until my cat jumped on the TV stand, and I watched twelve hundred dollars of glass and electronics nearly tip into the floor. Do not be like me. Stability is just as important as signal. Beyond the physical blockage, having your soundbar shoved right against the screen can cause other issues, like the audio delay on your soundbar due to heat or blocked ports. If you are already struggling with how to fix a soundbar that isn’t loud enough for a large room, adding a physical barrier to the mix only makes the experience feel more budget than it should. Have you ever found yourself doing a weird dance in your living room just to change the channel? You are not alone, and it is definitely not a permanent requirement for good sound.
Do I Really Need to Buy New Furniture to Fix This?
The fear is always that the solution will involve a credit card and a trip to a furniture store. I have been there, staring at TV risers online that cost more than my actual speakers. It feels like a trap. When you try to stop your soundbar from blocking your TV remote sensor, the first instinct is to rearrange everything, but often the solution is much smaller. We need to look at how we can manipulate light and height to our advantage without compromising the aesthetics of our setup. In the next section, we are going to dive into the actual methods that work, from the simple five-dollar fix to the set it and forget it tech upgrades that use cables instead of line-of-sight light. Let us get your remote talking to your TV again without the gymnastics.
Don’t Move the Furniture, Move the Signal
The most elegant solution isn’t always moving the heavy stuff; sometimes it is about outsmarting the light. I once spent an entire Saturday afternoon trying to wall-mount a soundbar just to clear the IR sensor, only to realize I’d drilled four holes in my drywall for nothing because the soundbar sounded terrible that high up. If you are worried about placement affecting audio quality, remember that why your speakers bass port should never be pushed against a wall applies here too—shoving the bar back to clear the sensor can muddy your low end. Instead of moving the mountain to Muhammad, we are going to move the signal.
The Invisible Bridge: Using an IR Repeater
An IR repeater is basically a relay system for your remote. It consists of a tiny receiver you stick on the front of your soundbar and a small ‘blaster’ that you position in front of the TV’s blocked sensor. It is like using a periscope to see over a fence. I installed one of these for a client who had a massive wooden soundbar that was basically a barricade. It cost less than a pizza and solved the problem in minutes. This is arguably the cleanest way to stop your soundbar from blocking your TV remote sensor without changing the look of your media console. 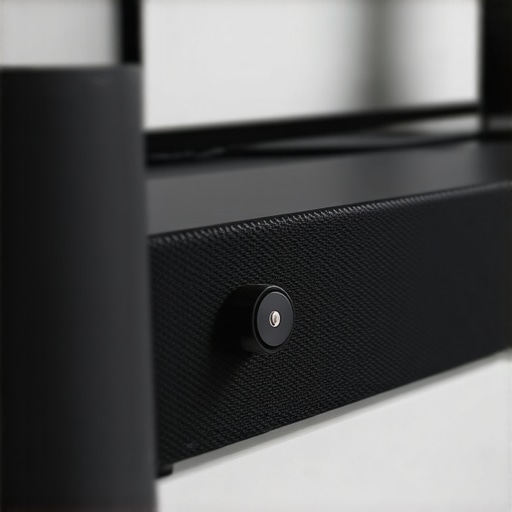
Use Your HDMI Cable as a Remote Shortcut
Before you buy anything, check the back of your TV for an HDMI port labeled ‘ARC’ or ‘eARC’. Most modern setups use HDMI-CEC, which allows your TV and soundbar to talk to each other via wire. This means your TV remote sends a signal to the TV, which then tells the soundbar to change volume through the cable. It bypasses the need for the soundbar’s own IR sensor entirely. However, keep in mind that this handshake can sometimes get ‘confused,’ leading to timing issues where you might need to how to fix the audio delay on your soundbar. If you notice a lag, you should definitely look into how to fix the lip-sync delay on your soundbar using hdmi settings to keep the actors’ voices aligned with their lips.
Simple Risers That Won’t Kill the Aesthetic
If you prefer a low-tech approach, you just need a little bit of lift. Forget the books. I found that a set of four small, clear acrylic risers or even heavy-duty adhesive rubber feet can give your TV the half-inch of clearance it needs. I did this with my old Sony soundbar; I just placed four 1-inch rubber bumpers under the TV’s original feet. It was invisible from a distance, stable as a rock, and the remote worked perfectly. Just be careful with balance—you do not want your screen wobbling every time the bass hits. If you’re using a setup with a separate sub and find that how to fix a subwoofer that is vibrating your furniture is becoming an issue, those same rubber feet can pull double duty as isolation pads.
Reflect the Light if You Can’t Bypass It
In a pinch, I have used a small piece of reflective tape or even a tiny mirror angled behind the soundbar. IR light bounces off surfaces like a flashlight. By angling a reflective surface, you can sometimes ‘bounce’ the remote’s signal around the soundbar and into the sensor. It is a bit of a MacGyver move, and it took me about twenty tries to get the angle right on my basement setup, but it is a zero-cost fix that feels like magic when it finally clicks. It works best if your TV stand has a slightly glossy finish or if you have a white wall behind the TV to help diffuse the light. If your soundbar is particularly stubborn, you might even consider how to get clear movie dialogue without a dedicated center speaker through better placement, which often moves the soundbar further forward and naturally clears the IR path anyway.
I will never forget the Friday night I unboxed my first high-end soundbar. I had spent weeks researching, looking for that perfect balance of crisp dialogue and thumping bass. I finally got it hooked up, sat back on my couch with a bowl of popcorn, and realized I could not turn the volume down. My gorgeous new speaker was about half an inch too tall. It was sitting right in front of my TV’s infrared eye. To get the remote to work, I had to stand up and hold the remote at a 45-degree angle toward the ceiling like I was summoning a storm. It was ridiculous. I felt like a tech expert who had been defeated by a plastic box. It is a classic home theater fail that nobody tells you about until the box is already open and the cables are messy. You probably know that feeling. You spend good money on audio gear, only for it to break the basic functionality of your television. It is frustrating, it is ugly, and it is a total mood-killer during a movie marathon. Today, I am going to walk you through the fixes I have learned through trial and error—some high-tech, some very DIY—so you can finally put your feet up and keep them there.
Stop Stretching Your Arm Just to Mute the TV
The core of the problem is simple physics. Most TV remotes use infrared light, and as the Consumer Technology Association points out, IR light requires a direct line of sight; it cannot pass through your soundbar’s casing or that fancy acoustic mesh. I made the classic rookie mistake of trying to boost the TV height by stacking it on a pile of old hardcover books. It worked for ten minutes until my cat jumped on the TV stand, and I watched twelve hundred dollars of glass and electronics nearly tip into the floor. Do not be like me. Stability is just as important as signal. Beyond the physical blockage, having your soundbar shoved right against the screen can cause other issues, like the audio delay on your soundbar due to heat or blocked ports. If you are already struggling with how to fix a soundbar that isn’t loud enough for a large room, adding a physical barrier to the mix only makes the experience feel more budget than it should. Have you ever found yourself doing a weird dance in your living room just to change the channel? You are not alone, and it is definitely not a permanent requirement for good sound.
Do I Really Need to Buy New Furniture to Fix This?
The fear is always that the solution will involve a credit card and a trip to a furniture store. I have been there, staring at TV risers online that cost more than my actual speakers. It feels like a trap. When you try to stop your soundbar from blocking your TV remote sensor, the first instinct is to rearrange everything, but often the solution is much smaller. We need to look at how we can manipulate light and height to our advantage without compromising the aesthetics of our setup. In the next section, we are going to dive into the actual methods that work, from the simple five-dollar fix to the set it and forget it tech upgrades that use cables instead of line-of-sight light. Let us get your remote talking to your TV again without the gymnastics.
Don’t Move the Furniture, Move the Signal
The most elegant solution isn’t always moving the heavy stuff; sometimes it is about outsmarting the light. I once spent an entire Saturday afternoon trying to wall-mount a soundbar just to clear the IR sensor, only to realize I’d drilled four holes in my drywall for nothing because the soundbar sounded terrible that high up. If you are worried about placement affecting audio quality, remember that why your speakers bass port should never be pushed against a wall applies here too—shoving the bar back to clear the sensor can muddy your low end. Instead of moving the mountain to Muhammad, we are going to move the signal.
The Invisible Bridge: Using an IR Repeater
An IR repeater is basically a relay system for your remote. It consists of a tiny receiver you stick on the front of your soundbar and a small ‘blaster’ that you position in front of the TV’s blocked sensor. It is like using a periscope to see over a fence. I installed one of these for a client who had a massive wooden soundbar that was basically a barricade. It cost less than a pizza and solved the problem in minutes. This is arguably the cleanest way to stop your soundbar from blocking your TV remote sensor without changing the look of your media console.
Use Your HDMI Cable as a Remote Shortcut
Before you buy anything, check the back of your TV for an HDMI port labeled ‘ARC’ or ‘eARC’. Most modern setups use HDMI-CEC, which allows your TV and soundbar to talk to each other via wire. This means your TV remote sends a signal to the TV, which then tells the soundbar to change volume through the cable. It bypasses the need for the soundbar’s own IR sensor entirely. However, keep in mind that this handshake can sometimes get ‘confused,’ leading to timing issues where you might need to how to fix the audio delay on your soundbar. If you notice a lag, you should definitely look into how to fix the lip-sync delay on your soundbar using hdmi settings to keep the actors’ voices aligned with their lips.
Simple Risers That Won’t Kill the Aesthetic
If you prefer a low-tech approach, you just need a little bit of lift. Forget the books. I found that a set of four small, clear acrylic risers or even heavy-duty adhesive rubber feet can give your TV the half-inch of clearance it needs. I did this with my old Sony soundbar; I just placed four 1-inch rubber bumpers under the TV’s original feet. It was invisible from a distance, stable as a rock, and the remote worked perfectly. Just be careful with balance—you do not want your screen wobbling every time the bass hits. If you’re using a setup with a separate sub and find that how to fix a subwoofer that is vibrating your furniture is becoming an issue, those same rubber feet can pull double duty as isolation pads.
Reflect the Light if You Can’t Bypass It
In a pinch, I have used a small piece of reflective tape or even a tiny mirror angled behind the soundbar. IR light bounces off surfaces like a flashlight. By angling a reflective surface, you can sometimes ‘bounce’ the remote’s signal around the soundbar and into the sensor. It is a bit of a MacGyver move, and it took me about twenty tries to get the angle right on my basement setup, but it is a zero-cost fix that feels like magic when it finally clicks. It works best if your TV stand has a slightly glossy finish or if you have a white wall behind the TV to help diffuse the light. If your soundbar is particularly stubborn, you might even consider how to get clear movie dialogue without a dedicated center speaker through better placement, which often moves the soundbar further forward and naturally clears the IR path anyway.
Stop Blaming the Amp for Your Muddy Audio
It is easy to think that if your setup isn’t performing, the answer is a bigger credit card balance. I see this all the time in audiophile forums: someone complains about thin sound or poor clarity, and the immediate advice is to buy a new DAC. But here is a nuanced truth: your room is likely doing more damage to the signal than your electronics. In fact, why your high-end DAC sounds exactly like your laptop’s headphone jack often comes down to the simple fact that the ‘bottleneck’ isn’t the digital-to-analog conversion; it is the physical interaction between speakers and walls. High-end gear cannot fix poor acoustics.
The Phase Mistake That Makes High-End Gear Sound Cheap
One of the most common ‘oops’ factors I have encountered during home theater audits involves simple wiring. You can spend thousands on a premium receiver, but if one speaker wire is reversed, the speakers will be ‘out of phase.’ This means when one speaker pushes air out, the other pulls it in, effectively canceling out your bass. You would be shocked how many enthusiasts live for years with this issue because they assumed their setup was foolproof. It only takes a second to learn how to tell if your speakers are out of phase in 30 seconds, and it is a far more effective upgrade than any $200 cable. As Dr. Floyd Toole, a renowned fellow at the Audio Engineering Society, has demonstrated in his research, the room and speaker interaction accounts for roughly 30% to 50% of our subjective sound quality assessment. No amplifier can overcome physics. 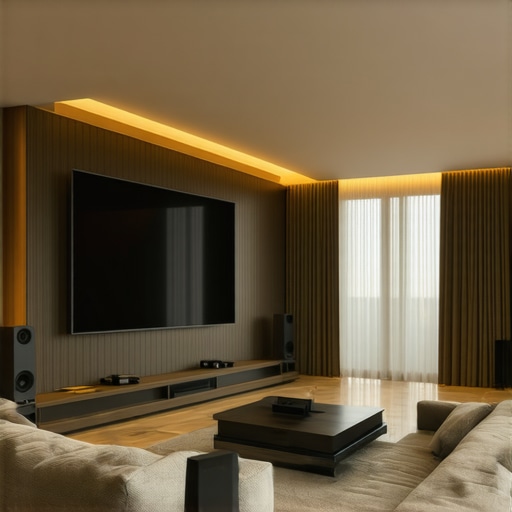
Does Your L-Shaped Room Make Proper Imaging Impossible?
If you are struggling with an asymmetrical layout, you have probably noticed the soundstage feels ‘heavy’ on one side. This is not a hardware failure; it is boundary reinforcement where one speaker is getting more bass boost from a nearby wall than the other. This is precisely why your floorstanding speakers sound unbalanced in an l-shaped room. Before you replace your drivers, try the ‘speaker crawl’ or check how to find the sweet spot for your speakers in a rectangular room to see if a six-inch shift fixes the phantom center. Have you ever fallen into the trap of buying more gear to fix a problem that was actually just a bad cable or a weird room corner? Let me know in the comments.
Once you have nailed the placement and the handshake issues, the next battle is against time, dust, and electrical oxidation. I keep a can of DeoxIT D5 in my desk drawer like it is a holy relic. If you have ever felt that heart-sinking sensation of hearing a crackling sound when you turn a knob, you do not need a new receiver. You just need to learn how to fix a scratchy volume dial with electrical contact cleaner. It is a ten-minute job that has saved me thousands in unnecessary upgrades over the years. We often mistake a bit of dirt for a dying component, but most high-end gear is built to last decades if you treat the contact points with respect.
How do I keep my home theater sounding like new for years?
Maintenance is about more than just wiping the gloss finish. You have to monitor the physical health of your drivers. Rubber and foam surrounds are usually the first things to fail, especially in humid climates or rooms with direct sunlight. I have seen vintage bookshelf speakers literally crumble into dust because the owner didn’t know how to clean sticky speaker surrounds without damaging the rubber. Furthermore, if you notice your system lacks the ‘punch’ it used to have, it might not be your ears getting older; it is likely how to tell if your speakers capacitor is starting to fail. Capacitors are essentially the batteries of your speaker’s crossover, and they do have an expiration date. According to technical documentation from Hypex Electronics, maintaining stable operating temperatures is the single most important factor for the longevity of modern Class D amplifiers. If your cabinet is poorly ventilated, you are essentially cooking your investment.
The Pro Tool That Beats Any New Speaker Purchase
If you really want to scale your system to the next level, stop guessing with your ears and start using data. I personally use a UMIK-1 calibrated microphone paired with Room EQ Wizard (REW) software. It is a steep learning curve, but it is the industry standard for a reason. If that feels too daunting, even learning how to use your phone to measure your rooms-frequency-response can reveal exactly why your bass feels thin or why certain notes sound boomy. I once used this data to realize that my Bluetooth range was being killed by a nearby router, leading me to how to add an external antenna to a bluetooth receiver for better range for a flawless outdoor signal. 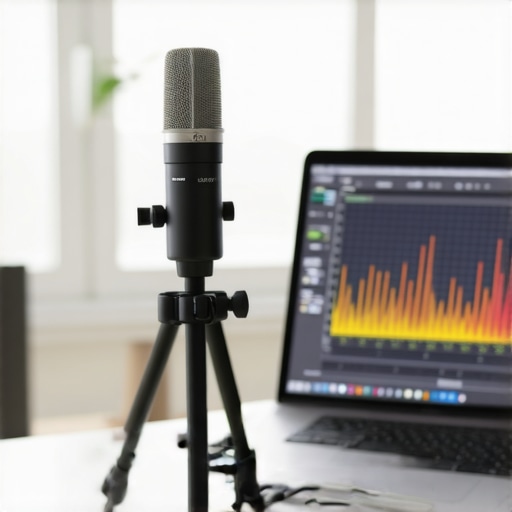
Looking ahead, I predict we are moving toward ‘active’ room correction where speakers will use built-in LiDAR to map your room and adjust their DSP in real-time. But until that becomes affordable for the average enthusiast, these manual checks are your best defense against bad sound. I highly recommend you download a free frequency generator app tonight and run a slow sweep from 20Hz to 200Hz. If you hear your window frame or a picture gallery rattling at 50Hz, you have found your next weekend project. My advice? Grab some blue-tack or felt pads and hunt down those vibrations before you even think about buying a new subwoofer.
I will never forget the Friday night I unboxed my first high-end soundbar. I had spent weeks researching, looking for that perfect balance of crisp dialogue and thumping bass. I finally got it hooked up, sat back on my couch with a bowl of popcorn, and realized I could not turn the volume down. My gorgeous new speaker was about half an inch too tall. It was sitting right in front of my TV’s infrared eye. To get the remote to work, I had to stand up and hold the remote at a 45-degree angle toward the ceiling like I was summoning a storm. It was ridiculous. I felt like a tech expert who had been defeated by a plastic box. It is a classic home theater fail that nobody tells you about until the box is already open and the cables are messy. You probably know that feeling. You spend good money on audio gear, only for it to break the basic functionality of your television. It is frustrating, it is ugly, and it is a total mood-killer during a movie marathon. Today, I am going to walk you through the fixes I have learned through trial and error—some high-tech, some very DIY—so you can finally put your feet up and keep them there.
Stop Stretching Your Arm Just to Mute the TV
The core of the problem is simple physics. Most TV remotes use infrared light, and as the Consumer Technology Association points out, IR light requires a direct line of sight; it cannot pass through your soundbar’s casing or that fancy acoustic mesh. I made the classic rookie mistake of trying to boost the TV height by stacking it on a pile of old hardcover books. It worked for ten minutes until my cat jumped on the TV stand, and I watched twelve hundred dollars of glass and electronics nearly tip into the floor. Do not be like me. Stability is just as important as signal. Beyond the physical blockage, having your soundbar shoved right against the screen can cause other issues, like the audio delay on your soundbar due to heat or blocked ports. If you are already struggling with how to fix a soundbar that isn’t loud enough for a large room, adding a physical barrier to the mix only makes the experience feel more budget than it should. Have you ever found yourself doing a weird dance in your living room just to change the channel? You are not alone, and it is definitely not a permanent requirement for good sound.
Do I Really Need to Buy New Furniture to Fix This?
The fear is always that the solution will involve a credit card and a trip to a furniture store. I have been there, staring at TV risers online that cost more than my actual speakers. It feels like a trap. When you try to stop your soundbar from blocking your TV remote sensor, the first instinct is to rearrange everything, but often the solution is much smaller. We need to look at how we can manipulate light and height to our advantage without compromising the aesthetics of our setup. In the next section, we are going to dive into the actual methods that work, from the simple five-dollar fix to the set it and forget it tech upgrades that use cables instead of line-of-sight light. Let us get your remote talking to your TV again without the gymnastics.
Don’t Move the Furniture, Move the Signal
The most elegant solution isn’t always moving the heavy stuff; sometimes it is about outsmarting the light. I once spent an entire Saturday afternoon trying to wall-mount a soundbar just to clear the IR sensor, only to realize I’d drilled four holes in my drywall for nothing because the soundbar sounded terrible that high up. If you are worried about placement affecting audio quality, remember that why your speakers bass port should never be pushed against a wall applies here too—shoving the bar back to clear the sensor can muddy your low end. Instead of moving the mountain to Muhammad, we are going to move the signal.
The Invisible Bridge: Using an IR Repeater
An IR repeater is basically a relay system for your remote. It consists of a tiny receiver you stick on the front of your soundbar and a small ‘blaster’ that you position in front of the TV’s blocked sensor. It is like using a periscope to see over a fence. I installed one of these for a client who had a massive wooden soundbar that was basically a barricade. It cost less than a pizza and solved the problem in minutes. This is arguably the cleanest way to stop your soundbar from blocking your TV remote sensor without changing the look of your media console.
Use Your HDMI Cable as a Remote Shortcut
Before you buy anything, check the back of your TV for an HDMI port labeled ‘ARC’ or ‘eARC’. Most modern setups use HDMI-CEC, which allows your TV and soundbar to talk to each other via wire. This means your TV remote sends a signal to the TV, which then tells the soundbar to change volume through the cable. It bypasses the need for the soundbar’s own IR sensor entirely. However, keep in mind that this handshake can sometimes get ‘confused,’ leading to timing issues where you might need to how to fix the audio delay on your soundbar. If you notice a lag, you should definitely look into how to fix the lip-sync delay on your soundbar using hdmi settings to keep the actors’ voices aligned with their lips.
Simple Risers That Won’t Kill the Aesthetic
If you prefer a low-tech approach, you just need a little bit of lift. Forget the books. I found that a set of four small, clear acrylic risers or even heavy-duty adhesive rubber feet can give your TV the half-inch of clearance it needs. I did this with my old Sony soundbar; I just placed four 1-inch rubber bumpers under the TV’s original feet. It was invisible from a distance, stable as a rock, and the remote worked perfectly. Just be careful with balance—you do not want your screen wobbling every time the bass hits. If you’re using a setup with a separate sub and find that how to fix a subwoofer that is vibrating your furniture is becoming an issue, those same rubber feet can pull double duty as isolation pads.
Reflect the Light if You Can’t Bypass It
In a pinch, I have used a small piece of reflective tape or even a tiny mirror angled behind the soundbar. IR light bounces off surfaces like a flashlight. By angling a reflective surface, you can sometimes ‘bounce’ the remote’s signal around the soundbar and into the sensor. It is a bit of a MacGyver move, and it took me about twenty tries to get the angle right on my basement setup, but it is a zero-cost fix that feels like magic when it finally clicks. It works best if your TV stand has a slightly glossy finish or if you have a white wall behind the TV to help diffuse the light. If your soundbar is particularly stubborn, you might even consider how to get clear movie dialogue without a dedicated center speaker through better placement, which often moves the soundbar further forward and naturally clears the IR path anyway.
Stop Blaming the Amp for Your Muddy Audio
It is easy to think that if your setup isn’t performing, the answer is a bigger credit card balance. I see this all the time in audiophile forums: someone complains about thin sound or poor clarity, and the immediate advice is to buy a new DAC. But here is a nuanced truth: your room is likely doing more damage to the signal than your electronics. In fact, why your high-end DAC sounds exactly like your laptop’s headphone jack often comes down to the simple fact that the ‘bottleneck’ isn’t the digital-to-analog conversion; it is the physical interaction between speakers and walls. High-end gear cannot fix poor acoustics.
The Phase Mistake That Makes High-End Gear Sound Cheap
One of the most common ‘oops’ factors I have encountered during home theater audits involves simple wiring. You can spend thousands on a premium receiver, but if one speaker wire is reversed, the speakers will be ‘out of phase.’ This means when one speaker pushes air out, the other pulls it in, effectively canceling out your bass. You would be shocked how many enthusiasts live for years with this issue because they assumed their setup was foolproof. It only takes a second to learn how to tell if your speakers are out of phase in 30 seconds, and it is a far more effective upgrade than any $200 cable. As Dr. Floyd Toole, a renowned fellow at the Audio Engineering Society, has demonstrated in his research, the room and speaker interaction accounts for roughly 30% to 50% of our subjective sound quality assessment. No amplifier can overcome physics.
Does Your L-Shaped Room Make Proper Imaging Impossible?
If you are struggling with an asymmetrical layout, you have probably noticed the soundstage feels ‘heavy’ on one side. This is not a hardware failure; it is boundary reinforcement where one speaker is getting more bass boost from a nearby wall than the other. This is precisely why your floorstanding speakers sound unbalanced in an l-shaped room. Before you replace your drivers, try the ‘speaker crawl’ or check how to find the sweet spot for your speakers in a rectangular room to see if a six-inch shift fixes the phantom center. Have you ever fallen into the trap of buying more gear to fix a problem that was actually just a bad cable or a weird room corner? Let me know in the comments.
Once you have nailed the placement and the handshake issues, the next battle is against time, dust, and electrical oxidation. I keep a can of DeoxIT D5 in my desk drawer like it is a holy relic. If you have ever felt that heart-sinking sensation of hearing a crackling sound when you turn a knob, you do not need a new receiver. You just need to learn how to fix a scratchy volume dial with electrical contact cleaner. It is a ten-minute job that has saved me thousands in unnecessary upgrades over the years. We often mistake a bit of dirt for a dying component, but most high-end gear is built to last decades if you treat the contact points with respect.
How do I keep my home theater sounding like new for years?
Maintenance is about more than just wiping the gloss finish. You have to monitor the physical health of your drivers. Rubber and foam surrounds are usually the first things to fail, especially in humid climates or rooms with direct sunlight. I have seen vintage bookshelf speakers literally crumble into dust because the owner didn’t know how to clean sticky speaker surrounds without damaging the rubber. Furthermore, if you notice your system lacks the ‘punch’ it used to have, it might not be your ears getting older; it is likely how to tell if your speakers capacitor is starting to fail. Capacitors are essentially the batteries of your speaker’s crossover, and they do have an expiration date. According to technical documentation from Hypex Electronics, maintaining stable operating temperatures is the single most important factor for the longevity of modern Class D amplifiers. If your cabinet is poorly ventilated, you are essentially cooking your investment.
The Pro Tool That Beats Any New Speaker Purchase
If you really want to scale your system to the next level, stop guessing with your ears and start using data. I personally use a UMIK-1 calibrated microphone paired with Room EQ Wizard (REW) software. It is a steep learning curve, but it is the industry standard for a reason. If that feels too daunting, even learning how to use your phone to measure your rooms-frequency-response can reveal exactly why your bass feels thin or why certain notes sound boomy. I once used this data to realize that my Bluetooth range was being killed by a nearby router, leading me to how to add an external antenna to a bluetooth receiver for better range for a flawless outdoor signal.
The Hardest Lesson I Learned About Audio Marketing
The most expensive gear isn’t always the best gear for your specific room. I spent years chasing specs only to find that the 5-fix for humming speakers and ground loops did more for my clarity than a thousand-dollar power conditioner ever could. I also learned that physical mass is your best friend when it comes to clarity; the reason your speaker stands need to be filled with sand is because it stops micro-vibrations from coloring the audio signal. Lastly, never panic when things don’t turn on; knowing how to fix a receiver that wont turn on after a power surge can save you from an unnecessary trip to the electronics waste bin.
My Essential Toolkit for Better Sound
I never consider a setup ‘done’ until I have used these three things: a simple laser level for speaker toe-in, the Room EQ Wizard (REW) software to see the truth about my room’s bass, and a dedicated can of electrical contact cleaner. If you want to go deeper into the why behind the how, I highly recommend ‘Sound Reproduction’ by Floyd Toole. It changed how I view speaker placement forever. For those of you working with limited space, these tools will help you find the ‘sweet spot’ that no marketing pamphlet can promise.
Reclaim Your Movie Night
In the end, you shouldn’t be the one working to make the movie happen. Your technology should work for you. By taking the time to stop your soundbar from blocking your TV remote sensor and addressing the small physical bottlenecks in your room, you’re not just fixing a technical error—you’re ensuring that your home theater remains the sanctuary it was meant to be. Get those small details right, and the magic of the cinema will follow. Have you ever found a DIY fix for your home theater that worked better than the expensive ‘pro’ version? Let me know in the comments below!