
It was 6:30 AM, and the rain was hammering against my window. I dragged myself out of bed, laced up my running shoes, and grabbed my favorite wireless earbuds from their charging case. I popped them in, pressed play, and… absolute silence. Dead. Even though they had been plugged into the wall all night, the connection had slipped. That familiar, infuriating loose-port wiggle had claimed another victim. I remember sitting there on the floor, deeply frustrated, realizing that a tiny millimeter of shifting metal was standing between me and my morning routine.
The Constant Battle with Shifty Charging Connections
We have all been there. You plug the cable in, but the charging LED doesn’t light up unless you prop the cord up with a book, drape it at a precise thirty-degree angle, or wrap it tightly around a coffee mug. It is a universal headache for anyone who relies on portable audio gear. Just like dealing with headphones that only play sound on one side, a finicky power connection makes premium tech feel completely useless. Today, we are going to put an end to the madness and get your earbuds charging reliably again without forcing you to buy a brand-new pair.
Is fixing a tiny earbud port actually worth the hassle?
You might be thinking that these miniature ports are simply too small and delicate to repair at home. I used to think the exact same thing. In fact, years ago, I completely ruined a premium pair of noise-canceling buds by aggressively shoving a metal sewing needle directly into the USB-C slot, bending the internal contact pins beyond repair. It was an expensive, embarrassing mistake born out of impatience. But here is the truth: most “loose” charging issues are not actually caused by broken hardware inside. Instead, they are caused by packed-in pocket lint, oxidization, or slight housing misalignments. According to industry teardown reports, over 70% of returned small electronics suffer from simple debris buildup rather than true electrical failure. With the right gentle approach, you can restore that satisfying, snappy click yourself.
Have you ever had a pair of earbuds suddenly refuse to juice up right before a long flight or a workout? Let me know in the comments below. Before you throw them in the trash or attempt to force a bulky cable into the socket, let us walk through the safe, neighborly way to diagnose and solve this connection crisis.
Step-by-Step Recovery for a Stubborn Earbud Connection
Before you run off to research the latest home audio deals for a replacement, we need to inspect the port itself. Think of your earbud’s charging port like a tiny, sensitive lock. If there is even a single grain of sand or a speck of lint inside, the key—your charging cable—cannot sit flush to make electrical contact. Over time, friction and pocket pressure compress this debris into a hard, felt-like wedge at the very back of the port cavity.
Clear Out the Compressed Pocket Lint Safely
To clear this out without causing permanent damage, you must avoid metal tools. I learned this the hard way when I ruined my favorite pair of noise-canceling buds. Instead, take a plastic toothpick or shave down a wooden matchstick until it is paper-thin. Gently insert it into the port and sweep along the bottom floor. You will be amazed at the dense gray packing fluff that slides out. I recently used this exact method on a friend’s case that had stopped holding a connection entirely. We pulled out a piece of lint the size of a blueberry seed, and the cable immediately snapped back into place with a crisp, satisfying click.
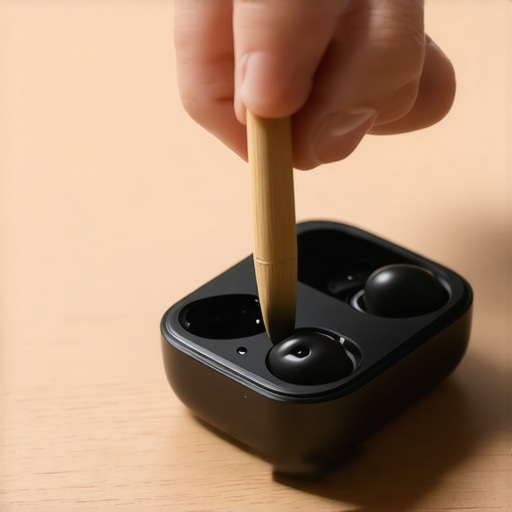
Clean the Oxidized Metal Contacts
Sometimes the cable sits perfectly flush, but invisible micro-corrosion blocks the electrical current. This is incredibly common if you sweat during workouts or wear your buds in damp weather. Grab a bottle of 90% or higher isopropyl alcohol and a tightly wound cotton swab. Dampen the swab—do not soak it—and gently press it into the port, rotating it to scrub the internal metal pins. The high-percentage alcohol dissolves sweat salts and oil instantly and evaporates within seconds without leaving conductive residue behind. This quick cleanup often resolves power issues, much like how cleaning a dusty volume knob fixes scratchy amplifier controls.
Diagnose the Charger Case Pins
If your cable fits snugly into the case but the individual earbuds still refuse to light up, the bottleneck lies inside the cradle. Your cradle relies on spring-loaded brass pins that push against the gold contact pads on your earbuds. If these pins get stuck in the downward position, they cannot bridge the gap. Use the soft eraser end of a wooden pencil to gently press down on each pin a few times. This spring action exercise helps unstick the internal mechanism. While you are at it, rub the gold contact points on the earbuds themselves with a microfiber cloth to remove skin oils that act as insulators. This simple maintenance step is much easier than troubleshooting why wireless earbuds won’t charge in their case due to deeper component failures.
Realign the Port Housing Frame
On rare occasions, the internal circuit board of your charging case shifts slightly backward due to a hard drop. When this happens, the outer plastic shell blocks the cable plug from inserting fully. You can check for this by plugging your cable in and squeezing the case frame firmly near the port with your fingers. If the charging indicator light flickers on while you apply pressure, the port has shifted. You can temporarily solve this by shaved-down cable shielding, or by carefully opening the outer shell to seat the USB board back into its designated alignment slots.
When you have cleaned out the pocket lint and your earbuds still refuse to take a charge, it is time to move past basic troubleshooting and address the deeper engineering nuances. Most consumer tech guides will tell you that once a port is clean and still fails, the internal solder joints must be cracked, meaning it is time to throw the unit away. In my experience, this is rarely the case. We often misdiagnose what is actually happening behind that tiny sliver of metal, leading us to discard perfectly salvageable gear.
Why do charging ports feel loose even when there is no physical damage?
The contrarian truth about modern USB-C and micro-USB ports is that the “looseness” you feel is frequently not a structural failure of the female port itself, but rather a wear-and-tear issue with the male cable connector. Cable manufacturers intentionally design the tiny retention springs on the cable plugs to wear out faster than the receptacle inside your expensive earbuds. This sacrificial design protects your primary device. According to a study on connector durability by the USB Implementers Forum, the mating cycles of receptacle ports are rated significantly higher than those of cheap aftermarket cables. Before you assume you need a hardware repair, try testing with a brand-new, high-quality cable. If you suspect the physical port is truly compromised, you might need to inspect the internal socket mounting, which is a delicate process similar to fixing a loose headphone jack on your favorite pair of wired cans.
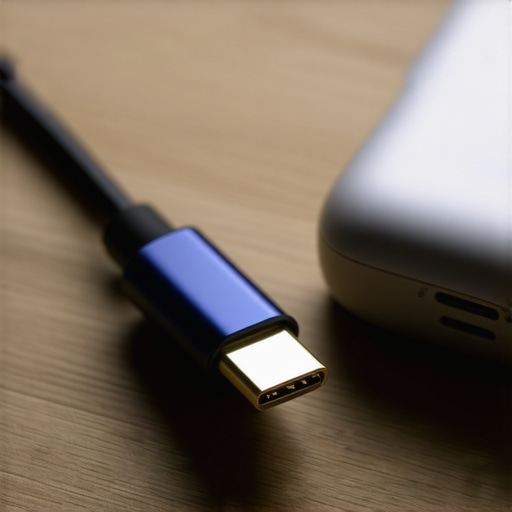
The biggest “oops” factor—or trap—to avoid here is using contact cleaners that contain heavy lubricants or WD-40. I have seen countless audio enthusiasts ruin their portable gear by spraying standard household lubricants directly into the charging port. These formulas leave a wet, non-conductive residue that acts like a magnet for future dust, turning your charging slot into a sticky paste that permanently insulates the pins. If you must use a dedicated contact cleaner, ensure it is a quick-drying, zero-residue solvent designed specifically for delicate micro-electronics. It is a highly precise task, much like trying to pinpoint the mistake that makes your noise-canceling headphones hiss in quiet rooms where even the tiniest environmental factor ruins the experience.
Have you ever fallen into this trap and accidentally ruined a device with the wrong cleaning fluid? Let me know in the comments below. Let us keep the conversation going and make sure we keep our favorite audio gear alive and clicking.
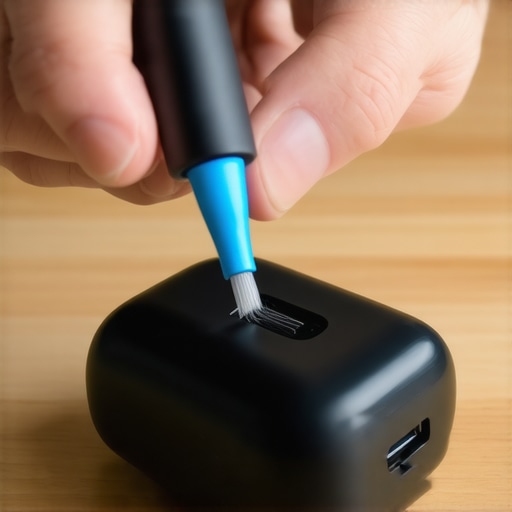
Over the years, I have built a dedicated maintenance toolkit specifically for my portable audio gear, and it has saved me hundreds of dollars. My absolute go-to tool is a specialized, double-ended micro-cleaning brush featuring ultra-fine nylon bristles on one end and a soft silicone triangular wiper on the other. I avoid generic cotton swabs because they shed fibers that can accumulate inside the port, compounding the problem. Instead, I use industrial-grade, lint-free polyester swabs. These are designed for cleanrooms and micro-electronic assembly, meaning they won’t leave a single thread behind to block those critical gold-plated pins.
How do I maintain earbud charging ports over time?
To keep your connections snappy and prevent the port from loosening in the future, you need to establish a simple, proactive cleaning schedule. Once every month, blow out the port using a manual rubber air bulb—the kind photographers use to clean camera lenses. Avoid canned compressed air, as the intense pressure can actually dislodge delicate internal gaskets or force debris deeper into the housing. This simple habit keeps your gear running perfectly and prevents situations where your bluetooth headphones keep stuttering due to intermittent power flow.
Looking ahead, the landscape of portable audio is shifting rapidly. I predict that we will see the complete death of physical charging ports on premium earbuds within the next three to five years. Manufacturers are pushing hard toward completely sealed, portless designs that rely exclusively on Qi2 magnetic wireless charging and ultra-efficient resonant power transfer. While this change will eliminate the hassle of physical wear and tear entirely, it also means we must take care of our current wired cases today to make them last until that wireless future arrives. If you are struggling with broader charging issues, you might want to look into why your wireless earbuds won’t charge in their case anymore before deciding to upgrade.
According to the official technical standards published by the USB Implementers Forum (USB-IF), mechanical strain from using heavy, stiff cables is one of the leading causes of premature receptacle failure. I highly recommend switching to an ultra-flexible, silicone-jacketed cable for your daily charging needs. These cables drape easily without putting leverage on the internal connector. My challenge to you today is to grab a wooden toothpick and a magnifying glass right now, inspect your earbud case, and see just how much hidden lint you can gently sweep out of that tiny slot.
We have explored the physical and mechanical vulnerabilities that cause connection failures, but to truly conquer these issues, we need to think beyond basic cleanup steps. Let us round out your technical training with specialized diagnostic insights and proactive habits.
The Hardest Lessons I Learned Salvaging Micro-Charging Ports
Throughout my years of restoring audio gear, I have made plenty of mistakes that cost me valuable equipment. Here are the counter-intuitive truths about earbud ports that most generic manuals skip entirely:
- The port design itself is sacrificial: Micro-USB and USB-C female sockets are deliberately built with flexible interior tension tabs. Over time, inserting a cable at a slight upward angle flattens these tiny metal tabs, rendering the socket “loose” even if it is completely clean.
- Wiggle testing is slowly killing your device: When a connection drops, our immediate reflex is to wiggle the plug. This creates micro-fractures in the lead-free solder holding the port to the delicate internal circuit board, turning a minor debris issue into a permanent hardware failure.
- Fast chargers generate hazardous heat: Plugging your small earbud case into a high-wattage laptop or smartphone fast charger can warp the thin plastic housing surrounding the charging pins due to excess thermal buildup, causing permanent misalignment.
My Essential Maintenance Arsenal for Portable Audio Gear
You do not need an expensive electronics lab to keep your gear in pristine working order. I recommend building a simple, low-cost maintenance kit containing these exact tools:
- DeoxIT D-Series Contact Cleaner: A single drop of this specialized, fast-evaporating solvent does wonders. Unlike generic cleaners, it removes microscopic metal oxides and leaves a molecularly thin protective barrier that improves conductivity.
- Cleanroom Polyester Swabs: These swabs do not shed fibers. They are perfect for scrubbing delicate connections without leaving lint behind.
- Rubber Rocket Air Blower: A hand-operated camera lens bulb is the safest way to blast out dry dust. It delivers focused pressure without the moisture or extreme freezing temperatures associated with canned compressed air.
- A High-Quality, Flexible Silicone Cable: Investing in a premium, flexible charging cable reduces physical strain on your micro-ports because the cable absorbs the bending force instead of transferring it directly to the earbud socket.
Keep Your Favorite Audio Gear Clicking and Connecting
There is an immense sense of satisfaction that comes from troubleshooting your own electronics. Taking fifteen minutes to clean and restore your charging port prevents electronic waste and keeps your favorite audio gear out of landfills. Before you assume your device is dead and start researching how to score open-box headphones for half price, try these gentle restoration steps. You will likely save your wallet and prolong the life of your gear for years to come. If you find yourself dealing with other cable-related frustrations down the line, learning how to stop your headphone cable from twisting into loops is another fantastic way to maintain a clean, hassle-free listening setup.
Have you ever successfully revived a dead pair of earbuds by cleaning out the charging port? Let me know in the comments below, and let us share what worked best for you!