
I’ve been there—it’s 11 PM, the house is finally quiet, and you’re ready to dive into that new blockbuster without waking the kids or the neighbors. You grab your favorite pair of cans, put them in pairing mode, and… nothing. The TV just sits there, searching, while your headphones blink away like a lonely lighthouse in a digital fog. I spent forty-five minutes last Thursday wrestling with my own set, feeling like I was trying to negotiate a peace treaty between two countries that don’t speak the same language. It’s maddening, isn’t it?
Your TV and Headphones Are Talking Different Languages
[image_placeholder] Most of us assume that Bluetooth is a universal ‘handshake,’ but the reality is more like a crowded cocktail party where everyone is yelling over each other. When I first started setting up my home theater, I made the rookie mistake of keeping every other Bluetooth-enabled device in the house active. My headphones were so busy trying to talk to my laptop and my phone that they completely ignored the TV sitting right in front of them. It’s a common oversight that can make even the most expensive gear feel like a paperweight. If you’ve ever wondered why your noise-canceling headphones struggle with high-pitched voices or why they won’t connect at all, you aren’t alone. Today, we are going to cut through the static and get your audio back on track.
Is Wireless Audio Even Reliable Enough for Movie Night?
There’s a lingering fear that Bluetooth is just too finicky for a serious setup. You might worry about lag or the dreaded ‘out of sync’ dialogue. Trust me, once you get the pairing right, it’s a game-changer. I used to think a wired connection was the only way to go until I realized how much I enjoyed being able to grab a snack from the kitchen without missing a word of the dialogue. However, you have to be careful about placement; for instance, you need to know how to stop your soundbar from blocking your TV remote sensor while you’re fiddling with settings. According to the Bluetooth Special Interest Group (SIG), the 2.4 GHz frequency band used by these devices is incredibly crowded, and interference from Wi-Fi routers or even household appliances can disrupt the initial pairing process between low-energy devices and smart hubs. Have you ever felt like throwing your remote at the screen because your headphones just won’t ‘see’ the TV?
The Simple Setting That Usually Breaks the Connection
One thing I learned the hard way is that ‘Pairing Mode’ isn’t just turning the headphones on. It sounds silly, but I once spent twenty minutes cursing a pair of Sony’s before realizing they were just ‘on’ and not actually in ‘discoverable’ mode. We often get caught up in complex fixes when the solution is a simple button hold. We’ll also look at why your Bluetooth headphones stutter when things get crowded. Let’s dive into the actual steps to make these two devices play nice together so you can finally enjoy your show in peace.
Clear the Wireless Path Before You Start
Before you dive into the menus, you need to eliminate signal competition. I remember a specific Friday night where I almost returned a perfectly good pair of headphones because they wouldn’t stay connected for more than thirty seconds. It turned out my iPad, tucked under a couch cushion, was aggressively trying to reconnect every time the TV signal flickered. This is exactly why you need to disable Bluetooth on every device within thirty feet—phones, laptops, and tablets. It is the digital equivalent of clearing the stage so your TV and headphones can have a private conversation. If you’ve ever had to deal with the 5-minute fix for crackling bluetooth signals on your laptop, you know that environmental interference is usually the silent killer of a good connection. 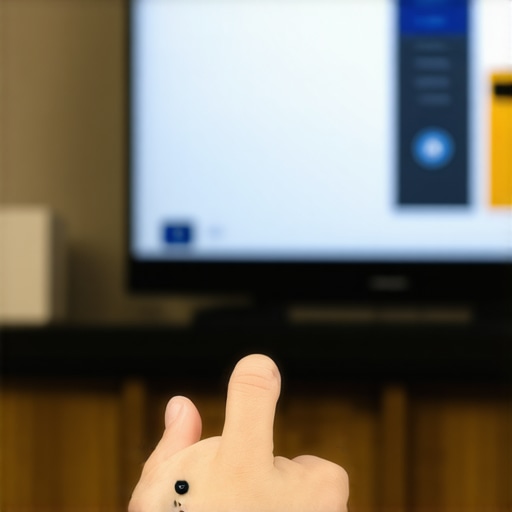
Force the Handshake with Proper Pairing Sequences
Most people make the mistake of just powering their headphones on and expecting them to appear in the TV’s list. You have to force them into Discovery Mode. For most Sony or Bose models, this involves holding the power button for a full seven to ten seconds until the LED flashes red and blue or a voice says, Ready to pair. If you just tap the button, they are in on mode, searching for the last thing they were connected to. On the TV side, navigate to the Sound Settings and look specifically for Bluetooth Speaker List. If your headphones appear but won’t connect, forget the device on the TV and start the process over. This refresh is often the same logic used when you need to fix a wireless subwoofer that keeps losing its pairing.
Fix the Audio Format to Prevent Silence
If you successfully pair the devices but hear nothing, the culprit is likely your TV’s output format. Most headphones cannot decode a raw Dolby Digital or DTS signal sent over Bluetooth; they need a standard PCM (Pulse Code Modulation) stream. Go into your TV’s Expert Settings under the Audio menu and change the Digital Output Audio Format to PCM. I have seen this solve silence issues in nine out of ten cases. This is a common hurdle when trying to stop your TV from cutting off dialogue in loud action scenes because certain formats just do not play nice with wireless bandwidth.
Check for Headset Profile Glitches
Sometimes, your TV might recognize the headphones as a communication device rather than an audio device. This is common if your headphones have a built-in mic. In these cases, the TV might switch to a lower-quality mono stream. If the sound suddenly becomes tinny, it is because the TV is trying to open a microphone channel. This is the same reason why your bluetooth audio quality drops when you open a mic app on your phone. You may need to go into the TV’s device manager and ensure the headphones are set to Stereo Audio rather than Hands-Free. Finally, if you notice a delay where the lips move before the sound hits your ears, check for an A/V Sync or Audio Delay setting in your TV menu. Adjusting this by a few milliseconds can compensate for the Bluetooth processing time, preventing that annoying feeling that your soundbar dialogue is lagging behind the TV picture, even though you are using headphones.Once you’ve managed to get those headphones paired, you might notice that the sound isn’t quite as ‘epic’ as you expected. This is where most people fall into the marketing trap of ‘more is better.’ We are told that higher price tags always equal better fidelity, but that’s a massive oversimplification.
Why Gold Connectors Won’t Save Your Sound Quality
Most of us have been conditioned to believe that shiny, yellow-tinted plugs are the gold standard—pun intended. I used to be that guy, swapping out every cable for the most expensive version I could find. However, you really need to ask yourself is gold-plated hardware really worth the extra cash? In most home environments, unless you are dealing with extreme humidity or corrosive salt air, the actual audio benefit is negligible. The real performance bottleneck is usually the impedance match between your TV or amp and your headphones. The Audio Engineering Society (AES) has frequently pointed out that frequency response deviations are more often caused by poor electrical load matching than by the materials in the signal path.
Why Does Your High-End Gear Sound Flat Compared to the Store Demo?
When you’re at the store, they are using dedicated high-current sources. When you get home and plug into a TV or a phone, the internal amp is often struggling. It’s a common reason why your expensive headphones sound thin on a basic smartphone or even a budget smart TV. They aren’t getting the juice they need to move those drivers properly. 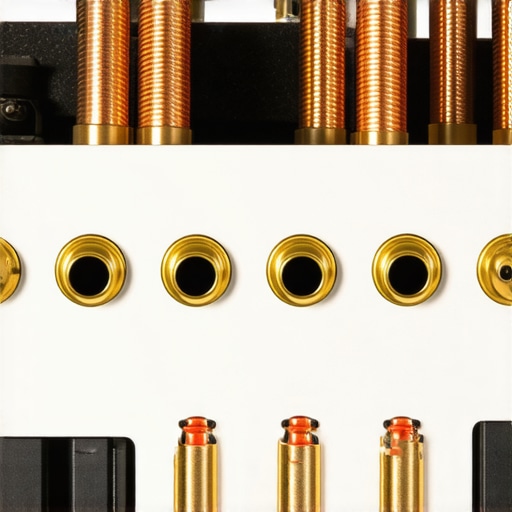
The Dangerous Power Mistake You Might Be Making
Here is a nuance that even some seasoned enthusiasts miss: the power supply chain. If you’ve added a dedicated amplifier to drive a high-end sound system or a pair of power-hungry planar magnetic headphones, you need to be careful with how you plug it in. You should definitely avoid using an extension cord for your power amp whenever possible. Cheap extension cords can’t handle the instantaneous current draws that a high-fidelity amp needs during a loud explosion or a heavy bass drop. This ‘choking’ of the power results in audible distortion that most people blame on their speakers rather than their wall outlet.
Check Your Headroom Before You Upgrade
Before you go out and buy a new soundbar or set of speakers, you need to understand the concept of headroom. It’s not about how loud it *can* go, but how cleanly it can handle those sudden peaks in sound. Learning how to tell if your amplifier has enough headroom for your speakers is the difference between a system that sounds stressed and one that sounds effortless. Have you ever fallen into the trap of buying ‘premium’ accessories only to realize they didn’t change a thing? Let me know in the comments below, because we’ve all been there.Once you have sorted out the technical glitches, the real work begins: keeping that performance at its peak. I have seen too many people spend thousands on a setup only to let it degrade into a crackling mess because they ignored basic maintenance. It is like buying a Ferrari and never changing the oil.
Stop Oxidation Before It Kills Your Signal
One of my weekly rituals is checking the connection points. Copper is a fantastic conductor, but it is prone to environmental wear. If you notice a dullness in your high frequencies, you really should check how to clean green oxidization off your copper speaker terminals. I personally use a drop of DeoxIT Gold on a lint-free cloth once every six months. It creates a molecular bond that prevents the air from reaching the metal. This is especially vital for your headphones, too. I’ve seen people lose their minds over why their ear cups are falling apart, but you can actually learn why your headphone pads are flaking and how to prevent it by simply wiping away skin oils after every long session. Oils are acidic, and they will eat through synthetic leather faster than you think.
The Secret 9V Battery Trick for Perfect Phase
If you are scaling your system by adding more speakers, you need to ensure they are all moving in the same direction. I always keep a 9V battery in my toolkit. It is the most reliable way to perform a ‘pop test’ to verify polarity. Learning how to use a 9v battery to check your speaker polarity can save you hours of head-scratching when your bass feels ‘hollow’ or out of phase. 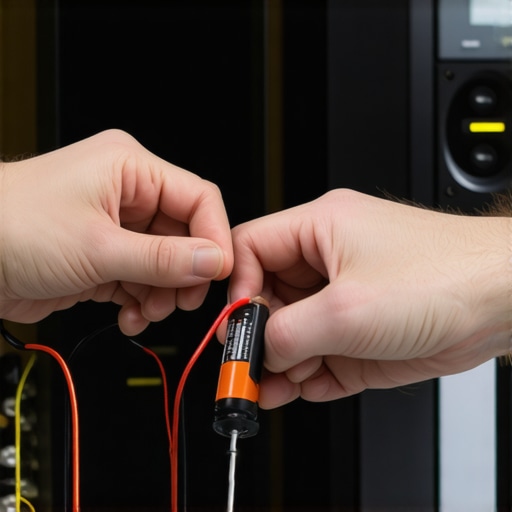 This level of attention to detail is what separates a hobbyist from someone with a truly professional-sounding room. It is also the first thing I do when I’m out hunting for deals at garage sales. You should always know the best way to test a used receiver before you buy it, because a quick visual inspection won’t tell you if the internal capacitors are about to pop.
How do I keep my speakers from degrading over time?
Longevity comes down to environment and gentle handling. The Audio Engineering Society (AES) Technical Committee on Audio Reliability and Maintenance notes that humidity fluctuations are the primary cause of driver surround failure. If your speakers have rubber surrounds that feel tacky, you need to know how to clean sticky speaker surrounds without damaging the rubber. Similarly, if a curious toddler has pushed in a cone, don’t panic; there is a right way how to safely remove a pushed in speaker dust cap without using a vacuum and tearing the material.
Will Your Bluetooth Gear Be Obsolete by 2026?
Looking ahead, the industry is moving toward ‘Auracast’ and LE Audio. This technology will allow a single TV to broadcast to an unlimited number of headphones simultaneously without the lag we currently struggle with. While your current gear is great, the future is about shared, high-quality wireless streams. For now, focus on the fundamentals. I challenge you to go check your speaker wire connections right now—unscrew them, wipe them down, and re-tighten. You might be surprised at how much ‘air’ returns to your favorite albums just by ensuring a clean contact.
The Most Expensive Lesson My Home Theater Taught Me
I used to believe that if I just spent enough money on flagship gear, everything would work together perfectly the first time. I learned the hard way that audio is a chain, and your system is only as strong as its weakest link. For instance, if you have ever noticed that your headphones sound slightly different in each ear, it is rarely a reason to panic and buy new ones; it is often a matter of adjusting the fit or checking your device’s accessibility balance settings. I have also found that you do not always need the latest tech to get incredible results; the trick to making vintage speakers sound modern again often involves nothing more than a fresh digital-to-analog converter or a deep clean of the internal components. These small, low-cost realizations have saved me thousands of dollars over the years.
The Three Tools I Use to Save Every Setup
[image_placeholder_final]
Beyond the 9V battery trick for checking polarity, there are a few items I always keep in my media console. First, a dedicated budget amp can be a total lifesaver for TVs with weak internal audio boards. Finding the 50 dollar amp that drives high impedance cans without a struggle was a turning point for my late-night movie sessions. Second, do not underestimate the power of physical placement. If you are struggling with a narrow room, learning how to build your own speaker stands for under twenty dollars can lift your audio from muffled and floor-bound to crisp and immersive. Finally, always keep a can of compressed air and some high-purity isopropyl alcohol nearby; 90% of the ‘hardware failures’ I encounter are actually just dust blocking a contact point.
Stop Tinkering and Start Listening
At the end of the day, your gear should serve the art, not the other way around. It is incredibly easy to get caught up in the minute details of decibels and frequency responses, but the ultimate goal is to get lost in a great film or a favorite album. Now that you have mastered the nuances of your Bluetooth headphones and cleared out the signal interference, it is time to put the remote down. Your setup is now optimized, maintained, and ready for the long haul. Have you ever spent an entire evening troubleshooting your audio only to realize the fix was a simple menu setting? Let me know your biggest ‘Aha!’ moment in the comments below.