
The sky was a bruised purple, and the air smelled of ozone—classic signs of a summer storm rolling through. I was right in the middle of a Pink Floyd session when the crack of thunder hit. The lights flickered, the screen went black, and my favorite vintage Marantz went silent. When the power finally stabilized, I hit the power switch, expecting that familiar, satisfying mechanical click. Nothing. The display stayed dark, and my heart sank into my stomach. I’d spent months hunting for that specific unit, and in one millisecond, it felt like I was looking at a five-hundred-dollar doorstop. [image_placeholder_1]
That Sinking Feeling When the Power Comes Back but the Music Doesn’t
If you are standing in front of your rack right now, staring at a dead piece of gear, I know exactly what you’re feeling. It’s a mix of frustration and that nagging worry about how much a repair technician is going to charge you just to look at it. Power surges are the silent killers of the audiophile world. They don’t always come with a smell of smoke; sometimes, they just leave your system in a state of digital catatonia. My goal today is to walk you through the exact steps I took to revive my setup, moving from the simplest fixes to the stuff that requires a screwdriver. We’re going to find out if your unit is truly fried or just playing it safe.
Is My Expensive Receiver Actually Dead Forever?
Most of us immediately assume the worst—that the motherboard is toasted or the transformer has melted. I’ve been there. In my early days, I actually hauled a perfectly good Denon to the curb because I didn’t know about internal protection circuits. It’s a mistake that still haunts my wallet. The truth is, modern receivers are built with “survival instincts.” They are designed to shut down completely to protect the most sensitive components from a voltage spike. Before you start searching for the best way to test a used receiver before you buy it as a replacement, you need to realize that silence doesn’t always mean death.
Why a Simple Reset Might Save Your Saturday Night
When a surge hits, the microprocessor inside your receiver can essentially “glitch out” as a defensive measure. It enters a protection mode that won’t let the unit power on until the logic circuit is cleared. This is one reason why you should avoid using an extension cord for your power amp, as inconsistent voltage only makes these logic errors more frequent. According to the National Institute of Standards and Technology (NIST), even high-quality surge protectors can have a “let-through voltage” that is high enough to confuse electronic logic gates without actually destroying them. It’s not just about the big lightning strikes, either. Smaller, invisible surges happen all the time. If you’ve noticed the real reason your amp is getting hot to the touch lately, it might have been struggling with fluctuating power long before the final shutdown. Have you ever stood over your setup, frantically pressing buttons while praying for a single LED to light up? Tell me I’m not the only one who’s done the “power button dance” in the dark. Before we give up, we need to try a hard power cycle and look for those hidden reset sequences that manufacturers rarely print in the manual. Understanding the difference between peak and rms power explained simply helps you understand the load your unit handles, but right now, we just need to get the electricity flowing again.The first thing you need to do is a ‘Hard Reset,’ which is the audio version of a cold shower for a panicked brain. Reach behind the unit and yank the power cord directly out of the wall. While it is unplugged, press and hold the power button for at least thirty seconds. This isn’t just audio voodoo; you are physically draining the stored electricity from the capacitors. These components act like tiny buckets of energy, and they can hold enough of a charge to keep a frozen microprocessor locked in an error state for hours. I remember doing this to a high-end Marantz that stayed dark after a brownout. I held that button for a full minute, plugged it back in, and the display lit up like a Christmas tree. It is a simple trick, but it works more often than you would think.
Clear the Wires to Reset the Protection Mode
If the hard reset did not do the trick, we need to look at your speaker connections. Many modern receivers will refuse to power up if they detect a short circuit on the speaker outputs. A single stray strand of copper wire touching the back of the chassis can trigger the protection circuit faster than you can blink. It is the same logic used when enthusiasts try to figure out how to fix a car amplifier that keeps shutting off in summer; the system is trying to save itself from a thermal or electrical meltdown. Disconnect every single speaker wire from the back of the receiver and try to power it on again. While you have the terminals exposed, this is the perfect time to learn how to use a 9v battery to check your speaker polarity and ensure your wiring hasn’t become brittle or frayed over time.
Identify the Culprit One Component at a Time
Once you have stripped the receiver down to just the power cord, try to turn it on. If it starts up, you know the problem is not the receiver—it is a short in your speakers or cables. You might even have a damaged driver that is pulling too much current, so knowing how to spot a blown tweeter before it ruins your crossover can save the rest of your system from secondary damage. If the unit still will not budge even with nothing attached, it is time to look inside for mechanical failures.
Search for the Sacrificial Fuse
Most audiophiles are terrified of taking the lid off their gear, but this is where the real hero usually lives: the fuse. A fuse is a deliberate weak point designed to break so your expensive transformer does not have to.  Opening the case is similar to the process of learning how to remove the back of a sealed speaker cabinet safely; you just need a steady hand and the right screwdriver. Look for small glass tubes near where the power cord enters the internal board. If the wire inside that glass tube is broken or the glass looks smoky, you have found your five-dollar fix. Replacing this can immediately restore the power flow, ensuring you still have enough juice to understand how to tell if your amplifier has enough headroom for your speakers to perform at their peak potential.Once you have checked the fuse, do not immediately run out and buy the most expensive audiophile-grade cables you can find to prevent future issues. There is a massive myth that gold plating makes everything sound better. In reality, while gold prevents corrosion, it is actually less conductive than copper or silver. According to the Engineering and Technology Board (ETB), the electrical conductivity of gold is only about seventy percent of that of copper. If you are obsessing over whether is gold-plated hardware really worth the extra cash, the answer is usually no, unless you live in a salt-air coastal environment where oxidation is a constant battle. Instead of gold, you should focus on the real performance benefit of using balanced xlr cables to reject noise, especially in long cable runs.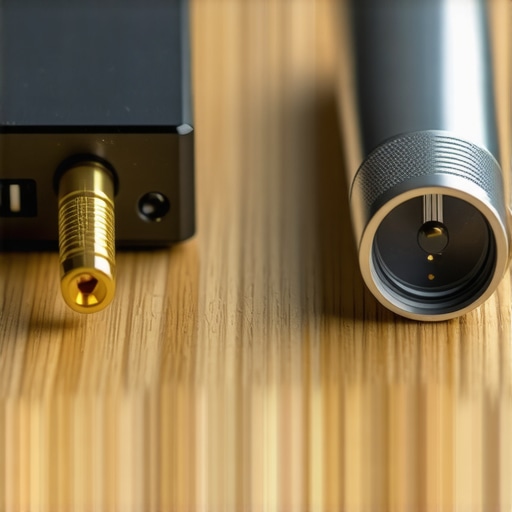
How Much Headroom Do Your Speakers Truly Demand?
Many advanced listeners buy high-end bookshelf speakers and wonder why they sound thin even at high volumes. They assume the receiver is damaged or low-quality. The truth is often simpler: why your bookshelf speakers need more power than you think comes down to sensitivity. Low-sensitivity speakers eat current for breakfast, and a budget receiver might be clipping its output just to get a decent volume, leading to that hollow sound that mimics a blown component. It is a classic trap to pair power-hungry gear with an underpowered source, which can eventually trigger the very protection modes we discussed earlier.
The Smartphone Trap for High-End Headphones
Another nuance people miss involves the source. If you have spent a fortune on high-impedance headphones, do not be surprised if they sound lifeless when plugged into a standard device. We see this all the time: why your expensive headphones sound thin on a basic smartphone is not because the headphones are broken; it is because the internal DAC and amp simply do not have the voltage to drive the drivers properly. It is the audio equivalent of trying to pull a trailer with a Vespa. Before you declare your equipment dead after a power surge, ensure the source is actually capable of pushing it. Have you ever fallen into this trap and blamed the gear instead of the setup? Let me know in the comments.
Maintenance is the least glamorous part of this hobby, yet it is what separates a system that lasts thirty years from one that ends up on a ‘for parts’ eBay listing. I have seen magnificent vintage setups ruined by something as simple as neglected atmospheric corrosion. Taking the time to learn how to clean green oxidization off your copper speaker terminals is a simple weekend project that restores the conductivity your system needs to breathe. I personally keep a can of DeoxIT D5 in my kit at all times; it doesn’t just scrub away the grime, it leaves a microscopic protective layer that prevents the air from eating your copper.
Stop Corrosion Before It Kills Your Sound
If you are primarily a headphone user, the enemy is even more stealthy. Pocket lint and skin oils migrate into your gear every single day. Knowing how to clean dust out of your headphone jack without damaging pins is an essential skill for when your device starts intermittently dropping a channel. It is not just about the connection quality; a dirty jack can cause physical resistance that eventually bends the internal contact springs. According to the IEC 60268-1 standard for sound system equipment, maintaining electrical integrity across every junction is the only way to guarantee that the signal remains true to the original recording. If the physical connection is weak, no amount of expensive software can fix the resulting distortion.
The One Tool You Shouldn’t Live Without
If you want to move beyond the guessing game, you need a digital multimeter. I use mine for everything from checking if a used cable is actually broken to verifying that a speaker’s voice coil hasn’t partially shorted. It is the only way to confirm that your equipment is performing within its factory specifications. While you are refining the technical side, don’t forget the aesthetics and safety of your space. Finding the best way to hide bulky subwoofer cables along a baseboard isn’t just about making the room look nice; it prevents trip hazards that could yank your expensive gear right off the shelf. 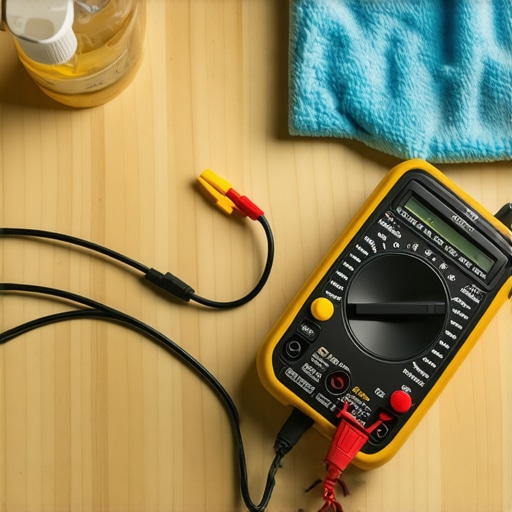
How do I maintain my audio investment over the long haul?
Consistency is the secret sauce. Every six months, I perform a ‘system audit’ where I unplug every connector and re-seat it. This physical friction helps keep the contact points fresh. For my portable gear, I follow the best way to store your iems to prevent driver damage, which involves using a hard-shell case with a small silica gel packet to combat moisture. If you’ve upgraded your home setup, always ensure you are getting the real performance benefit of using balanced xlr cables, especially for long runs, as they are far more resilient to the electromagnetic interference that builds up in a modern, Wi-Fi-heavy home. Looking forward, I predict we will see more ‘self-diagnosing’ amplifiers that use internal sensors to alert you when a capacitor is nearing its end of life, but until then, the manual check is your best defense. I strongly recommend you grab a flashlight tonight and check your speaker terminals for any signs of dullness or green film—cleaning it now will save your tweeter later.
Hard Lessons from the Audio Bench
Over the years, I have learned that a dead receiver is usually just a scared one. The most expensive mistake I ever made was assuming a lack of power meant a catastrophic failure. I have since realized that patience is your most valuable tool. If you rush to replace a unit without checking the internals, you are likely throwing away hundreds of dollars that could have been saved with a simple fuse or a thirty-second button hold. Also, remember that your environment matters; while we talk about electricity, simple things like humidity can sneak up on you. This is why gold plated connectors arent always better—they help with corrosion, but they will not save a poorly maintained circuit from a massive surge.
Another lightbulb moment for me was realizing how much small, incremental noise affects our perception of a broken system. Often, the static or failure we experience after a power event is not the components failing, but rather the result of logic errors. Taking the time to understand the 5 minute fix for crackling bluetooth signals on your laptop or checking for ground loops can often resolve issues that look like hardware failure at first glance. Experience has taught me to always assume the fix is five dollars before I assume it is five hundred.
The Repair Kit Every Enthusiast Needs
I do not go anywhere without my recovery bag. First, a high-quality contact cleaner like DeoxIT is essential. If you have been working on a system for a while, you have likely seen that dull film on older wires; knowing how to restore a sun faded speaker grille to look new again is great for aesthetics, but cleaning the actual contact points is what saves the sound. Second, a basic digital multimeter is the only way to know if your power supply is actually outputting the correct voltage. Finally, I always suggest keeping a set of spare fuses and short, high-quality interconnects for testing purposes. If you are dealing with a larger room and hearing reflections after you get the power back on, you might need to learn how to fix the annoying echo in your minimalist home theater to get that precision back to its original state.
Your Journey Back to High Fidelity
There is nothing quite like the relief of seeing those display lights flicker back to life after you thought all was lost. Audio gear is remarkably resilient if you treat it with a bit of technical respect and a steady hand. Do not let a single storm or a sudden surge discourage you from building the system of your dreams. Every time you troubleshoot and succeed, you are becoming more connected to the music and the machinery that brings it to life. Now that you have the tools to diagnose the problem, have you ever managed to save a piece of gear that everyone else told you was a lost cause? Let me know in the comments below.