
I sat there staring at my desk, my heart sinking as I saw my brand-new Sennheisers lying face-down on the floor, tangled in a charging cable and a half-eaten bag of chips. It was the third time that week they’d slid off the edge. I’d spent months saving up for high-fidelity sound, yet I was treating them like a pair of disposable airplane earbuds. I realized then that a good audio setup isn’t just about the drivers or the amp; it is about how you respect the gear when you aren’t wearing it. You do not need a $100 brushed-aluminum monolith to keep your desk organized. Today, I am going to show you how I built a rock-solid, surprisingly stylish stand for the price of a fast-food lunch. We are solving the clutter problem once and for all without draining your gear budget.
Your Desk Deserves Better Than a Tangled Mess
I used to think that headphone stands were a luxury for people with too much money and not enough cables. I was wrong. Leaving your gear flat on a surface is the fastest way to ruin it. Beyond just the risk of a fall, constant contact with a hard desk can lead to premature wear. I learned the hard way that when you don’t store them properly, you often end up wondering why your headphone pads are flaking much sooner than they should. A simple elevated rest keeps the tension off the adjustment sliders and keeps the dust out of the drivers. Plus, let’s be honest: a pair of headphones on a stand just looks cool. It turns a piece of tech into a centerpiece. My early mistake was trying to use a cheap plastic banana hanger I found at a thrift store. It was top-heavy, wobbled every time I breathed, and eventually tipped over, nearly snapping the gimbal on my favorite pair of open-backs. You need something with weight and a footprint that doesn’t quit. According to a report by Grand View Research, the global headphones market is growing rapidly as people invest more in premium audio, yet many users still neglect basic storage solutions that extend the life of these investments.
Is a Ten-Dollar Stand Actually Secure Enough for My Gear?
It is natural to be skeptical. We are conditioned to believe that ‘cheap’ means ‘flimsy.’ But here is the secret: wood and hardware store pipe don’t know they only cost a few dollars. They are incredibly dense and durable materials. By using a heavy base and a simple geometric design, we can create a stand that is actually more stable than the hollow plastic ones you find on major retail sites for triple the price. Have you ever accidentally knocked your favorite pair of headphones off your desk in a caffeine-induced frenzy? If so, you know that sickening ‘thud’ all too well. We are building this specifically to survive that desk-bump. We want to avoid that annoying situation where your high-end headphones start creaking because the frame has been stressed from too many drops. This project is about peace of mind. It’s about knowing that when you reach for your music, your gear is exactly where you left it, pristine and ready to perform. Before we grab the sandpaper, let’s look at why this specific ‘industrial-minimalist’ approach works so well for any home studio or gaming setup.
Start with a Base That Won’t Budge
The foundation of your stand is where most commercial products fail. They use light plastic that tips the moment you accidentally brush against it. For my build, I went with a 6-inch square of heavy walnut, but a thick piece of scrap oak or even a heavy steel plate works perfectly. I remember my first attempt at this; I used a thin piece of craft plywood because it was easy to cut. The first time I hooked up my setup and realized how to use a DAC to improve your desktop computers audio, the added weight of the premium USB cable was enough to drag the whole stand off my desk. It was a disaster. Now, I advocate for mass. Think of it like a high-end audio component; just as the reason your speaker stands need to be filled with sand is to provide a dead, non-resonant foundation, your headphone stand needs that same ‘planted’ feel. Drill a hole in the center of your base to accommodate a 1/2-inch floor flange. This flange is the anchor for everything that follows. 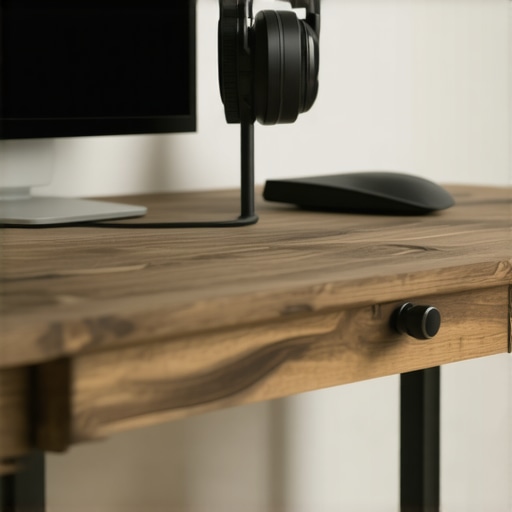
Assemble the Industrial Spine
Once your flange is screwed into the base, you are ready for the vertical support. This is where the hardware store becomes your playground. Grab a 10-inch length of 1/2-inch black iron pipe. It is naturally heavy, looks incredibly professional once cleaned, and costs less than a fancy cup of coffee. Thread the pipe into the flange and tighten it down with a pipe wrench. If you want to get fancy, you can spray paint these parts matte black, but I prefer the raw, oily look of the metal. If you are worried about the metal affecting your gear, remember that keeping your setup organized prevents common issues like wondering why your headphones sound quiet on your laptop but loud on your phone due to loose or damaged jack connections from cables being stepped on. Adding a 90-degree elbow to the top of the pipe gives you the ‘arm’ where the headphones will actually hang. Keep this arm short—about three inches is perfect—to ensure the center of gravity stays over the base.
Give Your Headband a Soft Place to Land
You should never hang your headphones directly on the bare metal of the pipe. Over time, the hard edge will compress the foam of your headband or scratch the leather. To solve this, I used a small strip of adhesive-backed cork, but a leather wrap or even a thick rubber gasket works wonders. This cushioning is vital because a compressed headband changes how the drivers sit on your ears. If the fit is off, you might find yourself searching for why your headphones sound thin when you wear glasses or other seal-related issues. I once skipped this step and ended up with a permanent dent in the padding of my favorite Sennheisers. Now, I treat the cradle with as much respect as the headphones themselves. This small layer of protection ensures that when you finally properly break in new headphones without using white noise, they stay in peak physical condition for years.
Check Every Connection for Stability
The final step is the ‘shake test.’ Grip the base and give the stand a firm wiggle. If there is any play in the threads, use a bit of Teflon tape on the pipe joints. A rock-solid stand doesn’t just look better; it prevents the micro-vibrations that can occur when you’re moving around your desk. We want to ensure that nothing about your storage solution causes mechanical stress, helping you avoid the dreaded task of learning how to stop your high-end headphones from creaking when you move due to a warped or stressed frame. By using heavy industrial parts, you’ve built something that will likely outlast the headphones themselves.I have seen people drop three months’ salary on a pair of high-end planar magnetics only to plug them into a standard laptop jack and wonder why they sound ‘flat.’ They fall for the myth that ‘premium’ means ‘plug and play.’ In reality, the more expensive your gear, the more it demands from the rest of your signal chain. But here is the contrarian truth: you do not always need a $2,000 stack to hear the difference. In many blind tests, like those cited by researchers in the Journal of the Audio Engineering Society, users struggle to differentiate between mid-tier and high-end DACs if the output impedance is matched correctly. Often, why your high-end DAC sounds exactly like your laptops headphone jack comes down to the fact that modern integrated chips have actually gotten surprisingly good at basic conversion. If you are just starting out, learning how to use a DAC to improve your desktop computers audio is more about cleaning up electronic interference than it is about magic bitstream processing.
Why Your $500 Headphones Might Sound Like Budget Earbuds
The biggest ‘oops’ moment I see in the audiophile community is the neglect of the ‘physical seal.’ You can have the best drivers in the world, but if there is a gap between the pad and your skin, the physics of sound pressure just falls apart. If you are a glasses wearer, you might be losing 10dB of sub-bass without even knowing it because the arms of your frames break the acoustic seal. This is exactly why your headphones sound thin when you wear glasses. The same principle applies to portable gear—the reason your wireless earbuds sound different after changing the tips is not just about comfort; it is about the specific resonant frequency of the ear canal chamber you are creating. 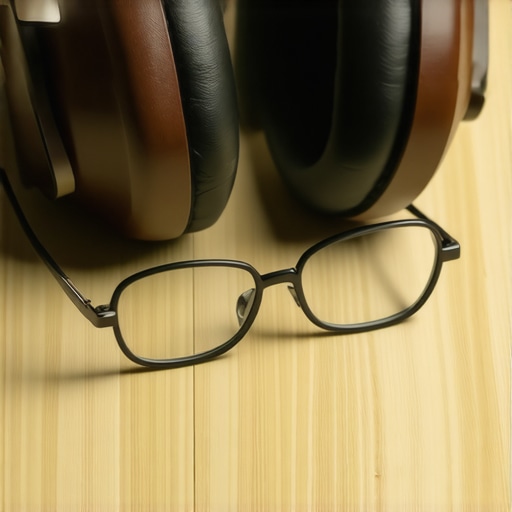
Is Your Desk Setup Killing Your Bass Response?
I once spent a whole weekend calibrating a soundbar setup only to realize the subwoofer was sitting on a hollow glass shelf. It sounded thin and localized. Knowing why your portable speaker has no bass when you place it on glass is vital for any home setup: glass and thin wood act like a drumhead, vibrating in sympathy with the speaker and cancelling out the low frequencies you actually want to hear. If you find your audio lacks punch, move your gear to a solid, decoupled surface before you go out and buy a more expensive amplifier. Many users mistakenly believe they need more power when they really just need better placement. Have you ever fallen into the trap of buying more gear to fix a problem that was actually just about where you put it? Let me know in the comments.Maintenance is the part of this hobby that isn’t “sexy,” but it’s what separates a true enthusiast from someone who just buys things and hopes they last. If you’ve ever reached for an old receiver only to find the volume knob makes a sound like someone walking on gravel, you know exactly what I mean. I personally swear by a can of DeoxIT D5 for these moments. Unlike generic hardware store cleaners that can strip away necessary lubricants, DeoxIT is a specialized formula that dissolves surface oxides while leaving a protective layer that prevents future corrosion. Learning how to fix a scratchy volume dial with electrical contact cleaner saved me from binning a perfectly good NAD amp last winter. And let’s talk about those headphone pads. I make it a strict habit to wipe down my leathers with a slightly damp microfiber cloth after every long session. It’s the salts and oils in your sweat that cause the protein leather to flake and peel, and knowing how to clean your headphone ear pads without ruining the leather is the difference between a five-year lifespan and a six-month one.
How do I maintain my vintage amplifiers over time?
The biggest enemy of high-performance electronics is heat. If you notice why your vintage amp gets hot even when you aren’t playing music, you’re likely looking at a bias current issue that’s slowly cooking your internal components. I always keep a digital multimeter handy to check the internal voltages against the manufacturer’s spec. According to the “Radiotron Designer’s Handbook” (4th Edition), electrolytic capacitors have a finite service life, often around 15-20 years in standard conditions before they lose their ability to filter noise effectively. This is why I periodically check the internals for any physical bulging or leakage. If you’re hearing a low-frequency hum that won’t go away, it might be time to learn how to tell if your speakers capacitor is starting to fail. It sounds technical, but once you open the chassis and see it for yourself, the mystery of audio repair vanishes.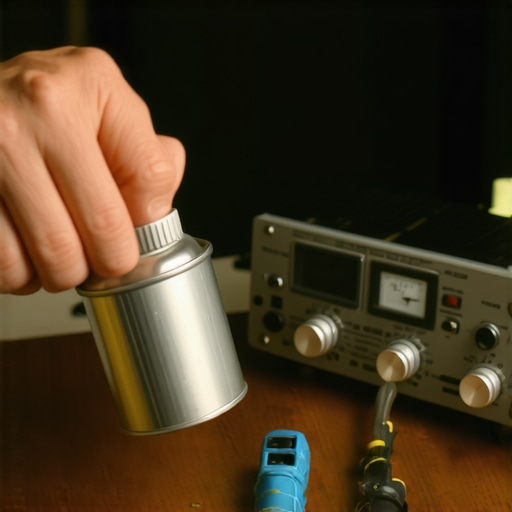 I see a future where physical wires become a choice for the purists, while “smart” DSP handles the heavy lifting for everyone else. We are already seeing AI-driven EQ that adjusts in real-time based on your specific ear shape or the ambient noise in the room. But even as the tech gets smarter, the physics of air and vibration remain the same. If your setup feels “off,” don’t immediately blame the software or your phone. Use the simple paper test for finding air leaks in your speaker cabinet to ensure the box itself isn’t the problem. Air leaks cause turbulence and ruin bass response faster than a bad cable ever could. My biggest recommendation? This weekend, take five minutes to check every connection. Over time, copper wire can oxidize at the terminal, creating resistance. A loose wire is often why your car speakers cut out when you hit a bump or why your home channel sounds weak. Tighten those terminals and strip back any green, corroded wire today—it’s free performance you’ve already paid for.
Why High-End Gear Fails Before Its Time
I used to believe that as long as I bought the most expensive equipment, the sound would take care of itself. I was wrong. The biggest lesson I learned is that mechanical fatigue—the slow degradation of materials—is the real gear killer. For example, cluttered desks lead to cable strain, which is often the silent reason how to test your headphones for a blown driver at home becomes a necessity after a rough fall. Another hard-earned truth is that physical comfort directly impacts your perception of sound quality; if you don’t address why your headphones feel heavy on your head and how to adjust them, you will likely stop using them long before the drivers actually wear out. Always pre-drill your pilot holes when working with hardwood bases like walnut or oak, as splitting the grain at the last second is a heartbreak you want to avoid.
The Toolbelt Every Music Lover Needs
You don’t need a professional workshop to maintain a world-class setup, but a few key items will save you thousands over a lifetime of listening. I personally keep a bottle of DeoxIT D5 handy because it is the most reliable way how to fix a scratchy volume knob on an old amp without causing more damage to the internal wipers. I also recommend owning a basic digital multimeter. It is absolutely essential when you are trying to figure out how to tell if your speakers capacitor is starting to fail before it takes out a whole circuit board. Finally, keep a supply of adhesive-backed cork or felt; it is the best landing pad for your gear and costs pennies compared to the price of replacing damaged headbands.
Start Building Your Perfect Listening Space
Creating a high-fidelity experience is about the small, consistent wins. Whether it is building this industrial stand this afternoon or finally organizing your cable management to prevent trips, every step you take protects your investment and improves your focus. Don’t let your premium gear gather dust or slide off a cluttered desk. Take control of your space today and enjoy the peace of mind that comes with a dedicated home for your favorite headphones. A well-organized desk makes every listening session feel like an event rather than an afterthought. What is the one piece of gear you are most afraid of accidentally dropping? Let me know in the comments below!