
I remember the exact moment my heart sank. I’d just hauled a pair of gorgeous, walnut-veneer vintage towers into my living room—the kind of find that makes a weekend. I hooked them up, dropped the needle on a favorite record, and instead of that warm, punchy bass I expected, I heard a sound like a wet cardboard box flapping in the wind. I pulled the grilles off, reached out to touch the woofer, and the edge literally disintegrated into gray dust under my finger. It looked like the speakers had been eating themselves from the inside out. My first thought was that they were trash, but I was wrong.
The Moment I Almost Threw Away My Best Speakers
[image] Before you start looking for trash bags, let me tell you: that crumbling mess is just a $20 fix and a few hours of patience away from sounding like new. I almost made the mistake of dumping mine because I didn’t know how to tell if your speaker is actually blown or just rattling. Most of the time, the engine of the speaker—the voice coil and magnet—is perfectly fine; it’s just the suspension that’s given up the ghost. Today, we’re going to walk through how to strip that old gunk and glue on fresh life.
Is This Project Actually Worth Your Weekend?
I get the skepticism. You’re worried you’ll spend three hours hovering over a workbench only to end up with a speaker that sounds worse. But here is the reality: vintage drivers often have a character and build quality that modern, budget-friendly bookshelf units just can’t touch. If you’ve noticed why your vintage speakers are losing their punch over time, it’s almost certainly the foam. Re-foaming is the ultimate audio life hack. Have you ever poked a speaker cone only to have it crumble like a dry cookie? I want to hear about your attic finds in the comments.
Why Foam Rot Happens to the Best of Us
It isn’t because you played them too loud or left them in a damp basement—though that doesn’t help. It’s a matter of chemistry. Most speakers from the golden era of audio used polyester-based polyurethane foam for the surrounds. According to chemical studies on polymers, these materials are highly susceptible to hydrolysis, where moisture in the air breaks down the chemical bonds in the foam over 10 to 20 years. One big mistake I made early on was trying to patch the holes with duct tape—don’t do that. It ruins the cone’s balance and weight. I even tried the simple paper towel trick for finding speaker air leaks, but when the foam is gone, you don’t need a trick to see the problem. You need a total replacement.
Scrape Away the Decades of Decay
To get a professional bond, you have to be ruthless with the leftovers. Your goal is to get down to the bare metal of the speaker basket and the clean paper or poly of the cone. I use a combination of 91% isopropyl alcohol and a dull flathead screwdriver or a plastic scraper. You don’t want to use a razor blade on the cone itself because one slip means a puncture, and then you’re into a much more difficult reconing job. Take your time here. If you leave even a tiny bit of the old, sticky residue, the new adhesive won’t grab correctly, and you’ll end up with air leaks that ruin your low-end response.
Get Every Last Bit of Sticky Gunk
I learned this the hard way on a pair of 1970s Advents. I thought “mostly clean” was good enough and rushed to the gluing stage. Two weeks later, the foam started lifting at the edges, and the speakers developed a hideous vibration. Now, I spend at least 45 minutes just on the cleaning phase. Use a cotton swab dipped in alcohol to soften the glue on the cone’s edge, then gently ‘roll’ the old gunk off with your thumb. It’s tedious, but it’s the difference between a repair that lasts twenty years and one that lasts twenty days. If you’ve ever dealt with a scratchy volume knob on an old amp, you know that tactile ‘grit’ is the enemy of good sound—the same logic applies to your speaker’s physical seal.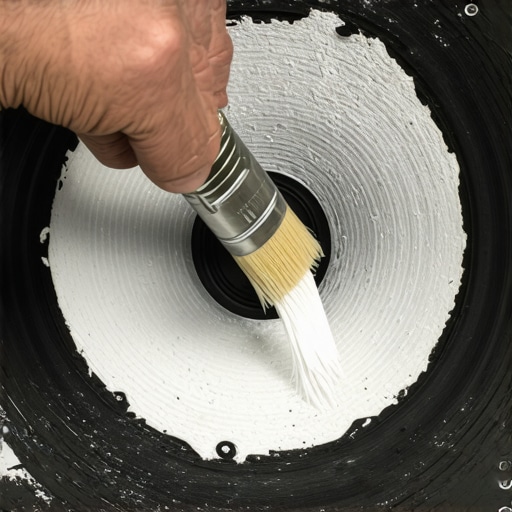
Align the Coil Without Using Shims
Once the surfaces are surgical-grade clean, it’s time to glue. Most kits come with a specialized white adhesive that stays tacky for a few minutes. Apply a thin, even bead to the inner lip of the new foam and the edge of the cone. Let it sit for about 60 seconds until it gets ‘grabby.’ Now comes the part that scares people: centering. If the voice coil isn’t perfectly centered in the magnet gap, it will rub, creating a metallic scraping sound that destroys the driver. Instead of cutting off the dust cap to use plastic shims, I prefer the ’30Hz tone’ method. Hook the speaker up to an amplifier and play a low-frequency sine wave at a very low volume. The vibration will naturally help the cone find its center as you press the foam down. Proper centering prevents the voice coil from rubbing, which can cause heat issues similar to why your vintage amp gets hot even when you aren’t playing music.
Don’t Let Your Hard Work Go Out of Phase
After the inner ring is set, repeat the process for the outer ring attached to the metal basket. Before the glue cures completely, move the cone up and down gently with your fingers to feel for any resistance or ‘scratching.’ If it feels smooth, you’re golden. This is also the perfect time to ensure your wiring is correct. If you accidentally swap your positive and negative leads when putting the drivers back in the cabinet, you’ll lose all your bass. You can quickly learn how to tell if your speakers are out of phase in 30 seconds by using a simple 1.5V battery test. Once the glue is dry and the seal is airtight, you can finally discover why your bookshelf speakers sound better when you move them off the desk and into a position where that newly restored bass can actually breathe.
Stop Wasting Money on Cables and Focus on Stability
Once you have the foam fixed, the temptation is to start ‘upgrading’ with expensive oxygen-free copper cables or a high-end DAC. Most people say these are the key to unlocking hidden detail, but in my experience, mechanical stability provides a much bigger ROI. I have seen enthusiasts drop a thousand dollars on wires while their speakers sit on hollow, ringing metal stands. This is why you should learn the reason your speaker stands need to be filled with sand. The mass kills resonance that even the best foam job cannot fix. Have you ever fallen into the trap of buying ‘magic’ accessories before fixing the physical basics? Let me know in the comments.
#IMAGE_PLACE_HOLDER_C#
Could Your Crossover Be Killing the Sound of Your New Foam?
If you have finished the re-foaming process and the driver moves freely, but the high end still feels ‘dark’ or recessed, you are likely looking at a component failure rather than a mechanical one. According to a study on the longevity of passive components by the Audio Engineering Society, electrolytic capacitors used in vintage crossovers have a typical lifespan of 20 to 25 years before their internal fluid dries out, causing their capacitance to drift wildly. This is a common nuance many beginners miss; they blame the new foam for a ‘stiff’ sound when in reality, it is time to learn how to tell if your speakers capacitor is starting to fail. Swapping these out for modern film capacitors is the true final step in a total restoration.
The Impedance Trap That Smokes Your Amp
One specific ‘oops’ factor I see with DIY restorations—especially when people start mixing and matching drivers from different sets—is ignoring the load on the amplifier. If you accidentally wire your internal components in a way that drops the resistance too low, your vintage receiver will go into protection mode or, worse, blow an output transistor. It is vital to understand the secret to choosing the right ohm rating for your amp before you ever hit the power switch on a newly rebuilt pair of towers. A speaker that sounds ‘thin’ or causes your amp to run dangerously hot is often an impedance mismatch in disguise. This is similar to the technical hurdle of how to match your car subs impedance to your amplifiers output, where a simple wiring mistake can turn a great project into a smoky disaster. Don’t let your hard work go to waste by rushing the final electrical checks.
Once your drivers are moving smoothly and your impedance is matched, the real work shifts from the internal hardware to the environment they live in. Restoration isn’t a one-time event; it’s a lifestyle of maintenance. I’ve seen too many people put forty hours into a rebuild only to let it rot again because they didn’t have a plan.
Keep the Connections Clean or Face the Static
I never finish a project without a can of Caig DeoxIT D5 nearby. It is the only chemical I trust for vintage gear. Most generic cleaners leave a residue that eventually attracts more dust, creating a gummy mess. If you don’t keep your switches clean, you will eventually find yourself searching for how to fix a scratchy volume dial with electrical contact cleaner. I personally spray every potentiometer and toggle switch the moment I open a chassis. This prevents oxidation from building up and ensures that your signal path stays as pure as possible. If you start hearing a low-frequency buzz after reassembling, you might have missed a grounding point, but don’t panic—it’s often just the $5 fix for humming speakers and ground loops that solves it. 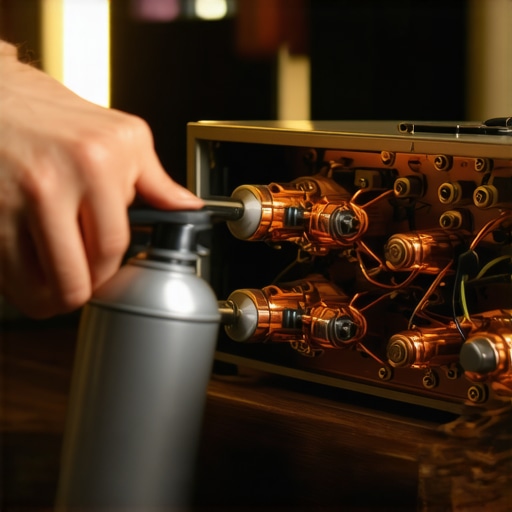
Your Room is Actually Your Loudest Component
You can spend thousands on restoration, but if your speakers are placed poorly, you’re only hearing 50% of their potential. Dr. Floyd Toole, a former president of the Audio Engineering Society and a legend in acoustics, famously demonstrated in his research that the ‘room-speaker’ interaction is the dominant factor in what we perceive as sound quality. This is why I tell everyone to stop leaving their gear in corners. You need to understand why your bookshelf speakers sound better when you move them off the desk and onto dedicated, mass-loaded stands. If you’re still getting a muddy sound after your foam job, perform the simple paper test for finding air leaks in your speaker cabinet. A single unsealed screw hole can act like a whistle that kills your low-end punch.
How can I maintain my restored audio setup for the long haul?
Maintenance is about climate and mechanical checks. Keep your speakers out of direct sunlight—UV rays are the primary enemy of new foam and rubber. Every six months, I do a ‘walk-around.’ I check the terminals for tightness and look for any signs of cable oxidation. If you are a headphone user as well, you should stay ahead of the curve by learning why your headphone pads are flaking and how to prevent it, because the same humidity that kills your pads will eventually soften the glue in your vintage cabinets. I also listen for any new mechanical noises; knowing how to stop your high-end headphones from creaking when you move is just as important as keeping your speaker’s voice coils aligned.
The Future of Vintage Audio is Digital
Looking ahead, I predict a major shift where we will see dedicated AI-driven Digital Signal Processing (DSP) units designed specifically for ‘legacy’ gear correction. Instead of just replacing capacitors, we will use software to perfectly model the original frequency response of a 1974 Pioneer and force the hardware to hit those marks. For now, however, the best thing you can do is get a baseline of what your gear is actually doing in your current space. I want you to take one advanced step this week: download a measurement app and learn how to use your phone to measure your room’s frequency response. Once you see the graph, you’ll finally understand why that one corner of your room feels so ‘boomy’ or thin.
The Subtle Errors That Ruin a Great Rebuild
After twenty years of tinkering, I’ve realized that the glue bottle is often more dangerous than the screwdriver. One of the biggest myths in speaker repair is that you can ‘eyeball’ the alignment without consequences. I’ve seen enthusiasts spend days on a project only to find their towers crackle because a loose wire was ignored, which is a similar headache to why your car speakers pop when you turn the key. My hardest lesson was learning that ‘mostly clean’ is a lie told by lazy hands; if there is even a microscopic speck of old foam left, that seal will eventually fail. I once had a project where the driver worked perfectly on the bench but failed in the cabinet because I didn’t realize why your car speakers cut out when you hit a bump, which often traces back to poor terminal connections made during reassembly. Take the extra five minutes to solder your leads instead of using old crimp connectors.
My Minimalist Kit for Heavy Restoration
I don’t keep a massive arsenal of tools, but a few items are non-negotiable for a successful speaker restoration. First, 91% isopropyl alcohol is mandatory—lower concentrations contain too much water and can warp delicate vintage paper cones. I also rely on a digital multimeter to check my work; it’s the only way to be sure you haven’t accidentally shorted the voice coil. If your testing phase goes wrong and you experience a hardware failure, you’ll want to know how to fix a receiver that wont turn on after a power surge before you give up. While modern tech has its own problems, like how to fix the audio delay on your soundbar, the beauty of vintage gear is that almost every failure is mechanical and reversible with the right patience and a few simple hand tools.
Give Your Music the Second Chance It Deserves
There is a specific kind of magic when you finally wire everything back up and hear that first bass note hit—not as a rattle, but as a clean, physical punch. Restoration isn’t just about saving money; it’s about preserving a piece of audio history that modern, plastic-heavy gear simply cannot replicate. Whether you are trying to figure out how to get clear movie dialogue without a dedicated center speaker or bringing a pair of thrift store find towers back to their 1970s glory, the effort of a speaker restoration is always worth the reward. Don’t let a bit of crumbling foam keep you from the best sound of your life. What was the first pair of speakers that made you truly fall in love with high-fidelity audio? Let me know in the comments below!