
I stepped into the dim garage, and there it was: a 1976 Marantz receiver that looked like it had survived a war. The wood case was beautiful, the silver faceplate gleamed under my flashlight, and the price tag was laughably low. I felt like I’d won the lottery. But the second I got it into my car, the reality hit me—or rather, it hit my nose. It smelled like a stale dive bar from the height of the disco era. Every time the unit warmed up, the scent of forty years of heavy smoking filled my living room, making my eyes water and my wife question my hobby choices. We love these old machines for their warmth and soul, but we definitely don’t love the “third-hand smoke” they bring along for the ride. Today, I’m going to walk you through the exact process I use to strip away decades of nicotine and tar without frying your precious circuitry.
That Beautiful Estate Sale Find Smells Like an Ashtray
The problem with vintage gear isn’t just the dust; it’s the film. Nicotine and tobacco tar are essentially a sticky glue that coats everything inside the chassis. I learned this the hard way early on when I tried to just “air out” a Sansui unit for a month. It didn’t work. Worse, I once made the amateur mistake of spraying a common household air freshener into the vents. All I did was create a sticky, floral-scented sludge that actually caused a short later on. If you are already dealing with internal issues, like how to fix a scratchy volume knob on an old amp, adding moisture or chemicals to the mix can be a recipe for disaster. You have to be methodical. According to the EPA, thirdhand smoke consists of residual nicotine and other chemicals left on indoor surfaces by tobacco smoke, and it is notoriously difficult to remove because it re-emits into the air long after the smoking has stopped.
Does that smokey residue actually hurt the electronics?
You might be thinking, “It’s just a smell, can’t I just ignore it?” Unfortunately, no. That sticky residue is a magnet for hair, dust, and grime. Over time, this buildup acts as an insulator, trapping heat against sensitive transistors and capacitors. If you’ve noticed why your vintage receiver’s lights are flickering, or if the unit seems to be running unusually hot, a thick layer of “smoke-gunk” could be the culprit. We need to get in there and clean it out properly. Have you ever brought home a piece of gear that looked perfect but smelled like a campfire? Drop a comment and tell me which model it was—I bet I’ve cleaned one just like it! Before we start scrubbing, you should also check for other age-related issues, such as how to tell if your speaker capacitors are starting to leak, because if you’re opening the hood anyway, you might as well do a full health check. Let’s get our supplies ready and dive into the deep clean.
Strip the Chassis Before You Scrub
First, you have to get the armor off. If your receiver has a wooden sleeve, take it off immediately. Wood is porous, and it drinks up smoke like a sponge. I once spent three days scrubbing the metal chassis of a Marantz, only to realize the smell was actually trapped in the wood grain of the case. To fix this, you will need a dedicated wood cleaner, or in extreme cases, a light sanding and resealing. While the case is off, take the opportunity to check the guts for any physical damage. Knowing how to use a multimeter to find a short in your speaker wires or internal components can save you hours of troubleshooting later if the previous owner was as careless with the electronics as they were with their cigarette ash.
Wash the Faceplate Like It Is Fine China
Next, tackle the faceplate and knobs. Pull every single knob off—they usually just tug straight out, though some require a tiny Allen wrench. Soak them in warm, soapy water. Use a soft toothbrush to get into the knurling. This is where most of the finger-tar lives. For the faceplate, be incredibly careful. Harsh chemicals can eat the lettering right off a vintage Sansui or Pioneer. I stick to a very mild dish soap solution and a microfiber cloth. If you have high-end gear, you should also be careful with the inputs; learning how to clean gold-plated connectors without ruining the finish is vital so you do not strip away the conductivity along with the grime.
Use High-Percentage Alcohol for the Circuitry
Now for the heavy lifting: the circuit boards. You need 99% isopropyl alcohol. Anything lower has too much water content, which can cause corrosion or shorts if it does not dry perfectly. Use a soft-bristle brush—an old toothbrush works great—and gently scrub the boards. I remember a specific Pioneer SX-1010 I worked on that was so coated in yellow film, the alcohol turned dark brown the moment it touched the board. It took me four passes and a whole box of cotton swabs before the green of the PCB finally showed through. Be careful around the tuner section, though. If you have a vintage CD player as part of your stack, this is also a good time to learn how to clean a laser lens on a skipping vintage CD player while you have the supplies out. Just remember, never aim high-pressure air at the delicate bits; the logic behind why you should never use compressed air to clean a silk dome tweeter applies to many sensitive internal audio components too—you can dislodge fine wires or blow dust into sealed potentiometers.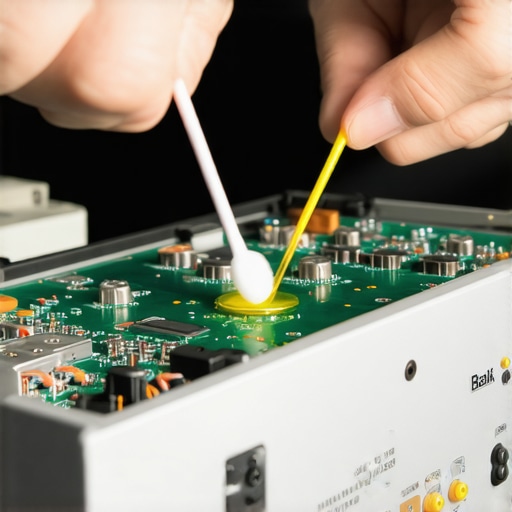
Kill the Odor at the Molecular Level
After the manual scrub, you might still have a lingering ghost of a scent when the transformers heat up. This is where chemical neutralization comes in. Do not use standard air fresheners. Instead, place the open unit in a large plastic bin with a container of activated charcoal or a bowl of white vinegar (but do not let the liquid touch the electronics!). Seal it for 48 hours. The charcoal acts like a chemical vacuum, pulling the remaining odor molecules out of the metal and plastic. If the sliders or pots are still gritty or smelling of burnt dust, you will want to look into how to fix a scratchy fader on a vintage audio mixer or receiver using a proper contact cleaner like DeoxIT. This ensures the electrical path is as clean as the chassis itself, and prevents the unit from clicking into protection mode during your first real listening session.While we’re talking about restoring the soul of these machines, let’s address a common mistake: the belief that high-end cables are a magic fix for smokey or dull sound. In my experience, if your receiver is clean but the highs still sound recessed, it’s rarely the wire. Most enthusiasts get caught up in the truth about speaker break-in periods or buying silver-plated interconnects, when the real culprit is usually component fatigue. Heat is the ultimate killer of vintage gear. A study published in the Journal of the Audio Engineering Society points out that even a slight increase in operating temperature—often caused by that insulating layer of nicotine—can significantly shorten the lifespan of electrolytic capacitors. If you’ve finished your deep clean and the unit still sounds veiled, you aren’t waiting for it to warm up or break in; you’re likely looking at a need for a recap.
Why does my stereo still sound muffled after a deep clean?
When the music lacks punch despite a spotless chassis, you are likely dealing with electrical drift. Those old capacitors have a liquid electrolyte inside that dries out over decades. Cleaning the nicotine gunk stops the external damage, but it doesn’t fix the internal chemistry. This often manifests as a need to fix channel imbalance on a vintage stereo amplifier because one side’s components have drifted further from spec than the other. Before you start replacing parts, however, make sure you aren’t creating a new problem. 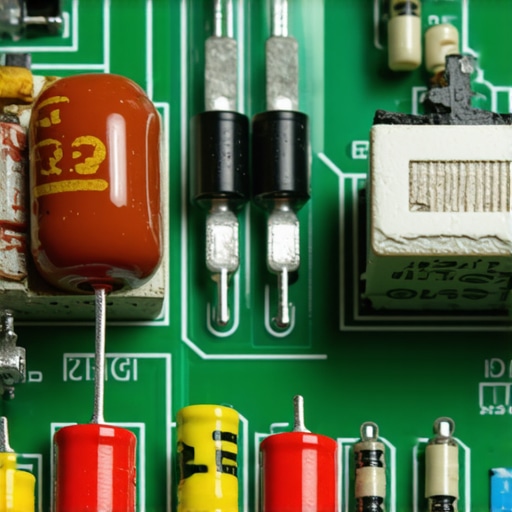 Another dangerous trap is ignoring impedance after a restoration. Many people get so excited to test their clean gear that they try to connect four speakers to a two-channel amplifier safely without actually doing the math. You must master the secret to choosing the right ohm rating for your amp before you push that volume knob past noon, or all that cleaning will be for nothing when your output transistors overheat and fail. Have you ever spent hours scrubbing a piece of gear only to realize the problem was something completely hidden? Let me know in the comments—I love hearing those learning the hard way stories!Once the smoke is gone and the capacitors are healthy, your job shifts from restoration to preservation. Vintage gear thrives on consistency. One thing I always do after a deep clean is check the DC offset at the speaker terminals. If your amp is putting out more than 50mV of direct current, it’s basically cooking your speaker voice coils. Knowing how to use a multimeter to find a short in your speaker wires is a great skill, but using that same tool to verify your amp’s output health is what keeps your system from a catastrophic meltdown. High heat isn’t just a home audio problem; it’s the same reason why your car amp is overheating during long summer drives. In both cases, airflow is your best friend. Don’t stack other components directly on top of your receiver. That Marantz needs to breathe!
How do I maintain my vintage setup over time?
The key is exercise. Capacitors actually stay healthy longer when they are used regularly. If you let a receiver sit for six months, the dielectric layer in those caps can start to degrade. Try to power on your system at least once a week for an hour. While it’s running, rotate every knob and flip every switch. This prevents oxidation from building up on those internal contacts you worked so hard to clean. If you find the sound becoming dull or vibrating strangely, you might need to look at the transducers themselves; for example, learning how to revive a vintage speaker cone with simple rubber treatment can restore the compliance that age and smoke film took away.
The Secret Weapons in My Repair Kit
I swear by the CAIG DeoxIT D5 for power switches and metal-to-metal contacts, but for the actual sliding faders, you must use DeoxIT FaderLube (F5). Using the wrong solvent can strip the lubricant right off the plastic tracks. Technical documentation from CAIG Laboratories notes that over-applying cleaners can actually trap debris rather than flush it out—less is always more here. If you’re working on an old mixer, learning how to fix a scratchy fader on a vintage audio mixer the right way means using the straw to target the gap, not the whole faceplate. I also keep a set of ESD-safe brushes and a high-purity (99.9%) isopropyl alcohol on hand for spot-cleaning any leaked electrolyte. 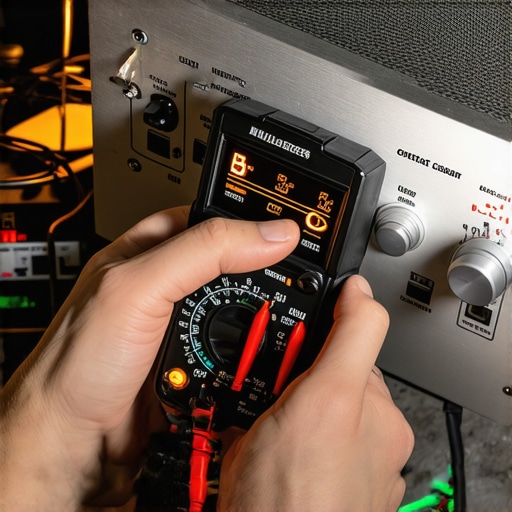 Looking ahead, I predict we are entering a golden age of restoration. With the rise of high-precision desktop CNCs and 3D printers, we will soon be able to manufacture perfect replicas of those impossible-to-find plastic gears and specialized knobs that often break on 80s-era gear. We won’t just be cleaning these machines; we will be manufacturing the parts to keep them running for another century. If you ever hear a strange noise and cannot tell if it is the amp or the speaker, check out how to tell if your speaker is actually blown or just rattling to isolate the issue quickly. My challenge for you: Grab a multimeter this weekend and check the DC offset on your main amp. It takes five minutes and could save your speakers.
Mistakes I Will Never Make Again with Vintage Electronics
Restoring a tobacco-damaged receiver is a rite of passage for any audiophile, but there are nuances that only a few ruined faceplates can teach you. First, never underestimate the power cord. I used to spend hours on the internal boards only to realize the thick rubber cord was acting like a giant incense stick, slowly releasing nicotine smells as it sat near the warm chassis. Wipe every inch of it with a strong degreaser. Secondly, be wary of the ‘cleaner’s high.’ You might think you’ve gotten every bit of tar, but nicotine is an expert at hiding behind the mounting brackets of the transformer. If you do not pull the major components slightly away from the frame, you are leaving a scent-bomb inside. Lastly, remember that while you are focused on the smell, you might be overlooking physical wear; for instance, the mistake that kills your portable speaker battery life is often related to neglect, and the same principle applies to vintage power caps. If you don’t use the gear, it dies anyway.
What I Keep on My Workbench Every Day
To do this right, you need more than just soap and water. I personally rely on a few specific items that have never steered me wrong. DeoxIT FaderLube (F5) is my absolute gold standard for any sliding component; using the wrong spray can lead to why your receiver’s protection mode keeps triggering at high volume because of gunked-up contacts. I also recommend a set of extra-long surgical cotton swabs to reach into the deep crevices of a Pioneer or Marantz chassis where human fingers just cannot go. For those who enjoy the hunt as much as the repair, mastering the trick to buying high-end audio at estate sales will ensure you always have a steady supply of projects. I also suggest a bottle of Novus Plastic Polish to restore the clarity of those yellowed dial covers once the smoke film is gone.
Give That Old Receiver a Second Chance
There is a profound sense of satisfaction that comes when you flip the power switch on a restored 70s receiver and see those warm incandescent bulbs glow through a crystal-clear faceplate. You aren’t just cleaning a piece of hardware; you are preserving a piece of musical history that was built to last several lifetimes. Once your unit is spotless and reassembled, make sure your final setup is perfect. Even a quick check like how to tell if your speakers are out of phase in 30 seconds can be the difference between a thin sound and a lush, room-filling experience. Take the time to do it right, and your vintage receiver will reward you with that signature warmth that modern digital amps simply cannot replicate. Have you ever rescued a piece of gear that was so dirty you almost threw it away? Let me know what it was in the comments below!