
I’ll never forget the night I nearly threw my back out jumping in the driver’s seat. I had just spent a long Saturday afternoon sweating over a new amp install, tucked away in my garage with a half-empty box of zip ties. Everything sounded crisp, the bass was tight, and I felt like a total pro. Then, I turned the ignition off. THUD. It sounded like someone had dropped a sledgehammer directly onto my floorboard. I was absolutely convinced I’d fried my voice coils or that my brand-new amp was a lemon. If you’re staring at your dashboard right now, wondering if your car is possessed or if you’ve just wasted your hard-earned cash on a system that’s about to explode, take a deep breath. I’ve been in that exact spot, and I can tell you right now: it’s usually a lot simpler (and cheaper) than you think. Today, we’re going to silence that thumping noise for good so you can finally enjoy the silence when the engine stops.
Why Your Car Shuts Down with a Bang
When that thud happens, what you’re actually hearing is a sudden discharge of electrical energy hitting your subwoofer’s cone. It’s a timing issue. Ideally, your amplifier should turn off a split second before your head unit (the radio) loses power. When the order gets swapped, the head unit sends a final ‘pop’ of voltage through the RCA cables while the amp is still fully awake and ready to blast it. I remember making a huge mistake early on where I assumed my gear was just faulty. I actually spent a weekend trying to figure out how to tell if your amps capacitors are failing, only to realize my remote turn-on wire was the real culprit. It’s a classic rookie move that costs more in stress than in parts. You might also be dealing with a poor ground connection, which is the root of about 90% of all car audio gremlins. If your system isn’t grounded to bare, shiny metal, that extra energy has nowhere to go but out through your speakers. I’ve even seen people struggle with this because they used the wrong gauge wire, which can lead to all sorts of voltage drops and signal noise. According to the technical experts at Crutchfield, this ‘turn-off pop’ is a result of a transient voltage spike that occurs when the circuit is broken too abruptly, often exacerbated by mismatched power-down sequences. Have you ever jumped out of your skin because your car gave you one final, loud goodbye? It’s a heart-pounding experience that no one tells you about when you’re buying the gear.
Will This Actually Kill My Equipment?
This is the big question every enthusiast asks while they’re frantically checking for smoke in the rearview mirror. The short answer is: probably not immediately, but it isn’t doing your gear any favors. Constant popping puts unnecessary physical stress on the subwoofer’s spider and surround. It’s like someone poking you in the chest every time you try to go to sleep. While it’s rarely as catastrophic as the popping sound when you turn on your car stereo, which can be even more aggressive, it still indicates an electrical inefficiency. You might even find that this instability is linked to other issues, like your car battery draining faster than it should because the amp isn’t shutting down cleanly. We want a system that is as quiet as a church mouse until you actually want it to roar. In the next few sections, we’re going to walk through the ‘Ground, Remote, and Capacitor’ checklist to isolate exactly where that rogue energy is coming from.
Scrub That Ground Wire to Bare Metal
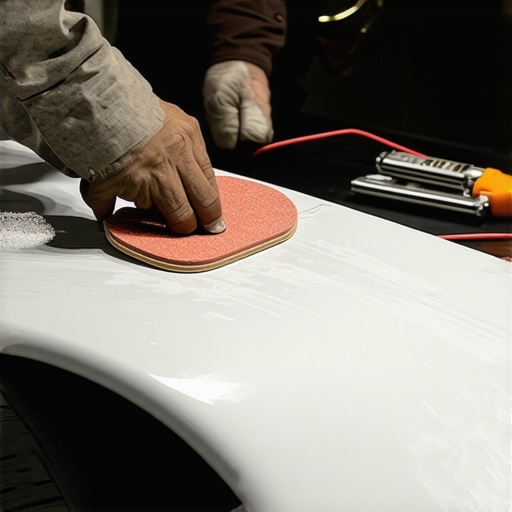
First things first: your ground is your electrical lifeline. If your amplifier is popping, it’s usually because it’s struggling to dump leftover electricity once the ignition cuts. I once spent three hours debugging a system in my old hatchback only to realize I’d bolted my ground wire to a painted seat-belt bolt. It looked secure, but paint is an insulator, not a conductor. The result? A nasty thud every single time I parked. I took a piece of 80-grit sandpaper, cleared a nickel-sized patch of floorboard until it shone like a mirror, and the noise vanished instantly. You need that metal-to-metal contact to ensure a low-resistance path. While you’re back there, verify that your connections are tight; a loose wire is a noisy wire. If you find your connections are wobbly, learning how to fix a loose speaker terminal is a skill that translates perfectly from home audio to your trunk setup.
Add a Delay to the Power Sequence
If your ground is solid but the thud persists, you’re likely dealing with a timing mismatch between your head unit and your amp. Your amplifier is staying ‘awake’ just a millisecond longer than the radio. To fix this, you can install a simple 12V delay relay on the remote turn-on wire. This tiny device keeps the amp from shutting down until after the head unit has stopped sending its ‘turn-off’ signal spike. It’s like a bouncer holding the door open for a second so the crowd can clear out before turning off the lights. Some enthusiasts try to compensate by swapping out expensive cables, but the real difference between gold and silver plated connectors won’t solve a physical timing issue. You need to physically control when that power leaves the building to ensure the amp is ‘asleep’ before the signal dies.
Separate Your Signal Cables from Power Lines
Sometimes the noise isn’t power-related at all; it’s signal bleed. High-quality shielded RCA cables are non-negotiable in a car environment where electrical noise is everywhere. When I was first starting out, I ignored this rule and bundled everything together with zip ties because it looked ‘cleaner.’ The result was a constant whine that followed the engine RPMs and a massive thud at the end of every drive. If your RCAs are running right alongside your main power cable, they’re going to pick up interference. I recommend running power down the driver’s side and signal cables down the passenger side. This physical separation prevents ‘induction,’ which is just a fancy way of saying electricity jumping from one wire to another. It’s the same logic behind why your car speakers pop when you turn the engine on—unwanted electrical noise finding its way into the audio stream. If you’ve already checked the paths and the pop remains, try a ground loop isolator. It’s a small plug-and-play box that sits between your radio and amp, acting as a filter for that stray voltage.
Lower Your Gain to Sensible Levels
We all want maximum volume, but ‘gain’ is not a volume knob; it’s a sensitivity adjustment. If your gain is cranked to the moon, your amplifier is going to amplify every tiny electrical hiccup when the car shuts down. Think of it like a megaphone; if you’re already shouting into it, even a small cough will sound like a roar to the people standing in front of it. Back the gain off about 10-15% and see if the pop softens. You might lose a tiny bit of peak loudness, but you’ll gain a much cleaner shutdown and probably better overall sound quality. It’s a simple trade-off that saves your subwoofers from the physical stress of those sudden voltage spikes.
Let’s dig a bit deeper because I see the same advice repeated on forums constantly, and half of it is just plain wrong. Most people will tell you that if your sub is popping, you just need better cables or a bigger capacitor. In my experience, throwing money at the problem rarely works because the thud isn’t a quality issue; it’s a logic issue. In fact, adding a massive stiffening capacitor without understanding your amp’s discharge cycle can actually make the pop louder. Those big caps hold onto energy like a heavy sponge, and if your amp doesn’t have a fast-drain circuit, that leftover juice has to go somewhere when the remote wire hits zero. If you have been wondering how to tell if your amps capacitors are failing, remember that a healthy cap can still cause a pop if it is not integrated correctly with your head unit’s power-down delay. You’re essentially keeping the amp ‘armed’ while the radio is sending its final goodbye spike.
Is Your Amp Actually Running Too Hot?
Temperature plays a massive role in electrical stability that rookies often overlook. When an amplifier overheats, its internal protection relays can become sluggish or even ‘sticky.’ This leads to a delayed disconnect that perfectly aligns with the head unit’s power-down pulse. If you have noticed the thud gets louder after a long drive, you should check how to tell if your amp is running too hot. High heat increases resistance in your ground path, and as we discussed earlier, resistance is the enemy of a silent system. I have seen enthusiasts spend hundreds on silver-plated RCAs, but the real difference between gold and silver plated connectors won’t fix a thermal-induced ground loop. If the internal components are cooking, the shutdown sequence is the first thing to get messy.
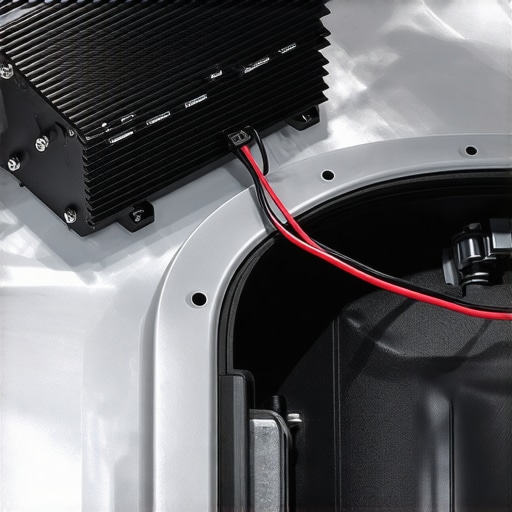
One of the biggest ‘oops’ factors I see involves the remote turn-on wire. Many people tap into the closest 12V switched source they can find, like a cigarette lighter or a fuse box. This is a trap. These circuits often lose power the exact microsecond you turn the key, while your head unit—especially modern ones with large internal capacitors—stays alive for a split second longer. This creates the dreaded ‘Signal-After-Power’ scenario. According to a study on transient intermodulation by the Audio Engineering Society (AES), even a 50-millisecond mismatch in power-down sequencing can result in a DC offset large enough to move a subwoofer cone to its physical limit. This isn’t just about noise; it is about mechanical preservation. If you’ve experienced this, you might also want to look into why your car speakers pop when you turn the engine on, as the logic is often the same, just in reverse.
The hidden nuance most people miss is the ‘Pin 1 Problem,’ a term coined by sound engineers to describe how shield noise enters the actual audio circuit. If your amp’s RCA inputs are poorly isolated, the ‘noise’ from your car’s charging system uses the audio cable as a secondary ground. When the system shuts off, that pent-up energy dumps through the speakers. I once fixed a persistent thud simply by moving the ground point two inches away from a fuel pump wire. It’s these tiny, non-intuitive changes that make a pro-level install. Have you ever fallen into this trap of buying new gear to fix a simple wiring logic error? Let me know in the comments. We have all been there, and sometimes the fix is just a bit of sandpaper and a better timing relay.
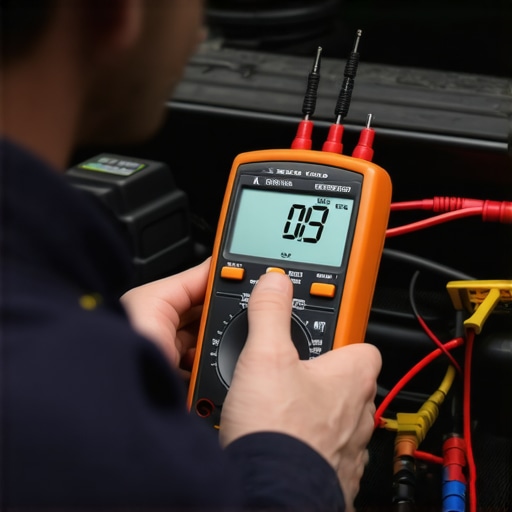
If you’re serious about stopping that thud for good, you need to stop guessing and start measuring. I never touch a new install without my digital multimeter (DMM). It’s the only way to verify that your gain settings aren’t clipping the signal or that your ground is truly low-resistance. According to the JL Audio Technical Support Knowledge Base, setting your amplifier’s input sensitivity using an AC voltmeter is the most reliable way to prevent the square-wave distortion that often manifests as a physical ‘pop’ during power transitions. I use mine to check every single ground point for continuity; if I see anything higher than 0.5 ohms, I know that thud is just a symptom of a much larger electrical bottleneck. While you are back there, take the time to organize. It sounds like busy work, but the best way to label your messy home theater cables actually applies here too—nothing is worse than tracing a popping noise through a ‘spaghetti’ pile of unidentified wires six months after the install.
The One Tool That Ends the Guessing Game
Beyond the multimeter, I’ve started using an oscilloscope for my more complex builds. It sounds overkill, but it allows you to actually see the ‘noise’ on the line that causes these shutdown spikes. If you aren’t ready for that level of gear, at least invest in a high-quality crimping tool. Most ‘pops’ are eventually traced back to a loose connection that has vibrated just enough to create an intermittent arc. If you find your amp is constantly struggling, you might be using the best gauge wire for a 500-watt car subwoofer but still losing the battle because your terminals aren’t properly compressed. I’ve personally switched to using marine-grade heat shrink on all my trunk connections to seal out the moisture that leads to corrosion—a silent killer of clean signals.
How do I keep my car audio system sounding fresh for years?
Maintenance isn’t just about the wires; it’s about the physical health of the speakers themselves. Every few months, I do a ‘walk-around’ inspection. I check the speaker surrounds for any signs of dry rot or cracking, especially if you live in a climate with extreme temperature swings. If you catch a small split early, knowing how to repair a tear in your speaker surround with rubber glue can save you a $300 replacement bill. You should also monitor your equipment’s temperature. If you find yourself frequently checking how to tell if your amp is running too hot, it might be time to install a small 12V cooling fan. Heat doesn’t just kill amps; it degrades the capacitors that are supposed to filter out the very noise that causes your shutdown thud.
Prepare for the Future of Smart Audio
Looking ahead, I predict that the traditional ‘remote wire’ will soon become obsolete. We are already seeing a shift toward high-end Digital Signal Processors (DSPs) that use signal-sensing logic to manage power-down sequences with micro-second precision. These systems eliminate the ‘logic thud’ by digitally muting the outputs before the internal power rails collapse. For now, we have to rely on good old-fashioned wiring discipline. If you’ve followed the steps and your system still gives you a hard time, go back to basics. Check your battery health, as a dying cell often lacks the reserve to handle the transient loads of a high-power system. My specific tip for today: go grab some 80-grit sandpaper and redo that ground one more time—make it shine like a new dime. You’ll be surprised how many ‘complex’ electrical problems are solved by a simple, clean piece of steel.
Lessons I Paid for in Blown Fuses and Frustration
Over the years, I’ve learned that a ‘perfect’ install on paper doesn’t always translate to the real world. One of the hardest lessons was realizing that factory ground points are often deceptive; even if a bolt looks solid, the chassis bonding might not be sufficient for high-current discharge. Always verify your ground with a meter, not just your eyes. Another lightbulb moment came when I realized that not all 12V switched sources are equal. Tapping into a circuit that fluctuates during the ignition cycle is a recipe for noise. If you are tidying up your trunk after fixing that pop, you should also look into the simple fix for a rattling rear deck in your car to truly clean up your low-end response. Finally, remember that heat is the silent killer of timing circuits; if your trunk is a furnace, your relays will eventually lag.
The Gear That Saved My Sanity in the Garage
If you’re tired of the guesswork, there are a few tools I swear by. First, a quality 12V delay relay (like the PAC TR-4) is the most reliable way to sync your power-down sequence. I also recommend keeping a dedicated set of self-adjusting wire strippers; they ensure you don’t nick the copper strands, which can lead to the very resistance that causes electrical noise. For those working in cramped quarters, knowing how to hide a car amp under the passenger seat safely can help you find shorter, cleaner cable paths that reduce the chance of signal interference. Lastly, I always keep a roll of Tesa tape handy to bundle wires—it’s the same cloth tape OEMs use to prevent rattles and protect signal integrity from engine bay heat.
Go Reclaim Your Quiet Drive Home
There is nothing quite like the feeling of a clean, silent shutdown after a long drive with your favorite tracks. You’ve put in the work to build a system that sounds incredible, so don’t let a lingering electrical gremlin ruin the experience. Fixing a subwoofer popping sound isn’t just about the noise; it’s about taking pride in a professional-grade installation that respects your hardware. Once you have silenced the thud, take a moment to sit in the cabin and learn how to balance your car audio for the drivers seat to ensure every note hits exactly where it should. Your car is your sanctuary—keep it sounding that way from the moment you turn the key until the second you step out. Have you ever struggled with finding a ground point that didn’t result in a nasty pop? Let me know in the comments below!