
I’ll never forget the day I finally saved up enough for a pair of high-end Focal components for my daily driver. I spent the entire Saturday afternoon crimping wires, sweating in the garage, and carefully mounting those beautiful drivers into the door cards. I was expecting a concert-hall experience. Instead, I got a “buzz-hall” disaster. Every time the kick drum hit, my door panel vibrated like a cheap massage chair. It felt like my car speakers sound like they are under a blanket. I felt defeated, thinking I’d wasted my money on gear my car simply couldn’t handle. But I wasn’t just hearing bad sound; I was hearing the physical limits of thin sheet metal. [image placeholder]
The Hidden Enemy Living Inside Your Car Door
Most of us treat our car doors like solid objects, but in reality, they are large, hollow echo chambers made of resonant steel. When your speaker moves forward to create a sound wave, it also sends energy backward into that cavity. Without treatment, that energy bounces around, creating phase cancellation and making your expensive mid-bass drivers sound thin and lifeless. I made the classic rookie mistake of thinking more power from a bigger amp was the answer. It wasn’t. In fact, adding power just made the rattles worse. Adding sound deadening—specifically butyl-based mats—changes the game because it adds “mass loading” to the panel. It stops the metal from acting like a second, out-of-tune speaker. I learned the hard way that even the simple way to fix a rattling metal speaker grill won’t help if the entire door skin is flexing. Today, we’re going to look at why this simple layer of “sticky silver stuff” is actually the most important part of any car audio build.
Is sound deadening actually worth the extra weight?
I get it. You don’t want to turn your car into a lead-lined tank. However, you don’t need to cover 100% of the surface to see a massive difference. According to acoustics experts at SoundDeadenerShowdown, covering just 25% of a flat metal surface with a high-quality vibration damper can reduce its resonant energy by more than 50%. This means you get a much quieter ride and punchier bass without ruining your fuel economy. If you’ve ever noticed that your car speakers rattle only when it is cold outside, you’re already feeling the effects of how materials change their behavior. Sound deadening stabilizes that environment. Have you ever felt like your speakers were fighting against your car rather than playing for you? Let me know in the comments if you’ve ever faced this frustration.
Turn Your Door into a Sealed Enclosure
A speaker is only as good as the “box” it sits in. In a car, the door is a terrible box—it’s full of holes for wires, lock rods, and drainage. When you apply deadening, you aren’t just stopping vibrations; you are effectively sealing the “baffle.” This prevents the “back wave” of the speaker from meeting the “front wave,” which is the primary cause of that hollow, weak sound. It’s a similar logic to why your car’s bass sounds better in the back seat than the front; it’s all about how those sound waves interact with the space around them.
Strip the Door Down to the Bare Metal
Before you even touch that roll of butyl, you have to get the metal surgically clean. I learned this the hard way on my first project—a beat-up sedan where I just slapped the deadener over years of dust and door-cavity wax. Three weeks later, in the July heat, the material slid down and gummed up my window tracks. Now, I use isopropyl alcohol and a microfiber towel until the metal literally squeaks. This ensures the adhesive bond is permanent. You aren’t just looking for a ‘pretty’ install; you are looking for a mechanical bond that turns the sheet metal and the butyl into a single, non-resonant unit.
Pressure is More Important Than Coverage
Once the surface is prepped, don’t just use your hands. You need a wooden or metal roller to apply significant pressure. This is called mass loading. Think of a church bell; if you tape a small coin to it, it still rings. But if you weld a heavy lead weight to it, the ring turns into a dull ‘thud.’ That’s what we’re doing to your car door. You can actually use this technique to determine how to tell if your speaker is actually blown or just rattling. If the vibration disappears when you press on the panel, your speaker is fine—your door just needs more mass. 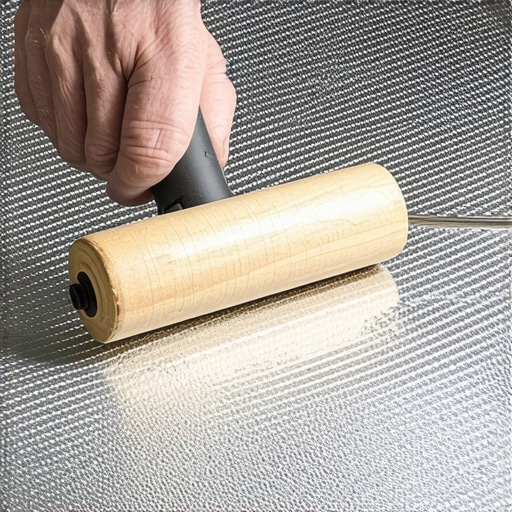
Seal Every Hole to Create a Real Enclosure
Most people stop once they’ve covered the flat spots, but the real magic happens when you seal the access holes. These are the big gaps manufacturers leave so they can reach the window regulator. By covering these with a rigid material or a double layer of deadener, you transform the door from a drafty cage into a semi-sealed box. This is exactly how to get better bass from a sealed subwoofer box—you are controlling the air spring behind the cone. I’ve seen guys spend $500 on speakers and get less mid-bass than a $100 set in a properly sealed door. To verify your seal is tight, you can even use the simple paper towel trick for finding speaker air leaks around the speaker adapter ring.
Check for Phase Before You Reinstall the Panels
Finally, before you clip those plastic door panels back on, run a quick test. There is nothing worse than finishing an eight-hour install only to realize your wiring is backwards. You need to know how to tell if your speakers are out of phase in 30 seconds by using a simple 9V battery test or a polarity app on your phone. Even if you’re waiting for the truth about speaker break-in periods to reveal the final sound signature, getting the phase right from minute one is non-negotiable. If one speaker is pushing while the other is pulling, all that hard work you did deadening the doors will be cancelled out by poor acoustics.Let’s dig deeper into the biggest myth in the car audio world: the belief that you need to cover every square inch of your car in silver foil to get good sound. Everyone says more is better, but in my experience, the ‘wallpaper’ approach is a total waste of money and weight. You aren’t building a submarine; you’re trying to stop a metal panel from ringing. A study by the Society of Automotive Engineers (SAE) demonstrates that constrained layer damping (CLD) works by converting kinetic energy into heat through shear strain, which means the chemical composition of the butyl matters infinitely more than the thickness of the shiny aluminum top. If you buy cheap, ‘roofing-grade’ flashing from a hardware store, it will off-gas toxic fumes when your car sits in the sun, and the adhesive will fail. I’ve seen enthusiasts spend hundreds on bulk packs only to realize their car amp is overheating during long summer drives because they blocked off all the natural airflow in the cabin. 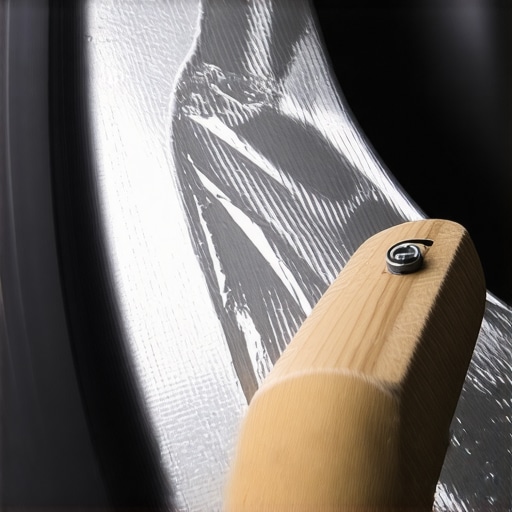
Does sound deadening actually block out highway noise?
This is the nuance most beginners miss: vibration dampers don’t actually block external sound—they only stop the car itself from making noise. If you want to block the hum of the road or the wind, you need a different material entirely, like Mass Loaded Vinyl (MLV). If you skip the MLV and only use butyl mats, you’ll still hear the road, even if your speakers sound punchier. It’s a common trap to keep adding more mats while wondering why the car isn’t getting quieter. In fact, if you over-damp a door without addressing electrical noise, you might finally hear that car alternator making your speakers whine because the background floor has been lowered. You need to ensure you properly ground a car amplifier to eliminate engine hum before you can appreciate the silence you’ve just bought.
The Dangerous Mistake of Ignoring Weep Holes
Here is the ‘oops’ factor that can literally rot your vehicle from the inside out. Every car door has small drainage holes at the very bottom, called weep holes. Rainwater naturally runs down your window glass and into the door cavity. If you get over-zealous with your sound deadening and seal those holes, your door will turn into a fish tank. I once helped a friend who couldn’t figure out why his mid-bass drivers suddenly stopped working; we pulled the door card and found two inches of standing water that had fried the voice coils. If you ever notice your car subwoofer smells like it is burning or your door speakers sound distorted, check for moisture first. Have you ever fallen into this trap of over-applying material or blocking a critical vent? Let me know in the comments. Before you call the project finished, take five minutes to use a multimeter to find a short in your speaker wires that might have been caused by a sharp edge of the aluminum foil. Getting these nuances right is what separates a DIY ‘hack job’ from a professional-grade acoustic environment.
The Only Three Tools You Need to Do It Right
I’ve tried every shortcut in the book, from using the back of a screwdriver to ‘roll’ the butyl to using a hair dryer instead of a proper heat gun. Don’t do that. If you’re serious about your soundstage, you need a heavy-duty steel roller. I personally use a weighted 2-inch model because plastic rollers flex too much, failing to apply the uniform pressure necessary to create that mechanical bond I mentioned earlier. You also need a high-quality digital multimeter. Before you snap those plastic panels back into place, I always use a multimeter to find a short in your speaker wires. It takes two minutes and saves you the absolute nightmare of pulling the door apart again when your amp goes into protection mode. In my own garage, I follow the principles laid out in the Journal of the Audio Engineering Society (JAES), specifically Richard Small’s seminal work on low-frequency reproduction in small enclosures. He proves that the stiffness of the boundary—in this case, your car door—directly affects the speaker’s Q-factor. If that metal is floppy and untreated, your ‘Small’ parameters are essentially useless. 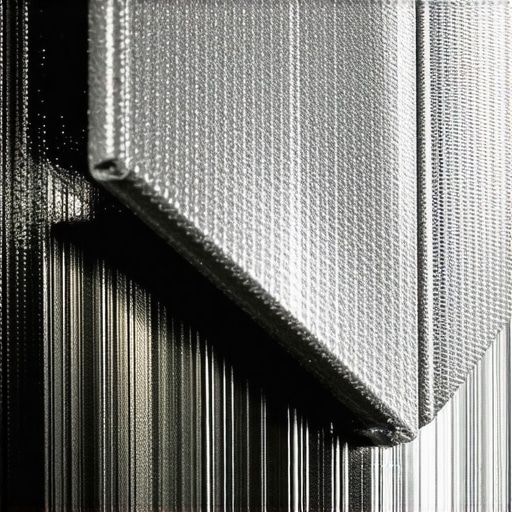
How do I keep my car audio sounding peak for years?
Sound deadening is mostly a ‘set it and forget it’ project, but the environment inside a vehicle is brutal. Between sub-zero winters and the 140-degree cabin temperatures of a July afternoon, even the highest-rated adhesives can eventually fatigue. I recommend doing a quick ‘tap test’ on your door panels every spring. If a section that used to sound like a dull, heavy thud now rings like a bell, it means the material has started to delaminate. This is also the perfect time to check your electronics, as heat is the primary killer of gear. Ensure you know how to stop your car amp from overheating in the summer by verifying that your sound deadening sheets haven’t shifted and blocked critical airflow vents. If you have scaled up your system, you might even consider how to bridge a two-channel amp without blowing a fuse to give your treated doors the extra power they need to truly shine. Looking ahead, I suspect we will see ‘smart’ acoustic panels integrated with the car’s DSP, allowing the system to actively tune out road noise based on the resonance of the deadening material itself.
Scaling Your Build to the Rest of the Vehicle
Once your doors are silent, you will suddenly start hearing rattles you never noticed before. Usually, the next culprit is the rear deck. You need to know how to stop your car’s rear deck from rattling when the sub hits because that thin shelf is a major source of low-end distortion. If you are still running a factory head unit, the easiest way to add a subwoofer to a factory car stereo is to tap into those now-deadened door speaker signals for a clean input. As you add more gear, keep the installation clean and safe; learn the easiest way to hide power wires in your trunk to avoid magnetic interference. My advanced tip for you today is simple: grab a polarity app and double-check your phase one last time before you finish. It is the most common reason ‘perfect’ installs sound flat and lifeless.
Hard Lessons from a Decade of Dampening Doors
I’ve spent years chasing the perfect soundstage, and if there is one thing I’ve learned, it’s that your equipment is only as good as the environment it lives in. Don’t fall for the ‘100% coverage’ myth; focus your energy on the flat, large surfaces that ring like a bell when you tap them. I once made the mistake of buying the thickest mat available only to find my door panels wouldn’t clip back into place. Also, remember that while you are waiting for the truth about speaker break-in periods to pass, the biggest improvement you will hear on day one is the dramatic increase in mid-bass punch, not just the lack of rattles. The door effectively becomes a rigid enclosure, which is the foundation of any high-end build.
The Toolkit That Saves My Sanity Every Time
When you are deep in a build, having the right tools isn’t just about speed; it’s about avoiding a total system failure. I never start a project without my heavy steel roller—plastic versions flex too much and fail to create that molecular bond needed for mass loading. I also keep a reliable multimeter nearby at all times. It is absolutely vital to use a multimeter to find a short in your speaker wires before you snap the panels back on, because a single stray strand of wire touching your new aluminum-backed deadener can send your amp into protection mode. If you’re adding a sub to match your newly silenced doors, take a moment to learn how to match your subwoofer phase with your main speakers to ensure the timing is perfect across your entire frequency range.
Your Daily Commute Deserves a Better Soundtrack
There is a specific kind of pride that comes from closing your car door and hearing a solid ‘thud’ instead of a hollow ‘clank.’ It makes the entire vehicle feel like a luxury cruiser, even before you turn the volume up. Don’t be afraid to get your hands dirty and start with just the front doors. Once you treat those panels and hear the difference in clarity, you’ll never want to drive a factory-stock car again. Investing time into your car audio system is ultimately an investment in your own daily peace and musical enjoyment. What was the first ‘rattle’ that finally pushed you to look into sound deadening? Let me know in the comments below!