
I sat in my brand-new SUV last summer, cranked up a classic funk track, and felt… nothing. No thump in my chest. No vibration in the seat. Just the thin, papery rattle of factory-installed 6.5-inch drivers. It was heartbreaking. My car had all the bells and whistles, but the audio was anemic. I knew I needed a subwoofer, but looking at that integrated touchscreen and the complicated climate control panel, I was terrified. I’d been there before. Years ago, I tried to ‘hack’ a sub into an old sedan by splicing random wires I found under the dash. I ended up with a car that wouldn’t start and a repair bill that made my eyes water. It was a rookie move, and I learned the hard way that you can’t just wing it with modern electronics. But I also learned that you don’t have to rip your car apart to get decent sound. Today, I’m going to share the easiest, most stress-free method to get that deep bass without ruining your factory warranty or your Saturday afternoon.
Why Your Factory Sound System Feels Like It’s Missing a Soul
Most car manufacturers spend a fortune on marketing and safety, but when it comes to the audio, they often cut corners. They give you just enough power to hear the news or a podcast, but not enough to actually feel the music. This is often why your car speakers sound like they are under a blanket when you try to push them. They are being asked to do a job they weren’t designed for. A technical report from the Audio Engineering Society (AES) highlights that low-frequency reproduction is crucial for the perceived ‘fullness’ of sound; without it, our brains register the audio as thin and artificial. By adding a dedicated subwoofer, you offload the heavy lifting from your door speakers, allowing them to focus on the mids and highs. The result? A cleaner, more powerful soundstage that makes your commute feel like a front-row seat at a concert. [image]
Is the risk of messing up your dash actually worth it?
I get it. You’re worried about voiding your warranty or, worse, causing a permanent rattle in your dashboard. The good news is that the ‘easiest way’ I’m talking about doesn’t involve removing the radio at all. We’re going to use the existing speaker signals. If you’ve ever felt intimidated by the spaghetti mess of wires behind a head unit, you can breathe a sigh of relief. You won’t be touching them. Have you ever looked at your dashboard and felt totally intimidated by the thought of changing anything? I’d love to hear about your fears or past ‘installation disasters’ in the comments.
The Simple Path to Bass Without the Headaches
The secret weapon in our arsenal is the powered subwoofer or a high-quality Line Output Converter (LOC). This little device taps into your rear speaker wires—which are usually very easy to access—and converts that signal into something a subwoofer can understand. It’s the bridge between ‘factory boring’ and ‘aftermarket amazing.’ Before you run out and buy the biggest box you can find, remember that you need to match your car subs impedance to your amplifier’s output to keep things running cool and efficient. Using this method, I managed to transform my SUV’s sound in about two hours. I even learned the easiest way to hide power wires in your trunk, so the install looked completely professional. Don’t worry about the technical jargon; we’re going to walk through this step-by-step so you can how to get rid of the annoying hiss in your budget car amp if you’re worried about signal noise. Interestingly, you might find that your car’s factory speakers sound better than your new cheap ones once they aren’t struggling to produce bass they can’t handle. Let’s get into the nitty-gritty of the gear you’ll actually need.
Why the Line Output Converter Is Your New Best Friend
Think of a Line Output Converter (LOC) as a professional translator. Your factory head unit speaks ‘High-Level’ (the powered signal meant for speakers), but your subwoofer’s amplifier only understands ‘Low-Level’ (the unpowered RCA signal). If you try to force the wrong language into your amp, you get distortion, heat, or a fried circuit board. For my first real ‘clean’ install in a 2018 Accord, I used a basic fifteen-dollar converter and the bass sounded muddy because the factory system was automatically cutting the low-end frequencies as I turned the volume up. Switching to an active LOC with a load-sensing feature changed everything; it restored the deep low-end that the factory computer tried to hide. It’s the difference between hearing a drum and feeling the kick in your seat.
Snagging the Right Signal Without a Mess
You don’t need to pull the dash or touch the sensitive electronics behind your touchscreen. Instead, look for your rear deck speakers or the wires running along the door sills. By tapping into these, you’re grabbing the full audio signal already being sent out. But be warned: avoid those cheap plastic T-tap connectors. I once spent four hours troubleshooting why your car speakers cut out when you hit a bump only to find a loose T-tap had vibrated just enough to lose connection. Instead, use the ‘military splice’ method: strip a small section of the factory wire, poke a hole through the copper strands, thread your new wire through, and wrap it tight with high-quality electrical tape. 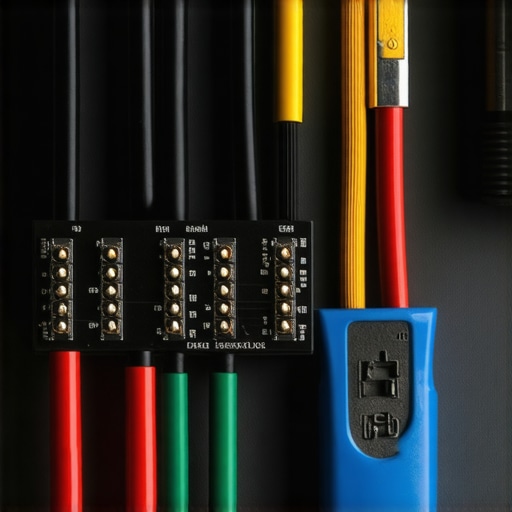
Give Your Amp the Clean Power It Craves
Your amplifier is like a high-performance athlete; it can’t run a marathon if it’s breathing through a straw. You need a dedicated power cable running directly from your battery to the trunk. Always install a fuse within 12 to 18 inches of the battery to prevent a car fire if the cable ever shorts. Just as important is the ground wire. If you don’t find a solid, bare-metal spot on the chassis, you’ll hear a high-pitched squeal that changes with your engine RPM—this is exactly why your car alternator is making your speakers whine. Take the time to sand down the paint to shiny metal where you bolt your ground. This is the most effective way to how to properly ground a car amplifier to eliminate engine hum before it ruins your listening experience.
How to Dial in the Sound So It Doesn’t Just Boom
Once everything is wired, don’t just crank the ‘Gain’ knob to the maximum. The gain isn’t a volume knob; it’s a sensitivity match between the LOC and the amp. Set it too high, and you’ll hear clipping, which is a fast track to learning how to tell if your speaker is actually blown or just rattling. Also, check your phase. If the sub is pushing out while the door speakers are pulling in, they cancel each other out, and your bass disappears. You can learn how to match your subwoofer phase with your main speakers by simply flipping the wires or hitting the phase switch on your amp to see which setting sounds ‘fuller.’ Finally, ensure there is plenty of airflow around the unit so you don’t have to research how to stop your car amp from overheating in the summer.Most enthusiasts spend weeks obsessing over spec sheets, convinced that an extra zero on the price tag or a ‘gold-plated’ certification is the magic bullet for perfect audio. But after years of tearing down systems and testing gear, I’ve realized that the most expensive mistake you can make is ignoring the physics of your room in favor of ‘voodoo’ marketing. Many people will tell you that you need 100 hours of specialized pink noise to ‘open up’ a new set of drivers, but you should learn the truth about speaker break-in periods before you waste your time. In reality, the mechanical suspension of a speaker stabilizes within minutes. Most of what we perceive as ‘break-in’ is actually our brains undergoing psychoacoustic adaptation. Even with personal gear, knowing how to properly break in new headphones without using white noise is as simple as playing your favorite music at normal levels. Have you ever fallen into the trap of ‘burning in’ gear for days? Let me know in the comments.
Does Your Room Geometry Sabotage Your New Setup?
The ‘Oops’ factor for most home setups isn’t the gear itself; it’s the room. You can spend thousands on a flagship receiver, but you might still wonder why your high-end dac sounds exactly like your laptops headphone jack if your room is full of hard reflections. Dr. Floyd Toole, a legend in the field of acoustical engineering, has proven through decades of research that the interaction between a speaker and the room is the single most important factor in sound quality. If your bass feels thin, understanding why your subwoofer sounds better in the corner of the room—a phenomenon known as boundary reinforcement—can save you more money than any cable upgrade ever could. 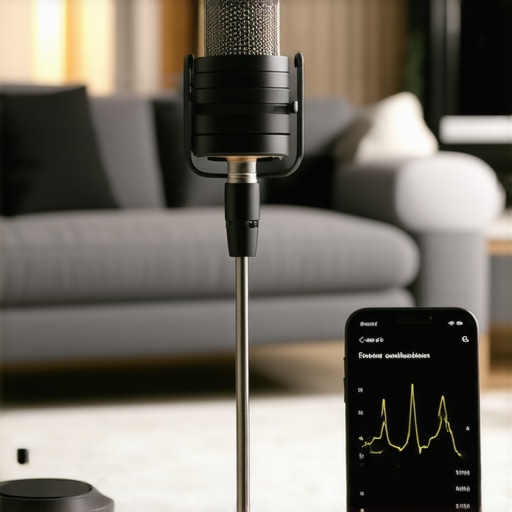 Don’t guess where the problems are; you can actually how to use your phone to measure your rooms frequency response to find the exact peaks and dips in your listening area. This scientific approach helps you avoid the common frustration of why your speakers sound harsh when you play high-res files, which is often a result of ‘ringing’ in an untreated room rather than a flaw in the audio file. Stop chasing the gear and start fixing the space it lives in.
The Tiny Tools That Save Me Thousands in Repair Bills
I’ve spent years collecting gear, and if there’s one thing I’ve learned, it’s that neglect is the silent killer of high-fidelity sound. You buy a beautiful vintage amp and a year later, the volume knob sounds like someone is crunching potato chips in your ear every time you adjust it. My secret weapon is a can of DeoxIT D5. It’s not just a cleaner; it’s a chemical rejuvenator. When you learn how to fix a scratchy volume dial with electrical contact cleaner, you aren’t just spraying away dust; you’re dissolving oxidation that physically blocks micro-signals from passing through the potentiometer. According to the technical documentation from Caig Laboratories, the manufacturers of DeoxIT, oxidation increases contact resistance exponentially, which is often the culprit behind ‘lost’ channels or muddy mids. This simple ten-minute fix has saved more receivers from the scrap heap than any other tool in my kit.
How do I keep my speakers and amps sounding new for the long haul?
Maintenance isn’t just about cleaning; it’s about preventative care. For those of you with vinyl setups, you’ve likely noticed how to stop your turntable from picking up vibrations from your floor is a constant battle against gravity and structural resonance. But what about the internal components? If you’re running older gear, you need to watch your capacitors. A leaking or bulging cap can take out an entire power transformer. Learning how to tell if your speakers capacitor is starting to fail is a skill that separates the hobbyists from the pros. Similarly, if you enjoy portability, you must avoid the mistake that kills your portable speaker battery life—which is usually leaving it at 0% or 100% charge for months on end. Li-ion batteries crave the middle ground to stay healthy. 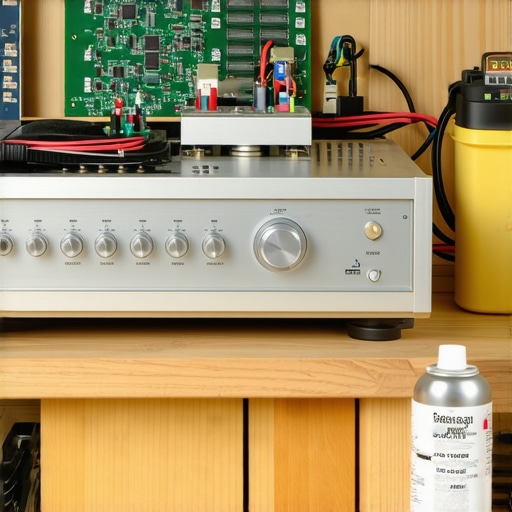
Where the World of High-End Audio is Heading
As I look toward the next decade of home audio, I see the ‘passive’ speaker era slowly fading. We are moving toward a future dominated by active, DSP-corrected systems. Imagine a world where your speakers use built-in LiDAR to map your room’s dimensions and automatically apply a parametric EQ to kill standing waves. This tech is already trickling down from high-end studio monitors into consumer soundbars. Even if you love the old-school look, you can still how to revive old speakers with new foam surrounds to keep the vintage aesthetic while using modern external processors to handle the room correction. The trend is clear: we are moving from ‘better hardware’ to ‘smarter software.’ If you have a piece of gear that’s been sitting silent because it ‘sounds off,’ I challenge you to open it up this weekend. Check those connections and give the internal contacts a clean. You might find that your favorite piece of equipment isn’t broken—it’s just waiting for a little TLC to sing again.
The Expensive Mistakes That Taught Me Everything
After years of tinkering with car speakers and home theaters, I’ve realized that the biggest barrier to great sound isn’t your budget—it’s your patience. I used to think that more power always meant more quality, but I was wrong. The first time I tried to how to bridge your car amp for more bass power, I didn’t account for the heat, and I nearly melted my mounting board. I learned that headroom is important, but control is everything. Another ‘lightbulb moment’ happened when I realized that sound is 50% gear and 50% environment. You can have the best sub in the world, but if your trunk isn’t dampened, you’re just listening to rattling metal. Finally, don’t get discouraged by technical hurdles. Every professional installer started by blowing a fuse or wiring something out of phase. The difference is they didn’t stop there.
My Proven Toolkit for High-Fidelity Results
If you’re serious about maintaining your gear, there are a few things I never travel without. First is a reliable digital multimeter; it’s the only way to truly know if your ground is solid. Second, if you work with any analog gear, you need a high-quality contact cleaner. I’ve used it to how to fix a scratchy volume fader on a professional mixer and restore life to 30-year-old receivers. For home setups, I highly recommend the ‘Room EQ Wizard’ software. It’s free, and when paired with a cheap measurement mic, it takes the guesswork out of speaker placement. If you’re a vinyl enthusiast and find why your vinyl records sound distorted at the end of the side, a simple alignment protractor will be the best ten dollars you ever spend.
Your Music Deserves This Transformation
At the end of the day, we do this for the feeling we get when the beat finally drops. Whether you are upgrading your car speakers or fine-tuning a dedicated listening room, the goal is the same: to disappear into the music. Don’t be afraid to pull that door panel or crawl into your trunk with a flashlight. The reward of a crisp, punchy system that you built with your own hands is worth every second of frustration. Go grab your wire strippers and start your journey toward the perfect soundstage today. Have you ever spent hours chasing an annoying rattle only to find out it was just a loose coin in the door pocket? Let me know in the comments below!