
It is a classic Saturday night move. I am nestled into the cushions, a bowl of popcorn balanced on my lap, and the movie starts. It is way too loud. I click the ‘volume down’ button. Nothing. I click again, harder this time, as if pressure equals signal strength. Still nothing. I end up leaning three feet forward, arm outstretched like a fencer, just to get the soundbar to acknowledge my existence. It is frustrating, it is silly, and frankly, we are too old to be doing gymnastics just to watch Netflix. If you are tired of playing a game of ‘find the right angle,’ you are in the right place because I have lived through this exact annoyance and finally found the way out.
The Living Room Yoga Nobody Asked For
I will be honest with you: I once spent $200 on a high-end universal remote because I was convinced my stock soundbar remote was just a cheap piece of plastic garbage. I felt like a genius for about ten minutes—until the new remote did the exact same thing. It turns out, the hardware usually is not the problem. I made the mistake of ignoring the environment. I was focused on the device in my hand when I should have been looking at the path the signal has to travel. Sometimes the fix is as simple as repositioning the bar so it does not block its own sensors. We often assume that because we can see the TV, the remote can ‘see’ the soundbar, but infrared light is a lot pickier than our eyes are. Today, we are going to stop the guessing game and fix that line of sight once and for all.
The Physics of the Infrared Ghost
Most soundbars rely on Infrared (IR) technology. It is old, it is reliable, but it is also incredibly sensitive to light pollution. I did not realize this until I read a report from Consumer Reports explaining that many modern LCD and LED screens emit a burst of IR interference the moment they are turned on, which can essentially ‘blind’ your soundbar for several minutes. It is like trying to see a flashlight while someone is shining a high-beam searchlight in your face. If your remote works fine after the movie has been playing for twenty minutes but fails at the start, you are likely dealing with screen interference. Beyond just the light, we also have to deal with the ‘muddy’ reality of modern living rooms. If you are already struggling with dialogue that sounds muffled, adding a non-responsive remote to the mix makes the whole experience feel broken.
Is My Soundbar Just a Piece of Junk?
I get this question all the time from neighbors who see me tinkering with my setup. They worry they bought a ‘dud’ because the remote only works if they are standing directly in front of the unit. The truth is, even the most expensive systems can be defeated by a poorly placed coffee table book or a glass cabinet door that reflects the IR signal away from the sensor. It is rarely a hardware failure and almost always a geometry problem. Have you ever found yourself pointing your remote at the ceiling or the side wall just to get the volume to change? Let me know in the comments, because that ‘bounce’ trick is actually a huge clue as to what is going wrong in your room.
Clear the Path for Your IR Signal
To get your remote working, you have to treat it like a flashlight. If there is a stack of coasters or a decorative bowl in front of the soundbar’s sensor, the light simply won’t reach its destination. I once visited a friend who complained his remote was ‘broken.’ I walked over, moved a single picture frame two inches to the left, and suddenly the volume responded. We often focus so much on the tech that we forget the physical world. If you find that your soundbar is blocking the TV’s own sensor, or vice versa, you are fighting a losing battle from the start. Elevate the TV or move the bar forward to the very edge of the console to ensure those beams have a straight shot. 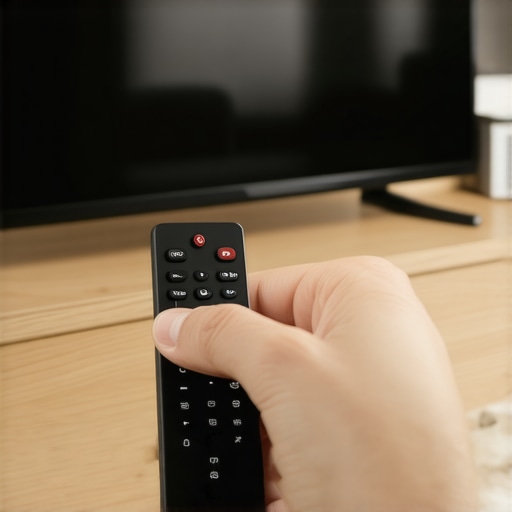
Drown Out the Electronic Noise
Your TV is actually a giant light bulb, and sometimes it’s too bright for its own good. Many LED panels emit a massive amount of IR ‘noise’ when they first power up. If your remote is sluggish only during the first ten minutes of a movie, try dimming the screen or disabling ‘ambient light sensing’ features. You might find that your home theater actually performs better with the lights off, not just for the mood, but because it reduces the overall light pollution your sensors have to sift through. This is why high-end setups often use wired IR extenders; they move the ‘eye’ of the system away from the glowing heat of the screen.
Stop Stacking Your Gear
We are all tempted to save space by stacking components, but this is a recipe for signal failure and hardware death. I learned this the hard way when I put a sleek new record player directly on top of my receiver to save shelf space. Within an hour, the remote became unresponsive because the receiver was literally baking from the trapped heat. There is a very good reason why you should never place your turntable on top of your receiver; heat rises, and electronics hate it. That heat can actually cause the IR receiver component to drift in frequency, making it ignore your remote’s commands until it cools down. Give your gear at least two inches of breathing room on all sides.
Eliminate Wireless Traffic Jams
Sometimes the remote isn’t the only thing struggling to communicate. If you have a wireless subwoofer, it’s likely fighting for the same 2.4GHz airwaves as your Wi-Fi router and your Bluetooth devices. If you notice your wireless sub keeps disconnecting while you are trying to change the volume, your remote’s signal might be getting caught in that digital crossfire. Move your router at least three feet away from your soundbar. I once had a client whose remote wouldn’t work whenever they used their microwave—it sounds like an urban legend, but interference is a very real physical force. If the lag is unbearable, check for a firmware update or look into how to fix the audio delay through your TV settings to sync the physical response with the digital action.It is a classic Saturday night move. I am nestled into the cushions, a bowl of popcorn balanced on my lap, and the movie starts. It is way too loud. I click the ‘volume down’ button. Nothing. I click again, harder this time, as if pressure equals signal strength. Still nothing. I end up leaning three feet forward, arm outstretched like a fencer, just to get the soundbar to acknowledge my existence. It is frustrating, it is silly, and frankly, we are too old to be doing gymnastics just to watch Netflix. If you are tired of playing a game of ‘find the right angle,’ you are in the right place because I have lived through this exact annoyance and finally found the way out.
The Living Room Yoga Nobody Asked For
I will be honest with you: I once spent $200 on a high-end universal remote because I was convinced my stock soundbar remote was just a cheap piece of plastic garbage. I felt like a genius for about ten minutes—until the new remote did the exact same thing. It turns out, the hardware usually is not the problem. I made the mistake of ignoring the environment. I was focused on the device in my hand when I should have been looking at the path the signal has to travel. Sometimes the fix is as simple as repositioning the bar so it does not block its own sensors. We often assume that because we can see the TV, the remote can ‘see’ the soundbar, but infrared light is a lot pickier than our eyes are. Today, we are going to stop the guessing game and fix that line of sight once and for all.
The Physics of the Infrared Ghost
Most soundbars rely on Infrared (IR) technology. It is old, it is reliable, but it is also incredibly sensitive to light pollution. I did not realize this until I read a report from Consumer Reports explaining that many modern LCD and LED screens emit a burst of IR interference the moment they are turned on, which can essentially ‘blind’ your soundbar for several minutes. It is like trying to see a flashlight while someone is shining a high-beam searchlight in your face. If your remote works fine after the movie has been playing for twenty minutes but fails at the start, you are likely dealing with screen interference. Beyond just the light, we also have to deal with the ‘muddy’ reality of modern living rooms. If you are already struggling with dialogue that sounds muffled, adding a non-responsive remote to the mix makes the whole experience feel broken.
Is My Soundbar Just a Piece of Junk?
I get this question all the time from neighbors who see me tinkering with my setup. They worry they bought a ‘dud’ because the remote only works if they are standing directly in front of the unit. The truth is, even the most expensive systems can be defeated by a poorly placed coffee table book or a glass cabinet door that reflects the IR signal away from the sensor. It is rarely a hardware failure and almost always a geometry problem. Have you ever found yourself pointing your remote at the ceiling or the side wall just to get the volume to change? Let me know in the comments, because that ‘bounce’ trick is actually a huge clue as to what is going wrong in your room.
Clear the Path for Your IR Signal
To get your remote working, you have to treat it like a flashlight. If there is a stack of coasters or a decorative bowl in front of the soundbar’s sensor, the light simply won’t reach its destination. I once visited a friend who complained his remote was ‘broken.’ I walked over, moved a single picture frame two inches to the left, and suddenly the volume responded. We often focus so much on the tech that we forget the physical world. If you find that your soundbar is blocking the TV’s own sensor, or vice versa, you are fighting a losing battle from the start. Elevate the TV or move the bar forward to the very edge of the console to ensure those beams have a straight shot.
Drown Out the Electronic Noise
Your TV is actually a giant light bulb, and sometimes it’s too bright for its own good. Many LED panels emit a massive amount of IR ‘noise’ when they first power up. If your remote is sluggish only during the first ten minutes of a movie, try dimming the screen or disabling ‘ambient light sensing’ features. You might find that your home theater actually performs better with the lights off, not just for the mood, but because it reduces the overall light pollution your sensors have to sift through. This is why high-end setups often use wired IR extenders; they move the ‘eye’ of the system away from the glowing heat of the screen.
Stop Stacking Your Gear
We are all tempted to save space by stacking components, but this is a recipe for signal failure and hardware death. I learned this the hard way when I put a sleek new record player directly on top of my receiver to save shelf space. Within an hour, the remote became unresponsive because the receiver was literally baking from the trapped heat. There is a very good reason why you should never place your turntable on top of your receiver; heat rises, and electronics hate it. That heat can actually cause the IR receiver component to drift in frequency, making it ignore your remote’s commands until it cools down. Give your gear at least two inches of breathing room on all sides.
Eliminate Wireless Traffic Jams
Sometimes the remote isn’t the only thing struggling to communicate. If you have a wireless subwoofer, it’s likely fighting for the same 2.4GHz airwaves as your Wi-Fi router and your Bluetooth devices. If you notice your wireless sub keeps disconnecting while you are trying to change the volume, your remote’s signal might be getting caught in that digital crossfire. Move your router at least three feet away from your soundbar. I once had a client whose remote wouldn’t work whenever they used their microwave—it sounds like an urban legend, but interference is a very real physical force. If the lag is unbearable, check for a firmware update or look into how to fix the audio delay through your TV settings to sync the physical response with the digital action. While we’ve cleared the physical path for your remote, we need to talk about the invisible path of your audio signal. Most people believe that ‘more power’ equals ‘better sound,’ but that is a dangerous oversimplification. I’ve seen enthusiasts drop thousands on a high-wattage digital receiver only to wonder why their passive speakers sound quiet compared to a 30-year-old analog unit. It is not a defect; it is a failure to understand the relationship between current and voltage.
Why do ‘powerful’ digital amps often feel weak with high-end speakers?
The trap here is the ‘Max Power’ rating on the box. According to the FTC’s Amplifier Rule, many manufacturers historically inflated these numbers by testing at a single frequency rather than the full 20Hz to 20kHz spectrum. If you don’t pay attention to choosing the right ohm rating for your amp, you are essentially choking your speakers before they even start. A digital amp might claim 100 watts, but if it cannot handle a 4-ohm load without the voltage sagging, it will clip and distort long before you hit theater levels. 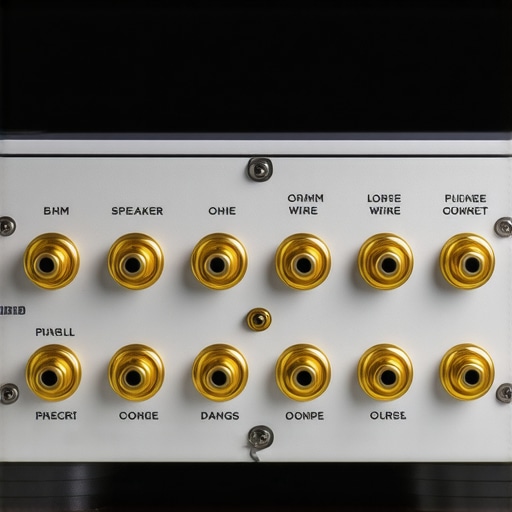 Let’s talk about the ‘Break-in’ myth. Everyone will tell you that you need to run your speakers for 50 to 100 hours before they ‘open up.’ While there is a sliver of truth in the mechanical suspension loosening up slightly, researchers like Floyd Toole have demonstrated that most ‘break-in’ is actually psychoacoustic. Your brain is simply adapting to the new frequency response. However, if you are looking for real physical improvements, focus on why your new speakers sound better after use—it often has more to do with the temperature of the voice coil than the cone ‘stretching.’ One of the biggest ‘Oops’ factors I see involves the center channel. There is a specific reason why your center channel should never be placed on the floor: the floor reflections create a ‘comb filtering’ effect that makes voices sound hollow and muddy. The same logic applies to room volume. This is why your soundbar sounds thin in large open-concept homes; the sound energy is simply dissipating into the massive air volume. Have you ever fallen into this trap of buying gear that didn’t fit the physics of your room? Let me know in the comments.I’ve learned that the secret to a system that lasts thirty years isn’t just buying expensive stuff; it’s about not letting the environment eat your gear alive. Oxidation is the silent killer of high-end fidelity. Even if you have the best gear, atmospheric moisture creates a microscopic layer of “crust” on your connections. I personally use a product called DeoxIT D5—it’s the industry standard for a reason. Every six months, I pull my cables and clean my gold-plated connectors without ruining the finish. This ensures the resistance stays low and the signal stays pure. If you start hearing a crackle when you adjust the gain, you need to learn how to fix a scratchy volume knob on an old amp before the dust causes permanent scoring on the internal potentiometer tracks.
How do I maintain my home audio system over time?
Maintenance is about preventative checks, not just reacting when something breaks. I set a calendar reminder every year to inspect the physical integrity of my drivers. Humidity can dry out the rubber or foam that holds your speaker cones in place. If you catch it early, you can revive old speakers with new foam surrounds for about $20, whereas waiting until they crumble could lead to a blown voice coil. According to the technical documentation from the Audio Engineering Society (specifically the AES2-2012 standard), consistent thermal management and electrical contact integrity are the two biggest factors in long-term transducer reliability. 
Why a Multimeter is Your Best Friend
You don’t need an engineering degree to troubleshoot your setup. A basic $15 multimeter can save you hours of hair-pulling. I’ve seen people replace entire amplifiers when the problem was just a tiny strand of copper touching the chassis. Learning to use a multimeter to find a short in your speaker wires is the single most valuable “pro” skill you can acquire. It allows you to verify that your amp is seeing the load it expects, rather than guessing why the protection circuit keeps tripping. It is a level of authority over your gear that prevents you from being fleeced by repair shops.
The Future of Home Audio Scaling
We are moving away from the “one big box” era. I predict that within the next five years, passive speakers will become a niche for enthusiasts, while everyone else shifts to fully active, DSP-corrected systems. This is why I always tell people that two small subwoofers are better than one massive driver; the future is about using software to manage room physics rather than just throwing raw power at the problem. Advanced digital processing can now compensate for poor room acoustics in real-time, making those high ceilings or awkward corners a non-issue. My advanced tip for you this week: take five minutes to pull your main speaker cables, check for any frayed ends, and give those terminals a quick wipe with 99% isopropyl alcohol. You might be surprised at the “free” clarity you get back.
The Small Tweaks That Finally Made My Setup Sing
After years of fighting with unresponsive remotes and “weak” amplifiers, I realized that the best audio system isn’t always the most expensive one—it’s the one that is most respected. I used to think a soundbar was a set-it-and-forget-it device, but I learned that even the most modern tech needs a little help from its environment. Lesson one: Your room is as much a component as your speakers. Lesson two: Don’t let a “digital” label fool you; knowing the reason your passive speakers sound quiet with a digital amp can save you from buying gear you don’t actually need.
Your Next Steps Toward Audio Mastery
If you want to move from being a frustrated listener to a home theater pro, you need to expand your toolkit beyond the remote. #IMAGE_PLACEHOLDER_E# I always recommend learning how to use a multimeter to find a short in your speaker wires because it’s the fastest way to stop guessing and start fixing. For those looking to upgrade without breaking the bank, I’ve found that the trick to buying high-end audio at estate sales is the best-kept secret for finding vintage gems. And for the modern listener, knowing how to use your phone as a high-end audio source ensures your music sounds great no matter where you are.
Turn Your Living Room Into a Sanctuary
Building a great audio experience is a marathon, not a sprint. Don’t feel like you have to fix every reflection or wire every extender in a single afternoon. Start with the small stuff: move that picture frame, wipe those connectors, and give your gear some room to breathe. When you finally stop fighting your soundbar remote and start getting lost in the sound, all the effort will feel worth it. Building a home theater is about enjoying the art, not wrestling with the hardware.
Have you ever spent way too much money on a ‘fix’ only to find out the solution was actually free? Let me know your biggest audio facepalm moments in the comments below!