
The sun was setting on the most frustrating Saturday of my life. I had spent six hours sweating under a brutal afternoon heat, burying what I thought was perfectly fine wire for my new patio speakers. I finally clicked the remote, expecting a wall of crystal-clear sound. Instead? I got a whisper. A thin, crackly, pathetic excuse for audio that made my high-end outdoor monitors sound like they were trapped inside a tin can. It was a classic rookie mistake. I had ignored the physics of electrical resistance, and my speakers were literally starving for power. I learned the hard way that you cannot cheat the distance between your amp and your backyard.
Why Thin Wire Is the Silent Killer of Outdoor Sound
If you are planning to run cable more than 50 feet, the gauge isn’t just a detail; it is the lifeline of your entire system. When I first started messing with outdoor audio, I thought wire was just wire. I grabbed a spool of flimsy 18-gauge stuff because it was cheap and easy to hide. Huge mistake. As the distance increases, the resistance of the wire climbs, which means your amplifier has to work ten times harder just to push signal through the line. This is exactly why cheap speaker wire causes signal loss over 50 feet. You lose the deep, thumping bass first, then the crisp highs. Eventually, you are left with a muddy mess. Beyond just the sound quality, making an amp struggle against high resistance is the real reason your amp is getting hot to the touch and could eventually lead to a total hardware failure.
Is Thicker Wire Actually Just Marketing Hype?
I get the skepticism. Some boutique cables cost more than the speakers themselves, and it feels like a scam. You might be wondering if you really need to spend the extra cash on bulky 12-gauge or 14-gauge wire. But here is the reality: it is not about the “purity” of the copper or some magical gold-plated coating. It is about the physical diameter of the conductor. A thicker wire (which, confusingly, has a lower gauge number) allows more current to flow with less resistance. According to the Engineering Toolbox, 12-gauge copper wire has roughly 1.6 ohms of resistance per 1,000 feet, while 18-gauge has over 6 ohms. That is a massive difference when you are trying to maintain audio fidelity across a backyard. I have seen so many people buy amazing gear only to bottleneck it with wiring that looks like dental floss. Have you ever spent a fortune on speakers only to be disappointed by the volume? We are going to make sure that never happens again. I will help you calculate exactly what you need so you are not stuck fixing a system that isn’t loud enough for your next barbecue. We will even look at keeping your DIY setup waterproof so your hard work survives the first rainstorm.
Choose Your Wire Gauge Like Your Sound Depends on It
Think of your speaker wire like a garden hose. If you try to push a massive amount of water through a tiny straw, you only get a trickle at the end. For any run over 50 feet, 14-gauge is your bare minimum, but 12-gauge is the gold standard for outdoor setups. This extra thickness reduces the electrical friction the signal encounters as it travels. When I moved from my old 18-gauge dental floss to a heavy-duty 12-gauge spool, the transformation was instant. The kick drum in my favorite tracks actually felt like a physical hit rather than a distant tap. 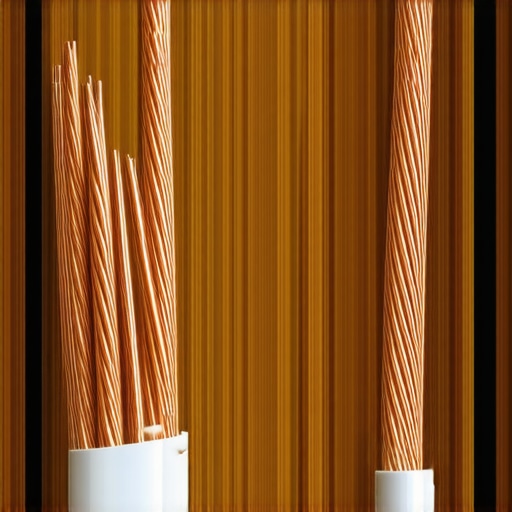
Avoid the Power Loss Trap
If you are pushing massive distances, don’t make the mistake of using an underpowered source. You should also be wary of your power source; specifically, why you should avoid using an extension cord for your power amp whenever possible. Voltage drops can occur before the signal even hits the speaker wire, leaving your system sounding anemic. Focus on the continuous power rather than marketing numbers. It is vital to understand the difference between peak and rms power explained simply so you don’t over-estimate what your gear can actually handle over a long day of playing music.
Verify Your Phase Before You Bury the Cables
There is nothing worse than finishing a four-hour trenching job only to realize your speakers are out of phase. When one speaker is pushing while the other is pulling, they cancel each other’s bass frequencies out. I remember a specific July 4th party where my system sounded thin no matter what I did. I finally realized one speaker was wired backward. Now, I always teach people how to use a 9v battery to check your speaker polarity before a single drop of dirt covers the wire. A quick pop from the speaker cone tells you exactly which wire is positive.
Protect Your Hardware From the Heat
Resistance creates heat, and heat kills electronics. If you are running long lines, your amp is fighting an uphill battle. You need to learn how to tell if your amplifier has enough headroom for your speakers. If you are maxing out the volume just to hear the music 60 feet away, your amp will eventually clip or shut down. I once tried an experimental setup for a friend where I had to figure out how to wire a 4-ohm car speaker to an 8-ohm home receiver just to get enough coverage. While it worked for the afternoon, the amp was scorching to the touch because I hadn’t accounted for the total load.
Keep Those Connections Clean and Green-Free
The outdoor air is the enemy of copper. Moisture eventually leads to that nasty green crust that eats away at your signal. Every spring, I make it a habit to check my terminals. Learning how to clean green oxidization off your copper speaker terminals is a mandatory skill if you want your system to last more than two seasons. Use a bit of sandpaper or a dedicated cleaner to bring back that shiny copper. It is a small maintenance step that prevents you from having to re-buy and re-run hundreds of feet of cable every few years.Beyond just the physical wiring, there is a psychological trap many of us fall into: the ‘more is better’ fallacy. Everyone says you need high-resolution 24-bit audio to hear ‘real’ music, but in my experience, upgrading your files before addressing your room acoustics is a waste of money. If your listening space is poorly treated, why your speakers sound harsh when you play high-res files becomes the primary issue—those extra bits just highlight the ringing in your room or the physical limitations of your tweeters. A famous study by Meyer and Moran for the Audio Engineering Society demonstrated that even trained listeners often can’t distinguish between high-res and Red Book CD quality in typical domestic environments. The real secret isn’t the file; it’s how that sound interacts with the world. 
Stop Obsessing Over High-Res Files Until Your Room Is Ready
It sounds counterintuitive, but your ‘deals’ on high-end gear are often sabotaged by basic physics. People spend thousands on amplifiers but forget the mechanical foundation. You might think heavy metal stands are enough out of the box, but the reason your speaker stands need to be filled with sand is to kill parasitic resonance that muddies your midrange. Without that extra mass, your ‘high-end’ speakers are essentially sitting on vibrating tuning forks. Similarly, many wonder: is gold-plated hardware really worth the extra cash? While it looks great, gold is actually less conductive than copper or silver; its only real benefit is preventing the oxidation I mentioned earlier. It won’t fix a system that lacks fundamental power.
The Tiny Gap That Steals Your Bass
Here is the ‘oops’ factor most headphone enthusiasts miss: the acoustic seal. If you wear glasses, the arms of the frames create a microscopic gap in the headphone cushion. This tiny break in pressure leads to why your headphones sound thin when you wear glasses. You can spend $2,000 on a pair of elite planar magnetic headphones, but if that cushion isn’t perfectly flush against your skin, your sub-bass response will drop off a cliff. It is the most common reason people return high-end headphones thinking the drivers are defective. If your audio lacks punch, try removing your glasses or switching to thin-arm frames.
Does Cable Directionality Actually Matter for Home Audio?
This is the ultimate advanced reader debate. Some manufacturers claim their copper is ‘drawn’ in one direction, requiring a specific orientation for signal flow. Scientifically, in an alternating current (AC) circuit—which audio signals are—electrons flow in both directions. Unless the cable has a specific shield-grounding configuration at one end (a ‘pseudo-balanced’ design), directionality is largely a marketing myth used to justify inflated price tags. Instead of worrying about arrows on your wires, look at your source components. I have seen too many people buy $500 cables only to wonder why your expensive headphones sound thin on a basic smartphone. The bottleneck is the voltage output of your device, not the molecular structure of the copper.
Check Your Headroom Before You Crank It
One final nuance: don’t confuse ‘loudness’ with ‘power.’ You need to understand how to tell if your amplifier has enough headroom for your speakers. If you are pushing your volume dial to 90% just to reach a decent level, you are likely clipping the signal. Clipping generates high-frequency distortion that can heat up and eventually destroy your tweeters. It is far better to have an ‘overpowered’ amp running at 30% than a budget amp struggling at its limit. Have you ever fallen into the trap of buying gear that was ‘too much’ for your amp to handle? Let me know in the comments.Maintaining high-end audio isn’t about expensive rituals; it’s about basic chemistry and preventative care. I learned this lesson the hard way when my favorite vintage receiver started making an aggressive ‘pop’ every time I adjusted the volume. Most people assume their gear is dying when they hear static, but usually, it’s just microscopic dust and oxidation. I swear by a can of Caig DeoxIT D5; it is the industry standard for a reason. It doesn’t just clean the surface; it chemically improves the conductivity of the metal. If you are hearing crackles, you need to learn how to fix a scratchy volume dial with electrical contact cleaner before you even consider shopping for a replacement. It is a five-minute fix that can save you hundreds in repair fees. Beyond the dials, you must check your physical connections at least twice a year. I have seen ten-thousand-dollar systems crippled by nothing more than atmospheric moisture. If your cables have been sitting untouched, you are likely losing signal to corrosion. This is exactly why you should know how to clean green oxidization off your copper speaker terminals. I personally use a stiff nylon brush and a tiny dab of silver-enhanced conductive grease to lock out the air. It is the secret to a system that sounds ‘alive’ rather than just ‘functional.’ 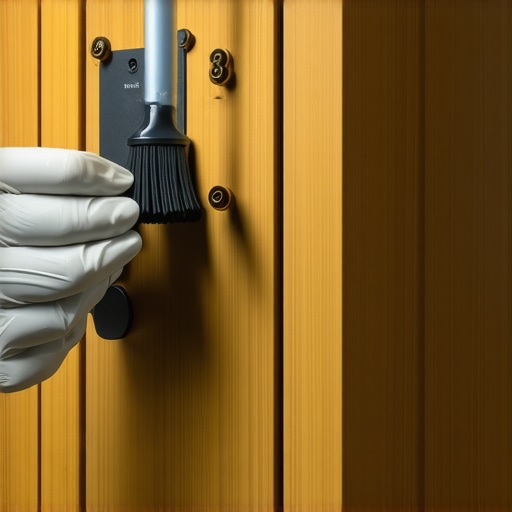
How Do I Keep My Vintage Gear Sounding Like New?
The biggest threat to long-term performance is the internal components literally drying out over decades. As noted by engineering experts at Nichicon, electrolytic capacitors have a ‘design life’ often rated for 2,000 to 10,000 hours at their maximum operating temperature, meaning heat is the literal clock ticking inside your receiver. If your amp is over ten years old and running hot, you need to know how to tell if your speakers capacitor is starting to fail. You will notice the bass getting ‘loose’ or a slight 60Hz hum in the background. This doesn’t mean the gear is trash; it’s a standard service item. You can even use the trick to making vintage speakers sound modern again by swapping in higher-quality film capacitors if you are comfortable with a soldering iron. I predict that in the next few years, we will see more ‘smart’ maintenance tools integrated into amplifiers that can measure component health in real-time. Until then, you are the technician. Watch for physical wear on your drivers too. I have saved dozens of vintage woofers by knowing how to fix a small rip in a speaker surround with glue before it turned into a total blowout during a party. If your surrounds feel tacky or stiff, check out how to clean sticky speaker surrounds without damaging the rubber to prevent premature rot. When you are ready to scale up, don’t just buy bigger boxes; buy a multimeter. It is the most important tool in my kit for verifying impedance matches and ensuring I don’t fry a power stage. It is how I safely figured out how to wire a 4-ohm car speaker to an 8-ohm home receiver without the thermal protection kicking in every five minutes. Take one piece of gear you haven’t touched in a year and give the terminals a quick clean tonight; you will be shocked at how much ‘veil’ is lifted from the music just by restoring a perfect electrical contact.
Mistakes That Almost Made Me Quit Outdoor Audio
After years of trial and error, I realized that the biggest enemy isn’t the budget—it’s the rush. I once buried 200 feet of cable before checking the signal, only to find a break halfway through. Always test your connections before you trench. Also, don’t assume that simply turning up the volume fixes poor placement. If your audio feels ‘lost’ in the open air, you might just need to adjust the angle or height of your mounts. If you are running your gear in a hot garage or enclosure, you should understand how to fix a car amplifier that keeps shutting off in summer because the thermal physics are identical for home amps in tight spaces. Finally, protect your investment. Before you finalize the install, learn how to spot a blown tweeter before it ruins your crossover so you aren’t chasing ghosts in your wiring later. #IMAGE_PLACEHOLDER_E#
Tools I Never Leave the House Without
To keep my backyard sounding like a concert hall, I rely on a small but mighty toolkit. A high-quality digital multimeter is non-negotiable for checking continuity and verifying that my 12-gauge wire is delivering the full signal. I also keep a ‘placement map’ based on the logic of how to find the sweet spot for your speakers in a rectangular room; while the outdoors doesn’t have four walls, you can still use these principles to visualize how sound reflects off your house siding or patio roof. Finally, I never start a season without a fresh can of contact cleaner to treat my terminals and prevent signal-killing corrosion.
Bring the Concert to Your Back Patio
There is nothing quite like the feeling of sitting back with a cold drink and hearing your favorite album rendered perfectly in the open air. It takes a bit of sweat and a commitment to using the right speaker wire, but the results are worth every second of effort. Don’t be afraid to experiment with your setup and tweak the angles until it sounds exactly right to your ears. Have you ever run into a weird wiring issue that took you all day to solve? Let me know in the comments below!