
I’ll never forget the first time I showed off my new subwoofer setup to a buddy. I popped the trunk, chest puffed out, ready for the big reveal. Instead of hearing about the bass, he just stared at the bird’s nest of thick power wire and tangled zip ties. “Nice fire hazard,” he joked. I played it off, but man, I was cringing. My car sounded like a concert hall, but the trunk looked like a science project gone wrong. I learned the hard way that a great install isn’t just about the decibels; it’s about the presentation and, more importantly, the safety of your vehicle’s electrical system.
My Trunk Used to Look Like a Science Project Gone Wrong
The biggest mistake I made back then—and I see it all the time—was thinking that a few loose cables wouldn’t hurt anyone. I just tucked the wires under the corner of the trunk mat and called it a day. Not only did it look amateur, but those loose wires eventually led to a loose connection that caused my aftermarket radio to drain my battery overnight. When cables are flopping around every time you take a sharp turn, you’re asking for trouble. Today, I want to show you the path to a stealthy, professional look that keeps your gear safe and your trunk functional. We are going to turn that chaos into a clean, factory-style finish that you can actually be proud to show off.
Is Cable Management Really Worth the Extra Effort?
You might be wondering if it’s worth pulling up trim panels just for a few wires. From my experience, the answer is a resounding yes. Beyond the aesthetics, proper wire routing prevents heat build-up and interference. If you don’t take the time to properly ground your car amplifier and secure your power runs, you’ll likely end up with that annoying engine hum through your speakers. I’ve spent more hours than I’d like to admit chasing down rattles, only to realize the culprit was a loose power wire vibrating against the spare tire well. Taking twenty extra minutes to hide those cables correctly can save you hours of troubleshooting later.
The Simple Secret to Stealthy Power Runs
The easiest way to get that professional look isn’t by buying expensive specialized kits; it’s by utilizing the existing channels your car’s manufacturer already built. Every car has factory wire looms and plastic sills designed to carry the electrical lifeblood of the vehicle. By piggybacking on these paths, you ensure your wires are protected from being pinched or stepped on. I once made the error of running a wire too close to the trunk hinge, and let’s just say it didn’t end well for the insulation. According to safety guidelines from organizations like the National Highway Traffic Safety Administration (NHTSA), loose items in a vehicle—including heavy gauge wiring—can become dangerous if they interfere with vehicle operation or the structural integrity of interior panels. Have you ever opened your trunk and felt a sudden wave of shame at the mess of wires staring back at you? It happens to the best of us, but it’s a fixable problem that starts with a little bit of patience and the right technique. In the next section, we’ll dive into the specific tools and hidden gaps in your trunk that make this job a breeze.
Pop Those Plastic Panels and Find the Hidden Channels
The first step to a stealthy install is realizing that your car is full of hollow spaces specifically designed to hide the guts of its electrical system. You need to get comfortable with pulling up the plastic door sills and the kick panels. I used to be terrified of breaking those little plastic clips, but a cheap set of nylon pry tools is a lifesaver. Once those panels are up, you’ll see the factory wiring harness. This is your highway. Lay your power wire right next to it and use zip ties every six inches to keep it from shifting. This ensures that when you snap the panels back down, nothing is pinched. I once rushed a job on an old sedan and just shoved the wire under the carpet without securing it. A month later, the constant foot traffic on the wire caused the insulation to wear thin, and I started wondering why your car speakers pop when you turn the key every time I started the engine. It was a direct result of a sloppy run.

Don’t Let Power Wires Cross Your Signal Cables
This is a fundamental rule that many beginners ignore: keep your power cables and your RCA signal cables as far apart as possible. Think of your power wire like a high-pressure water main and your signal wires like sensitive microphones. If you run them side-by-side for the entire length of the car, the power wire will leak electrical noise into the signal, and you’ll end up wondering why your car alternator is making your speakers whine. I usually run the thick power wire down the driver’s side and the RCA cables down the passenger side. If they absolutely have to cross, make sure they do so at a 90-degree angle. This minimizes the surface area where they interact and keeps your audio signal clean and crisp. It’s the difference between a high-end listening experience and a budget setup that sounds like a swarm of bees lives in your dashboard.
Anchor Your Setup to Prevent the Infamous Trunk Rattle
Once you get into the trunk, the real magic happens. This is where most people get lazy, but it’s where the most damage can occur. Every inch of loose wire is a potential rattle or a point of failure. I highly recommend using adhesive-backed zip tie mounts on the metal floor of the trunk or behind the side carpeting. This keeps the wires from bouncing against the metal every time the sub hits. If you don’t anchor things down, you’ll be searching for how to stop your cars rear deck from rattling with heavy bass when the real culprit is actually a loose 4-gauge wire slapping against your spare tire well. I once used duct tape for a ‘quick fix’ during a summer heatwave, and by Tuesday, the glue had melted into a gooey mess that let the wires flop right onto the exhaust heat shield. Not only did it look terrible, but I had to learn how to fix a car subwoofer that smells like it is burning because the heat was transferring through the wire insulation. Now, I use braided tech-flex sleeving over all my exposed trunk wires. It gives it that high-end, factory-plus look and adds an extra layer of abrasion resistance against grocery bags and luggage.
Ensure a Rock-Solid Ground Point
Finally, your cable management isn’t complete until you’ve managed the most important wire of all: the ground. A clean ground is the backbone of your system’s stability. You want to find a solid piece of the vehicle’s chassis, scrape away the paint until you see shiny bare metal, and bolt your ground wire down tightly. If this connection is loose or dirty, you’ll spend your whole weekend trying to figure out how to properly ground a car amplifier to eliminate engine hum. When you manage your ground wire, keep it short—ideally under 18 inches. Loop it neatly and secure it so it can’t wiggle. A solid ground ensures your amp gets the current it needs to perform without overheating or cutting out during those heavy bass drops.
Let’s dig deeper into the actual science of why we go to all this trouble. Many enthusiasts believe that buying the most expensive, thickest power cable is a shortcut to better performance, but that is a common misconception. In my experience, a moderate-gauge, high-quality copper cable with a clean routing path outperforms a massive ‘bargain’ cable that is actually made of Copper-Clad Aluminum (CCA). If you over-spec the wire but neglect the signal chain, you might end up wondering why your high-end dac sounds exactly like your laptops headphone jack. The real bottleneck is rarely the thickness of the insulation; it is the integrity of the signal and the stability of the voltage. I have seen guys spend hundreds on 0-gauge wiring only to have their system fall flat because they didn’t account for the increased resistance of poor-quality connectors.
Forget the Watts and Focus on the Current
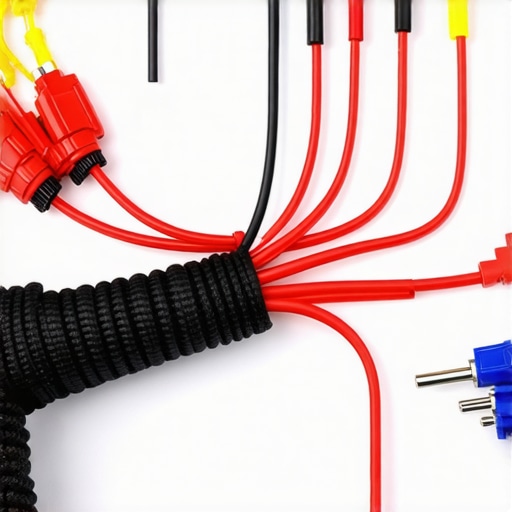
The ‘Oops’ factor often comes from the obsession with peak wattage numbers on the box. Everyone says you need 1,000 watts for a sub to hit hard, but I’ve found that a well-managed 300-watt system with a high-current amplifier sounds significantly punchier and cleaner. If you aren’t careful with your gain settings and wire management, you’ll be searching for how to get rid of the annoying hiss in your budget car amp. This hiss is often the sound of a system struggling with a high noise floor caused by poor routing. A 2022 study by the Audio Engineering Society (AES) on automotive electromagnetic compatibility emphasizes that the physical geometry of the wiring—specifically the loop area between power and ground—is more responsible for induced noise than the actual shield thickness of the cables themselves. By keeping your runs tight and following the vehicle’s natural lines, you are physically reducing the ‘antenna’ effect that picks up electrical interference.
How Can You Tell if Your Speaker Cables Are Actually Bottlenecking Your Setup?
If you have managed your power runs but the music still feels ‘lifeless,’ you might be dealing with a signal bottleneck. I’ve noticed that when people push their systems to the limit, a common mistake is ignoring the high-frequency response. This is often why your car speakers sound thin when you turn up the treble; the amplifier is clipping due to voltage drops, or the thin factory speaker wire is simply choking the signal. For a sophisticated setup, you want to ensure your signal path is as direct as possible. Avoid using those cheap ‘line-output converters’ if your head unit has dedicated RCA outputs. Using a low-quality converter is the quickest way to make a five-hundred-dollar amplifier sound like a fifty-dollar swap-meet special.
The Phasing Trap That Makes Expensive Gear Sound Cheap
One final nuance that separates the pros from the amateurs is speaker polarity. You can have the most beautiful cable management in the world, but if you accidentally swap the positive and negative on just one speaker, your bass will literally vanish. This happens because the speakers are ‘fighting’ each other, pushing and pulling at the same time, which cancels out the sound waves. If your mid-bass sounds weak, you need to learn how to tell if your speakers are out of phase in 30-seconds. I once helped a guy who was about to sell his entire setup because it sounded ‘hollow.’ It turned out he’d just swapped the wires on his driver-side door speaker during the install. We flipped the wires, and suddenly the stage opened up. If you don’t double-check this, you might think your speakers are the problem, when really it’s just a simple wiring flip that makes why your car speakers sound like they are under a blanket. Have you ever fallen into this trap? Let me know in the comments.
I used to think a pair of rusty wire strippers and a roll of electrical tape were enough to build a world-class system. I was dead wrong. If you want a setup that survives the vibrations of the road and the extreme temperature swings of a car interior, you need to upgrade your toolkit. Personally, I never start a job anymore without a ferrule crimping kit. Instead of shoving frayed, bare copper into an amplifier’s terminal block—which is a recipe for a short circuit—I crimp a metal sleeve onto the end of the wire. It creates a solid, airtight connection that won’t vibrate loose. If you find that why your car speakers cut out when you hit a bump is a regular mystery in your life, it’s almost always because of a loose mechanical connection that a simple ferrule would have prevented.
Upgrade Your Toolkit for a Professional Finish
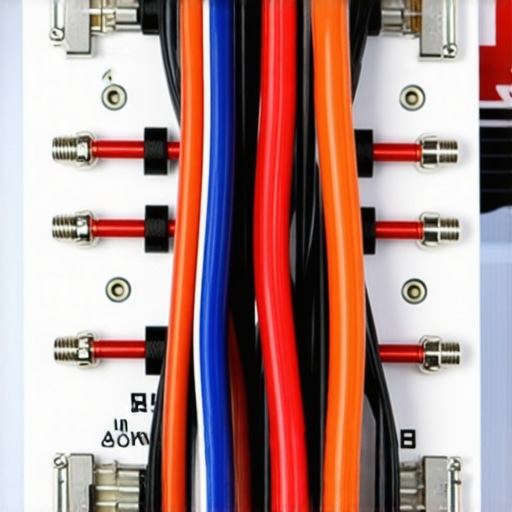
Another tool I swear by is a non-contact infrared thermometer. I use it to check the operating temperature of my amplifiers after an hour of heavy listening. Heat is the silent killer of electronics, especially in cramped trunks. If your amp is hitting north of 140 degrees Fahrenheit, you’re in the danger zone. This is often the primary reason how to fix a car amplifier that keeps shutting off in summer becomes a top priority for enthusiasts. By monitoring the heat, you can decide if you need to add 12V cooling fans or relocate the gear to a spot with better airflow. I also keep a can of high-quality electrical contact cleaner in my glovebox. It’s the secret weapon for how to fix a scratchy volume dial with electrical contact cleaner or refreshing a terminal that has started to gather grime.
Beat the Heat Before Your Amp Quits
Long-term results aren’t just about the initial install; they are about preventing environmental decay. In the automotive world, moisture and salt are constant threats. I’ve seen beautiful copper runs turn into a green, crusty mess in under a year because the installer didn’t use heat shrink tubing. Whenever I make a connection, I slide a piece of marine-grade, adhesive-lined heat shrink over it. When you heat it up, the glue melts and creates a waterproof seal. If you’ve neglected this, you’ll eventually need to learn how to clean green oxidization off your copper speaker terminals to restore your sound quality. According to the MECP (Mobile Electronics Certified Professional) Study Guide, high resistance caused by oxidation is one of the leading causes of premature equipment failure in mobile environments.
How do I keep my audio system running like new for years?
Maintenance is a seasonal task. Every six months, I go through my trunk and hand-tighten every single screw terminal. The constant vibration of a subwoofer is basically a slow-motion wrench trying to undo your hard work. I also check my battery terminals for any sign of corrosion. If you’re running a high-powered system, your alternator is working overtime, and any resistance at the battery can lead to why your cars aftermarket radio is draining your battery overnight. If you have a ported subwoofer box, take a flashlight and look inside for any debris or loose poly-fill that might be choking the air movement. It’s also the perfect time to verify you are still getting the most out of your amp by checking how to match your car subs impedance to your amplifiers output, ensuring nothing has shifted or been re-wired incorrectly during a service visit.
The Future of High-End Mobile Audio
Looking ahead, the trend is moving away from massive, heavy amplifiers toward highly efficient Class-D designs with integrated Digital Signal Processing (DSP). As electric vehicles (EVs) become more common, managing the current draw of your audio system will be more critical than ever to avoid impacting your driving range. We are entering an era where software tuning is just as important as the physical wiring. My advice? Don’t just set it and forget it. Every few months, sit in the driver’s seat with a reference track and really listen. If the stage feels like it’s drifting, it might be time to re-calibrate. I challenge you to go out to your car right now, pop the trunk, and check your ground bolt. If it’s even slightly loose, tighten it down and see if your mid-bass punch improves instantly. You’d be surprised how often a ten-second adjustment beats a thousand-dollar upgrade.
The Mistakes That Taught Me More Than Any Manual
Over the years, I’ve realized that the most expensive gear in the world can still sound like garbage if the foundation is weak. Here is the insider truth: cable management isn’t just about looks; it’s about electrical integrity. If you ignore the small details, you’ll eventually find why your car speakers sound like they are under a blanket. First, always choose Oxygen-Free Copper (OFC) over Copper-Clad Aluminum (CCA). CCA is cheaper, but it creates more heat and resistance, which can lead to voltage drops. Second, never underestimate the power of a label maker. Labeling both ends of every run saves hours when you’re troubleshooting a dead channel. Finally, remember that your trunk is a high-vibration environment. Every zip tie you skip is a potential rattle waiting to ruin your favorite track.
Tools That Turned My Installs From Messy to Pro
If you want to move beyond the ‘electrical tape and hope’ phase, you need a few specialized items in your kit. I never touch a car interior without a set of Nylon Pry Tools; they prevent the dreaded ‘white stress marks’ on your plastic trim. For the electrical side, a Ferrule Crimping Kit is non-negotiable for a professional connection to your amplifier terminals. I also keep a can of DeoxIT or similar high-quality cleaner on hand—it’s the same stuff I use for how to fix a scratchy volume dial with electrical contact cleaner on home gear, and it works wonders for preventing corrosion on car battery terminals. Lastly, Split Loom Tubing is the secret to making your engine bay runs look like they came from the factory.
Stop Overthinking and Start Routing
The transition from a messy install to a masterpiece doesn’t happen overnight. It starts with one wire at a time. Once you master the art of car audio cable management, you won’t just hear the difference—you’ll feel it in the reliability and punch of your system. You might even find that your hardware performs better than expected, similar to how to get better bass from a sealed subwoofer box simply by optimizing the environment. Don’t let a mess of wires hold back your listening experience. Get out there, pop those panels, and build the system your car deserves.
Have you ever spent hours chasing a rattle only to find it was a loose cable? Let me know in the comments below!