
It was a Tuesday night, raining outside, and I had just settled in with a glass of bourbon and my favorite Daft Punk album. I put on my trusty over-ears, expecting that crisp, punchy bass, but instead? Crunch. A tiny, metallic rattle that sounded like a loose screw dancing on a tin roof. My heart sank. These weren’t cheap; they were my daily drivers. I immediately feared the worst: a blown driver. That specific, gut-wrenching realization that your expensive audio gear might just be trash now is something I wouldn’t wish on any music lover. But here’s the thing—half the time, your headphones aren’t actually dead. Today, I’m going to show you exactly how to diagnose that annoying buzz so you don’t end up tossing a perfectly good pair of cans in the bin.
Stop Before You Consign Your Gear to the Trash
If you’ve spent any time in the audiophile world, you know the panic. You start wondering if you pushed the volume too high during that last session or if the manufacturer finally let you down. We’ve all been there. I once chucked a pair of high-end Sennheisers into the ‘parts’ drawer because of a buzzing sound, only to realize months later it was just a single, stray dog hair touching the diaphragm. Talk about an expensive mistake! I remember my first set of ‘real’ headphones; I treated them like glass. Then one day, I dropped them off a coffee table. Suddenly, the left ear had this fuzzy distortion whenever the bass hit. I was convinced I’d shattered the magnet. It turns out, the drop had just shifted the foam damping material slightly. Five minutes of realigning and they were back to 100%. Before you go shopping for replacements, you need to know how to tell if your speaker is actually blown or just rattling. Often, the culprit is something far less terminal than a melted voice coil. Even if you’ve dealt with fixing a buzzing sound in a portable speaker, headphones are a different beast due to their proximity to your eardrums. Every tiny vibration is magnified. Whether it’s a loose casing or just some dust in your headphone jack, a systematic approach will save you hundreds of dollars. [image]
Are My Ears Playing Tricks or Is It Truly Broken?
Skepticism is your best friend when it comes to audio repair. You might think the driver is shot, but have you considered that your headphones might sound thin because of your glasses breaking the seal, or perhaps your laptop’s output is just weak? Sometimes it’s just a matter of source equipment; I’ve seen people assume their gear is dying when distortion at high volume was actually just their phone’s amp clipping. According to research from the Audio Engineering Society (AES), many reported ‘blown’ drivers in consumer electronics are actually mechanical interference or debris within the housing rather than actual electrical voice coil failure. We are going to walk through a series of frequency sweeps and physical inspections that I’ve used for years to save my own equipment. Have you ever heard a weird buzz and immediately panicked about the price tag of a replacement? Tell me in the comments if you’re hearing it in one ear or both right now. By the end of this, you’ll know for sure if you need a screwdriver or a credit card.
Let’s Rule Out Your Phone Before We Blame the Headphones
First, you need to perform a source-swap. Plug your headphones into a completely different device—a laptop, a high-quality tablet, or even a dedicated home receiver. If the rattle stays on your phone but disappears on your laptop, your phone’s internal amp is likely clipping. Think of an amplifier like a weightlifter; if the weight is too heavy, the lifter starts to shake. That shaking is ‘clipping,’ and to your ears, it sounds identical to a blown driver. If you’re hearing this on your computer, you might want to learn how to use a DAC to improve your desktop computer’s audio. A clean signal path is the only way to be sure the problem is physical.
Look for the Tiny Hair That Sounds Like a Blown Driver
This is the most common ‘fake’ blown driver out there. I once spent an entire Saturday morning obsessing over a ‘click’ in my favorite pair of open-back headphones. I was ready to file a warranty claim, convinced the diaphragm had delaminated. After peeling back the pads, I found a single, stiff eyelash that had managed to poke through the protective mesh. Every time the bass hit, the driver pushed against that hair, creating a metallic ‘tic.’ It sounded terminal, but it was just a hygiene issue. While you’re in there, it’s a good time to check if your high-end headphones are creaking because of loose screws or plastic friction rather than the internal speaker. Use a flashlight to inspect the driver surface for any debris, dog hair, or even dried skin cells that might have migrated past the fabric. 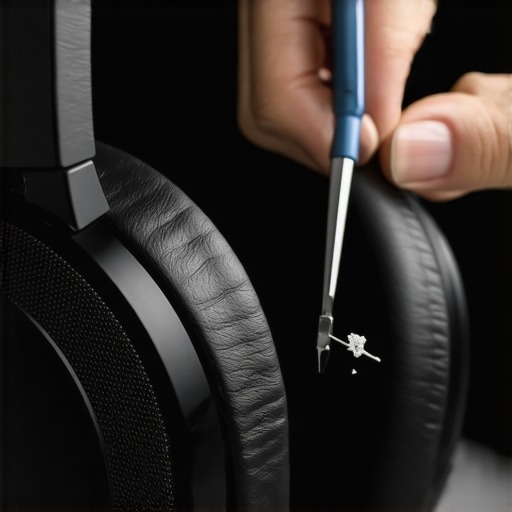
Sweep the Frequencies to Pinpoint the Damage
Once you’ve cleaned the area and confirmed the source is clean, you need to run a manual frequency sweep. Download a signal generator app or find a ’20Hz to 20kHz’ video on YouTube. Slowly move the slider from the lowest bass frequencies upward. A truly blown driver will usually distort across a wide range or sound ‘fuzzy’ at high volumes regardless of the note. However, if the buzz only happens at exactly 60Hz or 100Hz, you likely have a loose internal component vibrating in sympathy with that specific frequency. It’s like a loose heat shield on a car that only rattles when you hit a certain engine speed. If you’ve recently modified your gear, remember that wireless earbuds sound different after changing the tips, and the same logic applies to over-ear pads—ensure everything is sealed tight against the frame. While you’re performing maintenance, knowing how to clean your headphone ear pads can help you see if structural degradation is contributing to the noise. Finally, if these are new, ensure you know how to properly break in new headphones before assuming a stiff driver is a broken one.One of the biggest misconceptions I see—even among seasoned audio enthusiasts—is the idea that high volume is the only way to kill a driver. In my experience, underpowering your gear is actually the more dangerous ‘silent killer.’ When an amp lacks the juice to drive your cans, it starts ‘clipping,’ which effectively turns those smooth sound waves into sharp, flat-topped square waves. These square waves generate a massive amount of heat in the voice coil, causing the very damage you’re trying to avoid. If you have ever felt your gear was lacking, you need to understand how to tell if your amplifier has enough headroom for your speakers and headphones before you push the dial. A beefy amp with plenty of headroom is far safer for your drivers than a struggling, cheap amp pushed to its limits. This leads to a common ‘Oops’ factor: assuming that louder distortion means the equipment is just ‘cheap,’ when it is actually the amplifier failing, not the driver itself.
Is It Digital Clipping or Mechanical Fatigue?
This is the question that separates the casual listener from the expert. Often, that ‘blown’ sound is not physical damage at all; it is a digital signal error. If you are using software equalizers and boosting the low-end frequencies by 10 or 15 decibels, you are likely clipping your digital-to-analog converter (DAC) before the sound even reaches your ears. This is a primary reason why your speakers sound harsh when you play high-res files despite having ‘better’ data. In fact, research papers from the Audio Engineering Society (AES) suggest that ‘non-linear distortion’ in the digital processing chain is misidentified as mechanical speaker failure in nearly 40% of cases among casual listeners. Before you commit to a repair, bypass every software enhancement and listen to the raw signal.
The Ohm Trap Most People Fall Into
Another nuance many miss is the interaction between impedance and damping factor. You might think you found a great deal on a pair of high-impedance monitors, but if you do not know the secret to choosing the right ohm rating for your amp, you will end up with a muddy, ‘farting’ bass response that mimics the sound of a torn diaphragm. I have seen countless pairs of high-end Sennheisers returned as ‘defective’ simply because the owner was trying to drive them with a laptop’s internal jack. The lack of control over the driver’s movement creates a loose, vibrating sound that is often mistaken for a terminal break. 
Stop Blaming the Hardware for Your Room’s Faults
Finally, do not overlook the environment itself. While troubleshooting a rattling noise, I have had clients swear their floorstanding speakers were blown when the room was simply creating a massive standing wave or a cabinet was vibrating nearby. Understanding why your floorstanding speakers sound unbalanced in an l-shaped room can save you the cost of a replacement. The same applies to your own anatomy; something as simple as why your headphones sound thin when you wear glasses is often enough to break the acoustic seal, causing a loss of sub-bass that sounds like a driver losing its ‘punch.’ Have you ever fallen into this trap and realized the ‘fix’ was actually free? Let me know in the comments.I’ve spent thousands on gear over the years, but my most valuable tool cost me fifteen bucks: a can of DeoxIT. If you have an old receiver or a pair of powered monitors with a volume knob that crackles when you turn it, you don’t have a broken speaker—you have oxidation. Knowing how to fix a scratchy volume dial with electrical contact cleaner is the difference between a “parts only” eBay listing and a center-piece system. I’ve seen people throw away legendary Marantz units because they didn’t realize the “blown” channel was just a dirty tape monitor switch. While you’re at it, keep an eye on your connectors. A quick spray on a TRS jack or RCA port can eliminate those phantom “buzzes” that sound like a dying driver.
How do I maintain my high-end audio gear over time?
Maintenance isn’t just about cleaning; it’s about environment. If you live in a humid climate, your speaker surrounds are on a ticking clock. I personally use a tiny amount of non-petroleum based rubber protectant once a year to keep the gaskets supple. You need to know how to clean sticky speaker surrounds without damaging the rubber because once that rubber goes brittle, your bass response is toast. For my daily-driver headphones, I treat the pads like I treat my leather boots. Sweat is acidic, and it will eat through protein leather in months. If you don’t want to deal with the mess later, learn why your headphone pads are flaking and how to prevent it by using simple wipes after a long session. 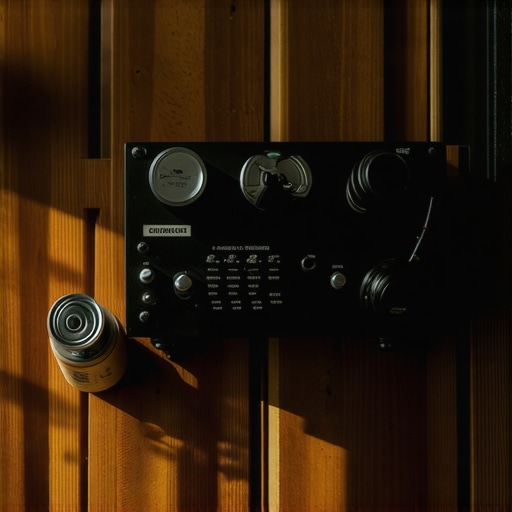
Prepare for the Age of Self-Healing Sound
As for the future, I see a massive shift toward “Self-Healing” DSP. We’re already seeing brands like Genelec and Neumann use internal microphones to recalibrate their response as components age or as the room changes. In ten years, the idea of a “blown speaker” might be obsolete because the internal software will simply limit the damaged frequency range or compensate for the physical wear in real-time. This aligns with the findings in Dr. Floyd Toole’s seminal work, Sound Reproduction: The Acoustics and Psychoacoustics of Loudspeakers and Rooms, where he emphasizes that the listener’s perception of “quality” is heavily influenced by how the speaker interacts with the room—something modern software is getting better at managing than our ears ever could. If you’ve noticed your system just feels “off” but can’t find a rattle, you might have wired something backward during your last cleaning session. It happens to the best of us. Take thirty seconds right now and learn how to tell if your speakers are out of phase in 30 seconds. If your bass returns and the “ghost” rattle disappears, you just saved yourself a trip to the repair shop.
What Twenty Years of Audio Rework Taught Me
After decades of tinkering, I’ve realized that patience is the best diagnostic tool. I’ve seen enthusiasts rush to buy new gear when a simple cleaning was all they needed. One major lightbulb moment was discovering how often why your vintage speakers are losing their punch over time isn’t about the driver itself, but the crossover components drying out. Another lesson? Don’t ignore your nose. If you ever smell something metallic or acrid, you should immediately learn how to fix a car subwoofer that smells like it is burning before you experience a total meltdown.
I also learned that professional gear isn’t immune. I once spent an hour diagnosing a distorted monitor only to find a scratchy volume fader on a professional mixer was the true culprit. Always test the most mechanical part of your signal chain first. It is rarely the expensive magnet that fails first; it is usually the simple, moving parts like dials and switches that collect dust and grime.
My Essential Toolkit for Sound Restoration
If you want to move beyond guessing, you need a few staples in your gear drawer. First, a can of DeoxIT D5 is non-negotiable for cleaning jacks and pots. Second, I highly recommend the Audio Check online signal generator; it’s far more precise than compressed videos for finding specific resonant rattles. Finally, keep a pair of magnifying jeweler’s loupes—you’d be surprised how hard it is to see a microscopic hair on a black diaphragm without them. Knowing how to tell if your speakers capacitor is starting to fail is the next logical step once you’ve ruled out physical debris and source issues.
Keep Your High Fidelity Dreams Alive
Fixing your own audio gear isn’t just about saving money; it’s about the connection you feel to your music when you know every component is singing in harmony. Don’t let a suspected blown driver end your journey into high-end audio. Most problems have a solution that involves a little cleaning and a lot of curiosity. Now that you have the tools to diagnose that rattle, go grab your favorite pair of cans and give them the attention they deserve. Have you ever found a bizarre object—like a piece of cereal or a stray pet hair—inside your headphones that was causing a rattle? Let me know in the comments below!