
I remember the day I finished my first ‘dream’ home theater. I had the massive towers, the sub that could shake the neighbors’ windows, and a shiny new OLED. But to keep the room looking ‘clean,’ I tucked my center channel speaker directly onto the carpet, tilted up slightly with a couple of doorstops. I thought I was a genius. Fast forward to movie night: my wife and I spent two hours leaning forward, squinting our ears, and asking each other, ‘What did he just say?’ It was frustrating and honestly embarrassing after spending so much on gear. I eventually realized that by putting my speaker on the floor, I was basically muffling the most important part of my system. If you are struggling with muffled voices, you might have even wondered how to get clear movie dialogue without a dedicated center speaker, but the truth is that your speaker is likely fine—it is just in the wrong place. Today, I am going to help you fix your soundstage by explaining why that floor placement is a sonic death sentence and how a few inches of elevation can change your life.
Stop burying your movie dialogue in the carpet
It took me far too long to understand that the center channel handles about 70% of a movie’s soundtrack, including almost all the dialogue. When you place that speaker on the floor, the sound waves immediately hit the floor and bounce back up, creating a mess of ‘early reflections.’ This is similar to how why your bookshelf speakers sound better when you move them off the desk; you are essentially decoupling the sound from a flat, reflective surface that wants to distort it. In my early days, I assumed that as long as the speaker was pointed toward my head, the floor didn’t matter. I was wrong. The floor absorbs high frequencies and reflects mid-bass in a way that makes every actor sound like they are talking through a thick woolen blanket. Have you ever felt like you are constantly fighting with the volume remote just to hear a conversation during a quiet scene?
Does raising the speaker really make a noticeable difference?
You might be skeptical that a foot or two of height matters, but the physics are clear. According to technical papers from the Audio Engineering Society (AES), floor reflections cause a phenomenon known as comb filtering, which can physically cancel out specific frequencies in the human vocal range. This isn’t just about ‘audiophile’ preferences; it is about the basic legibility of speech. Much like why your subwoofer sounds better in the corner of the room due to boundary loading, your center channel interacts with the floor to create an artificial bass boost that ruins clarity. When you lift that speaker to ear level, you are finally hearing the tweeter the way the engineers intended, without the floor adding its own unwanted ‘remix’ to the movie. We are going to look at exactly how to bridge that gap and get your audio back on track.If you cannot mount the speaker on a wall or put it in a media console, you need to treat the floor like a trampoline for sound—it is bouncing energy where you do not want it. I learned this the hard way when I first set up my rig. The first thing I did after my ‘muffled dialogue’ disaster was buy a set of cheap foam isolation pads. I thought I could just slap them under the speaker and call it a day. It helped, but the real breakthrough came when I actually tilted the speaker at a 15-degree angle. Suddenly, the high frequencies weren’t hitting my shins; they were hitting my ears.
Elevate and isolate for instant vocal clarity
Your goal is a straight line of sight between the tweeter and your ears. If you cannot get the speaker to ear level, which is usually around 36 to 42 inches, you must tilt it. Use a laser pointer or even just a flashlight held against the top of the speaker cabinet to see where the sound is actually ‘aiming.’ If the light hits the coffee table, your sound is hitting the coffee table and bouncing.
Angle the tweeter directly at your ears
Most center channels are designed with a wide horizontal dispersion but narrow vertical dispersion. This means if you are sitting off-axis vertically because the speaker is on the floor, you are missing the most detailed part of the audio. I once used a stack of old magazines to test different angles before buying a proper stand. It looked ridiculous, but the change in clarity was immediate. Once you find that angle, you might notice your effort to how to find the sweet spot for your speakers in a rectangular room becomes much easier to manage because the phantom center finally locks into place.
Decouple the cabinet to stop the vibrations
When a speaker sits directly on the floor, it transfers mechanical energy into the floorboards. This is why how to stop your turntable from picking up vibrations from your floor is such a common headache; everything in the room is connected. For your center channel, this vibration turns the floor into a secondary, very low-quality speaker. Use rubber feet or Sorbothane pucks. In my setup, I found that even why floorstanding speakers need spikes when used on carpet follows a similar logic—you want to minimize the contact area to prevent the floor from ‘singing’ along with your movie. 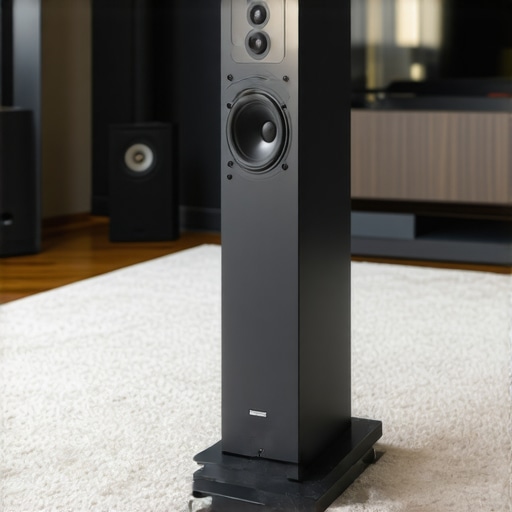
Find a dedicated stand that won’t wobble
A flimsy stand is almost as bad as the floor. If the stand vibrates, it colors the sound. I learned this the hard way with a cheap metal pedestal that rang like a bell every time there was an explosion on screen. Experienced installers know that the reason your speaker stands need to be filled with sand is to add mass and kill those ringing resonances. If you’re building a home theater on a budget, even a sturdy end table is better than the floor, provided you can use the best way to hide bulky subwoofer cables along a baseboard to keep the aesthetic clean while routing your center channel wires.
Fix the furniture interference
If your speaker is on the floor because of a massive TV stand, you might be creating a ‘shelf’ for reflections. If the speaker is recessed even an inch behind the edge of a shelf, the sound will bounce off that surface before it ever reaches you. I once spent an hour pulling my speaker forward so the front baffle was slightly overhanging the edge. The ‘boxy’ sound vanished instantly. This is the same principle as why your bookshelf speakers sound better when you move them off the desk; you are removing the immediate reflective surfaces that cause interference and muddy the vocal range.Many enthusiasts assume that modern room correction software like Audyssey or Dirac can “math away” a bad floor placement. It is a common trap: you run the calibration microphone, see the EQ curve flatten out on your screen, and assume the job is done. However, software cannot fix the physical time-domain errors caused by those early reflections hitting the carpet. As Dr. Floyd Toole, a former president of the Audio Engineering Society and a pioneer in psychoacoustics, has demonstrated in his research, our brains are incredibly adept at distinguishing between the direct sound from the speaker and the reflected sound from the floor. Even if your receiver shows a flat frequency response, your ears still perceive the “smearing” effect of the sound arriving twice. This is precisely why your speakers bass port should never be pushed against a wall; physical boundaries create acoustic problems that digital filters can only mask, not eliminate.
Don’t expect software to fix a physical placement problem
When a speaker sits on a hard floor or even a low-pile carpet, it creates what engineers call a “half-space” environment. This physically doubles the acoustic pressure at low frequencies while high frequencies are scattered or absorbed. If you want to see the damage for yourself, you can learn how to use your phone to measure your rooms frequency response. You will likely see a massive dip in the lower-midrange, known as a “floor bounce notch,” that no amount of digital boosting can truly fill without distorting the driver.
Why do my voices still sound muddy after running auto-calibration?
The answer usually lies in vertical lobing and phase cancellation. Most center channels use a “woofer-tweeter-woofer” (MTM) layout which is notoriously sensitive to vertical positioning. When this speaker sits on the floor, the interaction between those drivers creates interference patterns that change drastically depending on your seated height. If you are on the floor, you are likely sitting in a “null” where the waves from the two woofers are cancelling each other out. Tilting the speaker helps the high frequencies, but it does not change the fact that the floor is acting as a giant acoustic mirror. 
The chesty voice trap and how to escape it
One of the biggest mistakes I see—the “Oops” factor—is overcompensating for the lack of clarity by cranking the treble or the center channel volume. This is a recipe for ear fatigue. When a speaker is on the carpet, the floor absorbs the high frequencies, leading you to think you need more “sparkle.” But adding treble just makes the sibilance (the ‘s’ and ‘t’ sounds) piercing while the actual dialogue remains buried in the mud. It is a similar frustration to why your noise canceling headphones struggle with high pitched voices; you are fighting the physics of the environment with the wrong tools. Instead of chasing EQ settings, focus on the “boundary gain.” Just as why your subwoofer sounds better in the corner of the room due to acoustic reinforcement, the floor unnaturally boosts the mid-bass of your center channel, making actors sound unnaturally “chesty” and thick. Don’t let your gear’s potential go to waste because of a few feet of vertical space. If you’ve already tried tilting and still feel like you are missing out on that crisp, theater-like detail, you might need to check for mechanical issues. Using the simple paper test for finding air leaks in your speaker cabinet can ensure that the “muffle” isn’t actually a hardware failure or a loose seal. Have you ever fallen into the trap of thinking software would save your setup? Let me know in the comments.Once you have successfully rescued your speaker from the floor and angled it toward your listening position, you are only halfway there. High-performance audio is not a set-it-and-forget-it hobby; it is a relationship with your environment. If you have pets, you already know the trick to removing dog hair from speaker grilles safely is vital for maintaining the look and acoustic transparency of your setup. Dust and hair can settle into the tweeter waveguide, subtly dulling the very frequencies you just worked so hard to recover. Over time, your gear will show its age, but you can learn how to restore a sun-faded speaker grille to look new again to keep that ‘just-unboxed’ aesthetic.
Keep the dust and dog hair away from your tweeters
I have seen incredible systems crippled by something as simple as oxidized copper. Every six months, I make it a habit to unscrew my speaker terminals, wipe the wire with a bit of contact cleaner, and re-tighten them. This ensures that the electrical signal for those crucial movie voices stays strong. If your dialogue sounds muffled even after you have lifted the speaker, you might need to investigate how to tell if your speakers capacitor is starting to fail, especially in older units. This is a major reason why your vintage speakers are losing their punch over time—the physical hardware simply wears out. For those using older receivers, knowing how to fix a scratchy volume knob on an old amp can prevent sudden signal drops that ruin your calibration and leave you frustrated during a quiet drama.
How do I keep my home theater sounding crisp for years?
To maintain long-term results, you need to transition from ‘guessing’ to ‘measuring.’ I personally use a UMIK-1 calibrated microphone paired with Room EQ Wizard (REW). John Mulcahy, the developer of REW, emphasizes in his technical documentation that while steady-state frequency response matters, the initial impulse response—the first few milliseconds of sound—is what defines our perception of clarity and localization. By measuring the ‘ETC’ (Envelope Time Curve) in REW, you can identify exactly which piece of furniture is causing that one pesky reflection that muddies your center channel. 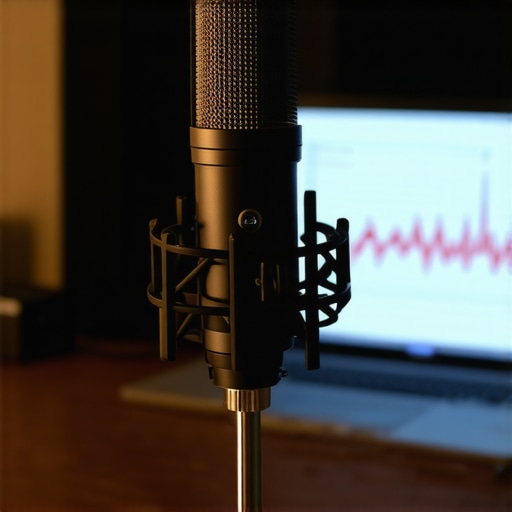
AI and the end of manual speaker placement
I predict that within the next five years, the ‘center channel on the floor’ debate will be solved by computational audio. We are already seeing this in high-end soundbars that use beamforming to ‘steer’ dialogue upward toward the screen, regardless of where the physical drivers sit. However, until that tech becomes affordable for everyone, the physics of placement remains king. I want you to download a free copy of REW this weekend. Even if you do not have a professional mic yet, just exploring the interface and looking at the documentation on impulse response will change how you ‘see’ sound in your room. If you are serious about movie night, stop guessing where the sound goes and start measuring it.
The Acoustic Price of My Early Laziness
I used to think that as long as the speaker was ‘good,’ the placement was secondary. That was a lie. My biggest lightbulb moment was realizing that the floor acts like a giant acoustic sponge for clarity but a megaphone for mud. I spent years chasing the latest home audio deals only to find out that a $20 stand made a bigger difference than a $2000 upgrade. I also learned that physical space is the best EQ; just like how why your speakers bass port should never be pushed against a wall, your center channel needs breathing room to resolve the fine details in an actor’s voice. When you let that speaker sit on the carpet, you are essentially asking it to fight the laws of physics and lose every time.
My Go-To Setup Gear for Precision
If you want to stop guessing and start listening, I highly recommend downloading Room EQ Wizard (REW). It is the gold standard for measuring room acoustics. Pair it with a UMIK-1 microphone to see the actual frequency response of your room. For physical fixes, I swear by Sorbothane isolation pucks. They are essential if you need to how to fix a subwoofer that is vibrating your furniture, and they work wonders for decoupling a center channel from a hard media console shelf. Finally, if you notice a lag between the lips and the sound while testing your new position, you will want to check out how to fix the audio delay on your soundbar or receiver settings to ensure perfect sync.
#IMAGE_PLACE_HOLDER_E#
Take Your Movie Nights Back from the Mud
You do not need a degree in physics to get theater-quality sound; you just need to respect the path of the sound wave. Move that speaker, angle it at your ears, and finally stop asking your partner what was just said on screen. Your high-end speakers deserve to be heard clearly, not muffled by floorboards and dust. Once you hear the difference, you will never go back to ‘laziness’ in your layout. Have you noticed a big jump in clarity after moving your center speaker off the floor? Let me know in the comments.