
I stood on my wobbly coffee table at 2 AM, holding a heavy bookshelf speaker against the ceiling with one hand while trying to balance a level with the other. My wife thought I’d finally lost it. Honestly, I thought so too. I had spent thousands on a high-end receiver, but why your surround sound system sounds like its in mono was the only article I needed back then because my ‘3D’ audio was completely flat. I made the mistake of thinking that as long as the sound came from ‘up there,’ it would work. I was wrong. It didn’t sound like rain; it sounded like a speaker stuck in a bucket. After moving those speakers four times and patching more drywall than I care to admit, I finally discovered that Atmos is less about power and more about the geometry of your room. [IMAGE_PLACEHOLDER]
Stop Guessing Where Your Ceiling Speakers Go
If you have ever felt like your overhead effects are just a muddy mess, you are not alone. Most of us start by sticking speakers where they look good or where the joists allow. But sound waves don’t care about your interior design. When I first started, I didn’t realize why your center channel should never be placed on the floor, and I brought that same ‘close enough’ attitude to my height channels. I put them too far forward, and the helicopter in the movie sounded like it was crashing into my TV instead of flying over my head. To get that ‘bubble’ of sound, you need to align your speakers with your ears, not your furniture. You can actually learn how to use your phone to measure your rooms frequency response and check if your placement is causing nasty nulls or peaks that kill the immersive effect.
Does My Ceiling Really Need to Look Like Swiss Cheese?
This is the biggest hurdle for most of us. We fear that cutting holes will yield zero results. But the truth is, a properly angled 5.1.4 setup is the single biggest jump in audio quality since the invention of the subwoofer. According to the official Dolby Atmos Home Theater Installation Guidelines, the ideal placement for overhead speakers is at a 45-degree angle relative to your seated position. This creates the optimal ‘elevation’ perception that makes your brain believe the sound is truly overhead. If you’re hesitant about cutting holes, you can even look into the trick to making cheap bookshelf speakers sound expensive and mount them on brackets instead. It’s all about the angle, not the price tag. Have you ever felt like your Atmos setup was just… missing something? Let me know in the comments if you’ve been struggling with that ‘flat’ sound despite having the right gear. We are going to fix that today.
Nail the Geometry Before You Cut
To get started, you need to think of your speakers like spotlights. If the light isn’t hitting you directly, you’re sitting in the shadows. I remember the first time I fired up Blade Runner 2049 after what I thought was my ‘final’ install. The rain was there, but the voices felt like they were coming from a tin can. It turned out I was ten degrees off, and in the world of Atmos, ten degrees is a mile. You can avoid my misery by using a simple protractor or a phone app to hit that 45-to-55-degree window from your head to the ceiling. If the speakers are firing at the floor three feet in front of you, the reflected sound will reach your ears before the direct sound, creating a messy echo. This is often where people think they have ‘bad speakers,’ but it’s really just bad timing. Don’t just eyeball the center of the room; find your ‘money seat’ and build the circle of sound around that single point.
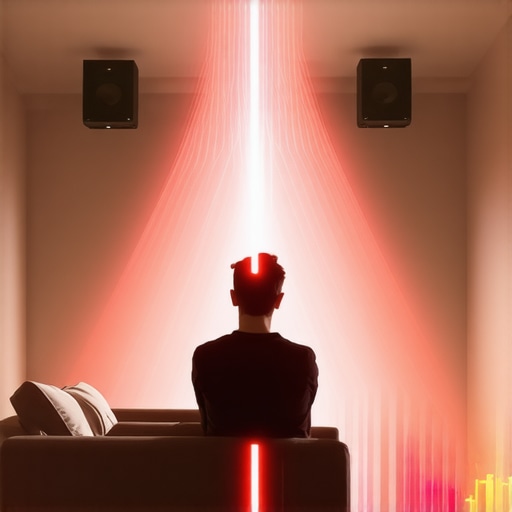
Phase Issues Will Kill Your 3D Bubble
Even if your measurements are perfect, one flipped wire can destroy the entire illusion. When speakers are out of phase, they fight each other—one pushes while the other pulls—effectively canceling out the bass and making the overhead effects sound like they are coming from ‘nowhere’ instead of ‘up there.’ I once helped a friend who thought his expensive KEFs were broken because the soundstage felt hollow. We did a quick check and realized his rear heights were wired backward at the receiver. You should take a moment to learn how to tell if your speakers are out of phase in 30 seconds to avoid this exact nightmare. Once you have the heights synced, you need to make sure the transition between the floor and the ceiling is seamless. This is why it is vital to how to match your subwoofer phase with your main speakers, as a phase-aligned system ensures that a helicopter moving from the front-left to the top-right doesn’t lose its ‘thump’ halfway through the journey.
Keep Your Ceiling from Rattling Your Brain
Atmos speakers move air, and air moves drywall. If your mounting isn’t rock solid, you’ll hear the plastic casing vibrating against the ceiling joists during every explosion. I used to have this annoying buzz during Interstellar that I thought was a blown driver; it turned out to be just a loose screw on the speaker baffle. If you’re using a beefy setup, you might even need to know how to fix a subwoofer that is vibrating your furniture because those low frequencies travel up the walls and can shake your height channels loose over time. Furthermore, if you’ve opted for mounting bookshelf speakers on brackets instead of using in-ceiling models, remember that the rules of physics still apply. Understanding why your speakers bass port should never be pushed against a wall is just as important for ceiling mounts. Smothering the port against the drywall will turn your crisp overhead effects into a boomy, unrecognizable thud that ruins the spatial precision Atmos is famous for.
Everyone tells you to just run the auto-calibration microphone, sit back, and let the software handle the rest. They treat room correction like a magic wand. In my experience, relying solely on software is the fastest way to kill your ‘3D’ bubble. While Audyssey or Dirac can adjust for distance and level, they cannot fix physical acoustic reflections that blur your overhead imaging. For instance, if you have a hard floor, those ceiling-mounted sounds bounce right off the ground and hit your ears a second time, creating a ‘smeared’ effect. I learned the hard way that you often need to physically treat the room first; you should definitely see why you should use a rug to fix a bright sounding room to soak up those floor reflections before they ruin your height precision.
Can You Really Get Punchy Bass From the Ceiling?
This is the most common advanced question I get. The short answer is: no, and you shouldn’t try. A major mistake I see is people setting their ceiling speakers to ‘Large’ in their receiver settings. Even the best in-ceiling speakers struggle with low frequencies. Dr. Floyd Toole, a renowned expert in psychoacoustics, notes in his research that our ability to localize sound decreases as frequencies drop, but room resonances become much more problematic. By forcing your ceiling speakers to handle bass, you are just introducing distortion. Instead, you need to cross them over at 80Hz or 100Hz and let your subwoofers do the heavy lifting. In fact, if you find your bass feels uneven as you move around the room, it’s worth considering why two small subwoofers are better than one massive driver for creating a smooth low-end foundation that complements your Atmos heights. 
The Dangerous Trap of Impedance Mismatching
Many enthusiasts get so excited about adding more channels that they ignore the electrical limits of their equipment. If you are adding four height channels to a 7-channel receiver and using an external amp to bridge the gap, you must be careful. I once helped a guy who couldn’t figure out why your receivers protection mode keeps triggering at high volume every time an explosion happened on screen. It turned out he was using 4-ohm ceiling speakers with a receiver rated only for 8 ohms. You have to understand the secret to choosing the right ohm rating for your amp before you start plugging in extra height channels. If your amp is struggling to breathe, your ‘3D’ sound will sound thin and strained rather than immersive.
Stop Obsessing Over Speaker Break-In
Let’s address a common myth: the idea that your Atmos speakers need 100 hours of ‘break-in’ before they sound good. While there is a slight mechanical change in the spider and surround after the first few minutes of use, the truth about speaker break-in periods is that the change is mostly in your head. If your Atmos setup sounds ‘muddy’ out of the box, it’s a placement or phase issue, not a ‘break-in’ issue. Don’t waste a week playing pink noise at your ceiling; spend that time double-checking your 45-degree angles. Have you ever fallen into this trap of waiting for speakers to ‘open up’ while ignoring the actual room geometry? Let me know in the comments.I’ve spent years chasing the perfect sound, and if there’s one thing I’ve learned, it’s that the setup is only half the battle. Maintenance is where the pros truly separate themselves from the amateurs. If you start hearing a low-frequency buzz through your overheads, don’t panic and start ripping out wires. You can usually find how to get rid of ground loop hum in your audio setup with a simple ground loop isolator. I personally keep a can of electrical contact cleaner in my tool kit at all times; it is a lifesaver for when you need to know how to fix a scratchy volume knob on an old amp without having to send the unit back to the manufacturer for a month.
Kill the Hum Before It Ruins Your Movie Night
Gene DellaSala from Audioholics often emphasizes the importance of ‘headroom’ in multi-channel systems, and his advice is gold. If you are pushing your receiver to its absolute limit just to hear the height channels, you are inviting thermal compression and clipping. This stress is often why your receivers protection mode keeps triggering at high volume during heavy action sequences. I recommend checking your heat dissipation every few months. If your amp feels like a pizza oven, you need more breathing room or an external cooling fan.
How do I keep my home theater system performing like day one?
Dust is the silent killer of any high-end audio setup, especially for those of us with in-ceiling speakers. These units are notorious for collecting debris behind the mesh, which can eventually lead to annoying vibrations. Before you decide your hardware is failing, you should learn how to tell if your speaker is actually blown or just rattling. A quick blast of low-pressure air can sometimes save you the cost of a full replacement. Also, don’t forget the terminals; oxidation on speaker wire can slowly sap your high-frequency detail. I make it a ritual to re-strip my wire ends every two years to ensure the connection is as tight as the day I first climbed that ladder.
The Future of Atmos is Losing the Wires
Looking ahead, I suspect we are moving toward a world where auto-calibration actually works without human intervention. With the rise of AI-driven spatial mapping, future receivers will likely use object-tracking cameras to map your room’s acoustics in real-time. But until those systems are perfected, you are still the best tool in the box. I still rely on manual tweaks by learning how to use your phone to measure your rooms frequency response to verify that my room correction software isn’t overcompensating and sucking the life out of the midrange. #IMAGE_PLACE_HOLDER_D# My big tip for you this week: go into your receiver’s manual speaker settings and bump your Atmos height channels by 1.5dB or 2dB over the ‘calibrated’ level. It is the secret to making those subtle ambient effects truly stand out in a larger room.
Hard Lessons From the Atmos Trenches
After years of trial and error, I’ve realized that the biggest killer of immersive audio isn’t cheap speakers—it’s overcomplicating the tech while ignoring the physical basics. I used to spend hours worrying about ‘breaking in’ my drivers, but the truth about speaker break-in periods is that your brain adapts much faster than the physical hardware. My biggest breakthrough came when I stopped obsessing over the receiver’s auto-calibration and started listening to the room itself. If your system keeps cutting out during the good parts, check if your receivers protection mode keeps triggering at high volume because of an impedance mismatch or simple lack of ventilation. Sometimes the ‘fix’ for a muddy overhead sound is as simple as slightly angling the speaker toward the primary listening position rather than straight at the floor.
The Gear That Actually Stays in My Rack
I don’t believe in buying every new gadget, but there are a few essentials I never skip for a high-performance 3D setup. First, always have a plan for your power delivery; if you are adding multiple height channels, make sure you understand the secret to choosing the right ohm rating for your amp to avoid frying your internal components during heavy transients. Second, I always keep a simple diagnostic routine; knowing how to tell if your speaker is actually blown or just rattling saves a lot of money and time on unnecessary replacements. Finally, for those of us integrating older high-end gear into a modern Atmos system, knowing how to fix a scratchy volume knob on an old amp is a lifesaver for keeping your signal path clean and noise-free.
Stop Tinkering and Start Listening
At the end of the day, your surround sound system exists to make you feel like you’re part of the story, not to make you feel like a frustrated electrician. Don’t be afraid to experiment with moving a rug to dampen floor reflections or bumping the levels of your height channels by a decibel or two to find that ‘sweet spot’ that works for your specific ears. The perfect 3D bubble is within reach if you focus on the geometry of your room and the integrity of your connections. [IMAGE_PLACEHOLDER]
Have you ever spent hours chasing a weird rattle in your ceiling only to find out it was a loose screw on a speaker grille? Let me know about your most frustrating or rewarding Atmos setup moment in the comments below!