
I was sitting there, coffee in hand, ready to melt into the couch while listening to a pristine Miles Davis press. Then it happened. A sharp, metallic zing pierced through the air every time the upright bass hit a low G. It wasn’t the music. It wasn’t a blown driver either. It was that pesky metal grill vibrating against the cabinet frame like a trapped bumblebee. It drove me absolutely nuts. I spent twenty minutes pressing my thumb against different spots on the mesh until the sound stopped, only for it to return the second I sat back down. If you’ve ever felt that phantom itch of a localized buzz ruining your high-fidelity experience, you aren’t alone. Today, I’m going to walk you through the simplest, cheapest way to fix a rattling metal speaker grill using items you likely have in your junk drawer right now.
Find the Source Before You Reach for the Screwdriver
Before we dive into the fix, we have to make sure we’re looking at the right culprit. I remember back in my early days, I spent three hours dismantling a vintage cabinet only to realize the rattle was actually a loose screw on a nearby lamp. Talk about a face-palm moment. You need to tell if your speaker is actually blown or just rattling before you start bending metal or applying adhesives. If the buzz only happens at specific frequencies, it’s almost certainly a mechanical resonance issue. According to the Audio Engineering Society, mechanical resonance in speaker enclosures can distort the intended frequency response by several decibels, masking the detail you actually paid for. That’s why a tiny vibration feels like such a massive distraction. Have you ever spent hours chasing a noise only to find it was something completely unrelated to the speakers?
Does a DIY fix actually work for high-end gear?
You might be thinking that a home-grown solution is only for cheap bookshelf speakers, but even premium towers can fall victim to loose clips or thermal expansion. In fact, some enthusiasts notice that their car speakers rattle only when it is cold outside because the metal and plastic components contract at different rates. The fix I’m sharing involves creating a hidden dampening gasket that works on everything from a $50 garage find to a $2,000 audiophile setup without ruining the aesthetics.
The Secret Ingredient is Probably in Your Junk Drawer
When I first started tinkering, I made the huge mistake of using permanent superglue on a vibrating grill. I thought, “If I glue it, it won’t move.” Well, it didn’t move, but neither did the dust that eventually caked the cone, and I couldn’t get the grill off to revive the foam surrounds when they started to perish a few years later. The real answer isn’t a permanent bond; it’s decoupling. We are looking for a material that provides enough friction to stop the movement but remains thin enough to stay invisible. Using something as simple as felt dots or thin weatherstripping can create the necessary buffer to kill the rattle for good.
How to Spot the Metal-on-Metal Culprit
The first step is identifying exactly where the grill is touching the cabinet frame. Think of your speaker grill like a loose lid on a pot of boiling water—it doesn’t need to be completely off to make a racket; it just needs a microscopic gap to vibrate against. I like to play a low-frequency sine wave—usually between 40Hz and 60Hz—while gently running my finger along the edge of the grill. You can even use your phone to measure your room’s frequency response to find the exact peak where the resonance is most aggressive. When the buzzing stops under your fingertip, you’ve found the specific contact point that needs surgery.
Build an Invisible Gasket with Household Items
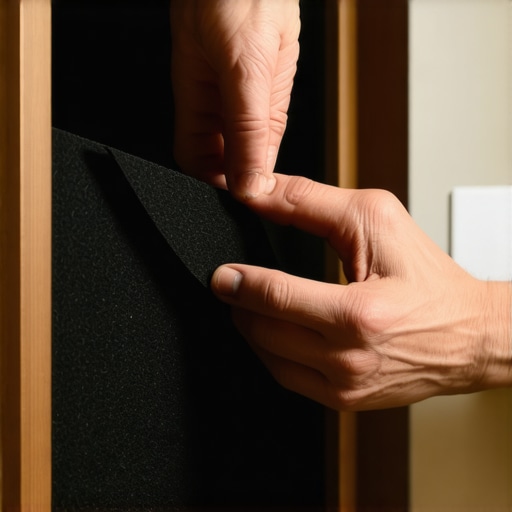
Once you’ve identified those hot spots, you need to create a buffer. We are essentially building a tiny shock absorber that decouples the grill from the cabinet. My favorite tool for this is adhesive-backed felt or very thin foam weatherstripping. If you’re working on a budget, even small snippets of electrical tape can work in a pinch. The goal is to apply these materials to the ‘shelf’ or the lip of the speaker cabinet where the grill rests. This creates a soft, compressed layer that absorbs the kinetic energy before it can turn into that annoying metallic zing.
Why Tightening Screws Often Makes It Worse
A common instinct for many DIYers is to just crank down the mounting screws until they won’t budge. I’m telling you right now: don’t do it. Metal expands and contracts with the ambient temperature. If you tighten a grill when it’s warm, and then the room cools down, you’re putting immense stress on the frame, which can actually warp the metal and create new rattles. This is one reason car speakers rattle only when it is cold outside; the materials are physically fighting each other. Instead of brute force, use damping. A snug fit with a soft gasket is always superior to a ‘death grip’ with bare metal.
My Estate Sale Rescue Mission
I remember a particularly stubborn set of floorstanders I picked up at an estate sale years ago. They looked mint, but at high volumes, the left one sounded like a bag of quarters in a dryer. At first, I was worried I’d have to fix a scratchy volume knob or something internal, but it was just the metal tabs holding the grill. I didn’t have felt on hand, so I used the fuzzy ‘loop’ side of some Velcro I found in a kitchen drawer. I cut them into tiny 2mm strips and tucked them behind the tabs. The result was total silence even at wall-shaking volumes. It’s the same logic that helps in making cheap bookshelf speakers sound expensive—it is entirely about controlling unwanted resonance rather than buying more power.
Most people think they need to spend weeks ‘breaking in’ their gear with special white noise tracks before it sounds ‘real.’ In my experience, while mechanical suspensions do loosen slightly, 90% of what you hear is actually your brain’s auditory cortex habituating to the new sound signature. It’s why the truth about speaker break-in periods is often more about psychoacoustics than physics. If you aren’t careful, you might spend fifty hours waiting for a ‘magic’ change that will never come, instead of addressing the real culprit: your room’s interaction with the air.
Don’t Let Your Walls Kill Your Bass
The biggest ‘oops’ factor I see in the audiophile world is the person who spends $500 on silver-plated cables while their speakers are shoved tight into a corner. This is a fatal mistake for your stereo image. I’ve learned the hard way that bass ports need breathing room to prevent muddy resonance from masking the mid-range detail. While it is true that you can learn why your subwoofer sounds better in the corner due to boundary gain, your main towers will usually sound bloated and slow if they aren’t at least 18 inches from the rear wall.
Why does my 40-watt vintage amp feel more powerful than a modern soundbar?
It comes down to dynamic headroom and current, not just the ‘watts’ listed on the marketing sticker. Many modern manufacturers use ‘Peak Power’ ratings to inflate their numbers, which is essentially the audio equivalent of a car that can only hit its top speed for a split second before the engine explodes. A famous study by Dr. Floyd Toole in Sound Reproduction highlights that our perception of ‘loudness’ and quality is far more dependent on linear frequency response and off-axis performance than raw wattage. This explains why vintage speakers losing their punch is often a result of aging capacitors failing to provide that instantaneous current, rather than a lack of rated power.
The Nuance of Phase Alignment
Another nuance often missed by even seasoned hobbyists is phase alignment. You can have the most expensive, perfectly damped setup in the world, but if your speaker wires are accidentally swapped on one side, your soundstage will completely collapse into a thin, hollow mess. I’ve seen professionals spend hours tweaking EQ settings only to realize they could tell if their speakers are out of phase in about thirty seconds with a simple 9V battery test. It’s these tiny, free adjustments that often yield 10x the results of a new amplifier. Have you ever fallen into this trap of over-complicating a fix when the answer was a simple wire swap? Let me know in the comments.
Once you have sorted out the phase issues and resonance, you enter the long game: maintenance. If you want to keep that clarity for another twenty years, you need to look beyond just the wires. I’ve seen too many systems degrade slowly because the owner didn’t realize their speaker’s capacitor was starting to fail. As Vance Dickason notes in The Loudspeaker Design Cookbook, the electrolyte in vintage capacitors eventually dries out, shifting crossover points and dulling your tweeters. It’s a slow death that your ears habituate to until you finally swap them and realize what you’ve been missing.
DeoxIT D5 is My Absolute Secret Weapon
The most used tool in my kit isn’t a fancy calibrated mic—it’s a simple can of DeoxIT D5. I use it to fix a scratchy volume dial before it becomes a permanent dropout issue. It’s also crucial to clean gold-plated connectors without ruining the finish. Over time, even gold can attract a film of grime that adds resistance. I’ve found that a quick swipe with a lint-free swab every six months keeps the noise floor non-existent. Most people ignore their RCA jacks until they start humming, but a proactive cleaning schedule prevents the need for invasive repairs later.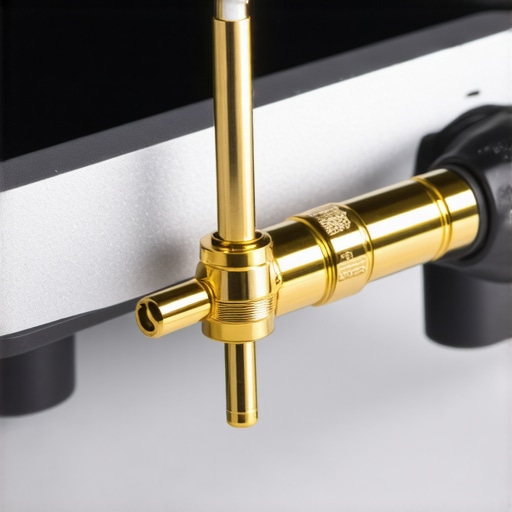
How do I maintain my system’s health over the decades?
Maintenance isn’t just about the electronics; it’s about the materials. Don’t forget the soft parts that handle the physical movement of sound. Learning how to clean your headphone ear pads without ruining the leather can double the lifespan of expensive cans. If you’re a vintage collector, knowing when to revive old speakers with new foam surrounds is the difference between a landfill and a legendary listening room. I also keep a close eye on my amplifiers; if you notice why your vintage amp gets hot even when you aren’t playing music, it’s a sign that the bias current needs recalibration. Ignoring heat is the fastest way to cook an output transformer.
Stop Letting Oxidation Steal Your High-End Detail
We are moving toward a future where AI-driven predictive maintenance will likely be built into every high-end receiver, alerting your phone the moment a capacitor starts to drift out of spec. Until then, you are the sensor. My big advice? Buy a basic digital multimeter. It’s the only way to truly verify that your gear is performing at its peak. I want you to try this advanced tip: grab that multimeter and check your amplifier’s DC offset at the speaker terminals. If it’s reading higher than 50mV with no music playing, your amp is ‘leaking’ electricity that will eventually burn out your voice coils. It’s a five-minute check that could save you a thousand-dollar repair bill down the road.
Mistakes That Taught Me More Than Manuals Ever Could
Over the years, I’ve realized that the most frustrating noises often have the simplest solutions. I used to think a buzzing sound meant I had to hunt for the trick to making cheap bookshelf speakers sound expensive, but usually, it’s just a loose mechanical bond. One major lightbulb moment was discovering that a ‘blown’ sound is often just a loose grill; you should always tell if your speaker is actually blown or just rattling before spending a dime on replacements. Another lesson? Never underestimate the power of a clean connection. I now make it a habit to clean gold-plated connectors without ruining the finish every time I pull a grill off for maintenance. It’s those small, intentional acts of care that keep a system sounding pristine for decades rather than just a few years.
A Few Essentials for the Dedicated Audio Tinkerer
If you want to move beyond basic troubleshooting, there are a few items I never let my workbench go without. First is a high-quality contact cleaner to fix a scratchy volume dial with electrical contact cleaner before oxidation ruins the potentiometer. Second, I highly recommend ‘The Loudspeaker Design Cookbook’ by Vance Dickason; it’s the bible for understanding how cabinets and drivers interact. Lastly, keep a digital multimeter handy to check how to tell if your speakers capacitor is starting to fail. These tools turn guesswork into a science and give you the confidence to tackle any issue that arises with your favorite home audio deals.
Trust the Process and Enjoy the Silence
There is a unique kind of satisfaction that comes from fixing a rattling metal speaker grill with your own two hands. It’s not just about saving money; it’s about reclaiming the purity of your listening experience. When that metallic zing finally vanishes and you’re left with nothing but the music, you’ll realize that the most expensive upgrade isn’t a new amp—it’s a well-maintained system. Don’t be afraid to pull those grills off, apply some dampening, and listen closely. You have the power to make your gear sound exactly the way it was intended. What’s the most annoying rattle or buzz you’ve ever had to hunt down in your setup? Let me know in the comments below.