
I’ll never forget the time I tried to host a small dinner party with a sleek, glass-top dining table as my centerpiece. I placed my favorite portable speaker right in the middle, expecting crisp, room-filling sound. Instead, it sounded like a mosquito buzzing in a soda can. It was embarrassing. I actually thought my driver had blown until I moved the speaker to a solid oak side table to make room for the salad bowl. The difference was night and day. The bass suddenly had weight, and the vocals didn’t hurt my ears anymore. It was a classic lightbulb moment that taught me one of the most important lessons in home audio: the surface under your speaker is just as important as the speaker itself. Today, I am going to show you exactly how to use your furniture to fix your sound without spending a dime on new gear.
Your Table Is Actually Part of Your Speaker
Most people think of their Bluetooth speaker as a self-contained unit. You charge it, you pair it, and you play it. But here is the thing—sound is just vibration. When your speaker sits on a surface, it transfers some of that energy into the material below it. Wood, being a natural and relatively dense material, acts like a secondary resonator. It is why violins and acoustic guitars aren’t made of plastic or glass. I used to think I needed to buy a massive driver to get real sound, but often, the secret to getting deep bass from tiny desktop speakers is simply picking the right spot to put them. Just like why floorstanding speakers need spikes when used on carpet, the way your device interacts with the floor or furniture determines the final output you actually hear.
Is a wooden surface actually worth the hype?
You might be skeptical. After all, shouldn’t a two-hundred-dollar speaker sound good anywhere? While high-end engineering helps, physics does not take a day off. According to research on material resonance often cited by the Acoustical Society of America, the density and internal damping of wood make it ideal for reinforcing lower frequencies while absorbing harsh high-end reflections. If you have ever wondered why your Bluetooth speaker sounds muffled when placed against a wall, it is because boundaries and materials change everything about the sound signature.
The Rookie Mistake I Made So You Don’t Have To
Early in my obsession with gear, I spent way too much time obsessing over specs and not enough on placement. I once almost returned a perfectly good pair of monitors because I had them sitting on hollow plastic crates. I was convinced they were broken! Now I know better. Why your Bluetooth speaker sounds much fuller on a wooden table isn’t just a coincidence—it is a free acoustic upgrade that uses the table’s mass to amplify the sound waves. Have you ever noticed your music sounding completely different just by moving your speaker two feet to the left? Let me know if you’ve ever felt like your gear was underperforming just because of where it was sitting.
Turn Your Furniture Into a Giant Subwoofer
To get started, you need to treat your table like the body of an acoustic guitar. The speaker is the strings—it provides the initial vibration—but the wood provides the volume and the ‘soul’ of the sound. If you just plop it down anywhere, you’re leaving 40% of your audio quality on the table (literally). I once spent a rainy Saturday afternoon sliding my old Bose Revolve across a heavy walnut coffee table like a chess piece. I was frustrated because the kick drums sounded like someone hitting a wet cardboard box. I finally moved the speaker about four inches inward, away from a decorative metal inlay. The bass tightened up instantly. It turned out the metal was vibrating at a different frequency, cancelling out the low end. That’s why you have to be intentional. 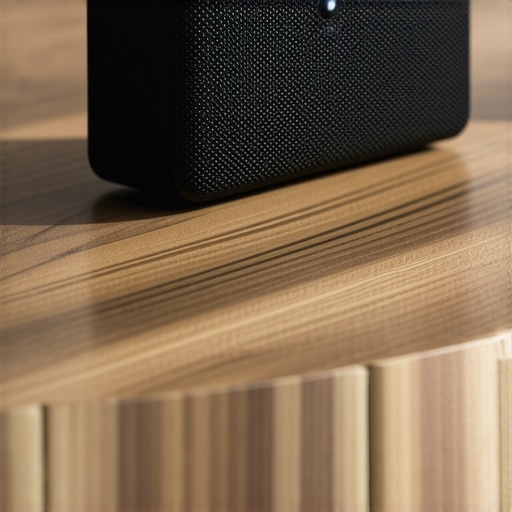
Start with the Two-Finger Test
Before you even turn the music on, tap the surface of your table with your knuckles. If it sounds hollow and ‘ringy,’ it’s going to add a lot of boominess to your music. If it sounds dead and thud-like, it’s a high-density surface that will provide a very clean, punchy response. This is the trick to making cheap bookshelf speakers sound expensive without spending a cent on wiring or DACs. If the table vibrates too much, you’ll want to check how to tell if your speaker is actually blown or just rattling before blaming the hardware. Different woods offer different ‘flavors.’ Pine is soft and tends to soak up some of the energy, making the sound feel warmer but less detailed. Oak or Maple are much harder; they reflect the sound with more bite, which is great for rock or hip-hop but can be fatiguing for long listening sessions.
Why the Table Edge is Your Worst Enemy
If you place your speaker right at the very edge of a desk or table, the sound waves wrap around the cabinet and hit the floor too quickly. This is called ‘diffraction.’ It thins out the sound and makes the vocals feel like they’re coming from a tiny tin can. For the best results, place the speaker about 6 to 10 inches back from the front edge. This allows the table surface to act as a launchpad for the sound, reinforcing the lower frequencies before they hit your ears. This is exactly the secret to getting deep bass from tiny desktop speakers that most people miss in their home office setups.
Use the Room to Do the Heavy Lifting
The table is your primary tool, but the wall behind it is your secondary amplifier. If your speaker has a rear-firing port (a hole in the back), the distance to the wall is critical. Too close, and it sounds muddy; too far, and it loses its punch. This is a common reason why your bluetooth speaker sounds muffled when placed against a wall. I recommend starting at 5 inches and moving it back an inch at a time until the bass feels ‘fast’ and doesn’t linger too long after the beat. If you still hear a whistling or strange air noise, you might need to try the simple paper towel trick for finding speaker air leaks to ensure the cabinet itself is still airtight. By manipulating these three physical variables—surface density, edge distance, and wall proximity—you are essentially building a custom acoustic enclosure for your speaker every time you set it down.Most ‘audiophile’ advice tells you to let your new gear ‘warm up’ for a month before it sounds right. Honestly? I think it is mostly bunk. The truth about speaker break-in periods is that while some mechanical parts do loosen up, the biggest change is actually happening in your brain as it gets used to a new sound signature. According to technical analysis from experts at Audioholics, once the spider and surround of a driver reach their operating temperature—which takes minutes, not weeks—the measurable difference is negligible. If it sounds bad out of the box on that wooden table, it is probably your room acoustics or poor positioning, not a lack of ‘burn-in.’
The Heat Trap That Kills Your Gear
One mistake I see constantly, even in high-end setups, is the ‘Stack of Doom.’ People love to save space by stacking components. Whatever you do, remember why you should never place your turntable on top of your receiver. It comes down to two things: heat and electromagnetic interference. Your receiver needs air to breathe, and your turntable’s sensitive needle will pick up every bit of hum from the transformer below. I once saw a friend fry a vintage Marantz because they blocked the vents with a heavy record player. It is a painful lesson you do not want to learn the hard way.
How do you know if your speakers are fighting each other?
If you have followed my table-placement advice and the bass still feels ‘hollow’ or shifts weirdly as you move your head, you might be dealing with a phase issue. It is incredibly easy to accidentally swap the red and black wires on one side. This makes the drivers move in opposite directions, effectively cancelling out the sound waves before they reach your ears. You can learn how to tell if your speakers are out of phase in 30 seconds by just listening for a centered vocal image. If the singer sounds like they are coming from everywhere except the middle, your wiring is the culprit. 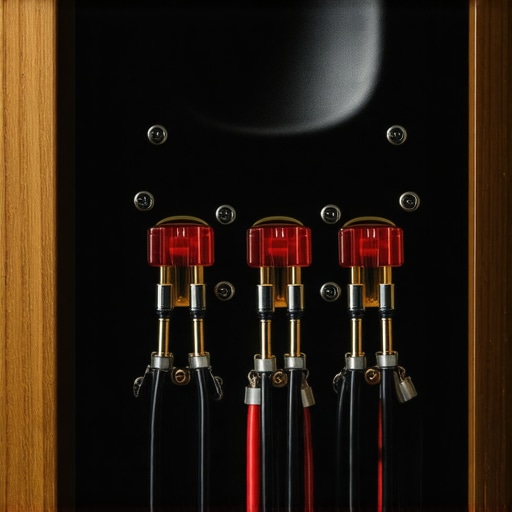 Another nuance often overlooked is the cable type. In a crowded home office with dozens of power bricks and monitors, you might need to understand the difference between balanced and unbalanced cables for home studios to avoid that annoying low-level buzz. However, for most short runs on a desk, fancy cables won’t fix a bad surface or poor alignment. Have you ever fallen into this trap—buying expensive cables or ‘break-in’ services to fix a sound problem that was actually just poor placement? Let me know in the comments below, and let’s troubleshoot your setup together.Even if you have found the perfect table and your wall spacing is millimeter-accurate, audio gear is a physical machine that eventually wears down. I keep a can of Caig DeoxIT D5 in my desk drawer like it’s emergency medicine. Over time, oxygen and humidity create a microscopic layer of ‘gunk’ on your copper and silver plugs that acts like a filter for your high-end frequencies. If you’ve ever heard a crackle when you turn a dial, you need to know how to fix a scratchy volume knob on an old amp before the noise drives you crazy. It is usually just oxidation, not a broken component. But be careful—don’t just scrub away at those delicate surfaces. Learning how to clean gold-plated connectors without ruining the finish is a skill that preserves conductivity without stripping the expensive plating that prevents corrosion in the first place.
How can I keep my vintage gear from dying?
The biggest enemy of long-term audio health is heat and component aging. Electrolytic capacitors—those little ‘cans’ you see on the circuit boards inside your amp—have a finite lifespan. According to technical documentation from Vishay Intertechnology, these components have a specific load life and can dry out after 15 to 20 years, leading to a persistent low-frequency hum or total failure. I make it a habit to peek inside my favorite units every few years to look for bulging or leakage. You should learn how to tell if your speaker capacitors are starting to leak so you can catch the problem before it takes out a rare transformer. It is the difference between a ten-dollar repair and a five-hundred-dollar replacement. For your modern mobile gear, the rules are different but just as strict; remember that the mistake that kills your portable speaker battery life is often as simple as leaving it plugged into a charger 24/7, which keeps the lithium cells in a high-stress state.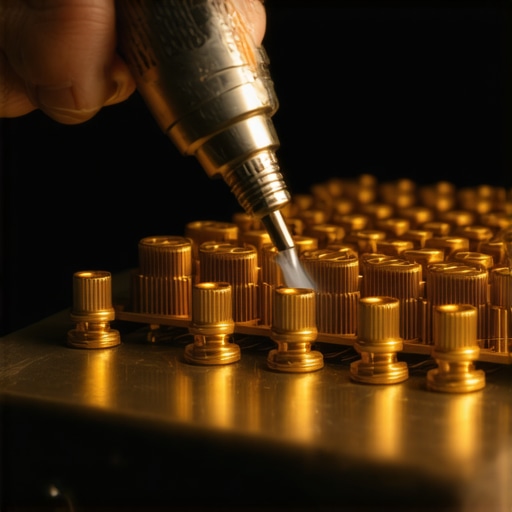
Your Best Friend Is a Cheap Multimeter
You do not need an engineering degree to troubleshoot your setup, but a fifteen-dollar multimeter is my most-used tool. When a speaker suddenly goes silent, my first move is never to buy a replacement; it is to check for continuity. Knowing how to use a multimeter to find a short in your speaker wires has saved me hundreds of dollars in ‘broken’ gear that was actually just a frayed cable hidden behind a bookshelf. Looking forward, I expect the trend of AI-driven room correction to move from high-end receivers directly into the speakers themselves. We are already seeing DSP that can sense the density of the surface the speaker is sitting on and adjust the EQ to compensate for glass or wood reflections in real-time. Until that becomes the standard, the manual check is still king. I want you to try one thing tonight: take five minutes to unplug your main speaker cables, give the tips a quick wipe with a clean microfiber cloth, and plug them back in firmly. You might be surprised at how much ‘air’ and clarity return to your music just by refreshing those contact points.
The Three Audio Myths That Cost Me Too Much Money
After a decade of tinkering with home audio, I’ve realized that the most expensive equipment often fails because of the simplest mistakes. First, forget the idea that you need a fortune to get good sound; the trick to making cheap bookshelf speakers sound expensive is 90% placement and 10% hardware. Second, don’t let a salesman convince you that you need to wait weeks for your gear to ‘mature.’ The truth about speaker break-in periods is that your ears adjust far faster than the physical rubber of the speaker does. Finally, stop buying ‘audiophile-grade’ cables for three-foot runs. If you have a clean signal, a standard copper wire will outperform a gold-plated gimmick every single time. My biggest lightbulb moment was realizing that my room was the most important component in my signal chain, not my amplifier.
What I Keep in My Audio Troubleshooting Bag
If you want to take your hobby seriously without going broke, there are three resources I never leave home without. I always suggest hitting local auctions; the trick to buying high-end audio at estate sales is looking for the brands that the general public doesn’t recognize. For hardware maintenance, a simple bottle of contact cleaner is vital—just make sure you know how to clean gold-plated connectors without ruining the finish so you don’t strip away the protection. Lastly, I always have a cheap multimeter on hand. Learning how to use a multimeter to find a short in your speaker wires has saved me from throwing away perfectly good gear more times than I can count. These tools aren’t flashy, but they are the difference between a frustrating afternoon and a perfect listening session.
Now Go Find Your Speaker’s Forever Home
Improving your home audio shouldn’t be a source of stress; it should be an adventure in physics. Take what you have learned today and start moving your gear around. Listen to how the wood grain adds warmth and why why your bluetooth speaker sounds much fuller on a wooden table than it ever did on that glass shelf. You don’t need a degree in acoustics to hear the difference—you just need a little bit of patience and a heavy piece of furniture. Your favorite albums have layers of detail you haven’t even discovered yet, and they are waiting for you to find them. What’s the weirdest surface you’ve ever tried putting a speaker on? Let me know in the comments if it actually worked!