
I’ll never forget the smell of scorched synthetic fibers in my first beat-up sedan. I had just finished installing a beast of a four-channel amp and, in my rush to hear that first bass hit, I shoved it right under the passenger seat and called it a day. No mounting, no clearance—just “stealth” by way of laziness. Twenty minutes into a highway cruise, the cabin smelled like an electrical fire. I pulled over, heart pounding, to find my amp literally melting into the floor mat because it couldn’t breathe. It was a classic rookie move that almost cost me my car. Since then, I’ve mastered the art of the stealth install, ensuring that my gear stays hidden but stays cool. Today, I’m going to show you exactly how to tuck that power away without turning your upholstery into a fire hazard. Have you ever tried to hide an amp only to have it shut off five minutes later because it hit its thermal limit?
Stop Sacrificing Your Trunk Space for Better Sound
Putting an amp under the seat is the ultimate move for keeping your trunk free for groceries or tools, but it’s not as simple as sliding it under the tracks. The biggest hurdle isn’t space; it’s heat. If you don’t know how to tell if your amp is running too hot, you’ll likely face a frustrating cycle of the system cutting out right during your favorite song. I learned the hard way that why your car amp is overheating during long summer drives usually comes down to a total lack of airflow in that cramped footwell. According to the Engineering Toolbox, stagnant air acts as an insulator rather than a coolant, which means we have to create a physical gap between the amp and the carpet to allow for natural convection.
Won’t the Amp Melt My Floor Mats or Catch Fire?
This is the number one fear I hear from folks, and frankly, it’s a valid one if you’re planning on a “lazy” install. My early mistake was resting the metal heatsink directly on the carpet fibers. Metal-to-carpet contact is a recipe for disaster because the carpet traps the heat, forcing the internal components to bake. If you’re pushing a lot of wattage, you might even be worried about electrical strain; in those cases, it’s worth looking into how to add a second battery for your high power car amp to keep the voltage stable. But for the average setup, the fix is much simpler: we build a small riser. By lifting the amp just half an inch off the floor, you create a chimney effect that pulls cool air in and pushes hot air out.
Why the Passenger Seat is Your Best Friend
Beyond the stealth factor, mounting under the passenger seat keeps your signal wire runs short if your head unit is in the dash. This reduces the chance of picking up engine noise or interference. However, you have to be careful with the wiring. If you don’t secure those cables, the seat sliding back and forth will eventually cheese-grater through your insulation. This can lead to a short, which is a major reason why your car audio system drains the battery while the engine is off or, worse, pops a main fuse. We’re going to walk through the proper mounting bracket techniques and cable management tricks to make this look—and perform—like a professional factory install.
Build a Riser to Give Your Amp Some Breathing Room
To avoid the thermal shutdown nightmare, you need to elevate the amplifier. I learned this the hard way after a ‘velcro-only’ install led to my amp sliding forward and getting wedged against a heater vent during a winter drive—it went into protect mode in minutes. Instead of mounting directly to the carpet, cut a piece of 1/2-inch MDF or high-density plastic slightly larger than the amp’s footprint. Wrap this board in matching carpet or vinyl so it blends in. This board acts as a solid anchor point and creates a buffer. By screwing the amp to the board and the board to the floor (being extremely careful not to drill into the gas tank or brake lines), you create that vital air gap. This setup also makes it easier to manage your cables beneath the unit itself. If you’re worried about the overall electrical health after adding more gear, you might need to know how to add a second battery for your high power car amp to keep things stable.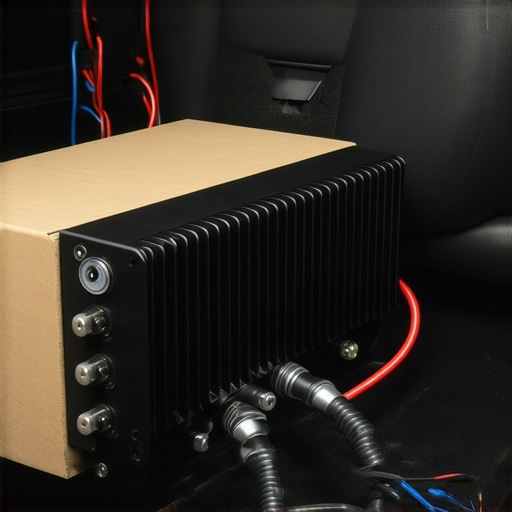
Keep Your Wires Away from the Seat Tracks
The most dangerous part of an under-seat install is the mechanical movement of the seat itself. Most seat tracks are sharp, grease-covered guillotines for thin copper wires. I once spent three days hunting down a mystery fuse-pop only to find the power cable had been slowly nibbled away every time my wife adjusted the passenger seat. You must use split-loom tubing or braided ‘techflex’ to protect your runs. Route your power, ground, and speaker wires through the center console or under the doorsill plates, and leave enough slack for the seat to move through its full range of motion without tension. Once you have the wires in place, use a few zip ties to secure them to the stationary part of the seat frame or the carpet itself. If you notice strange noises after the install, you should learn how to use a multimeter to find a short in your speaker wires before you fry your new equipment.
Grounding the System Without the Annoying Hum
A bad ground is the root of all car audio evil. When mounting under a seat, people often pick a seat bolt as a ground point. This is usually a mistake because seat bolts are often treated with anti-corrosion coatings that act as insulators. Instead, find a solid section of the floorpan, sand away the paint until you see shiny bare metal, and use a self-tapping screw with a star washer. If you skip this, you’ll likely hear a high-pitched whine that changes with the engine RPM. This is also a common reason why your car speakers pop when you turn the engine on. Once the ground is solid, perform a quick phase check. It’s incredibly easy to swap a positive and negative lead in the dark footwell, so follow the easy way to test if your speakers are out of phase to ensure your bass isn’t canceling itself out. A properly phased system under the seat can provide an incredible front-stage sound, especially if you’ve already noticed why your door speakers sound better after adding sound deadening. Doing the job right the first time means you won’t be pulling the seat back out next week to fix a loose connection.Most enthusiasts believe that because modern Class D amplifiers are 80-90% efficient, they can be tucked away in any airtight nook without a second thought. This is a dangerous misconception. In my years of troubleshooting systems, I’ve found that even ‘cool-running’ amps experience thermal runaway when the ambient temperature in a cramped footwell hits 120 degrees on a summer day. Everyone says Class D doesn’t need cooling, but in my experience, the lack of a cooling fan on these compact units makes them more susceptible to heat soak in stagnant air. According to the Arrhenius Law—a principle frequently cited in reliability engineering—the failure rate of electronic components essentially doubles with every 10°C increase in operating temperature. This isn’t just about the amp shutting off temporarily; it’s about the slow, silent degradation of internal components. If you notice your bass getting ‘fuzzy’ or losing punch after an hour of driving, it might be time to learn how to tell if your amps capacitors are failing due to this prolonged heat exposure. 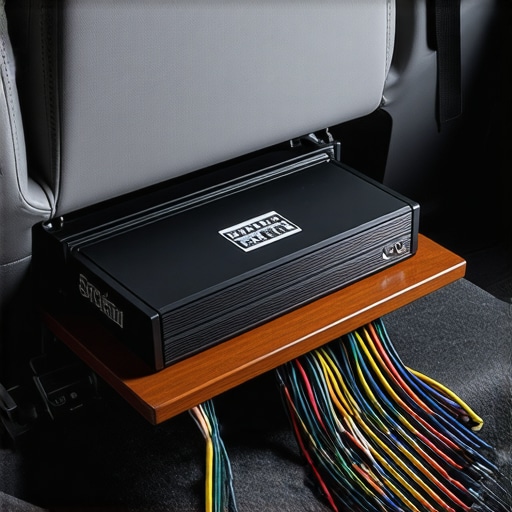 Another major ‘oops’ factor I see is the temptation to maximize power in a confined space without considering the electrical consequences. If you decide to learn how to bridge a two-channel amp without blowing a fuse, you are essentially asking that unit to work at its absolute thermal limit. Bridging increases the current draw and the heat output significantly because the internal resistance the amp ‘sees’ is effectively halved. When you combine this with the decision to how to wire two subwoofers to a single mono amp at a low impedance, you are creating a localized furnace directly under your passenger’s seat. I’ve seen beautiful leather seats actually discolor and the foam become brittle from the constant heat rising from a high-power amp that was pushed too hard in a zero-airflow environment.
Will Heated Seats Actually Damage My Under-Seat Amp?
This is a frequent concern for owners of modern vehicles, and it’s a nuanced issue. While the heating elements themselves are insulated, they still contribute to the ‘thermal budget’ of the cabin floor. If you are running your seat heaters on high while simultaneously pushing your audio system at full tilt, you are significantly raising the ambient floor temperature. This reduces the effectiveness of the amp’s heatsink. To mitigate this, always ensure your mounting riser provides at least a one-inch gap if your car has high-output heated seats. Have you ever fallen into the ‘it’s a Class D, it’ll be fine’ trap only to have your music cut out? Let me know in the comments.I never go into an install without my Fluke 117 multimeter. Relying on the ‘protect’ light to tell you there is a problem is like waiting for the smoke alarm to tell you your dinner is burnt—at that point, the damage is already underway. If you are serious about this hobby, you need to learn how to use a multimeter to find a short in your speaker wires before you even turn the key. I’ve seen too many DIYers fry a high-end MOSFET because they didn’t check for continuity between the speaker lead and the chassis. Precision is the difference between a system that lasts a decade and one that dies in a month.
Stop Guessing and Start Measuring Your Power
When you are working in the tight confines of a passenger footwell, your connections are under constant physical stress. I make it a habit to check my voltage drop at the amp terminals every six months. If your amp is starving for current, you are going to heat up those internal rails. This is exactly why some people choose how to add a second battery for your high power car amp to ensure the voltage never dips below 12.5V under load. According to Texas Instruments application note AN-2162, maintaining stable power supply rails is critical for Class-D amplifiers because voltage fluctuations directly translate into higher Total Harmonic Distortion (THD) and increased thermal waste. By keeping your power clean, you are literally extending the life of every capacitor in that casing.
Clean Your Connectors Before the Oxidation Sets In
Moisture is the silent killer of under-seat electronics. Every time someone gets into your car with wet shoes, that humidity settles right where your amp is tucked. Over time, this leads to a micro-layer of oxidation on your RCA inputs and power terminals. I personally use DeoxIT D5 on every single connection point. You should specifically look into how to clean gold-plated connectors without ruining the finish to prevent that crackling noise that often plagues older installs. If you ignore this, you might eventually wonder why your car speakers pop when you turn the engine on or why you’re getting intermittent signal loss. 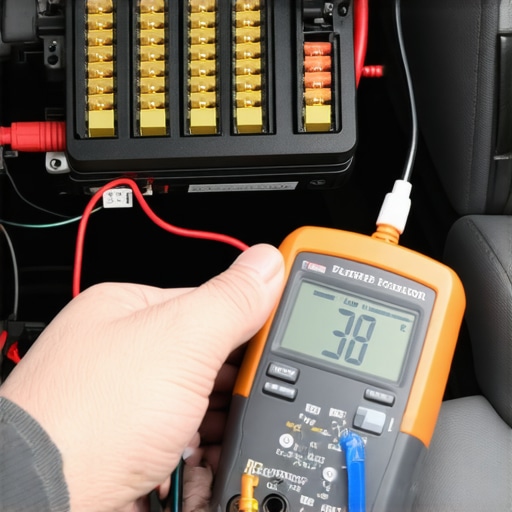
How do I keep my hidden amp running for years?
Long-term reliability comes down to periodic ‘snag tests.’ Every time you change your oil, reach under the seat and give your wires a gentle tug. If anything feels loose, tighten it. Heat cycles cause metal to expand and contract, which can loosen terminal screws over time. You should also keep an eye on the internal health of the unit; knowing how to tell if your amps capacitors are failing is vital for catching a blowout before it takes your speakers down with it. Looking forward, I expect Gallium Nitride (GaN) technology to completely take over the car audio market within five years. GaN transistors switch much faster and run significantly cooler than traditional silicon, which will eventually make our current heat-management struggles a thing of the past. For now, take ten minutes this weekend to check your ground point and wipe down your amp’s heatsink fins—it’s the easiest way to protect your investment. Go grab your multimeter right now and check your resting battery voltage; if it’s under 12.2V, your amp is already working harder than it needs to.
The Brutal Truth About Hidden Power Supplies
After years of cramming high-wattage gear into tight spaces, I’ve realized that the most common ‘wisdom’ is often the most dangerous. For instance, people assume that if an amp is ‘compact,’ it can handle any environment. The reality is that the floor of a car is a harsh ecosystem of vibration, dust, and moisture. One major lightbulb moment for me was realizing that the ground point is the most likely failure point over time—not the amp itself. If you’re hearing weird noises, it’s worth investigating why your car speakers pop when you turn the engine on before you blame the expensive hardware. Also, never underestimate the power of a phase test; it is startling how many ‘muddy’ systems are fixed just by using the easy way to test if your speakers are out of phase. Finally, remember that your seat tracks are moving guillotines. If you do not route your wires with 20% more slack than you think you need, you are essentially setting a trap for your own cables.
Gear That Makes the Difference Between DIY and Professional
To get that factory-quality finish under your seat, you need more than just a screwdriver. I never start an under-seat project without these three things: first, a reliable digital multimeter—knowing how to use a multimeter to find a short in your speaker wires is a non-negotiable skill for any installer. Second, high-density polyethylene (HDPE) board for the mounting riser; it is waterproof and won’t rot like MDF if a passenger spills a drink. Third, a high-quality contact cleaner. If you are using premium cables, you really need to know how to clean gold-plated connectors without ruining the finish to ensure the signal stays pure for the life of the vehicle. I also highly recommend picking up a roll of Tesa felt tape—it is what European luxury manufacturers use to prevent wires from rattling against the floorpan.
Reclaim Your Trunk Without Killing Your Amp
The journey to a perfect stealth install is as much about patience as it is about technical skill. By taking the extra hour to build a proper riser and secure your grounds, you are doing more than just protecting an amplifier; you are ensuring that your daily commute remains a sanctuary of high-fidelity sound. Do not let the fear of a little extra wiring stop you from achieving the clean, trunk-free look you want. Your car deserves a system that sounds as good as it looks, and with these steps, you are ready to make that happen. Have you ever had an amp shut down on you because it got too hot under the seat? Let me know in the comments below!