
I was sitting in my driveway with a brand-new 1500-watt monoblock amp and a sub that could probably rattle the neighbors’ teeth loose. I turned the volume knob up, waiting for that chest-thumping impact. The bass hit, but so did the panic—my dashboard flickered like a haunted house, and my engine RPMs dipped so low I thought the car was going to stall right there. I’d spent all my money on the gear and none of it on the juice to run it. It was a classic rookie move. I assumed the factory battery was a bottomless pit of energy. It isn’t. In fact, relying on a single stock battery for a high-output system is a fast track to a fried alternator and a very quiet ride home.
Your Factory Battery Wasn’t Built for High-End Bass
Most cars come off the lot with a battery designed to do one thing well: start the engine. Once the car is running, the alternator takes over the heavy lifting. But here is the problem. A high-power amp demands massive, instantaneous gulps of current that a standard alternator can’t always provide in the microsecond the bass hits. This leads to massive voltage drops. You might notice the real reason your cars alternator makes your speakers whine is often linked to this strained electrical environment. When I first started, I ignored these signs until I literally melted a terminal. Today, we are going to fix that. Adding a second battery acts like a local reservoir, providing the ‘punch’ your amp needs without starving the rest of your car’s electronics.
Is a second battery actually worth the extra weight?
I get this question all the time from folks worried about their gas mileage or trunk space. Here is the reality: if your lights are dimming, your amp is clipping. Clipping doesn’t just sound bad; it kills speakers. According to technical data from the Battery Council International, standard starter batteries are designed for high-cranking bursts but lack the chemistry to handle the deep, rapid cycling of a high-performance audio system. By adding a dedicated AGM (Absorbent Glass Mat) battery near your amp, you stabilize the voltage and actually prolong the life of your expensive gear. Plus, it prevents the frustrating scenario why your car audio system drains the battery while the engine is off because you’ll have more reserve capacity to play with.
Have you ever had your car actually sputter or lose power when the bass dropped on your favorite track? It’s a terrifying feeling. Beyond the fear, a struggling electrical system can lead to heat issues, which is often why your car amp is overheating during long summer drives. In the next section, we’re going to dive into the nuts and bolts of the installation, specifically how to wire things up so you don’t accidentally create a fire hazard.
Connect Everything in Parallel to Keep the 12-Volt Dream Alive
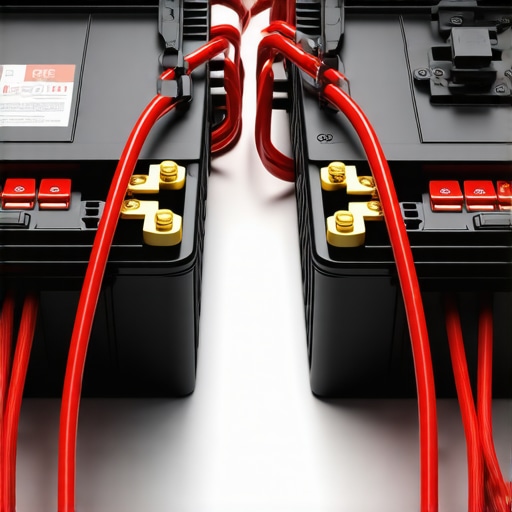
When you add a second battery, you must wire it in parallel with your primary battery. This means connecting positive to positive and negative to negative. If you accidentally wire them in series (positive to negative), you’ll double your voltage to 24 volts, which will instantly fry your head unit, your amp, and probably every sensor in your car. Think of your electrical system like a plumbing network. If you add a second water tank but use a straw-sized pipe, you’ll never get the pressure needed for a massive shower. You need thick, high-quality copper to move that current. Before you tighten everything down, it is smart to learn how to use a multimeter to find a short in your speaker wires or power lines to ensure your path is clear before you introduce a second power source.
Treat Your Power Cables Like High-Pressure Fire Hoses
If you are running enough power to justify a second battery, you likely already know how to wire two subwoofers to a single mono-amp, but that extra bass will reveal every loose bolt in your car. For the connection between batteries, do not settle for thin 8-gauge wire. Use 0-gauge or at least 4-gauge OFC (Oxygen Free Copper). Cheap CCA (Copper Clad Aluminum) wires are tempting because they are half the price, but they have higher resistance and can’t carry the same current without heating up. I once tried to save twenty bucks using thin wire on a 2000-watt setup in my old 1998 Camry. Within a week, the insulation on the wire was soft and sticky from the heat. I was lucky I didn’t start a fire. While you have the trunk torn apart to mount that second battery, you should also stop your car trunk from rattling with this cheap foam trick to keep your sound clean.
Protect Your Ride with Dual Fuses
This is where most beginners mess up. You need a fuse at the front battery and another fuse at the back battery on the same power wire. Why? Because if that long cable running through your car ever rubs against a metal edge and shorts out, the energy from both batteries will rush toward that short. Without fuses at both ends, the wire will become a red-hot heating element. Just like why your door speakers sound better after adding sound-deadening because of the extra care in installation, dual fusing is about attention to detail that prevents disaster. Place your fuses within 12 to 18 inches of each battery terminal.
Scrape That Paint for a Perfect Ground
Your second battery needs a ground just as beefy as the power wire. Do not just screw the ground wire into the sheet metal of your trunk. You need to find a solid spot on the chassis, drill a hole, and use a wire brush to scrape away every bit of paint until you see shiny bare metal. A solid ground is just as important as a tight connection on a how to fix a loose speaker terminal on your cabinet back home. If there is any resistance at the ground, your voltage will still sag, and your new battery won’t be able to do its job. I remember helping a friend who spent $400 on a high-end Kinetic battery but forgot to scrape the paint off the trunk floor. He was still seeing 11 volts at the amp because the current couldn’t complete the circuit through the factory primer. We spent five minutes with a sanding block, and his voltage jumped straight back to 14.2.
Let’s dig deeper into the actual science of sound, because most people stop at “more power equals more better.” That is a dangerous simplification that often leads to overspending on the wrong components. In my years of swapping alternators and rebuilding enclosures, I’ve realized that chasing a single massive driver is often a rookie mistake. Everyone says you need a massive 15-inch cone for deep bass, but why two small subwoofers are better than one massive driver often comes down to the speed of the transient response. Smaller cones have less mass to move, allowing them to stop and start with the precision needed for complex double-bass drum patterns. If you have ever felt your sub was loud but somehow “blurry,” you have likely made the mistake youre making when positioning your subwoofer or simply asked a heavy, slow driver to do too much work.
The High-Priced Cable Trap You Should Avoid
Here is a hard truth that might upset some audiophile purists: your $200 boutique cables are likely doing nothing for your sound quality if your electrical foundation is weak. I have seen enthusiasts spend a fortune on silver-core interconnects while their car’s electrical system was still sagging to 11 volts during a drop. You should stop wasting money on expensive optical cables and instead focus on the mechanical integrity of your connections. Dust, vibration, and oxidation are much bigger enemies to your signal than the “purity” of the copper. For example, knowing how to clean gold-plated connectors without ruining the finish will preserve your signal path far more effectively than a fancy marketing box ever will. The “Oops” factor here is neglecting basic maintenance while throwing money at perceived upgrades.

Can you actually hear the difference after the speaker break-in period?
There is a massive debate about whether speakers need to “stretch” before they sound right. While some claim it is purely a placebo effect, why your new speakers sound better after 20 hours of use is actually supported by the Audio Engineering Society (AES). Mechanical components like the spider and the surround have a measurable change in compliance as they reach their operating equilibrium. However, here is the nuance: if your system sounds thin and lifeless out of the box, it is rarely a “break-in” issue. It is more likely a phase cancellation. Learning the easy way to test if your speakers are out of phase can solve a “bad sound” problem in seconds, which no amount of break-in time will ever fix. Research from the AES suggests that while mechanical changes are real, they are often overshadowed by the listener’s psychological adaptation to the new sound signature. Have you ever fallen into this trap of waiting for a miracle break-in that never happened? Let me know in the comments.
Stop Ignoring the Micro-Corrosion on Your Connections
Once you have the second battery installed and the bass is hitting hard, it is easy to forget that your car is a hostile environment for electronics. Between the humidity, the engine heat, and the constant vibration, your connections will degrade. I’ve seen systems lose 20% of their output over a year just because of oxidation. You need to periodically check your terminals. Learning how to clean gold-plated connectors without ruining the finish is a skill that pays for itself in sound clarity. I personally use a non-residue contact cleaner and a lint-free cloth every six months. If you see a white, powdery crust on your battery terminals, that is a resistance nightmare. Clean it, tighten it, and seal it with a bit of dielectric grease to keep the oxygen out.
How do I keep my audio gear sounding like new for a decade?
Maintenance isn’t just about the wires; it’s about the moving parts. Speaker surrounds and cones are susceptible to drying out, especially in car trunks or sun-drenched living rooms. If you’re running older gear, knowing how to revive a vintage speaker cone with simple rubber treatment can save you from a costly replacement. For modern paper cones, you have to be even more delicate. You should definitely master how to clean your speaker cones without ruining the paper because a buildup of dust adds weight to the cone, which slows down the response and muddies the mid-range. I’ve even used the old-school trick of how to fix a speaker cone with a simple coffee filter for minor tears, and honestly, if done right, you can’t hear the difference in the frequency response.
Trust Your Multimeter Over Your Ears
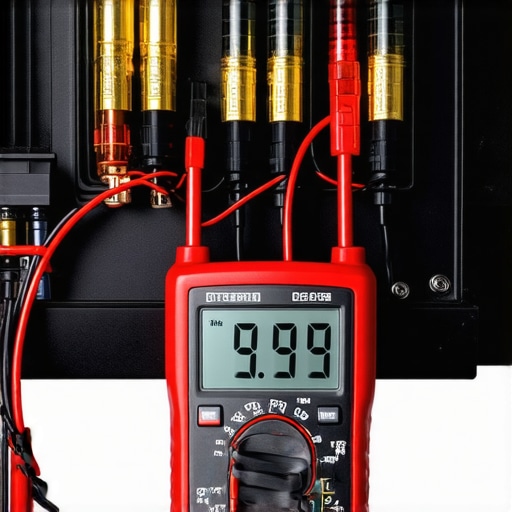
I don’t care how good your hearing is; you cannot hear a 0.5-volt drop until it’s already causing damage. This is why a digital multimeter is the most important tool in my bag. I use it to verify that my ground is perfect and that my batteries are charging at the same rate. If you suspect a problem, knowing how to use a multimeter to find a short in your speaker wires is the difference between a five-minute fix and a blown amplifier. According to the Capacitor Wizard technical documentation, ESR (Equivalent Series Resistance) is the ‘silent killer’ of audio fidelity, causing power supplies to ripple and introduce noise as the dielectric dries out. This is why you should learn how to tell if your speaker capacitors are starting to leak before they fail and take your crossovers with them.
The Future of Audio Maintenance is Smart Diagnostics
We are moving toward an era where manual checking might become a thing of the past. I predict that within the next five years, high-end amplifiers will come standard with Wi-Fi or Bluetooth-linked diagnostic apps that monitor real-time impedance and thermal health. We’re already seeing early versions of this in pro-audio rack gear. For now, though, the best way to prevent a disaster is to keep your equipment cool. If you’re pushing big power, you have to know how to stop your car subwoofer from overheating in the trunk by ensuring proper airflow or adding 12V cooling fans. My challenge for you this weekend: grab a multimeter, head out to your car or your home theater, and measure the voltage at the amp terminals while the music is playing at your usual volume. If that number dips below 12.5V, you’ve got work to do.
Lessons from My Melted Terminals and Sagging Voltage
Looking back at my first few builds, I realized that adding a battery is only half the battle. If I could go back, I’d tell myself that the ‘Big 3’ upgrade—improving the wiring between your alternator, battery, and chassis—is just as vital as the second battery itself. I also learned the hard way that not all batteries play well together. Mixing a standard lead-acid battery with an AGM one can actually lead to the stronger battery constantly trying to ‘charge’ the weaker one, eventually shortening the life of both. Always try to match your battery types if possible. Another lightbulb moment came when I realized that massive vibration from the subs was actually backing out the bolts on my battery terminals. Once those connections got loose, the resistance went up, the heat followed, and things started to smoke. Now, I always use nylon lock nuts or a drop of blue Loctite. You should also take the time to how to stop your cars rear deck from rattling when the sub hits because if the metal is vibrating that much, your electrical connections are definitely feeling the stress too. Lastly, before you push your equipment to the limit, make sure you know how to bridge a two-channel amp without blowing a fuse so you don’t overwhelm your newly stabilized power supply.
The Gear I Use to Keep the Bass Pounding
You don’t need a professional shop to do this right, but you do need a few specific tools. I never touch a car’s electrical system without a high-quality hydraulic wire crimper; those cheap hammer-style ones just don’t create the cold-weld connection needed for 0-gauge wire. I also recommend picking up a ‘Knukonceptz’ or ‘Sky High’ wiring kit—they use real oxygen-free copper that doesn’t corrode as fast as the cheap stuff. If you are looking to expand your collection on a budget, you might find some hidden gems by learning the trick to buying high end audio at estate sales, where you can often snag high-quality distribution blocks or old-school heavy-duty cables for pennies.
Go Build Something That Rattles Your Soul
There is nothing quite like the feeling of that first heavy bass drop after a successful install, knowing your lights aren’t going to flicker and your amp isn’t gasping for air. Taking the time to add a second battery is a rite of passage in the car audio world—it moves you from a ‘hobbyist with a box’ to someone who understands the foundation of sound. Once your power is solid, you can finally focus on the fine-tuning, like learning how to balance your car audio for the drivers seat to create that perfect soundstage. Don’t be afraid to get your hands dirty, scrape that paint for the ground, and double-check those fuses. Your gear and your ears will thank you. Have you ever had a specific electrical nightmare during an install? Let me know in the comments below!