
I’ll never forget the frustration of unboxing my first high-end soundbar, setting it up in five minutes, and then spending the next three hours wondering if I’d been scammed. The sound was muddy, the voices were buried, and I had to point the remote at exactly the right angle just to get the volume to budge. It wasn’t the gear; it was my gorgeous, bulky TV stand. I had shoved the soundbar into a shelf that was just a hair too small, effectively muzzling the speakers. Today, I’m going to help you identify if your furniture is strangling your audio and, more importantly, how to fix it without throwing out your favorite credenza.
The Day I Realized My Furniture Was My Audio’s Worst Enemy
In my early days of home theater DIY, I made the huge mistake of thinking “if it fits, it sits.” I tucked my soundbar deep into a cubby hole to keep the setup looking clean. I learned the hard way that the truth about why your soundbar dialogue is still muddy often comes down to physical barriers. When those sound waves hit the edges of your TV stand, they bounce back and create a mess of interference. This isn’t just about volume; it’s about the physics of sound.
Is a few inches of wood really enough to ruin the sound?
You might be thinking, “Come on, it’s just a stand, the sound can get around it.” But high-frequency sounds—the ones that carry the crispness of a human voice—are incredibly directional. If your soundbar’s drivers are firing directly into the lip of a shelf or behind a decorative trim, you’re losing about 40% of the detail. This is why why your soundbar remote doesn’t work from the couch is usually the first red flag people notice; the IR sensor is blocked along with the speakers.
Your TV Stand is Literally Choking the Life Out of Your Audio
When your soundbar is recessed into a stand or sitting too low behind the TV’s own bezel, you aren’t just losing volume—you’re creating an acoustic nightmare. The Audio Engineering Society notes that physical obstructions lead to “comb filtering,” which essentially deletes certain frequencies while exaggerating others. It is a scientific fact that speakers require a clear line of sight to the listener to maintain phase coherence and frequency response. It is the same reason why your soundbar sounds thin in a room with high ceilings or a cluttered cabinet. If the soundbar can’t “see” your ears, you aren’t getting the experience you paid for. I’ve seen people spend $800 on a bar only to have it sound like a $20 radio because it was buried behind a pile of gaming consoles. Have you ever felt like you had to choose between a clean-looking living room and actually hearing what’s happening on screen? Let me know in the comments, because I’ve been there. We’re going to look at how to get that secret to getting crisp dialogue without a center channel by simply moving your gear a few inches.The first thing you need to do—right now, before you change a single setting on your TV—is the “Flush Edge” adjustment. Most of us naturally push the soundbar back so it doesn’t look like it’s falling off the stand. This creates a flat “landing strip” of wood or glass directly in front of the speakers. When sound waves hit that surface, they bounce upward and collide with the direct sound hitting your ears. The result is phase cancellation and that frustrating “underwater” feeling.
The Flush Edge Rule That Saves Your Dialogue
Pull your soundbar forward until the front grille is perfectly flush with—or slightly over—the front edge of your furniture. If you have a round-edged stand, let the bar hang over by a few millimeters. It might look slightly “off” for the first five minutes, but your ears will thank you immediately. It is the same spatial logic used when finding the best height for your desktop speakers on a small desk because you are clearing the path for the audio to travel unimpeded. 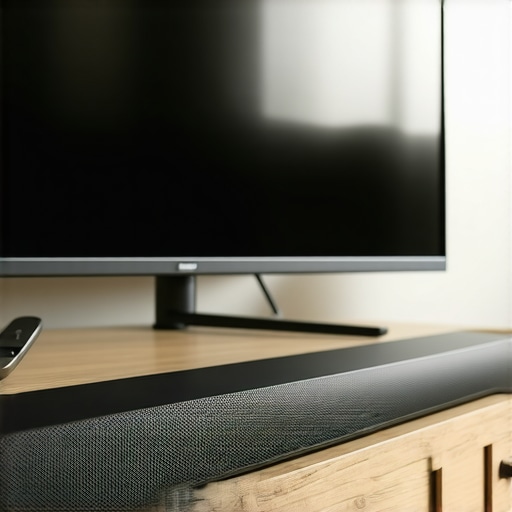
Aligning the drivers for maximum clarity
When I did this in my own living room, the improvement in high-frequency detail was like taking earplugs out. You want the sound to expand into the room, not reflect off your credenza.
Stop the Wood From Stealing Your Detail
Next, we have to address the “hidden” noise: resonance. Your TV stand isn’t just a platform; it’s often a giant wooden box that loves to vibrate. When your soundbar pumps out low-mid frequencies, the stand starts to hum along at its own frequency. This creates a muddy, bloated sound that masks the crisp high-end. I remember a specific setup for a friend where their expensive bar sounded like a vibrating tin can because the glass top was rattling against the frame.
Using isolation to prevent unwanted resonance
We applied small adhesive rubber feet to the bottom of the bar to decouple it. This simple act of isolation is why your desktop speakers need isolation pads to stop desk vibration—it keeps the energy in the speaker and out of the furniture. If you have ever wondered why your bluetooth speaker sounds much fuller on a wooden table, imagine that effect amplified and distorted by a 40-inch soundbar; it’s simply too much vibration for clear dialogue.
Dealing With the Dreaded Cabinet Cubby
If your soundbar is trapped inside a shelf, you are essentially putting it in a cave. This creates “boundary gain,” which makes the bass boomy and the dialogue impossible to hear. I once spent an afternoon fixing a soundbar tucked into a deep mahogany shelf where the sound bounced around like a pinball. We lined the back and sides of the cubby with thin felt to absorb those stray waves. It is a similar headache to why you should never place your subwoofer inside a cabinet, though on a smaller scale. While you are back there, use the best way to label your messy home theater cables so you can keep the slack organized. Physical tension from heavy, tangled cables can actually pull one side of a soundbar off-level, causing a subtle but annoying shift in the soundstage.Most enthusiasts think the solution to a ‘thin’ soundbar is a software update or a $100 HDMI cable. Let’s be real: you should stop wasting money on expensive optical cables expecting a miracle. If your furniture is poorly positioned, a gold-plated connector won’t save you. I’ve seen people agonize over the difference between cheap and expensive DACs that actually matters, only to ignore the fact that their soundbar is reflecting off a glass coffee table.
Stop Overspending on Cables That Don’t Change the Physics
It is easy to get caught in the marketing trap of high-end wiring. But in the digital realm, a cable either works or it doesn’t; it won’t make your dialogue warmer if your TV stand is physically blocking the tweeter. I’ve been in homes where $5,000 systems sounded like mud because the owner was convinced a silver-plated cable would compensate for placing the center channel inside a closed cabinet.
Why Corner Placement Is Actually Ruining Your Bass
There is a common belief that tucking your audio gear into a corner ‘amplifies’ the sound. Technically, it does, but it is the wrong kind of amplification. This is exactly why your floorstanding speakers sound boomy in the corner; you are exciting the room’s natural resonances in the worst way possible. You get more volume, sure, but you lose all the texture in the lower frequencies. It is a classic trap: trading quality for quantity. When the bass becomes ‘one-note,’ you lose the subtle details in a movie’s score or the low-end richness of a male voice. 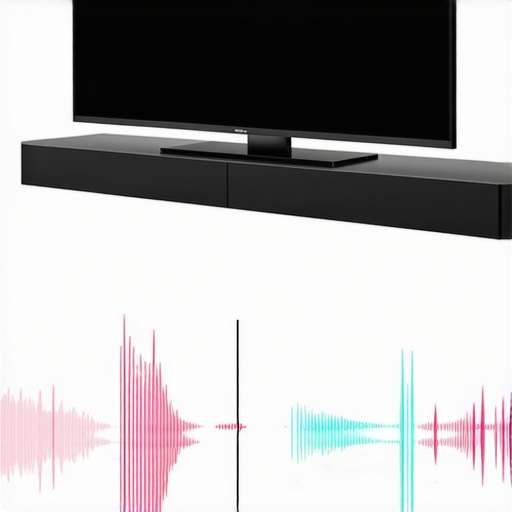
Can Software Calibration Truly Overcome Physical Obstacles?
Many modern soundbars come with ‘TruePlay’ or ‘AI Room Calibration.’ While these tools are impressive, they cannot rewrite the laws of physics. According to Dr. Floyd Toole, a pioneer in acoustic research and former President of the Audio Engineering Society, the loudspeaker-room interface is the single most influential factor in sound quality. Software can adjust the timing and EQ, but it cannot eliminate a physical reflection caused by a shelf. It is like trying to fix a blurry photo with a filter; the data is already lost. This is also a factor in why your new speakers sound better after 20 hours of use—both the hardware and your ears are adjusting to the environment, but they should not have to fight your furniture to do it.
The Rug Solution No One Talks About
If you have pulled the bar forward and it still sounds ‘harsh,’ look at the floor. Hardwood and tile are the enemies of clear dialogue. I always recommend people use a rug to fix the echo in your home theater room. It is the cheapest upgrade you will ever buy. By absorbing the ‘first reflection’ point on the floor, you stop the sound from bouncing into your ears at a slight delay, which is what causes that annoying harshness. Have you ever spent a fortune on fancy cables only to realize a $20 rug or a few inches of movement made a bigger difference? Let me know in the comments, because I have certainly fallen into the expensive gear trap before.
Once you have handled the physical placement of your speakers and furniture, the next logical step is ensuring your system actually stays running at its peak performance. I have seen beautiful, high-end setups die early deaths because of simple maintenance neglect. One thing I swear by is proper thermal management. If you are running an external amplifier, heat is your absolute worst enemy. According to technical white papers from the professionals at Genelec, keeping electronic components within their optimal operating temperature can double their lifespan by preventing the premature degradation of electrolytic capacitors. If you do not believe me, you should definitely learn how to tell if your amps capacitors are failing before you hear that dreaded pop that signals a costly repair.
How do I maintain my home audio gear for a lifetime?
Maintenance is not just about the internal electronics; it is about the physical integrity of every connection. Every six months, I pull my gear out of the rack and check for oxidation on the terminals. It is also the perfect time to reorganize. I cannot stress enough that using the best way to label your messy home theater cables will save you hours of hair-pulling frustration when a channel eventually goes out. While you are back there, take a soft, dry brush to the speaker drivers. You need to know how to clean your speaker cones without ruining the paper because dust buildup can actually add physical mass to the cone, subtly changing the frequency response and slowing down the transient response over time.
Can a cheap tool really diagnose high-end audio?
People ask me all the time how they can maintain their system without hiring a professional calibrator. My secret weapon is a basic digital multimeter. It is the only way to be 100% sure about your signal path integrity. I use mine to check for continuity and resistance whenever a speaker starts acting thin or unbalanced. Knowing how to use a multimeter to find a short in your speaker wires is the difference between a five-minute DIY fix and replacing a perfectly good receiver because you incorrectly assumed the internal amp was blown. 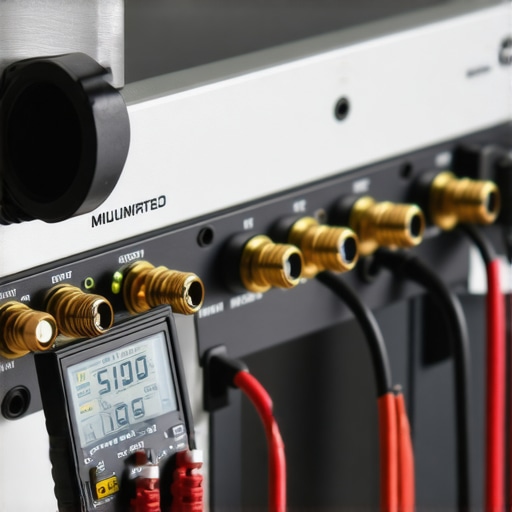
Smart room correction is about to change everything
Looking ahead, I predict that in the next few years, we are going to see acoustic transparency sensors built directly into high-end furniture. Imagine a TV stand that communicates with your soundbar via Bluetooth to tell it exactly how much diffraction the shelf edge is causing in real-time. Until that technology becomes mainstream, we have to rely on our own manual adjustments and tools like isolation. For any desktop or shelf-mounted setup, I always recommend looking into why your desktop speakers need isolation pads to stop desk vibration as the most cost-effective hardware upgrade you can make to preserve your furniture and your sound quality simultaneously. If you really want to take your maintenance seriously, grab a multimeter this weekend and test the resistance on your longest speaker runs; if one side is significantly higher than the other, you have found your bottleneck.
Lessons from the Trenches: Why Hardware Beats Software Every Time
Over the years, I have realized that the most expensive audio calibration software in the world cannot fix a physically blocked tweeter. One major lightbulb moment for me was discovering that if I have to crank the dial so high that the receiver starts clipping, the issue is almost always acoustic, not electrical. If you have ever wondered why your receiver shuts off when you turn the volume up, check if you are trying to force sound through a wooden cabinet wall first. I also learned that small adjustments, like checking the easy way to test if your speakers are out of phase, can reveal more ‘hidden’ detail than any software filter ever could. Trust your ears over the marketing on the box.
The Minimalist Kit for Serious Sound
You do not need a truckload of gear to fix your audio environment. I keep a very specific kit on hand for every room I set up. First, a simple digital multimeter is non-negotiable; I’ve used mine to save hundreds by learning how to use a multimeter to find a short in your speaker wires instead of buying new ones. Second, a set of high-density foam pads is essential. You can see why your desktop speakers need isolation pads to stop desk vibration, and that same logic applies to your TV stand. Finally, a simple label maker for your cables is a godsend for organization.
Reclaiming Your Living Room One Inch at a Time
Optimizing your home audio is a journey of small wins. You don’t need a professional acoustic degree to make your soundbar sing; you just need to stop letting your furniture dictate where the sound waves go. By simply pulling your gear forward and isolating it from the vibrations of your TV stand, you are already ahead of 90% of home theater owners. Don’t be afraid to move things around and experiment—it is the only way to find that sweet spot where the dialogue is crystal clear and the bass feels alive. Have you ever noticed a sudden boost in clarity just by sliding your speaker forward a few inches? Let me know in the comments below!