
I was hunkered down on my living room floor last Sunday, surrounded by a mountain of jewel cases, ready to revisit some classic grunge. I slid my favorite disc into the tray of my old Sony deck, pressed play, and waited for that familiar hum. Instead, I got the ‘clicking of death.’ The player struggled, spun up, and then spit out those two cold, digital words: ‘No Disc.’ It’s a heartbreaker, isn’t it? You spend years curating a collection only to have a microscopic bit of dust stand between you and your music. But before you go hauling that unit to the local electronics recycler, listen to your neighbor. Most of the time, your player isn’t dead; it’s just blind.
Your CD Player is Not a Paperweight
[image_placeholder] I’ve spent a lot of time hunting for gear, often using the trick to buying high-end audio at estate sales, and let me tell you—seven out of ten ‘broken’ CD players just need a little love on the optical assembly. We live in an era where everyone says ‘just stream it,’ but there is something tactile and honest about a spinning disc that a Spotify playlist can’t touch. Today, I’m going to show you exactly how to get in there and clear the fog. We are going to fix those skips, eliminate the ‘No Disc’ errors, and bring that vintage warmth back to your living room. Whether you are trying to get the smell of smoke out of a vintage receiver or just want your thrift store find to actually play a song, this is the most essential skill in your DIY toolkit.
Can a Simple Cotton Swab Actually Save My Stereo?
You might be skeptical. I certainly was. Early in my hobbyist days, I made the massive mistake of thinking ‘more is better.’ I used a heavy-duty industrial glass cleaner and a generic paper towel on a rare Denon player. I didn’t just clean the lens; I scratched the protective coating and chemically clouded the plastic until it was useless. It was an expensive lesson in patience and precision. The reality is that the laser lens is incredibly delicate. According to the Engineering and Technology History Wiki, the laser must focus on a data track that is only 1.6 micrometers apart. Even a tiny smudge of skin oil or a thin film of cigarette smoke can scatter the light enough to cause a total system failure. Have you ever opened up a piece of gear only to realize you were in way over your head? Don’t worry—we’re going to do this the right way, without the rookie mistakes. We’re going to treat this like surgery, but without the medical school debt. Let’s look at what we need to get that laser back in focus.
Get Inside Without Stripping the Screws
The first hurdle is purely mechanical. Most vintage decks use a simple ‘U-shell’ cover held by four to six Philips head screws. I learned the hard way with a gorgeous Marantz unit that these old screws can be soft as butter. I used a bit that was slightly too small, felt it slip, and heard that sickening ‘tink’ as the metal rounded off. Always use the exact right size driver and apply firm downward pressure. Once the lid is off, don’t just start poking. Take a moment to look at the overall health of the board. Just as you’d check if your speaker capacitors are starting to leak, look for any bulging or ‘crusty’ components on the player’s mainboard. If it looks clean, we’re ready to find the laser.
Locate the Optical Eye
The laser assembly usually sits on a pair of metal rails. If the tray is closed, you might need to manually eject it by turning a gear or using the ’emergency’ hole on the front panel with a paperclip. You’re looking for a tiny, clear convex lens—it looks like a miniature version of a magnifying glass. It is often suspended by very fine wires that allow it to bob up and down to find focus. Treat this like a literal eyeball. You wouldn’t poke your eye with a dry towel, and you shouldn’t do it here either. 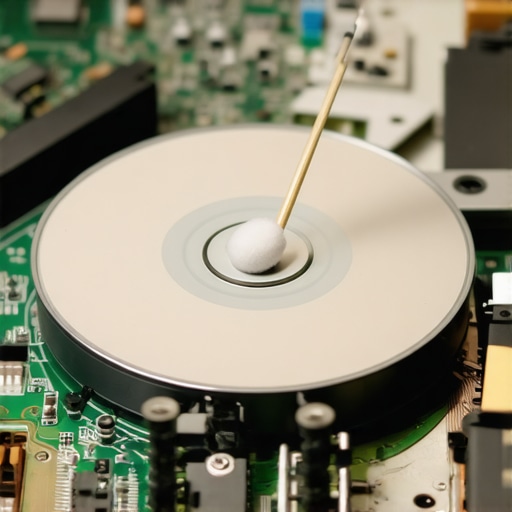
Wipe Away the Fog the Right Way
Grab a high-quality cotton swab—the kind that doesn’t shed fibers—and some 91% or higher isopropyl alcohol. Do not use the 70% stuff from the back of your medicine cabinet; the higher water content leaves a residue that’s worse than the dust you’re trying to remove. Dip the swab, then shake it out so it’s damp, not dripping. Gently, and I mean gently, place the swab on the lens and rotate it in a single, circular motion. Think of it like cleaning a camera lens or how you’d carefully clean gold-plated connectors without ruining the finish. One pass with the wet side, one pass with the dry side.
Grease the Tracks for Smoother Playback
If your player reads the disc but skips every time you get to track four, the problem isn’t the lens—it’s the ‘sled.’ The laser has to slide across those metal rails to read the outer parts of the disc. Over twenty years, the factory grease turns into a sticky sludge. Use a fresh swab to wipe the old gunk off the rails and apply a tiny amount of white lithium grease. While you have the hood open, it’s also a great time to check the back of the unit. A loose connection can mimic a failing player, so make sure you know how to fix a loose speaker terminal on your cabinet or the RCA jacks on the back of the deck. A solid physical connection is half the battle in high-end audio.Now that you have got the laser tracking again, let us talk about the biggest lie in home audio: the ‘premium’ digital cable. People will tell you that a two-hundred-dollar Toslink cable adds ‘depth’ and ‘sparkle’ to your 90s disc player, but it is just a series of ones and zeros. In my years behind the workbench, I have seen folks spend a fortune on interconnects while their internals were literally rotting. Stop wasting money on expensive optical cables because, in the digital realm, a signal either arrives or it does not; there is no ‘warmth’ to be found in a piece of plastic fiber. If you want to actually improve the sound, you need to look at the signal path after the laser has done its job.
The Ghost in the Machine is Usually Heat
While most beginners obsess over the lens, advanced hobbyists know that heat is the real silent killer of vintage gear. If your player starts skipping only after twenty minutes of playback, your laser is fine—your power supply is likely cooking. Just as you should keep an eye on how to tell if your amp is running too hot, you need to ensure your CD player has breathing room. These old units were often packed into tight cabinets with no airflow, causing the electrolytic capacitors to dry out. I have seen countless ‘broken’ players come back to life just by replacing a five-cent capacitor that looked perfectly normal to the naked eye. 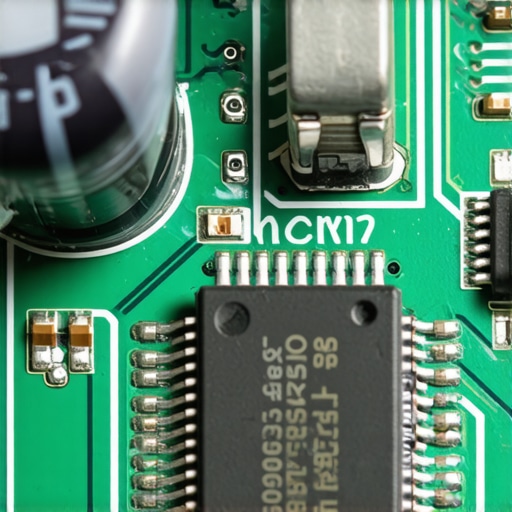
What if my player sounds thin after all that work?
This is the nuance that separates the pros from the amateurs. Sometimes, the issue isn’t that the disc won’t play, but that it sounds ‘tinny’ or ‘flat.’ Before you go out and buy new gear, check your physical connections. Understanding the real difference between gold and silver plated connectors can save you a lot of headache; often, a bit of oxidation on the RCA jacks is sucking the life out of your signal. A study by the Audio Engineering Society (AES) confirms that while human ears are incredibly sensitive to timing errors (jitter), these are almost always a result of the internal clocking mechanism or poor power regulation, not the ‘quality’ of the wire you bought at a big-box store.
Don’t Ignore the Analog Stage
The biggest trap I see is people forgetting that a CD player is half computer and half analog amplifier. If the output stage is weak, your music will sound lifeless regardless of how clean that lens is. If you find the sound lacks punch, it might be time to look at your external gear. For instance, knowing how to tell if your headphones need an external amp can help you realize that the ‘weak’ sound isn’t the player’s fault—it’s an impedance mismatch. We often blame the source when the bottleneck is actually further down the line. I once spent three days recalibrating a transport only to realize the owner’s receiver had a failing input selector. Have you ever fallen into this trap of fixing the wrong thing? Let me know in the comments.If you have ever been frustrated by a skipping disc or a fuzzy signal, you know that the right tools are non-negotiable. I do not mean those cheap ‘all-in-one’ cleaning kits you find at big-box stores; those are the audio equivalent of a fast-food burger. For real results, I swear by a can of DeoxIT D5. It is a specialized contact cleaner that does not just wash away gunk; it actually dissolves the oxidation on copper and silver contacts without melting the surrounding plastic. If you have noticed your volume control is crunchy or intermittent, you should learn how to fix a scratchy fader on a vintage audio mixer or receiver before the problem becomes permanent. Keeping these mechanical parts moving is the secret to gear that lasts forty years instead of four.
Stop Oxidation Before It Mutes Your System
[image_placeholder] This maintenance goes beyond just the internals. Your external connections are just as vulnerable to the environment. I’ve seen setups in humid basements where the RCA jacks looked like they had been pulled from a shipwreck. This buildup is often why your old receiver pops when you switch inputs. It is a simple fix: a little contact cleaner and a lint-free cloth will restore the conductivity. According to the Sony Service Manual for the KSS-210A series—one of the most common optical pickups ever made—the mechanical alignment of the sled is often more critical than the laser’s power output. This means that if the factory grease on those rails has turned into a sticky paste, the motor will draw too much current and eventually fry the driver IC chip.
How do I maintain my vintage player over time?
The key to longevity is consistency rather than one-off heroics. Every six months, I do a ‘soft audit’ of my system. I check for any heat discoloration on the chassis and listen for any new mechanical whirring. Keep an eye on the power section because knowing how to tell if your amps capacitors are failing is the difference between a cheap ten-minute fix and a melted transformer that ruins the whole unit. In the coming years, I suspect we are going to see a massive resurgence in ‘transport-only’ setups, where people use these vintage CD players solely for their high-quality mechanical builds, feeding the digital signal into modern high-end DACs. These machines were built with a level of precision that modern plastic streaming boxes just cannot match.
Why Every Hobbyist Needs a Reliable Multimeter
If you are serious about this hobby, put down the credit card and buy a decent digital multimeter. It is the only way to stop guessing. Tracking down electrical ghosts becomes a breeze once you know how to use a multimeter to find a short in your speaker wires. It’s also vital for checking the health of your power supply. Even your portable gear needs a bit of attention; for example, knowing the best way to clean earwax out of mesh earbuds can extend their life by months if not years. Don’t let your equipment slowly degrade until it’s unusable. My advanced tip for you today: grab a precision screwdriver set and verify that the mounting screws for your internal transformer are tight; transformers vibrate at 60Hz, and over a decade, they can literally vibrate themselves loose, creating a physical hum that ruins your noise floor. Go check your main deck right now—you might be surprised by what’s rattling around in there.
Hard-Won Truths from My Workbench
Over the years, I have realized that the most intimidating part of audio repair isn’t the complex circuitry—it’s the simple fear of breaking something irreplaceable. One of the biggest lessons I learned is that patience pays better than any high-priced tool. If a part won’t move, don’t force it; there is usually a hidden clip or a dab of twenty-year-old glue holding it back. Also, remember that just as your new speakers sound better after 20 hours of use, your repaired player might need a little run-time to settle back into its mechanical rhythm. Finally, trust your ears but verify with your eyes. If you hear a mechanical tick while the disc is spinning, look for the relay; often, understanding why your receiver clicks when you change the volume can help you identify similar mechanical aging within your CD transport. One final insider tip: never touch the tiny potentiometer on the laser head unless you are 100% certain the lens is clean and the rails are greased. Turning up that power is a one-way street that eventually burns out the diode. [image_placeholder]
The Gear That Keeps My Collection Alive
I don’t keep a massive laboratory, but three things are non-negotiable for my maintenance routine. First, a set of precision drivers is essential; using cheap, worn-out bits on vintage screws is a recipe for a stripped-out chassis. Second, I always use a dedicated labeling system for my internals. Trust me, the best way to label your messy home theater cables also applies to the delicate ribbon wires inside a disc transport. Third, keep a high-quality magnifying loupe on your desk. You cannot fix what you cannot see, especially when you are checking for microscopic cracks in the laser’s plastic housing or looking for cold solder joints on the mainboard. These simple items have saved me thousands in professional repair bills.
Take the Lid Off and Explore
Fixing a vintage CD player is about more than just saving money—it’s about preserving a piece of tactile engineering history in a world that is becoming increasingly digital and ephemeral. There is a specific kind of satisfaction that comes from seeing that ‘No Disc’ error vanish and hearing the first few notes of an album you haven’t enjoyed in years. Don’t be afraid to get your hands a little dirty and see how your equipment actually functions. Your gear was meant to be played and maintained, not to sit in a dark closet gathering dust. When you take the time to clean that lens and grease those tracks, you aren’t just fixing a machine; you are reclaiming your music. Have you ever managed to save a piece of gear from the landfill with a simple, ten-minute fix? Let me know in the comments below!