
I was twenty-two, living in a cramped apartment, and I had a trunk full of subwoofers but a car that wouldn’t start. I missed that chest-thumping bass. So, I did what any desperate audiophile would do: I dragged a 50-pound lead-acid battery into my living room, hooked it up to a 1000-watt amp, and hit ‘play’ on a heavy dubstep track. It worked… for about twenty minutes. Then came the smell. That sulfurous, rotten-egg stench that screams ‘I’ve made a terrible mistake.’ I realized then that while car batteries pack a punch, they aren’t exactly plug-and-play for your home theater.
I Learned the Hard Way So You Don’t Have To
Many of us get tempted to use car gear at home because the power-to-dollar ratio is insane. If you know how to properly bridge a car amplifier for more power, you can get incredible performance for a fraction of the cost of high-end home receivers. But the power source is always the sticking point. A standard wall outlet delivers AC, while your car gear is thirsty for 12V DC. I see people all the time trying to use cheap 12V power bricks that just can’t handle the current, leading to speakers popping when you turn the key—or in this case, the switch. Today, I’m going to break down why using a car battery is a viable, albeit tricky, solution, and how to do it without ruining your carpet or your lungs. I once made the classic mistake of using undersized wire that got so hot it melted the insulation; I want to make sure you avoid that fire hazard entirely.
Is This Setup Actually Going to Explode in My Living Room?
This is the big fear, right? We’ve all seen videos of lead-acid batteries venting or leaking. According to the experts at Battery University, overcharging a lead-acid battery in an enclosed space can lead to the buildup of hydrogen gas, which is—to put it mildly—very flammable. My early mistake was using a high-amp ‘dumb’ charger that cooked the battery. I didn’t realize that without ventilation, I was basically making a small chemical bomb. Have you ever tried to power your home audio with car parts and ended up with a face full of smoke? Reach out and tell me your story. Before you start properly grounding your setup to get rid of that annoying hum, you need to understand the physics of the battery itself. Unlike a mistake that kills your portable speaker battery life, a lead-acid error has much higher stakes.
Choose the Right Battery and Charger Combination
To avoid that sulfurous nightmare I mentioned earlier, you need to think of your battery as a reservoir and your charger as the supply pipe. If you use a standard ‘flooded’ car battery, it will vent gas during the charging process. This is why I eventually switched to an AGM (Absorbent Glass Mat) battery. They are sealed, more resistant to vibration, and significantly safer for indoor use. I once set up a temporary rig for a backyard party using an old marine AGM battery and a smart trickle charger. By keeping the charger active, I could play music for eight hours straight without the voltage dipping below 12.4V. If the voltage drops too low, you risk seeing why your receivers protection mode keeps triggering at high volume. A smart charger is non-negotiable because it stops pushing current once the battery is full, preventing the overheating that leads to chemical smells or worse.
Stop Your Cables from Turning into Heating Elements
In the car, you usually have short runs of thick wire. At home, people get lazy and try to use thin speaker wire for power. This is a recipe for a fire. Think of electricity like water flowing through a pipe; if the pipe is too narrow for the amount of water you’re forcing through it, pressure builds up as heat. I learned this the hard way when I tried to run a 600-watt monoblock off some leftover 16-gauge wire. Within minutes, the wire was too hot to touch. You need to choose the right gauge of wire even for short distances to ensure the amp gets the current it needs to produce clean bass. 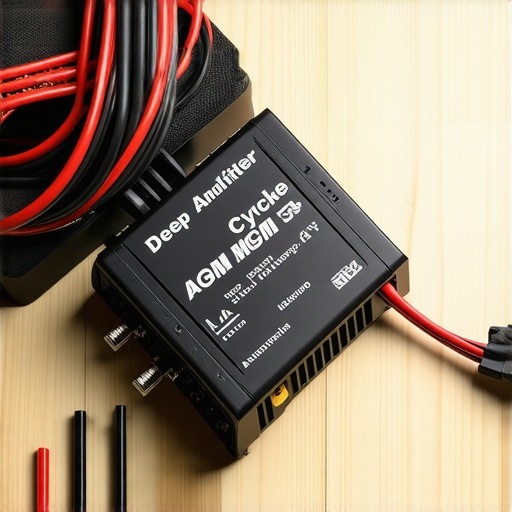
The Math Behind Matching Your Subs to Your Amp
You can’t just throw any speaker into this mix and expect it to sing. Car amplifiers are often stable down to 1 or 2 ohms, whereas home equipment usually expects 8 ohms. If you are using car subs at home, you must match your car subs impedance to your amplifiers output correctly. Wiring two 4-ohm subs in parallel creates a 2-ohm load; if your amp isn’t rated for that, it will shut down or, more likely, start to cook. I once spent an entire afternoon trying to figure out how to fix a car subwoofer that smells like it is burning, only to realize I had wired it in a way that forced the amp to work way beyond its thermal limits.
Keep the Air Moving to Prevent Thermal Shutdown
Even with the right battery and wiring, car amps are designed to live in trunks or under seats where there is at least some ambient air movement. In a living room cabinet, they can suffocate. If you’re pushing your system hard, you need to know how to stop your car amp from overheating by providing active cooling. I eventually mounted a couple of 120mm computer fans to my amp rack, powered by the same 12V battery. It looked a bit ‘mad scientist,’ but it kept the heat sinks cool to the touch even during the heaviest bass drops. If you don’t manage the heat, the internal components will degrade, and you’ll eventually find yourself wondering how to tell if your speakers capacitor is starting to fail because of the inconsistent power delivery.One of the biggest misconceptions I see in the DIY community is the ‘capacitor fix.’ Everyone says if your lights are dimming or your amp is clipping, just throw a 1-farad capacitor at it. But here’s the reality: a capacitor is a temporary storage device, not a power generator. If your power supply—in this case, your battery and charger—can’t keep up with the demand, a capacitor actually adds more load to the system during its recharge cycle. I’ve seen setups where a failing cap actually caused more harm than good. You really need to know how to tell if your speakers capacitor is starting to fail before you trust it to save your amp. Have you ever bought a piece of gear thinking it was a silver bullet, only to have it complicate things? Drop a comment and let’s talk about it.
Why does the bass sound so much thinner in your living room?
In the car audio world, we rely heavily on ‘cabin gain.’ Because a car is a small, sealed environment, the low frequencies are naturally pressurized and boosted. When you move those same subs into a 20×20 living room, that 12dB boost vanishes. To compensate, most people just crank the gain, which leads to clipping and heat. Instead, you should focus on placement. Understanding why your subwoofer sounds better in the corner of the room can give you back that ‘free’ volume without stressing your electronics. You might also want to look into how to get better bass from a sealed subwoofer box by experimenting with poly-fill, which tricks the woofer into thinking the box is larger than it is.
The Hidden Trap of Out-of-Phase Wiring
When you’re dealing with multiple drivers and a complex 12V-to-AC conversion, it is incredibly easy to flip a wire. If your speakers are fighting each other, your bass will disappear entirely. I always recommend people learn how to tell if your speakers are out of phase in 30 seconds using a simple 9V battery test. It’s a pro move that separates the amateurs from the veterans. 
Stop Chasing High-Res Files If Your Room Isn’t Treated
Another nuance is the obsession with high-bitrate audio. People get frustrated and wonder why your speakers sound harsh when you play high-res files, often blaming the equipment. In reality, as Dr. Floyd Toole points out in his expert research published in Sound Reproduction, the room’s reflections and standing waves are often the primary culprit for ‘harshness,’ not the file quality. If your room is full of hard surfaces, no amount of ‘clean power’ will fix a 10dB peak at 3kHz. Finally, if you hear a persistent buzz, don’t just ignore it; check out the $5 fix for humming speakers and ground loops to clean up your signal path for good.
The One Tool That Saves My Amps Every Month
I cannot stress this enough: if you are going to play with car audio gear in your house, you need a digital multimeter. It’s the only way to know if your battery is actually charging or if your amp is about to enter protection mode. I use mine to check the voltage at the amplifier terminals while the system is at full tilt. If I see it dip below 12.2V, I know my power supply is struggling. This is how I avoid the frustration of why your car speakers cut out when you hit a bump—which, in a home setting, is usually a loose terminal or a voltage sag. I also keep a can of DeoxIT nearby. If you’ve ever had to learn how to fix a scratchy volume dial with electrical contact cleaner, you know that oxidation is the silent killer of used gear. I spray my RCA inputs and terminal blocks once every six months to keep the signal path as clean as possible. It prevents that annoying crackle that can ruin a listening session. 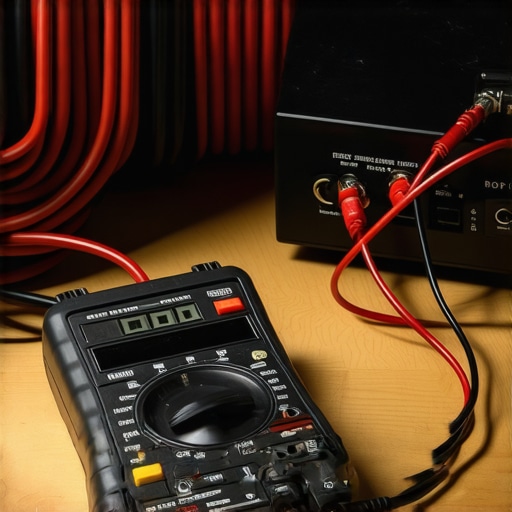
How can I maintain a car-to-home audio setup over time?
Long-term reliability in these systems comes down to thermal management and connection integrity. Car amps use their aluminum casings as heat sinks, and without the airflow of a moving vehicle, they can bake their own internals. I’ve seen why your vintage amp gets hot even when you aren’t playing music, and it usually boils down to poor ventilation or failing capacitors. According to Victron Energy’s ‘Wiring Unlimited’ technical manual, voltage drop is the primary cause of equipment failure in low-voltage DC systems. Even a tiny 3% drop in your 12V line forces the amplifier’s internal power supply to work significantly harder, generating excess heat. To keep things looking as good as they sound, I also take time for aesthetics. If your gear has been sitting in the sun, you should learn how to restore a sun-faded speaker grille to look new again using a simple fabric dye or specialized spray. It’s a small touch that makes a DIY rig look like a professional installation.
Why Lithium is the Future of Home DIY Power
If I were starting this journey today, I’d skip the heavy lead-acid batteries entirely. We are moving toward a world where LiFePO4 (Lithium Iron Phosphate) batteries are becoming affordable for the average hobbyist. They are lighter, safer, and can be discharged almost completely without damage, unlike the lead-acid batteries that lead to the mistake that kills your portable speaker battery life. In the next five years, I predict we will see more ‘all-in-one’ DC power banks designed specifically for audiophiles who want to run high-current car gear without the mess of chargers and acid. For now, focus on the fundamentals. If you really want to level up your desktop experience, learn how to use a DAC to improve your desktop computers audio before sending that signal into your car amp. It ensures you aren’t just amplifying the electrical noise from your motherboard. My challenge to you this weekend: Grab a multimeter and perform a ‘Voltage Drop Test.’ Measure the voltage at your battery, then measure it at the amp terminals while playing a heavy track. If the difference is more than 0.5V, you need thicker power cables. Do it now before you find out how to tell if your speakers capacitor is starting to fail due to poor power delivery.
What I Discovered After Melting My First Set of Wires
One thing nobody tells you is that car gear is built for a harsh, vibrating environment, which makes it oddly resilient for home use if you treat it right. However, if you skip the math, you’ll end up wondering why your car speakers cut out when you hit a bump—even if that ‘bump’ is just a slight voltage dip in your living room. I’ve found that using an AGM battery is the only way to go if you aren’t ready to invest in lithium yet. Also, don’t overlook the aesthetics of your DIY project. If you’ve picked up used components, you should definitely learn how to restore a sun-faded speaker grille to look new again to make the setup look as professional as it sounds.
#IMAGE_PLACEHOLDER_E#
The Gear That Keeps My House From Smelling Like Sulfur
I never start a build without a few specific items in my toolkit. First, a high-quality smart charger is essential for maintaining battery health. Second, a digital multimeter is your best friend for troubleshooting power issues. To get the best signal possible from your PC, I highly recommend looking into how to use a DAC to improve your desktop computers audio before it ever hits your amplifier. Finally, if you are mixing car and home components, make sure you know how to wire a 4-ohm car speaker to an 8-ohm home receiver to prevent blowing your output stages.
Start Building Your Ultimate Custom Setup Today
Taking car audio into your home is a rewarding challenge that offers incredible power for the price. As long as you prioritize ventilation and wire gauge, your amplifiers and speakers will provide years of chest-thumping performance. Don’t be afraid to experiment, but always keep safety at the forefront of your DIY journey.
Have you ever had a car audio component surprise you with its performance in a home theater? Let me know in the comments below!