
I remember the exact moment I lost my cool with my home audio setup. I was finally enjoying a rare quiet Saturday, streaming a high-fidelity jazz playlist from my phone to a receiver I’d tucked away in a beautiful wooden cabinet. The second I walked into the kitchen to pour a coffee—not even fifteen feet away—the music started skipping like a scratched record from my childhood. It was that classic, digital stutter that makes your skin crawl. I had already gone through the trouble of learning how to connect a modern phone to an old amp without a jack, but this range issue was a different beast entirely. It felt like I was tethered to my stereo by an invisible, very glitchy rope.
Stop Settling for Weak Signals and Choppy Audio
The truth is, most affordable Bluetooth receivers—and even some expensive ones—rely on a tiny, internal trace antenna etched directly onto the circuit board. These are notoriously bad at penetrating walls or even escaping the confines of a thick media console. If you’ve ever wondered why your bluetooth headphones stutter when your phone is in your pocket, you already know how fragile that 2.4GHz connection can be. Today, we are going to fix that. I’m going to show you how to bypass that pathetic internal strip and install a proper external high-gain antenna that can easily double or triple your reliable range. We are moving from a signal that barely clears the sofa to one that covers your entire house and maybe even the backyard.
Will this modification actually ruin my expensive receiver?
I get it—cracking open a piece of gear you spent hard-earned money on is terrifying. I’ve been there. In my early days, I once tried to solder a whip antenna onto a cheap transmitter and ended up melting the plastic casing because I used a soldering iron that was way too hot. It was an embarrassing rookie mistake that taught me the value of the right tools and a little bit of patience. But here is the reality: as long as you follow the steps, this is a low-risk, high-reward project. According to signal propagation studies by groups like the IEEE, even a modest 5dBi external antenna can significantly overcome the signal attenuation caused by household obstacles. You aren’t just making it louder; you are making the connection more resilient. Have you ever had a perfect evening ruined by a Bluetooth signal that just wouldn’t stay connected? Tell me your most frustrating ‘signal drop’ story in the comments below. Before we grab the screwdriver, let’s look at why those factory antennas are designed to fail you in the first place.
Getting Under the Hood Without Breaking Things
Before you start, make sure your receiver is unplugged. I once rushed into a project like this on an old Pioneer and saw a spark that nearly gave me a heart attack because I hadn’t let the capacitors discharge. It reminded me of the precautions needed when learning how to fix a receiver that wont turn on after a power surge. Open the outer casing carefully. Most modern receivers use simple Philips head screws, but keep a small tray nearby so you don’t lose them in the carpet. Once the guts are exposed, you are looking for the Bluetooth module. It is usually a small, separate green board or a shielded section on the main board with a distinct ‘zig-zag’ copper line etched into the surface. That tiny squiggle is your current antenna, and it is the reason your audio cuts out when you walk behind a chair.
Identify the Tiny Trace Antenna
Think of this internal trace like a person trying to shout through a thick duvet; the sound just isn’t going anywhere. To fix this, we need to bypass it. You will need a small U.FL to SMA pigtail cable and a steady hand. While you are inside the chassis, it is often a good time to perform other maintenance, such as learning how to fix a scratchy volume dial with electrical contact cleaner if your knobs have been acting up. Locate the point where the zig-zag trace begins. This is where the RF signal leaves the chip. You’ll see a tiny surface-mount resistor or a capacitor right before the antenna trace starts. This is our ‘tap’ point.
Solder Your New Gateway to the Airwaves
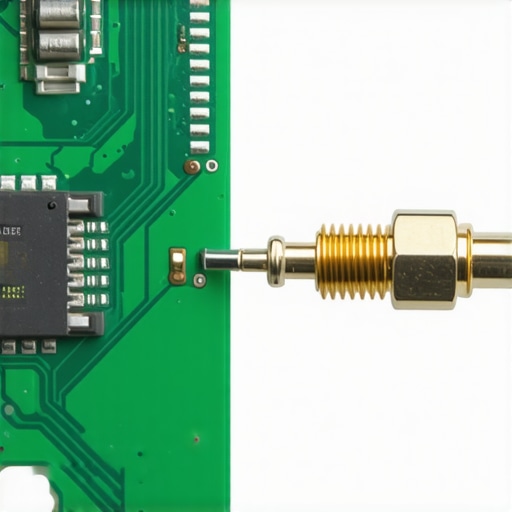
This is the surgical part. You need to scratch a tiny bit of the green solder mask off the trace leading to the antenna to reveal the shiny copper underneath. Using a fine-tip soldering iron, you will attach the center wire of your pigtail cable to this point. The outer shielding of the pigtail must be soldered to a nearby ground plane on the board. I remember doing this on a budget amp and being frustrated because the solder wouldn’t stick; I realized later I hadn’t cleaned the oxidation off. It’s similar to why you have to how to clean green oxidization off your copper speaker terminals to get a good connection. Once soldered, snip the connection to the old internal trace so the signal is forced out through your new cable. This ensures 100% of the energy goes to your external antenna rather than being split and wasted.
Punching Through the Chassis for a Permanent Fix
Now that the cable is attached, you need a way to get it outside the metal box. Metal is a natural enemy of radio waves, which is also why your portable speaker has no bass when you place it on glass—different materials interact with physics in ways that ruin your experience. You will need to drill a small hole in the back panel of your receiver, ideally in a spot that isn’t crowded by other inputs. Mount the SMA bulkhead (the threaded gold part of the cable) through this hole and tighten the nut. Just like the reason your speaker stands need to be filled with sand to provide stability, mounting this bulkhead firmly prevents the cable from snapping off the delicate circuit board if you accidentally tug on the antenna. Screw on a high-gain 5dBi or 7dBi antenna, and you’ve effectively given your receiver a massive pair of ‘ears’. Your range will jump from a shaky 15 feet to a solid 40 or 50 feet, even through walls.
Once you’ve solved the range issues with a custom antenna, you start to hear the music with a new level of clarity—and that’s exactly when the next set of problems usually rears its head. I’ve seen so many hobbyists get their Bluetooth signal stable only to realize their setup sounds surprisingly thin or ‘digital’ in the worst way possible. There is a massive misconception in the audio world that digital signals are just ones and zeros, and as long as they arrive, they are perfect. But in my experience, the way your receiver processes that newly rescued signal is where the real magic (or the disaster) happens.
Bookshelf Speakers Need More Juice Than You Think
The most common mistake I see people make after improving their source signal is pairing a high-gain wireless receiver with a weak, underpowered amplifier. Most people assume that because a speaker is small, it’s easy to drive. In reality, smaller bookshelf speakers often have lower sensitivity than giant floorstanders, meaning they actually require more wattage to move the drivers effectively. If you are noticing a lack of punch, it’s likely why your bookshelf speakers need more power than you think. When you underpower a speaker, you aren’t just losing volume; you are losing the dynamic range that makes music feel alive. It’s like trying to run a marathon while breathing through a straw—the signal is there, but the execution is strangled.
Does a High-End DAC Actually Matter if Your Amp is Entry-Level?
This is the question that keeps audiophile forums burning late into the night. You might be tempted to run out and buy a $500 external Digital-to-Analog Converter (DAC) to ‘clean up’ your Bluetooth stream. However, there is a hard truth most manufacturers won’t tell you: if your amplifier or your speakers aren’t transparent enough, that expensive DAC is essentially invisible. According to studies by the Audio Engineering Society (AES), the audible difference between mid-tier and high-end converters is often negligible compared to the massive distortions introduced by the room or the speakers themselves. This is why your high-end DAC sounds exactly like your laptops headphone jack in a poorly optimized system. Spend your money on better amplification first; that is where the ‘weight’ of the music comes from.
The Clipping Trap That Kills High-End Tweeters
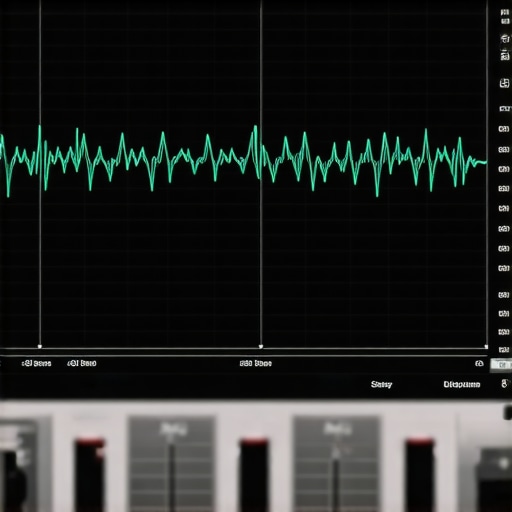
Here is the ‘oops’ factor that breaks my heart every time I see it in a neighbor’s setup. When you finally get a crystal-clear signal from your new antenna, the temptation is to crank the volume to see what the system can really do. If your amp is struggling to keep up, it starts ‘clipping’—chopping off the tops of the audio waveforms. This creates high-frequency harmonic distortion that can fry a delicate tweeter in seconds. You need to know how to spot a blown tweeter before it ruins your crossover because once that wire melts, the repair gets expensive fast. It’s a classic trap: the better your signal source, the easier it is to accidentally push a weak amp into the danger zone. Always make sure you understand how to tell if your amplifier has enough headroom for your speakers before you turn that dial to eleven.
Your Room is a Giant Instrument You Can’t Turn Off
Finally, stop blaming your gear for ‘boomy’ or ‘muddy’ sound until you look at where your speakers are sitting. I’ve seen people spend thousands on cables only to shove their speakers into a corner. Physics doesn’t care about your budget. This is why your speakers bass port should never be pushed against a wall; the air needs room to breathe, or you’ll end up with a low-end mess that masks all the detail you worked so hard to get with your antenna mod. Have you ever fallen into this trap of buying more gear to fix a problem that was actually just about speaker placement? Let me know in the comments below, and let’s stop the ‘gear-chasing’ cycle together.
Once you have nailed the placement and finished your antenna mod, you cannot just set it and forget it. I have learned the hard way that environmental factors—like humidity and dust—are the silent killers of custom audio gear. If you live in a humid climate, you will eventually need to know how to clean green oxidization off your copper speaker terminals because that fuzzy green corrosion is a signal killer. I personally keep a can of DeoxIT D5 on my workbench at all times; it is the industry gold standard for a reason. It does not just strip away the grime; it leaves a microscopic protective layer that prevents the air from reaching the metal again.
Your Toolbag Needs a Multimeter and Compressed Air
Maintenance is mostly about prevention. Every six months, I make a habit of pulling my receiver out of the rack and blowing the dust out of the cooling vents. Dust acts like an insulator, trapping heat inside the chassis and slowly cooking the delicate electronics. As legendary amplifier designer Nelson Pass often notes in his technical papers for First Watt, heat management is the single most important factor in preventing component drift. If your modded receiver is running hot inside a media cabinet, you need to watch for early warning signs, such as knowing how to tell if your speakers capacitor is starting to fail. A failing cap often bulges or leaks, but you will hear it as a subtle hum or a loss of low-end punch long before it pops.
How do I keep this custom setup running for years?
Consistency is your best friend here. Beyond just cleaning the metal bits, you should regularly inspect the moving parts of your system. For those of us using older gear, the trick to making vintage speakers sound modern again often involves ensuring the internal crossover connections haven’t shaken loose from years of heavy bass. Listen for the ‘warning signs’ in the hardware itself. For instance, the reason your expensive receiver makes a clicking sound when it starts is usually a protection relay, but if that click starts sounding sluggish or happens multiple times, your power supply is likely struggling. I also recommend checking the physical condition of your drivers; learning how to clean sticky speaker surrounds without damaging the rubber can extend the life of your woofers by a decade by preventing the material from cracking.
The Future of High-End DIY Audio
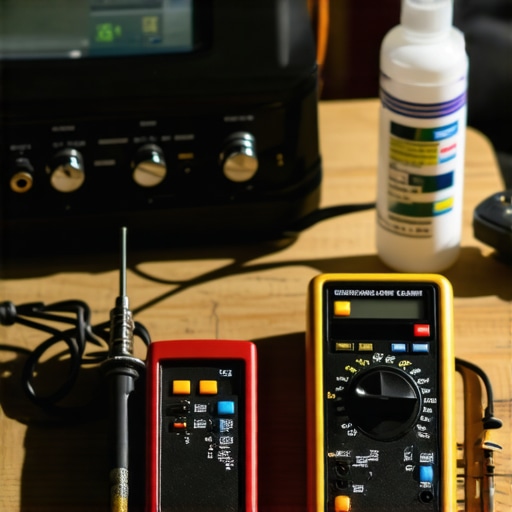
Looking ahead, I predict we are going to see a massive shift toward modular, open-source audio hardware. The industry is starting to realize that the ‘disposable’ nature of modern Bluetooth tech is a major turn-off for serious enthusiasts. In the next five years, we will likely see more receivers designed with user-replaceable radio modules, making the kind of ‘surgery’ we performed today a standard feature rather than a risky hack. We are moving toward an era where you can upgrade your wireless protocol as easily as you swap a lightbulb. If you want to stay ahead of the curve, my advice is to stop being afraid of the guts of your machines. Grab a basic digital multimeter this weekend and use it to check the resistance of your speaker wires. It is the one tool that takes the guesswork out of the hobby. Go ahead and scrub those old terminals—you will be shocked at the clarity you have been missing just because of a little dirt.
Hard Lessons from My War with Wireless Stutter
After years of drilling holes and soldering tiny traces, I’ve realized that signal range isn’t just about the antenna; it’s about surviving the 2.4GHz jungle. One thing the manuals never tell you is that your microwave or even a poorly shielded LED bulb can kill your music faster than a weak antenna ever could. In my own home, I found that placing my receiver too close to a smart hub created a ‘noise floor’ that even the best mods couldn’t punch through. If you take your setup outside for a gathering, you will quickly learn why your bluetooth speaker sounds flat in wide open spaces—without walls to bounce the signal (and the bass), your new high-gain antenna becomes your most important asset. Also, remember that the source matters; sometimes the best way to bypass wireless limitations entirely is learning how to use an old phone as a dedicated high-res music player via a direct connection.
Gear That Will Save Your Sanity and Your Sound
You don’t need a professional laboratory, but a few specific tools make the difference between a successful project and a ruined circuit board. I never start a project without these four essentials:
- Digital Multimeter: Essential for checking continuity. If you accidentally bridge two solder points on that tiny Bluetooth chip, this tool will tell you before you plug it in and fry the board.
- Silicone Soldering Mat: It keeps your table from burning and has magnetic compartments to stop those tiny receiver screws from disappearing into your carpet.
- DeoxIT D5: I’ve mentioned it before, but it bears repeating. It is the only chemical I trust to treat connectors after a mod.
- The Master Handbook of Acoustics: If you want to understand the ‘why’ behind the sound, this book is the industry bible for room physics.
Once you are moving your gear around to test your new range, take five minutes to research how to find the sweet spot for your speakers in a rectangular room. No amount of signal gain can fix the phase cancellation caused by a speaker being just a few inches out of alignment.
#IMAGE_PLACE_HOLDER_E#
Stop Being a Passive Listener
The most important thing I can tell you is that your audio gear is not a ‘black box’ that you are forbidden to touch. Once you successfully install an external antenna, you’ll feel a sense of ownership over your sound that no off-the-shelf product can provide. You’ve moved from being a consumer to being a creator of your own experience. This hobby is at its best when you are tweaking, testing, and refining. Don’t worry if your first solder joint looks a bit ugly—what matters is the music that comes out of the speakers afterward. Have you ever attempted a hardware mod only to realize the problem was actually just a setting on your phone? Let me know your biggest DIY ‘facepalm’ moment in the comments below!