
I’ll never forget the night I thought my house was haunted by a radiator that didn’t exist. It was 2 AM, the house was silent, and as I walked past my hi-fi setup, I felt a distinct wave of warmth hitting my leg. I reached out and touched my 1978 Marantz, and it was nearly scalding. No music had played for hours. The needle was parked. I panicked, thinking I was minutes away from an electrical fire, but what I was actually experiencing was a classic case of ‘idling heat.’ It’s a nerve-wracking discovery for any gearhead, especially when you realize your precious silver-faced beauty is consuming energy and generating heat while just sitting there. I spent weeks obsessing over whether I was killing my capacitors or if this was just the ‘soul’ of vintage gear. Spoiler alert: it’s usually physics, but left unchecked, it can lead to a situation where you are looking for how to fix a receiver that wont turn on after a power surge or chronic overheating.
The Mystery of the Toasty Chassis at Idle
When you own vintage gear, you aren’t just buying a piece of electronics; you’re adopting a temperamental pet. Most modern amplifiers are Class D—they stay cool because they are incredibly efficient. But your vintage beast likely operates in Class AB or even pure Class A. In these designs, the transistors are ‘biased’ to stay open and ready to work. This means electricity is flowing through them even when they aren’t pushing a signal to your speakers. I made the massive mistake early on of tucking my gear into a tight, unventilated wooden cabinet because it ‘looked better.’ I almost cooked the power transformer right out of the chassis. You have to treat heat management with the same respect you give to the trick to making vintage speakers sound modern again. If your amp is getting hot while idling, it’s often because the bias current is set too high, or the internal components are coated in forty years of dust that acts like a thermal blanket. Today, we are going to dive into why this happens and how you can dial back the temperature before you start smelling that dreaded ‘burning dust’ aroma.
Is This Heat Actually Going to Melt My Living Room?
It’s the number one fear: ‘Is my amp a ticking time bomb?’ While a warm amp is normal, a hot amp is a cry for help. According to engineering standards for thermal dissipation in legacy electronics, excessive heat is the primary killer of electrolytic capacitors, causing them to dry out and fail prematurely. If you can’t keep your hand on the top of the metal casing for more than five seconds, you have a problem that needs addressing. This is a very different sensation than the reason your expensive receiver makes a clicking sound when it starts, which is usually just a relay. Excessive idle heat is almost always a sign that the internal ‘bias’—the baseline voltage your transistors live at—has drifted over the decades and needs a professional adjustment. Have you ever walked into your room and felt like your amplifier was actually acting as a space heater? Drop a comment below; I’d love to hear which model you’re running and just how hot it gets. It’s time we stop ignoring the heat and start protecting our investment.
To get that heat under control, you have to start with the low-hanging fruit. My first real lesson in thermal management came when I moved my setup to a custom-built shelving unit. Within twenty minutes, the smell of hot metal filled the room because I didn’t leave enough clearance at the top. You need at least three to four inches of open space above the vents. Think of your amplifier like a lung; it needs to exhale hot air through the top and inhale cool air from the bottom. This is a similar logic to why your speakers bass port should never be pushed against a wall—airflow is the difference between performance and failure. If your gear is in a closed rack, you are essentially baking the circuit boards alive.
Evict the Dust Bunnies Before They Burn
Dust is a surprisingly effective insulator. Over forty years, a layer of gray fuzz accumulates on the heatsinks and transistors, trapping heat exactly where it needs to be released. I once opened a thrift-store Pioneer that was running hot enough to fry an egg. The interior looked like a dryer lint trap. I used a can of compressed air and a soft-bristled brush to gently clear the fins of the heatsinks. You have to be careful not to create static or bend any delicate components, much like the care you’d take when learning how to clean dust out of your headphone jack without damaging pins. Once the dust was gone, the idle temperature dropped by nearly fifteen degrees. It’s the easiest maintenance task you can perform, and it often solves the ‘burnt smell’ issue immediately.
Why Idle Current is Your Amps Best Friend and Worst Enemy
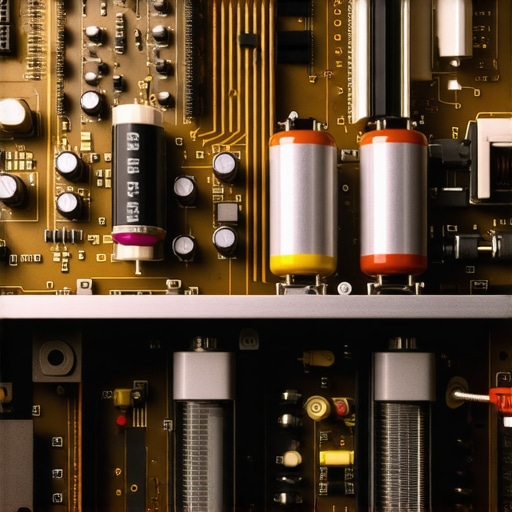
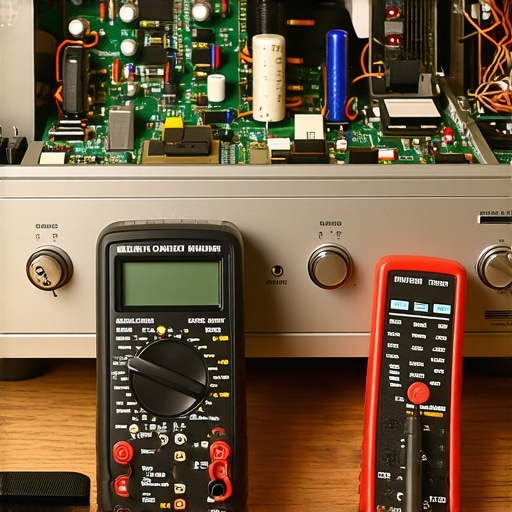
If cleaning doesn’t work, the culprit is likely ‘Bias Drift.’ In simple terms, bias is the baseline electricity flowing through your output transistors so they stay ‘on’ and ready to play music. Think of it like the idle speed of a car engine. If the idle is too high, the car runs hot and wastes fuel; if the bias is too high, the transistors generate massive heat even when no music is playing. Over decades, the internal components that regulate this voltage—resistors and potentiometers—change in value. This is a common reason why your vintage speakers are losing their punch over time or why the amp they are connected to feels like a space heater. You’ll need a digital multimeter and the service manual for your specific model to measure the millivolts across the emitter resistors and adjust them back to factory specifications.
Tackling the Bias Adjustment Yourself
I remember the first time I tried to adjust the bias on a Sansui AU-717. I was terrified. One slip of the screwdriver and I could have shorted a transistor, turning my prized amp into a doorstop. I used insulated ‘tweaker’ tools to slowly turn the tiny potentiometers while watching my multimeter. If you decide to do this, go slow. A quarter-turn can be the difference between a cool-running machine and a meltdown. While you are in there with the cover off, it is the perfect time to use some DeoxIT, which is the same process as how to fix a scratchy volume dial with electrical contact cleaner. Cleaning those internal adjustment pots ensures they make a solid connection, preventing the bias from jumping around and causing sudden heat spikes. If your multimeter readings are jumping all over the place even after a cleaning, you are likely looking at how to tell if your speakers capacitor is starting to fail, as failing power supply caps can lead to unstable voltages throughout the entire unit.
A common misconception in the audiophile world is that a more powerful amplifier will naturally run cooler because it isn’t ‘struggling’ to drive your speakers. In my experience, the opposite is often true with vintage Class AB designs. Many enthusiasts believe that if they buy a 100-watt beast, it will barely break a sweat at low volumes. However, high-wattage vintage units often have significantly larger power transformers and more output transistors that are biased quite aggressively. This results in a higher baseline current even when no music is playing. If you aren’t careful, you might be looking for how to tell if your amplifier has enough headroom for your speakers while ignoring the fact that your amp is essentially a space heater that happens to play music. Let’s dig deeper into why ‘more power’ often equals ‘more problems’ if your ventilation isn’t perfect.
Big Power Amps Do Not Always Run Cooler
One of the biggest ‘oops’ moments I see in home audio is the misuse of power delivery. People spend thousands on a restored McIntosh or Marantz and then plug it into a generic, ten-year-old power strip they found in the garage. This is a massive mistake because vintage high-current amplifiers can be sensitive to voltage drops. This is exactly why you should avoid using an extension cord for your power amp whenever possible. When an amp is starved for current or deals with resistance from poor wiring, the power supply has to work harder, generating unnecessary heat before the signal even reaches the output stage. I’ve seen power cords that were actually warm to the touch because they couldn’t handle the draw of a dual-mono vintage setup.
Does DC Offset Explain Why Your Speakers Are Moving Without Music?
If your amplifier is running hot and you notice your speaker cones are slightly pushed out or pulled in even when no music is playing, you are likely dealing with high DC offset. This is a nuance many beginners miss. Ideally, there should be zero direct current (DC) going to your speakers. As internal components age, they leak small amounts of DC voltage. This doesn’t just make the amp run hot; it can actually cook the voice coils of your speakers. While you might be focused on how to use your phone to measure your rooms frequency response, the real threat is the silent current flowing through your wires. According to the Arrhenius Law—a well-known principle in chemistry and electronics—the life of an electrolytic capacitor is halved for every 10-degree Celsius increase in operating temperature. By letting your amp run just slightly too hot, you are effectively fast-forwarding its death date.
Stop Starving Your Amp with Cheap Power Solutions
Another myth is that ‘re-capping’ an amp—replacing old capacitors—is a magic cure-all for heat. While it helps, if the technician doesn’t properly calibrate the DC offset and bias after the new parts are installed, the amp could actually run hotter than before. New capacitors have lower ESR (Equivalent Series Resistance), which can change the internal voltage dynamics. Have you ever fallen into the trap of thinking a bigger amp would fix your thermal issues or that a simple part swap would solve everything? Let me know in the comments. We need to stop treating these machines like modern appliances and start treating them like the precision instruments they are. Heat is a symptom, not a personality trait of vintage gear, and managing it correctly is the only way to ensure your setup lasts another forty years.
Buy an Infrared Thermometer and Stop Guessing
I used to rely on the ‘palm test’ to see if my amp was running too hot, but that’s about as scientific as checking a fever with a wet finger. Now, I use a non-contact infrared thermometer. It’s my absolute favorite tool for home audio because it allows me to pinpoint exactly which transistor is overheating without touching a live circuit. If I see one side of the heatsink hitting 60°C while the other stays at 40°C, I know my bias is lopsided. This precision is just as important as knowing how to spot a blown tweeter before it ruins your crossover. If you are serious about keeping forty-year-old gear on your shelf, spend the twenty bucks on a digital thermometer. It will save you from a catastrophic meltdown.
How do I maintain my vintage amp’s health over several years?
Consistency is the secret sauce. You can’t just service a piece of gear once and expect it to behave for another decade. I’ve made it a habit to pull my main integrated amp out of the rack every six months for a ‘wellness check.’ This involves a thorough dusting and a quick inspection of the terminals. You’d be surprised how quickly environmental factors can degrade your signal. I always look for signs of corrosion, which is why I keep a guide on how to clean green oxidization off your copper speaker terminals bookmarked. If you live in a humid climate, this isn’t optional; it’s survival for your sound quality.
Beyond the surface, you should be listening for the ‘mechanical’ health of the unit. If the volume knob starts to crackle, don’t wait for it to cut out completely. Learning how to fix a scratchy volume fader on a professional mixer or a home receiver with a quick blast of contact cleaner can prevent the carbon tracks inside the pot from wearing down prematurely. Douglas Self, in his technical authority *Audio Power Amplifier Design*, emphasizes that thermal compensation components must be in intimate contact with the heatsinks to prevent ‘thermal runaway.’ If those little sensors wiggle loose, your amp will literally cook itself from the inside out. Checking those physical connections is a five-minute task that saves a five-hundred-dollar repair bill.
Don’t Let Your Living Room Become a Sauna
If you find that your gear is still running hot despite a perfect bias setting, you might need to look at active cooling. I’ve started using ultra-quiet USB fans on top of my most temperamental Class A units. It feels like cheating, but moving even a tiny amount of air makes a massive difference. It’s a similar mindset to how to fix a car amplifier that keeps shutting off in summer—you have to manage the ambient environment if the chassis can’t do it alone. In the future, I suspect we will see ‘smart’ vintage restoration kits that include internal thermal sensors that can trigger an auto-shutoff or fan before the capacitors reach their boiling point.
The trend is moving toward preservation rather than replacement. As these vintage parts become rarer, the tools we use to monitor them become more vital. My prediction is that we are entering an era of ‘hybrid maintenance,’ where we use modern AI-driven diagnostic apps to listen to the noise floor of our old gear and predict part failure before it happens. For now, your best bet is a multimeter and a watchful eye. **My challenge to you:** Open your amplifier this weekend, give it a gentle cleaning with compressed air, and check the temperature after an hour of idling. You might just catch a problem before it turns into a puff of smoke.
Lessons My Melted Transistors Taught Me
After years of tinkering, I’ve realized that most of us treat heat as an inevitable tax on vintage ownership, but it doesn’t have to be. One of my biggest lightbulb moments was realizing that heat is cumulative. A slightly warm amp today might not fail, but that constant thermal stress is slowly baking the insulation on your transformer windings. Another hard-learned truth: never trust a seller who says ‘it was recently serviced’ unless they can show you the bias and DC offset readings. Often, ‘serviced’ just means they sprayed some air and wiped the dust off. Finally, remember that your environment is part of the circuit. If your room is 80 degrees, your amp starts with a massive disadvantage. It’s better to be proactive than to find out how to properly ground a car amplifier to eliminate engine hum or troubleshoot a fried circuit board after the damage is done.
#IMAGE_PLACEHOLDER_E#
Tools That Saved My Setup From a Meltdown
I don’t go near my rack anymore without three specific things. First is the original service manual. You can find most of these on HiFiEngine or similar archives; they contain the exact millivolt targets for your bias. Second is a ceramic adjustment tool. Using a metal screwdriver to adjust a pot is a recipe for a short circuit. Third is a component-level cleaner. While you’re inside addressing heat, you might as well check your drivers and see if you need how to fix a small rip in a speaker surround with glue. Keeping the physical hardware as healthy as the electrical components is the only way to maintain that signature sound. I also highly recommend using a dedicated power conditioner to ensure the voltage entering your amp is stable, which prevents the power supply from overworking.
Keep the Music Playing Without the Smoke
Vintage gear is a bridge to a different era of manufacturing, where things were built to be repaired rather than replaced. By taking the time to manage your idle heat, you aren’t just fixing a technical spec; you’re preserving a piece of history. Don’t be intimidated by the multimeter or the internal pots. These machines want to run cool, and they want to provide that rich, effortless sound we all crave. Whether you’re trying to figure out why your car speakers sound thin when you turn up the treble or why your home vintage speakers lack their original warmth, the answer almost always starts with proper thermal and electrical maintenance. Have you ever noticed your amplifier getting hotter during the summer months or after a long listening session? Let me know in the comments below how you keep your gear from turning into a space heater!