
I remember the day I finally upgraded to my first pair of real floorstanding towers. I spent weeks researching, and when they finally arrived, I set them up on my thick, plush living room carpet, wired them up, and… nothing. Well, not “nothing,” but they sounded dull. The bass was bloated, the vocals felt like they were coming from behind a heavy curtain, and the soundstage was a total blur. I actually sat there wondering if I had made a massive mistake, similar to how I felt when I realized why my speakers’ bass port should never be pushed against a wall. I even checked to see if my speakers were out of phase. It wasn’t until I found the small bag of metal spikes at the bottom of the box that everything clicked. Today, I’m going to explain why those little spikes are the most important “free” upgrade you’ll ever make for your home theater or stereo setup. We are going to stop your speakers from dancing on the rug and start making them sing.
Stop Letting Your Carpet Eat Your Audio Detail
The problem with carpet isn’t just that it’s soft; it’s that it’s unstable. When your speaker’s woofer moves forward to create a sound wave, Newton’s third law tells us there’s an equal and opposite force pushing the speaker cabinet backward. If your speaker is sitting on a squishy carpet, the cabinet actually wobbles. This microscopic rocking motion smears the sound, especially the low end. It’s a similar mechanical issue to how you have to stop your turntable from picking up vibrations from your floor, except here, the vibration is ruining the output itself. One of the biggest mistakes I made early on was using flat rubber feet on my carpet because I was afraid of poking holes in the rug. The result? A sound so muddy I thought I had a blown driver. Have you ever noticed your speakers swaying slightly if you give them a gentle nudge?
Do These Tiny Metal Points Actually Make a Difference?
I know it sounds like audiophile voodoo. How can four little spikes change the sound of a 50-pound speaker? The magic happens when the spike pierces through the carpet and padding to make direct, solid contact with the subfloor. This “anchors” the speaker in place. According to research from the Audio Engineering Society (AES), mechanical vibrations transmitted through the floor can create significant intermodulation distortion, muddying the clarity of the mid-range and low-end frequencies. By anchoring the speaker, the energy that was being wasted on moving the cabinet is now entirely focused on moving the air. If you’ve been struggling with a subwoofer that is vibrating your furniture or towers that just feel “loose,” spikes are your best friend. They turn that mushy bass into a tight, visceral punch you can feel in your chest.
Thread Your Spikes Like You Mean It
To get started, you will need to flip your floorstanding speakers upside down. I highly recommend doing this on a soft blanket or a piece of cardboard so you do not ruin the finish of the cabinets. Most towers come with threaded inserts already installed in the base. You will just screw the spikes in by hand. This mechanical grounding is a huge deal for clarity, much like the reason your speaker stands need to be filled with sand. If your speakers do not have these holes, do not panic; you can buy adhesive-backed spikes or outrigger bars that bolt onto the bottom. I remember doing this for a pair of old vintage towers I restored, and the difference in imaging was night and day. 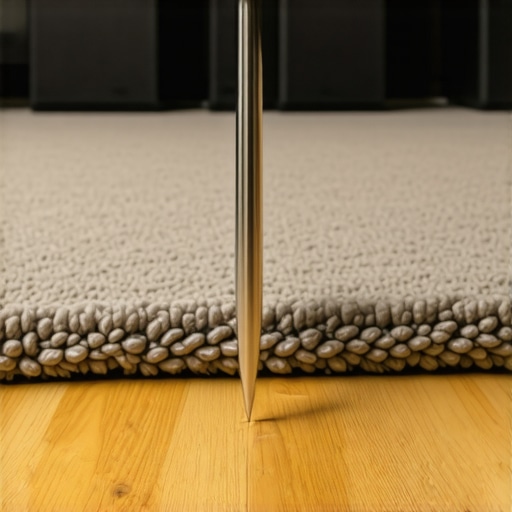
The Hidden Power of the Jam Nut
Once the spikes are in, you will notice a small ring or nut on each one. This is the jam nut, and it is the most overlooked part of the process. I once skipped tightening these because I was in a rush to hear the ‘new’ sound. Three days later, I heard a metallic buzzing during a bass-heavy scene in a movie. I spent twenty minutes trying to figure out how to tell if your speaker is actually blown or just rattling, only to find that one spike had worked itself loose and was rattling against the base. Tighten those nuts firmly against the bottom of the speaker once you have leveled everything. It creates a solid, unified structure that stops the cabinet from vibrating independently of the spikes. This ensures every bit of energy from the driver goes into the room, not into shaking the hardware.
Leveling Your Soundstage Without the Guesswork
Now, flip the speakers back over and find their permanent home. This is where the magic happens. You have to push down firmly on the top of the speaker until you feel the spikes bite through the carpet and hit the subfloor. If the speaker wobbles even a millimeter, the energy transfer is broken. It is the same principle as why your bookshelf speakers sound better when you move them off the desk—you are removing the unwanted surface interaction. I use a small bubble level on top of the speaker and adjust the individual spikes by unscrewing them slightly until the cabinet is perfectly level. Once it is rock solid, you can how to use your phone to measure your rooms frequency response. You will often see a noticeable reduction in those messy ‘peaks’ in the mid-bass once the speaker is properly coupled to the subfloor.
Stop the Wobble with the Three-Point Method
If you are struggling with an uneven subfloor, sometimes leveling four spikes is a nightmare. A pro tip I picked up years ago is to focus on getting three spikes perfectly anchored first. Once the speaker is stable on three points, you slowly lower the fourth spike until it just touches the floor. This prevents that annoying ‘diagonal wobble’ where the speaker rocks between two high points. If you skip this, your stereo image will drift as the speaker cabinet moves during loud transients. It is a tiny adjustment, but it keeps the soundstage centered and sharp. A steady speaker is a clear speaker, and taking ten minutes to level them properly is what separates a hobbyist from a real listener.
The Hidden Trap of the Mechanical Shortcut
While spikes are a game-changer for carpet, there is a common myth that they are a universal fix for every floor type. Most people assume that ‘coupling’—the act of hard-connecting your speaker to the floor—is always the goal. However, in my experience, if you are using spikes on a suspended wooden floor or a thin laminate, you might actually be making things worse. Instead of anchoring the speaker, you are turning your entire floor into a giant resonant soundboard. This is the same reason why your high-end DAC sounds exactly like your laptops headphone jack in certain rooms; the mechanical foundation is so compromised that the high-end electronics can’t overcome the physical environment. If your floor is hollow, spikes will transmit every vibration into the joists, creating a muddy, booming mess that no amount of EQ can fix.
When Spikes Actually Ruin Your Soundstage
The ‘oops’ factor usually happens when enthusiasts prioritize mechanical coupling over room acoustics. I’ve seen people spend hundreds on boutique titanium spikes while their speakers are shoved into corners where they shouldn’t be. If you find that why your speakers sound harsh when you play high-res files, it’s often because the spikes have tightened the transients so much that they are highlighting nasty reflections from your side walls. Spikes are a tool for precision, but they can’t fix a fundamentally bad room layout. Before you obsess over the spikes, make sure you understand why your subwoofer sounds better in the corner of the room (or why your towers might not) and ensure you have enough juice to drive them, as knowing how to tell if your amplifier has enough headroom for your speakers is just as vital for clarity as physical stability.
Is Decoupling the Real Secret to Low-End Clarity?
For those of you on hardwood or concrete, you might actually need the opposite of a spike: decoupling. Decoupling involves using specialized rubber or spring-based isolators that prevent vibration from entering the floor at all. Dr. Floyd Toole, a renowned expert in psychoacoustics and author of Sound Reproduction, has noted that while spikes stabilize the cabinet, the real battle is often with the room’s structural resonances. If your spikes are scratching your floors or making the room ‘shiver,’ switching to high-quality isolation feet can often provide a cleaner mid-range than spikes ever could. 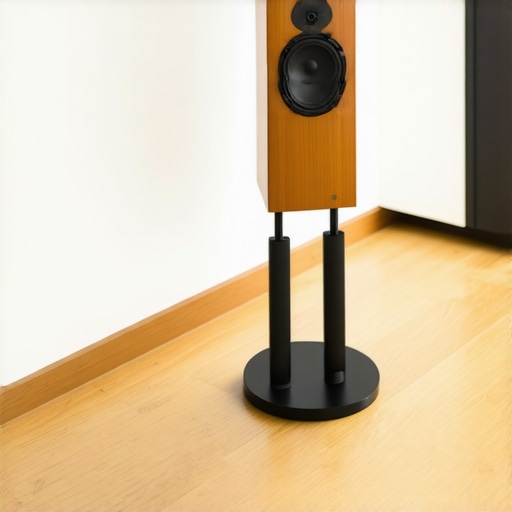 I remember switching to isolation pucks on my second-story home theater; the bass didn’t just get tighter—the rattling in the kitchen downstairs finally stopped. Have you ever fallen into this trap of over-tweaking your gear only to realize the room or the floor was the real problem? Let me know in the comments below.Beyond the initial setup of spikes and positioning, maintaining that ‘out of the box’ clarity requires a proactive approach to your hardware’s health. I keep a ‘maintenance bin’ in my closet that has saved me thousands over the years. Inside, you’ll always find a can of DeoxIT D5. If you’ve ever dealt with a crackle while adjusting music, you need to know how to fix a scratchy volume dial with electrical contact cleaner. It’s not just for old gear; even modern mid-range receivers can develop oxidation that chokes your signal. For those of you who live in humid climates, keeping an eye on your materials is key. I’ve seen beautiful sets of headphones ruined because someone didn’t realize why your headphone pads are flaking and how to prevent it. A simple wipe-down after a long session prevents skin oils from eating the material.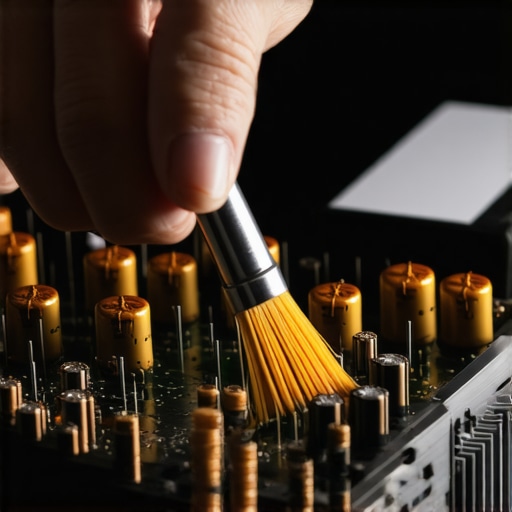
How do I keep my high-end audio gear from degrading over time?
The secret is managing heat and power. Amplifiers are the heart of your system, but they are also the most prone to failure. If you have a class-A or vintage unit, you probably know why your vintage amp gets hot even when you aren’t playing music. That heat eventually cooks internal components like electrolytic capacitors. I highly recommend using a dedicated power conditioner to protect against voltage spikes, as knowing how to fix a receiver that wont turn on after a power surge is a skill you hope you never have to use. Also, keep an eye on your crossovers. If your bass feels ‘slow’ or the imaging is drifting, you should learn how to tell if your speakers capacitor is starting to fail. Replacing a failing cap can bring a high-end speaker back to life for just a few dollars. Vance Dickason, author of The Loudspeaker Design Cookbook, emphasizes that cabinets can develop micro-leaks as gaskets and adhesives dry out. This is why I periodically perform the simple paper test for finding air leaks in your speaker cabinet. If your enclosure isn’t airtight, your ‘anchored’ speakers will still sound thin because the internal pressure is escaping. Looking ahead, the next decade is going to be about ‘Active Correction.’ We are moving away from passive spikes toward AI-driven pedestals that adjust in real-time to floor vibrations. Until then, you have the power in your pocket. I suggest everyone take five minutes to learn how to use your phone to measure your rooms frequency response. It’s the ultimate diagnostic tool for finding out if your physical tweaks are actually working. My challenge for you this weekend: check your speaker seals using the paper test—it takes seconds and could be the reason your low-end has lost its punch.
The Hard Truth About My Early Obsession With Speaker Placement
Looking back, I wasted months trying to ‘fix’ my audio with expensive cables when the real culprit was my unstable floor. I eventually learned that even the most expensive towers will underperform if they aren’t anchored. I also realized that why your floorstanding speakers sound unbalanced in an l-shaped room often comes down to how the floor reacts to the bass energy differently in each corner. Spikes provide that consistent mechanical baseline that allows you to actually hear the speaker’s true character, rather than the vibration of your carpet padding.
Another ‘lightbulb’ moment for me was realizing that mechanical stability affects the mid-range just as much as the bass. When the cabinet is still, the tweeter can project a more stable image. If you feel like your sound is ‘thin,’ don’t immediately blame the amp; instead, check how to tell if your amplifier has enough headroom for your speakers and make sure your spikes are properly tightened with the jam nut. A loose spike is essentially a tiny tuning fork ruining your clarity.
Tools That Actually Help You Dial In Your Setup
If you want to move beyond guessing, there are a few things I always keep in my kit. First, a high-precision torpedo level is non-negotiable for leveling spikes. Second, I highly recommend the ‘Audio Check’ website for frequency sweeps. To see the actual impact of your work, you should learn how to use your phone to measure your rooms frequency response. Seeing a graph of your bass response before and after spiking is incredibly satisfying. Finally, for those on hard floors, the SVS SoundPath isolation feet are my personal gold standard when spikes aren’t an option.
Go Ahead and Give Your Speakers a Solid Foundation
Audio is as much about physics as it is about electronics. By taking the time to properly couple your floorstanding speakers to your floor, you are removing a massive variable from your listening experience. It is the difference between hearing a recording and feeling like the band is in the room. Don’t let a squishy carpet hold your high-end gear back. Go find those spikes, level those cabinets, and finally hear what you have been missing. Have you ever tried using spikes on a hard floor and regretted the scratches, or did you find a way to make it work? Let me know in the comments below!