
I will never forget the first time I heard it. I had just spent six hours sweating in my driveway, routing heavy-gauge power cables and mounting my first real amplifier, feeling like a total pro. I turned the key, the engine roared to life, and then it happened—a high-pitched, piercing shriek that rose and fell perfectly in sync with the RPMs of my engine. It sounded like a miniature jet engine was trying to take off from inside my dashboard. I was devastated. I thought I had fried my new gear or, worse, that I had a defective car. Before you panic and start wondering if your speaker is actually blown or just rattling, let me tell you: that annoying noise is almost certainly a ground loop, and I’m going to show you exactly how to kill it.
Your Speakers Should Not Sound Like a Formula 1 Car
Most of us assume that if a sound is coming out of a speaker, the speaker must be the problem. I made that exact mistake early on, even spending money on a new head unit I didn’t need. The reality is that your speakers are just the messengers; they are dutifully playing back every bit of electrical interference they pick up along the line. This specific screech is widely known as alternator whine. It happens when your car’s charging system leaks electrical ‘noise’ into your audio cables. Have you ever noticed that the pitch changes when you step on the gas? That is the literal sound of your alternator working harder. If you have been struggling with this, tell me: have you already tried replacing your cables, or are you just starting to troubleshoot?
Is my alternator actually dying or is this just bad luck?
It is the biggest fear every DIYer has when they hear that whine. You worry that the charging system is failing or that your car’s electronics are incompatible with high-end audio. In most cases, your alternator is perfectly healthy. The problem is usually a ‘ground loop,’ which is a fancy way of saying your audio components are fighting over where to dump their extra electricity. This is why why your car alternator is making your speakers whine—it is finding a path through your signal cables instead of through the chassis.
The Rookie Mistake That Cost Me a Weekend
When I first started out, I grounded my amplifier to a painted bolt in the trunk because it was easy to reach. That was a massive error. A poor ground is the number one cause of system noise. If the connection isn’t metal-on-metal, the electricity looks for another way back to the battery, often hitching a ride on your RCA cables. This creates the ‘hiss’ and ‘whine’ that ruins your favorite tracks. You can often find a $5 fix for humming speakers and ground loops just by cleaning up your contact points. According to technical documentation from the Car Audio Fabrication community, even a fraction of an ohm of resistance in your ground wire can introduce audible EMI (Electromagnetic Interference) into your signal path. Learning how to properly ground a car amplifier to eliminate engine hum is the single most important step in any install. If you’re tired of the noise, let’s look at the specific steps to silence it, starting with your wiring layout. It might even be as simple as learning how to get rid of the annoying hiss in your budget car amp by separating your power and signal cables.
Scrape That Paint for a True Ground Connection
The biggest mistake people make is assuming a bolt through a metal floor is a good ground. I once helped a friend who was ready to sell his entire system because of a persistent buzz. We pulled up the carpet and found he’d bolted his ground wire directly onto the factory paint. In the car audio world, paint is an insulator, not a conductor. You need to take a wire brush or a piece of sandpaper and grind that spot down until it shines like a new nickel. If your ground isn’t perfect, your system will try to find a path back to the battery through your RCA cables, which is exactly how to get rid of ground loop hum in your audio setup at the source. Use a short, thick ground wire—no longer than 18 inches—to keep the resistance as low as possible.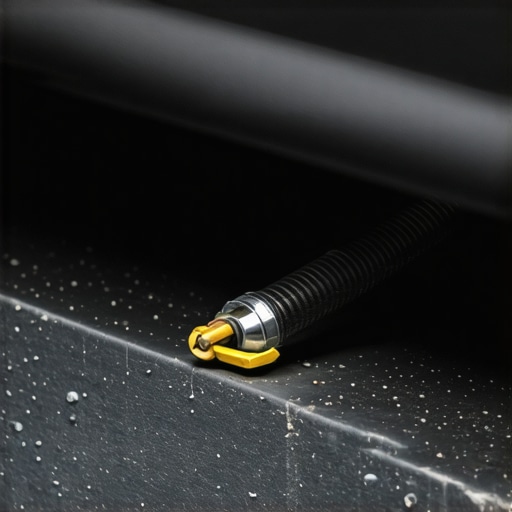
Separate Your Power and Signal Cables
Think of your power cable like a high-pressure fire hose and your RCA cables like a sensitive microphone. If you run them side-by-side down the same door sill, the electrical field from the power wire will ‘leak’ into the audio signal. I learned this the hard way during a rush job on my old hatchback; I tucked everything under the center console to save time, and the resulting engine whine was so loud I couldn’t hear the lyrics. Always run your heavy power wire down the driver’s side and your RCA cables down the passenger’s side. If they absolutely must cross paths, make them cross at a 90-degree angle to minimize interference. This simple physical separation is often the best way how to get rid of the annoying hiss in your budget car amp without spending a dime.
Stop Using the Gain Knob as a Volume Control
One of the most misunderstood parts of an amplifier is the gain setting. Most people crank it to the maximum, thinking it’s a power knob. In reality, the gain is there to match the output of your head unit to the input of the amp. When you floor the gain, you aren’t just making the music louder; you are raising the ‘noise floor.’ This amplifies the tiny bit of background interference that every car has into a full-blown screech. If you find your speakers are distorting or you hear a sharp click when you start the car, you might need to investigate why your car speakers pop when you turn the key, as it’s often a sign of poor signal management. Properly setting your gain ensures that your amplifier only works with a clean, strong signal from your source.
Check for a Blown Pico Fuse
If you are using a Pioneer head unit and the whine is unbearable, there is a specific ‘gotcha’ you need to know about. These units have a tiny internal fuse called a pico fuse on the RCA ground path. If you ever unplug your RCAs while the system is powered on, that fuse can pop. Once it’s gone, the shield on your RCAs is no longer grounded, and the noise will be astronomical. You can test this by taking a small piece of spare wire and touching one end to the outer ring of your RCA plug and the other to the metal chassis of the head unit. If the noise vanishes, you’ve found your culprit. Before you go through the hassle of how to bridge your car amp for more bass power, make sure your basic signal path is electrically sound.Once you have finally silenced that engine whine, you might think you have reached the finish line. However, this is where the real work of an audiophile begins. Most enthusiasts spend thousands on hardware only to realize their system still lacks that ‘soul’ or ‘punch’ they expected. The reality is that better gear doesn’t always equal better sound if you aren’t accounting for the physics of your car’s interior.
Stop Chasing the High-Res Dragon
One of the biggest myths in the modern audio world is that high-resolution files will automatically fix a mediocre system. I have seen guys spend a fortune on high-end DACs only to be disappointed when why your high-end DAC sounds exactly like your laptops headphone jack. If your amplifier’s noise floor is high or your speakers are poorly positioned, the extra data in a 24-bit/192kHz file is simply lost. In fact, sometimes the opposite happens.
Why do your speakers sound harsh when you play high-res files?
It sounds counterintuitive, but many listeners find that high-fidelity tracks actually highlight the flaws in their tweeters. This is often why your speakers sound harsh when you play high-res files; the increased frequency response can trigger resonances in cheap dome tweeters that standard Spotify streams wouldn’t reach. According to research published by the Audio Engineering Society (AES), the human ear is remarkably sensitive to intermodulation distortion in the higher frequencies, which is often exacerbated by poorly mastered ‘high-res’ tracks.
The Phase Trap That Muffles Your Bass
If your system sounds ‘thin’ or the bass feels like it is disappearing when you turn it up, you might be a victim of the most common expert-level mistake: phase cancellation. I once spent an entire Saturday morning wondering why a pair of $400 woofers sounded like tin cans. It turned out I had flipped the positive and negative wires on just one side. When one speaker pushes out while the other pulls in, they literally cancel each other’s sound waves. Learning how to tell if your speakers are out of phase in 30 seconds is a skill that separates the pros from the amateurs. Have you ever fallen into this trap? Let me know in the comments. 
Kill Your Rear Speakers to Save Your Soundstage
This is the most controversial advice I give, but it is the one that makes the biggest difference. Everyone thinks they need a ‘surround sound’ feel in a car, so they buy massive rear-deck speakers. In reality, why your cars rear deck speakers are ruining the stereo image is a matter of psychoacoustics. When you go to a concert, the band is in front of you, not behind you. By overpowering the rear of the car, you pull the ‘image’ away from your dashboard and create a muddy, confused sound. If you want true clarity, focus your budget on a high-quality front component set and let the rear speakers handle just a tiny bit of fill—or turn them off entirely.
The Uncomfortable Truth About Cheap Upgrades
Finally, don’t be so quick to toss your factory equipment. It is a common ‘oops’ factor to replace OEM speakers with the cheapest aftermarket set you can find, only to realize why your cars factory speakers sound better than your new cheap ones. Factory speakers are often highly efficient and designed specifically for the small amount of power your head unit provides. If you swap them for ‘pro’ speakers without adding a proper amplifier, you will actually lose volume and mid-bass punch. Always match your speakers to your power source, or you’ll be left with a system that sounds expensive but performs poorly.
Grab a Multimeter and Stop Guessing
I used to eyeball my wiring and hope for the best, but that is a dangerous game when you are dealing with expensive amplifiers. If you are serious about this hobby, a $20 digital multimeter is the single most important tool in your arsenal. I personally use mine to check the final impedance of my speaker wire runs before I ever hook them up to the terminals. This ensures I have actually found the secret to choosing the right ohm rating for your amp and am not about to send the unit into protection mode. Without measuring, you are just crossing your fingers that your parallel wiring didn’t drop too low.
DeoxIT D5 is My Secret Weapon for Vintage Gear
Nothing breaks my heart more than seeing a beautiful vintage receiver tossed in the trash because the volume knob makes a ‘scratching’ sound. That noise is usually just oxidized dust on the internal potentiometer. I have saved dozens of units by learning how to fix a scratchy volume dial with electrical contact cleaner. A quick spray of DeoxIT D5 into the housing can make a 40-year-old amp feel brand new. It is the same reason why your vintage amp gets hot even when you arent playing music—internal resistance from grime creates heat and signal loss.
How do I maintain my high-end audio system over time?
Long-term maintenance is about fighting the inevitable decay of physical materials. Rubber surrounds on woofers can dry out, and electrolytic capacitors have a finite lifespan. I recommend a ‘touch and listen’ audit every six months. Check the flexibility of your speaker cones; if they feel stiff or brittle, you might need to look into how to revive old speakers with new foam surrounds. Also, keep an eye on your heat sinks. Dust buildup is a silent killer, and knowing how to stop your car amp from overheating in the summer often starts with a simple can of compressed air. 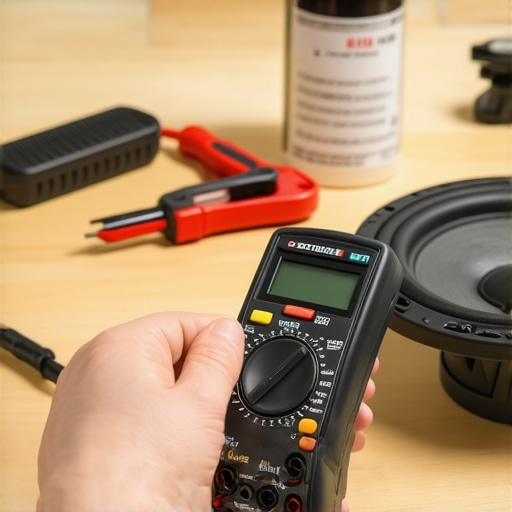
The Future is Acoustic Measurement in Your Pocket
The next big trend in audio isn’t just better hardware; it is the democratization of room correction software. We are reaching a point where expensive calibrated microphones are being replaced by the high-quality MEMS microphones found in modern smartphones. You can already learn how to use your phone to measure your rooms frequency response to find the ‘nulls’ and ‘peaks’ in your living room. According to technical white papers from the Dirac Research team, digital room correction can provide a more significant audible improvement than a $5,000 cable upgrade ever could.
Don’t Ignore the Small Stuff
It is easy to focus on the big amp and the massive sub, but the small points of contact matter. If you use headphones, learning how to clean your headphone ear pads without ruining the leather will prevent the material from cracking and losing its seal, which is critical for bass response. Similarly, if you notice your portable gear isn’t holding up, check the mistake that kills your portable speaker battery life before you assume the battery is dead. I highly recommend taking 15 minutes this weekend to use a coffee filter—yes, really—on a torn speaker edge to see how to fix a speaker cone with a simple coffee filter and save a driver from the landfill. Give it a shot; it is the ultimate low-cost victory for any DIY enthusiast.
The Hardest Lessons I Learned Under the Dashboard
After nearly two decades of wiring cars and living rooms, I’ve realized that the most expensive equipment can’t compensate for a rushed installation. One of my biggest lightbulb moments was realizing that noise is almost always a physical problem. If you notice your car speakers cut out when you hit a bump, it is rarely the amp failing; it’s a loose crimp or a bad ground. I also learned that more power isn’t always the answer—often, it’s about signal hygiene. I spent years buying bigger subs when all I really needed was to learn how to match your subwoofer phase with your main speakers to stop the waves from cancelling each other out.
My Essential Gear for Any Audio Project
If you’re serious about moving beyond the amateur stage, you need a few core resources. I always keep a bottle of DeoxIT nearby; it is the only way I know how to fix a scratchy volume knob on an old amp without replacing the whole board. For technical data, I rely on the Crutchfield MasterSheets for vehicle-specific wiring and AudioScienceReview for unbiased DAC and amp measurements. Lastly, never underestimate a simple piezoelectric polarity tester—it is the fastest way to ensure your speakers are moving in the right direction.
Your Path to Sonic Perfection
The journey of a DIY audiophile is rarely a straight line. You will blow fuses, you will scrape your knuckles, and you will definitely hear some strange noises along the way. But the first time you cruise down the highway with zero interference, you’ll know it was worth the effort. Now that you know the secret to choosing the right ohm rating for your amp and how to get rid of ground loop hum in your audio setup, you have the tools to outperform most professional shops. Go ahead, turn it up, and enjoy the clarity your system was meant to deliver. Have you ever spent an entire weekend chasing a noise only to find it was a loose screw? Let me know your most frustrating audio victory in the comments below!