
I remember the first time I sat in a high-end competition car. I was twenty, proud of my budget build, and certain my four-speaker setup was the pinnacle of audio engineering. Then I closed the door of that demo vehicle. The singer wasn’t just “everywhere”; she was standing right there on the dashboard, clear as day. I went back to my own car, and suddenly, my music felt like it was being played from a dark hallway somewhere behind my head. It was a visceral, disappointing realization. I had spent so much time worrying about how to stop your cars rear deck from rattling with heavy bass that I never stopped to ask if those speakers should even be that loud in the first place.
Stop Letting Your Rear Deck Steal the Show
For years, I believed the myth that more speakers equaled better sound. I would cram the biggest 6x9s I could find into the rear parcel shelf and crank the gain until the windows flexed. I thought I was building a surround sound sanctuary. I was wrong. What I was actually doing was destroying the “stereo image”—that magical illusion where your brain convinces you the band is performing right in front of you on the hood of your car. When your rear speakers are too dominant, they pull the soundstage backward. Instead of a focused performance, you get a muddy, smeared mess. It is like trying to watch a movie while someone is shouting the dialogue from the kitchen. We are going to fix that today. I will show you how to regain that front-row clarity without necessarily ripping out your hardware. Have you ever noticed that your music feels “pulled” toward the back of the car, even when you have adjusted the fader?
Does Having Rear Speakers Actually Make Music Worse?
Many people fear that turning down the rear speakers will make the car feel empty, but the opposite is often true. The science of psychoacoustics tells us that our brains prioritize the first sound that reaches our ears to determine direction. This is known as the Precedence Effect. According to researchers at the Audio Engineering Society, if sounds from different directions arrive within about 5 to 30 milliseconds of each other, the brain fuses them but localizes the source based on the first arrival. If your rear speakers are competing with your fronts, your brain gets confused, and that crisp stereo image vanishes. I made the mistake of thinking volume was the same as quality. I even wondered why your cars factory speakers sound better than your new cheap ones when I first started swapping parts out. The truth is, factory systems often tune the rear speakers to be much quieter for a reason. If you have ever felt like your car speakers sound like they are under a blanket, it might not be the speakers themselves—it might be the fact that your rear deck is fighting for attention. We need to treat the rear deck as “fill,” not the main event. Getting this right is as crucial as knowing how to tell if your speakers are out of phase when you are chasing that perfect sound.
How to Master the Art of Rear Fill
To get that elusive front-row sound, you have to stop treating your rear speakers like they are equal partners in the mix. Think of them as backup singers; they are there to provide depth and space, not to take the lead. I remember working on a project car—a beat-up 2004 sedan—where the owner had installed high-end components in the front but kept the rear deck speakers so loud that the vocals seemed to bounce between the dashboard and the back window. It was disorienting. We fixed it by applying a simple ‘Front-Bias’ philosophy that transformed the cabin from a noisy box into a concert hall.
Dial in the Fader for a Virtual Stage
The most immediate tool you have is your head unit’s fader control. Start by sitting in the driver’s seat and playing a high-quality track you know well. Shift the fader all the way to the front. The sound will feel focused but perhaps a bit ‘thin.’ Slowly—click by click—bring the rear speakers back into the mix. Stop the moment you feel the soundstage begin to shift from the hood of the car toward your head. For most vehicles, this sweet spot is usually around a 70/30 or 75/25 split in favor of the front. If you hear a high-pitched noise while doing this, you might need to learn how to get rid of the annoying hiss in your budget car amp before you can truly appreciate the clarity. 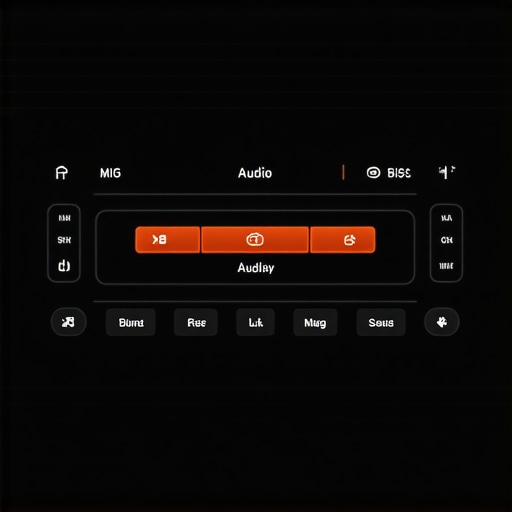
Use Crossovers to Kill the Localization
High frequencies are very directional. If your rear speakers are blasting tweeters directly into the back of your skull, your brain will immediately ‘localize’ the sound to the rear. To combat this, I often use a Low-Pass Filter (LPF) or a significant treble cut on the rear channels. By rolling off everything above 3kHz or 5kHz in the back, the rear speakers provide mid-range ‘warmth’ without pulling the singer off your dashboard. It is a similar logic to mounting surround speakers in a room with no back wall; you want the reflection and atmosphere, not a direct beam of sound hitting your ears. If you still hear vibrations after cutting the highs, you should check why your car door speakers rattle even at low volume to ensure your hardware is secured.
Sync Your Timing to Avoid Audio Smear
Even with the volume balanced, the physical distance between you and the rear speakers can cause a slight delay, making the music feel ‘muddy.’ If your head unit supports Time Alignment, delay the signal to the speakers closest to you. This ensures that the sound waves from the front-left, front-right, and rears all reach your ears at the exact same millisecond. I once spent an entire Saturday afternoon tinkering with millisecond delays in a truck, only to realize the ‘muddiness’ was actually a phase issue. Always take the time to tell if your speaker is actually blown or just rattling before you dive into advanced DSP settings. If everything is clear, move on to how to match your subwoofer phase with your main speakers to lock in the low end. Getting the timing right is the difference between hearing a ‘recording’ and feeling a ‘performance.’ Ensure your electrical foundation is solid, as you might need to properly ground a car amplifier to eliminate engine hum which can mask these subtle timing improvements.Once you have mastered the basics of soundstages and timing in your car, it is easy to think those same rules translate perfectly to your living room. But here is the contrarian truth: most people spend way too much money on ‘better’ gear while ignoring the physics of the room itself. I see it all the time in the home audio world—someone buys a flagship receiver and then wonders why your surround sound system sounds like its in mono. They are chasing specs instead of setup.
Stop Chasing High-Res White Whales
We are told that ‘high-resolution’ is the holy grail. We buy 24-bit/192kHz files and expensive converters, but often, your speakers sound harsh when you play high res files because the equipment is revealing flaws in the recording or your room’s reflections rather than the music’s beauty. In a famous double-blind study published by the Journal of the Audio Engineering Society, researchers E. Brad Meyer and David R. Moran found that listeners could not reliably distinguish between high-resolution audio and standard CD-quality 16-bit/44.1kHz audio. The ‘trap’ is thinking the file format matters more than the speaker placement. I have seen enthusiasts spend five figures on a system only to realize why your high end dac sounds exactly like your laptops headphone jack—because their room acoustics are so poor that the nuance is lost. 
Can You Actually Hear a Difference Between DACs?
For the advanced listener, the answer is often ‘no’ unless your electrical foundation is perfect. If you have noise in your line, you should first learn how to get rid of ground loop hum in your audio setup before upgrading your DAC. Another massive ‘oops’ factor is speaker height. I once visited a friend who complained about muddy dialogue; I found his speaker sitting on the rug. I had to explain why your center channel should never be placed on the floor. It’s the same reason your bookshelf speakers sound better when you move them off the desk. Reflections from hard surfaces destroy clarity faster than a cheap amplifier ever could. If you are struggling with a setup that feels ‘thin,’ you might even find why you should use a rug to fix a bright sounding room is a more effective upgrade than a new set of cables. Have you ever fallen into this trap of buying gear to fix a room problem? Let me know in the comments.Once you have optimized your room and balanced your soundstage, the real challenge begins: keeping that performance consistent for the next decade. I have seen countless enthusiasts spend thousands on a setup only to let it degrade through simple neglect. You can have the best speakers in the world, but if your connections are oxidized or your enclosures are leaking air, you are losing the very detail you paid for. I personally never enter a listening room without a specific set of tools. High on that list is a can of DeoxIT D5. If you have ever wondered how to fix a scratchy volume dial with electrical contact cleaner, you already know that even a tiny amount of oxidation can ruin a listening session.
The 15 Dollar Toolkit That Saves Your System
Maintenance isn’t just about dusting; it is about electrical and mechanical integrity. For those working with older gear, learning how to fix a scratchy volume fader on a professional mixer can save you a trip to a repair shop that might charge a hundred dollars just for a bench fee. According to the legendary audio designer John Curl, the ‘purity of the signal path’ is often compromised most by aging solder joints and oxidization at connection points. This is why I religiously clean my RCA terminals twice a year. If you are a car audio fan, this is even more critical. You need to ensure your gear survives the environment; for example, knowing how to stop your car amp from overheating in the summer is the difference between a long road trip with tunes and a silent ride home with a fried circuit board. 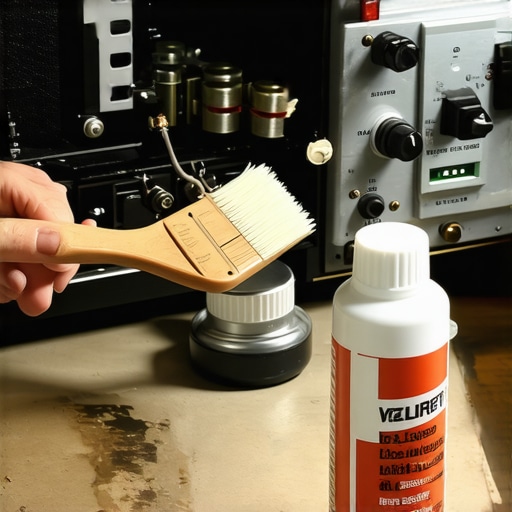
Don’t Let Dry Rot Kill Your Favorite Drivers
Mechanical parts are the first to go. If you have a set of vintage towers, keep a close eye on the rubber or foam around the cones. You might need to how to revive old speakers with new foam surrounds before the voice coil starts to rub and causes permanent damage. It is not just speakers, either. If you are a headphone user, you should check why your headphone pads are flaking and how to prevent it, as a poor seal from worn pads will instantly kill your bass response. Even your speaker cabinets can fail silently; I recommend using the simple paper towel trick for finding speaker air leaks to ensure your bass stays tight and punchy.
How do I keep my audio gear from sounding old?
Longevity comes down to heat management and component health. Electrolytic capacitors are notorious for drying out over twenty years. Learning how to tell if your speakers capacitor is starting to fail is a skill that will save your tweeters from receiving the wrong frequencies. Looking toward the future, I predict we will see more ‘Active’ systems where AI-driven software monitors component heat and health in real-time, effectively automating this maintenance. However, until your amp can talk to you, the responsibility is yours. My best advice for an immediate upgrade? Spend this weekend checking your enclosures. Take five minutes and try the simple paper towel trick on your subwoofer. If you find a leak, seal it up, and you’ll hear an instant improvement in mid-bass clarity that no new cable could ever provide.
Lessons My Ears Had to Learn the Hard Way
I spent years chasing the ‘ultimate’ speaker, only to realize that a budget setup in a well-treated car sounded better than flagship components in a vibrating door. I once thought high-res files were a magic wand, but I found that why your speakers sound harsh when you play high res files often comes down to the setup’s inability to handle that much detail. My biggest lightbulb moment? Realizing that the most expensive DAC in the world won’t save you if you have a persistent how to get rid of ground loop hum in your audio setup. Audio is about the system as a whole, not just the flashy parts. I also learned that small physical adjustments—like moving a speaker off a hard surface—matter more than any software setting. If you have bookshelf speakers, remember why your bookshelf speakers sound better when you move them off the desk because it eliminates those muddying early reflections.
The Only Gear I Carry Every Single Time
If you are serious about this, you need a basic maintenance toolkit. First, grab some electrical contact cleaner; it is the easiest way to learn how to fix a scratchy volume knob on an old amp without buying new gear. Second, do not sleep on your smartphone as a diagnostic tool. You can actually learn how to use your phone to measure your rooms frequency response to find exactly where the ‘dead zones’ are in your listening area. Finally, when you are wiring up a new system, be precise. Knowing how to choose the right gauge of wire for long outdoor speaker runs can prevent voltage drops that starve your amplifiers of the power they need to perform. #IMAGE_PLACEHOLDER_E#
Trust Your Senses and Start Listening
At the end of the day, audio is a journey, not a destination. Whether you are hunting for the best home audio deals or rewiring a classic sedan, the goal is to feel the music. Do not be afraid to move a speaker an inch or tweak a fader setting just to see what happens. Your ears are the ultimate judge, and no graph can tell you how a song should make you feel. Take the time to experiment, keep your connections clean, and never settle for ‘good enough’ when perfection is just a few adjustments away.
Have you ever spent hours chasing a sound problem only to find it was something incredibly simple like a loose ground? Let me know in the comments below!