
I sat there, staring at my brand-new pair of professional headphones, feeling like my head was being slowly crushed in a carpenter’s vice. I’d spent a week’s wages on these, yet after thirty minutes of listening, I had a throbbing tension headache that wouldn’t quit. It’s a common tragedy: you buy for the sound, but you suffer for the fit. I once tried to ‘speed up’ the process by aggressively bending a pair of plastic-heavy cans, and the sickening crack that followed still haunts my dreams. That was an expensive lesson in patience. Today, I’m going to show you exactly how to ease that pressure and customize your fit so you can actually enjoy your music without needing an aspirin. [IMAGE_PLACEHOLDER]
Stop the Skull-Crushing Clamping Force
If you’ve ever wondered how to identify a fake pair of premium headphones, sometimes the dead giveaway isn’t the logo—it’s the cheap, brittle plastic that snaps the moment you try to adjust it. High-quality gear is designed to be resilient, but even the best metal or reinforced nylon headbands come out of the factory with a ‘death grip’ meant to keep them secure on any head size. The problem is that ‘one size fits all’ usually means ‘hurts most people’ initially. According to ergonomic researchers at organizations like the Liberty Mutual Research Institute, prolonged pressure on the temporal bone is a leading cause of external compression headaches. This isn’t just about comfort; it’s about being able to use your gear for more than a single song.
Won’t stretching them just ruin the sound?
This is the biggest fear I hear from fellow enthusiasts. They worry that if the seal isn’t tight, the bass will disappear. While it’s true that open-back headphones leak sound by design, a proper fit shouldn’t mean pain. You can achieve a perfect acoustic seal without feeling like you’re in a wrestling match. Often, people think they need to stretch the band when they actually just need better cushioning. Before you start pulling at the frame, check if you’re seeing signs your headphone pads need replacing, because flat, worn-out foam often makes the clamping force feel much more aggressive than it actually is.
The Secret is Constant, Gentle Tension
My biggest mistake early on was thinking I could fix the fit in five minutes. I used a hairdryer—don’t do that. Heat can warp the driver housing or make the plastic brittle. The real ‘neighborhood pro’ move is using a stack of books or the box the headphones came in. You want something just slightly wider than your head. Let them sit there overnight. It’s a slow-motion adjustment that allows the material to ‘memory’ into a new shape without reaching the breaking point of the internal spring steel or plastic. Have you ever felt like you had to choose between great audio and a comfortable head? I’d love to hear which pair of headphones gave you the worst ‘death grip’ experience.
Stretch Your Headphones Without Snapping the Frame
The most effective way to kill the ‘death grip’ is a method I call the ‘Slow-Expansion.’ Find a stack of books or the original box your gear came in. You want an object that is about one to two inches wider than your own head. Carefully slide your headphones over this object and let them sit for at least 12 to 24 hours. I learned this the hard way with a pair of high-clamping Sennheisers that felt like a migraine in waiting. I actually used a yoga block for two days straight, and the difference was night and day. This allows the spring-steel or reinforced polymer in the headband to settle into a wider arc without exceeding its elastic limit. If you are working with cheaper gear, remember that the trick to making 50 dollar headphones feel like 300 monitors often starts with this exact structural adjustment to reduce fatigue. 
Swap the Pads Before You Break the Band
Sometimes the clamping force isn’t the problem—it’s the material touching your ears. If you’re using stock pleather pads, they tend to compress quickly and trap heat, which makes even light pressure feel unbearable. Upgrading to deeper, velour, or hybrid sheepskin pads can provide a physical buffer that distributes the pressure across a larger surface area. Before you go bending the metal, check for 7 signs your headphone pads need replacing today, because flattened foam is a primary culprit for ear-on-driver pain. When I swapped my old, crusty pads for thick memory foam, the headphones sat further away from my skull, effectively reducing the perceived tension without me having to stretch the frame at all.
Stop the Cable from Pulling Your Head Down
We often focus on the headband, but the ‘weight’ of the fit is often a result of cable drag. If you are using a heavy, coiled cable, it can pull down on one ear cup, causing an uneven fit that ruins the ergonomic balance. I once spent three hours trying to fix a ‘crooked’ headband only to realize my heavy studio cable was just caught on the arm of my chair. Understanding why your headphone cord is always tangled and how to stop it is vital for long-term comfort because it prevents that annoying, one-sided tugging.
Check for Hidden Adjustment Screws
Many professional-grade headphones have small adjustment screws near the gimbal. Over time, these can loosen or, conversely, be tightened too much from the factory, preventing the earcups from pivoting freely to match the angle of your jaw. Take a precision screwdriver and ensure the cups can swivel smoothly. If the cup can’t tilt, it will dig into the area behind your ear, which is a high-sensitivity zone for nerves. This simple mechanical check ensures the clamp is distributed evenly across your temples rather than concentrated on a single point.
I’ve noticed a recurring theme in the audiophile community: we often mistake physical discomfort for ‘pro-level’ isolation. I once spoke with a guy who wore a pair of studio monitors that left literal indentations on his temples because he believed the extra pressure improved the transient response. It’s time to debunk that. While a solid seal is vital for low-end extension, excessive clamping force can actually introduce bone conduction artifacts that muddy the very clarity you are paying for. Research by Dr. Sean Olive at Harman International suggests that listener preference is heavily dictated by a target frequency response that doesn’t require a vice-like grip to achieve. Once you have a basic seal, more pressure just equals more pain, not more fidelity.
Why Crushing Your Ears Won’t Save Your Low End
Many beginners think they need to squeeze the life out of their earcups to hear the sub-bass. In my experience, if your headphones lack punch, the issue is likely a driver limitation or a poor amp match rather than a loose fit. Before you try to bend your headband into a horseshoe, you should check how to tell if your headphones need an external amp. Often, that ‘thin’ sound you’re trying to fix with pressure is actually just a lack of power. 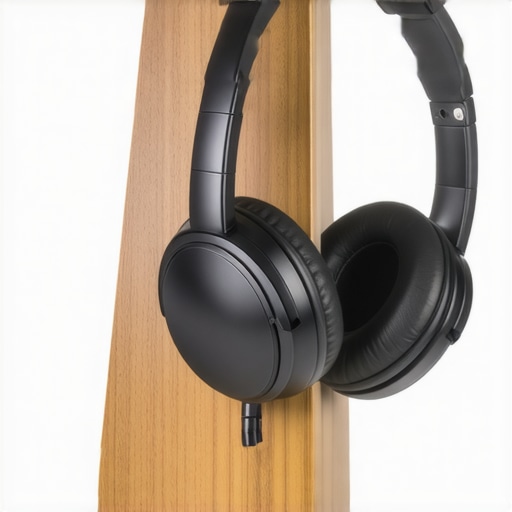
Does Your Gear Actually Need a Break-in Period?
The ‘burn-in’ debate is the ultimate audiophile rabbit hole. While there is a mechanical argument for why your new speakers sound better after 20 hours of use, when it comes to headphones, the ‘break-in’ you feel is usually just your brain adjusting and the pads finally softening. The hidden ‘oops’ factor here is trying to force this process. I’ve seen people use industrial heat guns to ‘soften’ plastic headbands, only to end up with a melted mess. Plastic has a ‘memory,’ but it also has a fatigue limit; if you stress it too fast or too hot, you create micro-fractures that will lead to a snap three months down the line.
The Trap of Chasing Minor Upgrades
It is easy to get distracted by shiny accessories when the real problem is ergonomics. I have seen people spend $200 on premium cables to fix a ‘harsh’ sound, ignoring the fact that their ears were simply sore and inflamed from a poor fit. Understanding the real difference between gold and silver plated connectors is far less important for your daily enjoyment than ensuring the weight of the headphones is distributed across your headband rather than your ears. If you’re using high-end noise-canceling gear, you might also find that why your noise-canceling headphones hiss in quiet rooms is more distracting than the fit itself. Focus on the physical fundamentals first. Have you ever fallen into the trap of thinking a tighter fit meant better bass? Let me know in the comments.
Maintaining a high-end audio setup isn’t just about avoiding the ‘death grip’ on your skull; it’s about ensuring the signals moving through your hardware remain as clean as the day you unboxed them. I’ve seen countless enthusiasts spend thousands on hardware only to let it degrade because of simple environmental factors. Oxidation is the silent killer of fidelity. Even if you have the best gear, your connectors are constantly fighting a battle against moisture and dust. According to the Audio Engineering Society (AES) technical committee on hardware, even a microscopic layer of atmospheric contaminants can increase contact resistance, leading to subtle signal degradation that most people mistake for ‘aging’ gear.
Keep Your Contacts Pristine Without Scrubbing
I learned early on that you should never use standard household cleaners on your equipment. Ammonia and vinegar are the enemies of delicate electronics. If you’re noticing a slight drop in volume in one ear, don’t panic. Before you assume you need to how to fix channel imbalance on a vintage stereo amplifier, check your connection points. I personally keep a can of specialized electronic contact cleaner on my workbench. A tiny spray on a microfiber cloth—not directly on the device—can remove years of buildup. If you are worried about the luster of your high-end cables, knowing how to clean gold-plated connectors without ruining the finish is essential to prevent stripping the thin layer of gold that provides that superior conductivity.
How do I keep my audio setup performing like new for years?
The secret is a combination of climate control and regular electrical health checks. I recommend a ‘deep clean’ every six months where you unplug everything and re-seat the connections. This physical action of sliding a jack in and out of a port actually helps break up minor oxidation. Also, pay attention to your environment. Humidity doesn’t just hurt your wood furniture; it can cause speaker cones to sag or soften over decades. If you have vintage gear, you should proactively learn how to tell if your speaker capacitors are starting to leak, as this is the most common cause of a sudden loss in punch or clarity.
Why Every Audiophile Needs a Multimeter
If you really want to graduate from ‘listener’ to ‘expert,’ you need to stop guessing and start measuring. I don’t go anywhere without my digital multimeter. It’s the ultimate tool for troubleshooting everything from a dead speaker to a faulty cable. Instead of throwing away a pair of headphones because one side went quiet, you can learn how to use a multimeter to find a short in your speaker wires. It takes five minutes and can save you hundreds of dollars in unnecessary replacements. 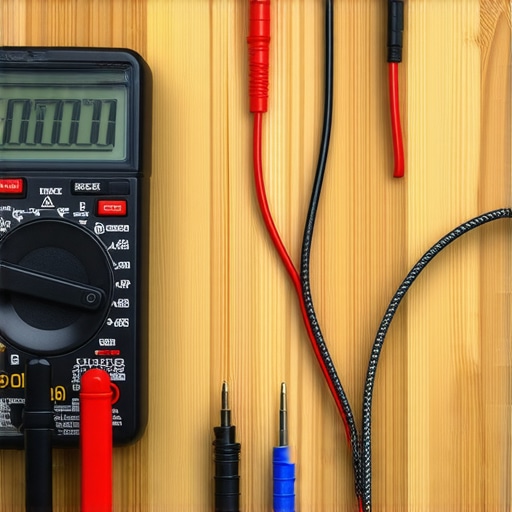
I predict that the future of this hobby lies in personalized calibration. Within the next few years, we will likely see headphones that use internal microphones to measure the specific acoustic impedance of your ear canal in real-time, automatically adjusting the output to compensate for pad wear or a loose fit. Until that tech becomes standard, we have to rely on our own maintenance. My challenge to you this week: take a precision screwdriver and check the terminal screws on your speakers. If they’ve vibrated loose even half a turn, tightening them will give you an immediate, audible boost in low-end tightness. Give it a shot and see if you can hear the difference.
Lessons from a Decade of Broken Headbands
If there is one thing I have learned after snapping three pairs of “indestructible” studio monitors, it is that brute force is never the answer. You cannot bully a headband into submission; you have to coax it. I also realized that most of us tolerate pain because we think it is a badge of honor for high-fidelity audio. It isn’t. If you are struggling with in-ear fit instead of over-ears, you might find that the reason your earbuds sound tinny after a workout is often due to the same lack of a proper, comfortable seal. Another hard-earned truth? Don’t buy for looks alone. I’ve found some of my most comfortable, “ugly” vintage gear by knowing the trick to buying high-end audio at estate sales where older, broken-in sets are waiting to be rescued.
The Gear I Use to Save My Ears
You don’t need a massive workshop to keep your gear in top shape. My personal “comfort kit” includes a high-quality digital multimeter for checking cable continuity, a set of replacement memory foam pads, and a specialized contact cleaner. I also keep a simple yoga block—it’s the perfect width for safely stretching out a tight headband over a weekend. If you are looking to upgrade your connections while you are at it, remember that the real difference between gold and silver plated connectors is often more about durability and corrosion resistance than a massive shift in sound, so prioritize the physical longevity of your setup.
Your Ears Deserve Better Than a Vice Grip
At the end of the day, audio gear should be a bridge to your favorite music, not a barrier. Taking ten minutes to adjust the pivot points or twelve hours to stretch a tight band can transform a pair of “closet-dust-collectors” into your daily drivers. Don’t be afraid to customize your gear; it’s yours, and it should fit you perfectly. Once you have the physical fit sorted, you can focus on the performance and ensure you aren’t dealing with why your noise-canceling headphones hiss in quiet rooms or other technical quirks. Have you ever had a pair of headphones that were so uncomfortable you actually gave up on them? Let me know in the comments below!