
I was sitting in a crowded coffee shop, three minutes away from an important interview, when I reached into my laptop bag and pulled out what looked like a bird’s nest made of silicone and copper. My heart sank. I spent the next four minutes frantically picking at knots while my interviewer waited on the screen. In my rush, I yanked too hard, and suddenly one earbud went silent. I had literally snapped the internal connection of a pair of high-end monitors just because I didn’t know how to store them. It was embarrassing, it was expensive, and it was the moment I realized that “pocket physics” is a real, vindictive force. We’ve all been there—tossing a neatly coiled cable into a pocket only to find a Gordian knot ten minutes later. Today, I’m going to show you exactly how to stop this madness using a few simple techniques that roadies and studio pros have used for decades.
The Cruel Science Behind the Pocket Knot
It feels like a personal attack, doesn’t it? You put the cords in neatly, and they come out a mess. But there’s actually a scientific reason for this chaos. A famous study by researchers at the University of California, San Diego, found that cables longer than 46 centimeters are almost guaranteed to spontaneously knot themselves when agitated. Since most headphone cords are about 120 centimeters, you’re essentially fighting a losing battle against entropy every time you walk. I used to think I was just “bad at cables,” but the truth is, the physics of cord length and flexibility are working against you. Just like how you might need to replace your headphone pads when they get worn out, you need to update your storage habits to save your wires.
Is it actually possible to keep cords straight without bulky cases?
You might be thinking that the only real solution is to switch to wireless, but then you’re dealing with battery life and frustrating Bluetooth lag while watching movies on your laptop. Or maybe you’ve tried those plastic “turtles” that just add bulk to your pocket. I’m here to tell you that you don’t need fancy gadgets. In fact, if you’re worried about your gear, you can actually build a simple diy headphone stand for 10 dollars to keep things organized at home. But for your pocket, you can have a perfectly organized setup using nothing but your own hands and a little bit of technique.
The Time I Ruined My Favorite Pair (and What You Can Learn)
Early on, I made the classic mistake of wrapping my cords tightly around my phone or my hand. I thought I was being tidy. In reality, I was putting immense strain on the “strain relief” parts of the cable. If you do this enough, you end up with a dead earbud or a crackling sound every time you move. It’s a bit like when passive speakers sound quiet with a digital amp—something is just fundamentally mismatched. In my case, I was mismatching the cable’s natural coil with my own forceful wrapping. Have you ever accidentally killed a pair of headphones by winding them too tight? Let me know in the comments, because I’d love to know I’m not the only one who learned the hard way. Understanding how to respect the wire’s internal memory is the first step toward a tangle-free life.
Master the Roadie Wrap to Save Your Sanity
The Over-Under technique is the gold standard for anyone who works with professional audio. It isn’t just for 50-foot XLR cables on a concert stage; it works perfectly for your daily earbuds too. When you coil a cable, it naturally wants to twist because of its internal structure. If you force it into a circular loop repeatedly in the same direction, you are building up torsional strain that eventually leads to those dreaded knots. Professionals avoid this by alternating the direction of each loop. It is a bit like how you have to match your subwoofer phase with your main speakers; if the physical twists are fighting each other, the result is total chaos. By giving the cable a half-twist forward for the first loop and a half-twist backward for the second, you neutralize the energy. When you let go, the cable falls straight. This technique is often discussed in circles where people value the difference between balanced and unbalanced cables for home studios, because high-end gear deserves high-end treatment. 
The Figure-Eight Trick for Crowded Pockets
If the Over-Under feels too complex for a quick commute, the Figure-Eight is your best friend. This is my go-to for smaller in-ear monitors. You extend your index and pinky fingers like you are at a rock concert and weave the wire back and forth in an ‘8’ pattern. This creates a series of counter-twists that cancel out the kinetic energy that causes ‘pocket physics’ to take over. I remember the first time I tried this after a long night of editing. I was exhausted and used to just stuffing my gear into a bag. I spent thirty seconds doing a proper figure-eight, and the next morning, my headphones unspooled like a silk ribbon. It felt like a small victory against entropy. It’s far more effective than just hoping they don’t tangle, just as understanding the real reason your wireless earbuds keep falling out is more effective than just pushing them in harder.
Stop Treating Your Wires Like Garden Hoses
The biggest mistake people make is the ‘elbow wrap.’ You know the one—wrapping the cord around your palm and elbow. This is the fastest way to ruin the internal copper shielding. It puts massive tension on the solder points near the jack. I once treated a pair of expensive Sennheisers this way, and within a month, the left channel started cutting out. It felt as frustrating as when you bridge your car amp for more bass power and suddenly realize you’ve pushed the hardware past its physical limit. Instead of tight tension, you want ‘loose discipline.’ Your loops should be relaxed. If the cable feels like it’s fighting you, it is. Listen to the wire’s natural curve.
Don’t Forget the Connection Point
While you are focusing on the wire, don’t ignore the 3.5mm or USB-C plug. A lot of tangles start because the heavy jack end flips through a loop. I usually leave the last two inches of the jack end free to tuck into the final loop as a sort of ‘lock.’ This keeps the whole bundle from unraveling in your pocket. Also, since you are handling these connections so much more often with these methods, you should probably learn how to clean gold plated connectors without ruining the finish. Dirt and oils from your fingers can build up during the coiling process, leading to crackly audio that has nothing to do with the wires themselves.While mastering the Over-Under wrap saves your cables from premature death, it’s only the tip of the iceberg when it comes to maintaining a high-fidelity system. One of the most persistent myths I see in the audiophile community is the idea that you need to spend a fortune on digital connections. I’m here to tell you: stop wasting money on expensive optical cables. In the digital realm, a signal is essentially binary; if the light reaches the sensor, the bits are transferred. However, where people *do* need to focus their attention is on the physical components that actually move, like your speaker drivers. There is a lot of heated debate around the truth about speaker break-in periods. While marketing might claim it takes 100 hours of ‘special’ pink noise, the physical reality is simply about the mechanical loosening of the spider and surround. In fact, Dr. Floyd Toole, a renowned expert in acoustics, suggests in his research that while measurable changes in driver suspension occur during early use, the human brain’s adaptation to the sound signature is often a much more powerful factor than the hardware’s physical ‘break-in.’
Why do my studio headphones sound lifeless on my laptop?
It is a common frustration for budding enthusiasts: you buy a pair of high-impedance studio cans, plug them into your laptop, and they sound thin, tinny, and quiet. This usually isn’t a defect in the headphones; it’s an impedance and power mismatch. Understanding why your headphones sound quiet on your laptop but loud on your phone is essential for anyone moving beyond consumer-grade gear. Your laptop’s internal amplifier might lack the necessary voltage to drive those drivers properly, leaving you with a flat soundstage regardless of how well you’ve stored your cables.
The Cleaning Mistake That Could Cost You Hundreds
Here is an ‘oops’ factor I’ve seen break hearts time and again: the dusty tweeter. You see a bit of lint on that delicate silk dome and reach for the canned air. Stop right there. The reason why you should never use compressed air to clean a silk dome tweeter comes down to simple physics—the concentrated pressure can easily deform the dome or even tear the delicate fabric, permanently ruining the high-frequency response. Instead, use a very soft-bristled brush or a light puff of breath. Audio gear is surprisingly robust, but it has specific ‘soft spots’ that require a surgical touch rather than brute force. 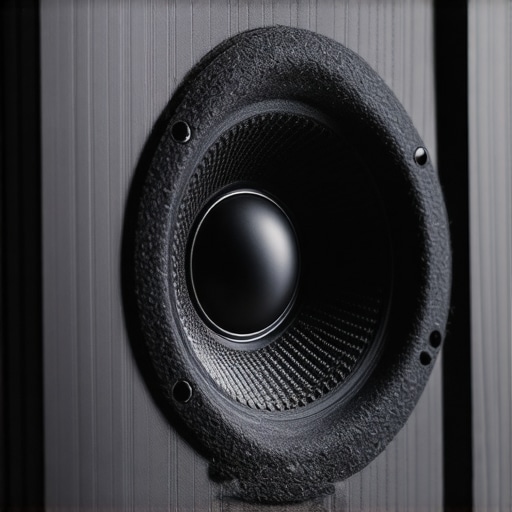
Is your floor ruining your expensive audio?
Most people blame their speakers or amp when the sound feels too ‘bright’ or ‘shrill,’ but the true culprit is often the room itself. If you have hardwood or tile floors, you are dealing with aggressive first reflections that smear the audio image. This is why you should use a rug to fix a bright-sounding room before you even think about buying new equipment. It’s a low-tech solution that provides more genuine acoustic value than a ‘premium’ power cord ever could. Have you ever fallen into this trap of buying ‘magic’ gear to fix a sound problem, only to realize it was a simple room or power issue? Let me know in the comments, because I’ve definitely been there.
I once picked up a beautiful 1970s Marantz receiver for fifty bucks at a garage sale because the owner thought it was broken. Every time he turned the volume up, the speakers emitted a sound like gravel in a blender. It wasn’t a blown capacitor; it was just forty years of dust and oxidation on the internal contacts. Learning how to fix a scratchy volume knob on an old amp is a rite of passage for any budget audiophile. Most people assume their gear is dying when, in reality, it just needs a five-minute cleaning. I swear by DeoxIT D5—it is the industry standard for a reason. Professionals at companies like Pass Labs have long emphasized that keeping signal paths clean is more important than buying the most expensive cables on the market.
Don’t let a dusty knob ruin your vintage receiver
If you have an old mixer or an EQ with sliding controls, you will eventually face the dreaded ‘stutter.’ This happens when the carbon track inside the fader gets gunked up with skin oils and household dust. Instead of tossing the unit, you can learn how to fix a scratchy fader on a vintage audio mixer using specialized fader lube. Unlike standard contact cleaners, fader lube replaces the dampening grease that makes those sliders feel smooth. If you use the wrong spray, you might fix the noise but end up with a fader that feels like it’s scraping against sandpaper. It is all about using the right tool for the specific job.
How do I maintain my high-end audio gear over time?
Consistency is key when it comes to longevity. I make it a habit to do a ‘connection audit’ twice a year. I unplug every RCA and speaker cable, wipe the tips, and plug them back in. This friction actually helps clear away minor oxidation. While you are back there, you should also check how to tell if your speaker capacitors are starting to leak. If you see any bulging or crusty residue on those internal components, that is a ticking time bomb for your audio quality. Catching these issues early is the difference between a cheap repair and a total system failure. 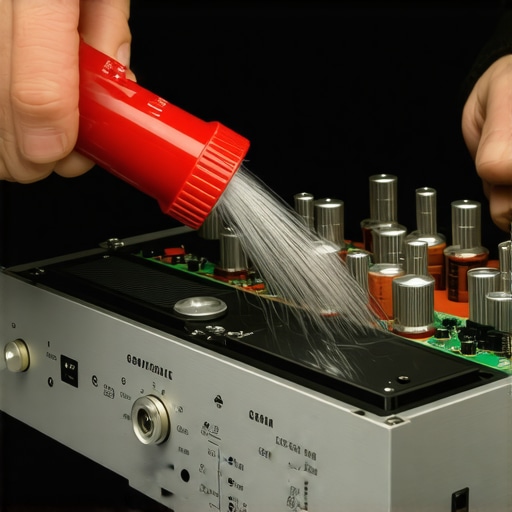
Finding that annoying hum without losing your mind
Nothing kills the mood faster than a 60Hz hum vibrating through your subwoofer. Most people panic and think their amp is failing, but nine times out of ten, it’s a ground loop. I spent three hours last weekend tracing a hum in my home theater only to realize it was my cable box fighting with my subwoofer’s power supply. Knowing how to find the source of a ground loop in home theater is a superpower. I recommend the ‘process of elimination’ method: unplug everything except the amp and speakers, then add components back one by one until the hum returns. It’s tedious, but it’s the only way to be sure.
The three tools every audio geek needs in their drawer
You don’t need a full lab, but there are three things I never go without: a can of compressed air (for everything *except* tweeters!), a quality contact cleaner, and a basic multimeter. Being able how to use a multimeter to find a short in your speaker wires has saved me hundreds of dollars in unnecessary cable replacements. Looking forward, I predict we are going to see a massive shift back toward repairable, modular audio gear. As consumers get tired of ‘disposable’ Bluetooth tech, the value of vintage, serviceable analog equipment is skyrocketing. My advice? Grab a multimeter and start practicing on some thrift store finds today—you’ll be amazed at what you can revive with just a little patience and the right technique.
Lessons from a Decade of Tangled Messes and Blown Drivers
After years of repairing what I accidentally broke, I’ve realized that audio maintenance isn’t about being a perfectionist—it’s about being a realist. Here are a few things that changed the game for me:
- The One-Second Rule is a lie: If you think you’re saving time by stuffing a cord into your bag just this once, you aren’t. You’re actually spending five minutes later untangling it and potentially hours searching for how to identify a fake pair of premium headphones because you have to replace your broken ones.
- Heat is a silent killer: Just like cables get brittle, internal components fail when they can’t breathe. If you have a stack of gear, ensure there is airflow; otherwise, you might soon be looking for how to fix channel imbalance on a vintage stereo amplifier caused by heat-stressed capacitors.
- Sound quality starts at the jack: We focus so much on the drivers, but a dirty connection is the most common reason why your laptop speakers sound tinny and how to fix it. Always keep those connectors polished.
Tools That Saved My Audio Life
If you want to move beyond surviving your gear and start thriving with it, these are the few items I keep within arm’s reach. I trust them because they’ve literally pulled my systems back from the brink of the trash bin.
First, a basic digital multimeter. It’s the only way to know if a cable is actually dead or if the problem lies deeper in the circuitry. Second, DeoxIT D5; it’s expensive for a spray, but it works miracles on scratchy pots. Lastly, I highly recommend the Master Handbook of Acoustics by F. Alton Everest. It taught me that my room is a component of my sound system, just like my speakers are. Before you buy new gear, learn how to clean your speaker cones without ruining the paper to maintain what you already own.
Your Audio Gear Deserves a Long Life
Taking care of your equipment isn’t just about saving money; it’s about respecting the art of sound. When you take those extra thirty seconds to perform a proper Roadie Wrap, you’re ensuring that the next time you sit down to listen, the gear will actually work. These small habits—from avoiding pocket physics to keeping your connectors clean—add up to a lifetime of high-fidelity enjoyment. Don’t wait until something snaps to start caring for your setup.
Have you ever had a cable or a piece of gear fail at the worst possible moment because of a storage mistake? Let me know in the comments below!