
I was cruising down the highway last Tuesday, the kind of night where you just want to sink into the driver’s seat and let the music take over. I hit the first bridge on the interstate, the bass kicked in, and my rear deck started screaming. It wasn’t a musical scream; it was a rhythmic, plastic-on-metal vibration that made my high-end speakers sound like they were bought at a garage sale for five bucks. It’s infuriating. You spend all this time trying to balance your car audio for the drivers seat, only to have a loose trim piece mock your hard work. I knew right then I couldn’t live with it another day.
That Buzzing Sound Is Killing Your Vibe
We’ve all been there. You think you’ve finally dialed in the perfect system, but the car’s interior just can’t keep up. The rear deck—that flat shelf where your rear speakers live—is notoriously flimsy in most sedans. When those speakers move, they push air, but they also transfer energy directly into the surrounding plastic and sheet metal. I used to make the mistake of thinking I needed a whole new enclosure or a professional shop visit. I actually once tried to jam old gym socks into the gaps as a quick fix, which was a total failure and probably a fire hazard! Today, I’m going to show you how to stop your car’s rear deck from rattling when the sub hits using a method that costs less than a pizza and takes about ten minutes. We are going to isolate the vibrating surfaces and finally get that crisp, clean low end you actually paid for.
Is This Cheap Fix Just a Temporary Band-Aid?
I know what you’re thinking. You’re worried that if you don’t spend hundreds on professional-grade damping and tear out your entire interior, the rattle will just come back next month. I felt the same way until I realized that most rattles are caused by very specific touch points where plastic meets metal. According to technical research on automotive Noise, Vibration, and Harshness (NVH), localized damping is often more effective at stopping high-frequency rattles than mass-loading an entire panel. By targeting the source, you aren’t just masking the problem; you’re killing it at the root. Be honest: have you ever had to pull over just to shove a piece of cardboard into a gap to stop a noise?
Why Your Factory Rear Deck Simply Wasn’t Built for Bass
Car manufacturers are obsessed with weight reduction and cost. That means your rear deck is likely a thin sandwich of fiberboard, cheap carpet, and a few plastic clips. When you upgrade your audio, you’re asking that flimsy shelf to handle ten times the energy it was designed for. It’s no wonder it complains. It is very similar to why your door speakers sound better after adding sound deadening; you have to treat the environment to let the speaker do its job. I’ve found that applying a stop your car trunk from rattling with this cheap foam trick to the contact points of the deck can make a night-and-day difference in clarity.
Hunt Down the Vibrating Culprits
Finding a rattle is like trying to catch a fly in a dark room; you have to follow the sound. To start, you need a controlled environment. I use a frequency generator app on my phone to run a sine wave sweep from 20Hz up to about 100Hz. This mimics the low-end pressure of a subwoofer without the distraction of lyrics or changing beats. I remember doing this on my old sedan and realizing that what I thought was a blown speaker was actually just a loose plastic clip holding the third brake light. While you are back there inspecting the hardware, it is also a good time to check for other issues, such as why your car speakers pop when you turn the engine on, which could indicate a grounding problem rather than a mechanical rattle.
Use the Sine Wave Sweep Method
Once the tone hits the resonant frequency of your rear deck, the vibration will become loud and clear. Gently press your hand down on different areas of the rear shelf. When the buzzing stops, you’ve found a contact point. Common offenders include the plastic trim around the speakers, the child seat anchors, and the gap where the deck meets the rear window glass. This diagnostic phase is essential because it prevents you from wasting material on parts of the car that aren’t actually making noise.
Seal the Gaps with High-Density Foam
The secret weapon for this job is 1/2-inch adhesive-backed weatherstripping foam. It is cheap, compressible, and incredibly effective at absorbing mechanical energy. Think of it as a shock absorber for your interior panels. You want to create a ‘tension fit’ between the vibrating plastic and the metal frame of the car. This approach is very similar to the simple way to fix a rattling metal speaker grill because both solutions rely on eliminating the ‘play’ between two surfaces. If you find the noise is coming from deeper in the trunk, you might also need to look into a stop your car trunk from rattling with this cheap foam trick to fully quiet the rear end.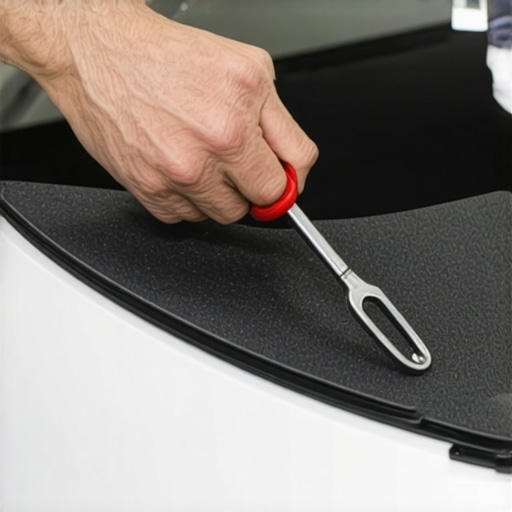
Wedge the Trim Without Breaking Clips
Carefully pry up the edge of the rear deck using a plastic trim tool. You don’t need to remove the whole assembly—just create enough space to slide a strip of foam into the gap. I once made the mistake of using a flathead screwdriver and ended up scarring the plastic and snapping three clips. Don’t be that guy. Apply the foam to the metal side so the adhesive stays hidden. While you have the panel slightly lifted, take a second to look at your wiring. If you see loose harnesses, use some zip ties or electrical tape to secure them. It is helpful to follow the best way to label your messy home theater cables logic even in a car; keeping things organized prevents future rattles from wires slapping against the deck. If you notice any frayed wires while you are in there, you may need to how to use a multimeter to find a short in your speaker wires to ensure your signal path is clean before you button everything back up. After the foam is in place, press the panel back down firmly. The rattle should be gone, leaving you with nothing but pure, undistorted bass.Now that we’ve silenced the physical groans of your car’s interior, we need to address the ‘Power Trap’ that catches even seasoned audiophiles. Most people assume that if their system sounds muddy or lacks punch, they just need a bigger amplifier. I’ve seen guys dump a thousand dollars into a high-current mono-block only to find their music still feels ‘congested.’ The truth is, doubling your wattage only grants you a measly 3dB increase in volume—hardly a transformation. In my experience, you’re far better off focusing on the efficiency of your setup. If you aren’t careful, you’ll end up wondering why your car amp is overheating during long summer drives because it’s fighting against poor impedance matching rather than delivering clean signal.
Why More Watts Usually Just Means More Heat
Everyone tells you to buy the biggest amp you can afford, but I disagree. A high-wattage amp driving a speaker in a vibrating, non-deadened environment is just a recipe for thermal failure. You’re asking the equipment to overcome physical obstacles with brute force. Before you upgrade your power, check your existing signals. I’ve solved ‘weak’ bass issues dozens of times simply by using the easy way to test if your speakers are out of phase. If one speaker is pushing while the other is pulling, they cancel each other out, and no amount of wattage will fix that hollow sound. 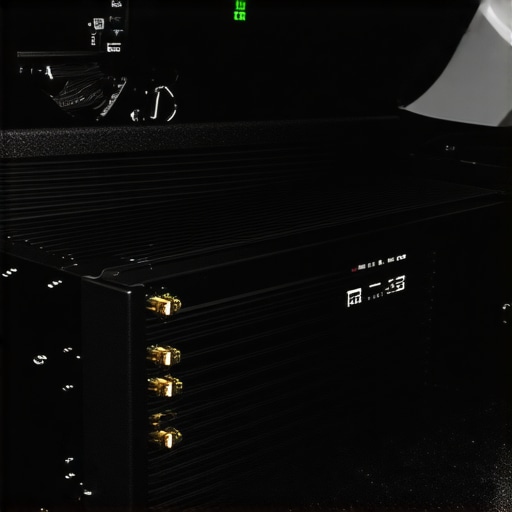
Does Your Speaker Really Need a Break-in Period?
This is one of the most heated debates in the audio world. You’ll hear people swear that you need to play pink noise for 40 hours before a speaker sounds ‘right.’ While it is true that the mechanical compliance of the spider and surround changes slightly when first used, research from experts like Dr. Floyd Toole in the Journal of the Audio Engineering Society suggests that these mechanical changes happen within seconds or minutes, not weeks. Often, what you are actually experiencing is ‘brain break-in’—your ears simply getting used to the new frequency response. That said, there is some value in knowing why your new speakers sound better after 20 hours of use, even if most of that ‘improvement’ is just your psyche adapting to the new sound signature.
The Phase Trap That Destroys Your Low End
The biggest ‘oops’ factor I see in DIY car audio isn’t poor gear; it’s poor installation logic. If you’ve silenced the rattles but the bass still feels like it’s coming from ‘nowhere,’ you might have a phase alignment issue. When speakers are out of sync, the waves literally eat each other. This is especially common when people start mixing and matching brands. Always ensure your polarity is consistent across all channels. Also, keep an eye on your temperatures; knowing how to tell if your amp is running too hot can save you from a permanent hardware failure. Have you ever fallen into the trap of buying more power instead of fixing your acoustics? Let me know in the comments.Once you have sorted out the phase and the physical rattles, the real work begins—keeping it that way. I’ve seen too many systems sound incredible for three months and then slowly descend into a fuzzy, distorted mess because the owner treated it like a ‘set and forget’ appliance. Car audio, especially, is a hostile environment. You have vibration, extreme temperature swings, and humidity all fighting your gear. The first thing I do every six months is a ‘connector audit.’ You would be shocked at how much grime builds up on your terminals. I personally swear by DeoxIT Gold, but you need to be careful; you have to know how to clean gold-plated connectors without ruining the finish or you’ll actually increase resistance rather than lowering it. A clean signal path is the difference between a system that pops and one that just hums along perfectly.
The Three Tools I Never Travel Without
If you’re serious about this hobby, you need more than just a screwdriver. My ‘holy trinity’ of tools includes a high-quality digital multimeter, a set of non-marring trim tools, and a small bottle of rubber glue. Why the glue? Because heat and high-excursion subs are brutal on surrounds. I’ve saved high-end drivers by knowing how to repair a tear in your speaker surround with rubber glue before the tiny rip turned into a total cone failure. It’s a five-minute fix that saves you a $200 replacement bill. While you’re at it, periodically check your physical connections at the box. Knowing how to fix a loose speaker terminal on your cabinet is a basic skill that prevents that annoying intermittent ‘cutting out’ during a heavy bass drop. 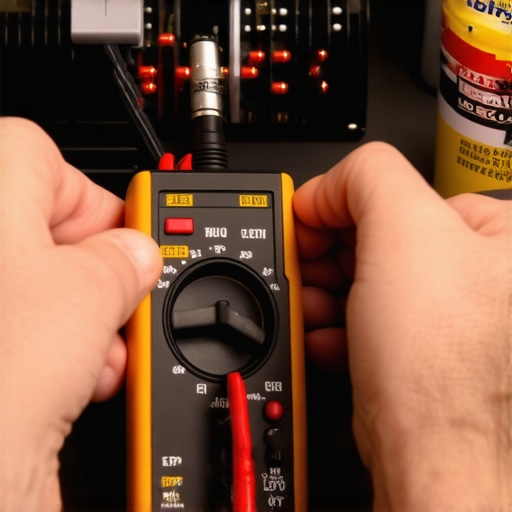
How do I maintain my amplifier’s health over several years?
Amplifier health really boils down to two things: heat management and capacitor integrity. Electrolytic capacitors are essentially tiny chemical batteries, and they have a shelf life. According to technical documentation from Rubycon on the ‘Service Life of Electrolytic Capacitors,’ every 10°C increase in operating temperature can actually halve the life of the component. This is why I obsess over airflow. If your amp is buried under a seat or tucked behind a carpeted panel, it’s a ticking time bomb. You should learn how to tell if your amps capacitors are failing—look for bulging tops or a slight fishy smell—long before the unit refuses to turn on.
Software Is Coming for Your Physical Foam
Looking at the horizon, the ‘future’ of car audio isn’t just better magnets or stiffer cones. It’s Digital Signal Processing (DSP). We are moving toward a world where we won’t need as much physical sound deadening because active noise cancellation and advanced EQ algorithms will ‘tune out’ the resonant frequencies of the car’s interior in real-time. We are already seeing this in luxury EVs. However, until that tech becomes affordable for the average DIYer, we rely on the old-school methods. My challenge to you: don’t just wait for something to break. Grab a multimeter this weekend and check your battery voltage at the amp terminals while the system is under load. If you see a drop of more than 0.5V, your wiring is the bottleneck, not your equipment.
What Nobody Tells You About Chasing In-Car Vibrations
After years of tearing apart trunks and prying up deck lids, I’ve learned that perfection is a moving target. The most important lesson is that sound behaves differently in the winter than in the summer. Cold plastic becomes brittle and more prone to snapping, while summer heat can soften the adhesives on your foam. Always do your final checks on a temperate day to ensure the ‘tension fit’ holds year-round. Also, never underestimate the power of a single loose screw; sometimes less tension is better than more to avoid warping the panel.
Another lightbulb moment for me was realizing that physical rattles can mask electrical noise. If you’ve silenced the deck but still hear a faint ‘tick,’ you might actually be dealing with a grounding issue. I always keep a multimeter handy to use a multimeter to find a short in your speaker wires before I blame the trim panels again. It’s about being methodical, not just loud.
My Personal Go-To Gear for Interior Silence
#IMAGE_PLACE_HOLDER_E#
If you want to move beyond the ‘pizza-budget’ fixes and build a real technician’s kit, here are the three things I never leave out of my garage:
- A Digital Multimeter: Essential for checking signal integrity and battery health. I use it to see if my car audio system drains the battery while the engine is off, which is a common silent killer of high-end setups.
- DeoxIT Gold: This is the industry standard for connections. Learning how to clean gold-plated connectors without ruining the finish ensures that the path from your amp to your speakers stays pristine for years.
- Industrial-Grade Rubber Glue: I’ve used this to save expensive drivers from the trash heap. It’s surprisingly easy to repair a tear in your speaker surround with rubber glue if you catch the damage early enough.
The Road Ahead Sounds Much Better Now
There is a specific kind of peace that comes when you hit that first deep note on the highway and the only thing you hear is the music. By taking the time to stop your car’s rear deck from rattling when the sub hits, you’ve done more than just fix a noise; you’ve reclaimed your driving experience. Don’t be afraid to keep tweaking and listening. Car audio is a journey, and every small adjustment brings you closer to that ‘perfect’ front-row seat sound.
Have you ever found a rattle in the most unexpected place, like inside a seatbelt tensioner or a sunglasses holder? Let me know your most frustrating noise-hunt story in the comments below!