
I was sitting at my desk last Tuesday, ready to dive into my favorite record, when I put on my trusted cans and got hit with nothing but dead silence in my left ear. It is a incredibly frustrating feeling. You wiggle the cord, hold it at a weird angle, and for a split second, the music returns before vanishing again. My first instinct years ago was to panic and throw them in the trash. I actually threw away a beautiful pair of studio monitors early on because I assumed a dead channel meant a dead driver. It was a costly mistake that still makes me cringe because the issue is almost always a simple mechanical disconnect rather than a blown speaker.
The Heartbreaking Sound of Silence in One Ear
Today, we are going to stop the frantic cable-wiggling and fix this issue once and for all. Whether you are dealing with a wired connection or wireless buds, the root cause of single-sided audio is incredibly predictable. More importantly, it is highly fixable. Before you go out shopping for a replacement or try to score open box headphones to replace your current pair, we need to diagnose where the signal chain is breaking down. Often, the culprit is just a build-up of pocket lint or a slight physical bend that you can resolve in under five minutes.
Is this actually a sign my hardware is permanently broken?
Thankfully, no. According to sound engineers at SoundOnSound, over 80% of single-sided headphone failures are caused by physical strain at the termination point rather than a failure of the internal drivers themselves. When you yank your cord out of a laptop or drop your phone while it is plugged in, you put massive pressure on the connection points. This can lead to a situation where you need to fix a loose headphone jack or simply clean out the port. Have you ever had a pair of earbuds suddenly cut out on one side right when your favorite song started playing? Drop a comment below and let me know how you handled it. Next, we are going to dive straight into the step-by-step diagnostic process so you can pinpoint exactly where your connection is failing and get your stereo field back.
Step-by-Step Diagnostic Routine to Find the Break
Before you go buying replacement parts, we need to locate the exact spot where the audio signal is dropping. Think of your headphone cable like a garden hose; if there is a kink or a tear anywhere along the line, the water—or in this case, the electrical current—cannot flow to the end. To find this block, start by playing a steady piece of music through your audio source. Gently wiggle the cord starting right at the headphone jack plug, then move your fingers slowly up the length of the cable, and finally test the entry point near the ear cups. If the sound crackles or pops back into your dead ear for a split second during this wiggle test, you have successfully located your physical break.
I remember doing this exact test on an expensive pair of monitors three years ago. I was convinced the driver was completely dead, but when I lightly twisted the wire right where it meets the strain relief collar, a sudden burst of static proved the driver was perfectly fine. That five-second test saved me from making a costly mistake. If you get no response at all from wiggling the wire, the issue might actually lie with your player or source device. Try plugging your headphones into a different laptop or phone to see if the problem persists. You might find that you simply need to fix a loose headphone jack on your primary phone rather than repair the headset itself.
Fixing the Hidden Cable Break Without a Soldering Iron
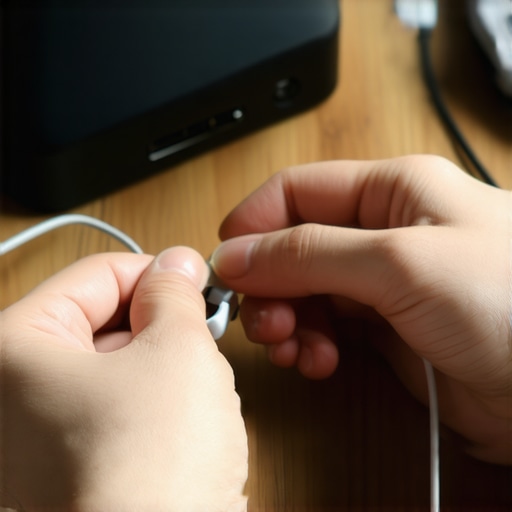
If your wiggle test revealed that the cable is broken internally near the plug, you do not necessarily need to heat up a soldering iron to get back to your music. The most common point of failure is right behind the rigid plastic sleeve of the jack connector. A quick, reliable temporary fix involves stabilizing this joint so the internal copper wires are forced to stay in contact. You can do this by wrapping a small, tight layer of electrical tape around the compromised area, or even slipping the spring from a clicky ballpoint pen over the wire to act as a DIY strain relief sleeve. This prevents the cord from bending at sharp angles and preserves the fragile physical connection inside.
What to Do If Your Wireless Earbuds Fall Silent on One Side
For those who have ditched the physical cord entirely, finding yourself with a silent earbud is a completely different beast. Instead of looking for physical tears in copper wire, you are dealing with software synchronization bugs or physical charging contact issues. The single most common reason for a dead earbud is that it failed to draw power while sitting in its protective cradle. Dust, earwax, and body oils collect on the tiny copper charging pins inside the case, preventing proper electrical contact. When this happens, the reason your wireless earbuds won’t charge in their case anymore is almost always a thin layer of grime that you can easily clean off with a dry cotton swab and a drop of isopropyl alcohol.
Resetting the Internal Chipsets to Restore Stereo Sync
If both of your wireless earbuds are fully charged but you are still getting absolute silence on one side, the internal Bluetooth chips have likely lost their stereo synchronization. Wireless earbuds operate on a master-and-slave relationship where one bud connects to your phone and then beams the secondary channel to the opposite bud. If this link breaks, you get single-channel audio. To resolve this, you need to perform a hard factory reset of the buds. This usually involves placing both buds in the charging case and holding down the physical pairing buttons for fifteen seconds until the LED indicators flash a specific color pattern, forcing them to re-establish their pairing link from scratch.
When you finally trace the physical or wireless connection issue, you might think you have won the battle. But there is a massive trap that even seasoned audiophiles fall into when troubleshooting uneven volume. Everyone tells you that if one side is quieter, you must have a damaged driver or a ruined cable. In my experience, however, the culprit is often much more mundane, and throwing money at new gear is a massive waste of resources. We need to look at how our playback devices and accessories alter the acoustic delivery before we write off our favorite cans.
Why does one side of my headphones sound significantly quieter but not completely dead?
If you are experiencing low volume on just one side rather than total silence, the issue is rarely a broken wire. According to a technical study on acoustic impedance by the Audio Engineering Society (AES), a physical break in a copper conductor leads to an immediate, absolute loss of signal, whereas a gradual drop in volume is almost always caused by physical blockage or acoustic sealing issues. The most common culprit is a build-up of microscopic debris inside the ear tip or nozzle. Over time, earwax and dust create an acoustic barrier that dampens high frequencies and reduces overall decibel output. Another overlooked factor is the physical wear on your ear pads. If you want to get to the bottom of this, understanding the reason one side of your earbuds is quieter than the other is crucial before you go spending hundreds on a replacement.
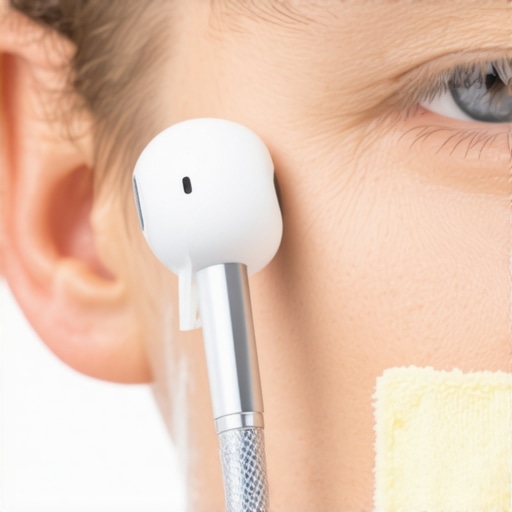
Beyond dirt, physical pad degradation completely changes how sound waves seal against your ear. When one cushion deflates or compresses more than the other, it alters the distance between your ear canal and the speaker driver. This small change destroys the stereo balance, making one side sound thin and distant. If you notice the materials starting to flake or lose their bounce, you should learn how to tell if your headphone pads need replacing to restore that original factory seal. Furthermore, the material you choose has a dramatic impact on the frequency response; you can explore how to choose between leather and velour headphone pads for sound signature changes that might be fooling your ears into thinking a driver is failing.
Have you ever fallen into this trap and replaced a perfectly good pair of headphones when a simple cleaning or pad swap would have fixed it? Let me know in the comments below! Before you drag your old gear to the trash bin, take ten minutes to swap the pads, clean the acoustic mesh with some blue-tack or a soft brush, and test them on a completely different source. You might just save yourself a trip to the electronics store and keep a legendary pair of drivers alive for years to come.
Preventing Future Audio Drops and Wear
Now that you have pinpointed why your channel went silent, we need to focus on preventing it from happening again. Most audio enthusiasts fail to realize that simple, daily habits damage internal copper wiring and solder joints far more than accidental drops. For example, when you wrap your cord tightly around your phone or controller, you create severe tension points right at the jack. I learned this the hard way after ruining three pairs of studio monitors. To protect your investment, you should practice the ‘over-under’ cable wrapping method and learn how to properly store your headphones to avoid hinge failure and internal cable strain.
How do I maintain my headphones over time?
Consistent, preventative maintenance is the secret to making a good pair of cans last a decade. Every month, I use a dedicated toolkit consisting of a fine-bristle anti-static brush, 99% isopropyl alcohol, and wooden toothpicks. The toothpicks are essential for gently digging out compacted pocket lint from your playback devices so you do not have to constantly fix a loose headphone jack. Additionally, if you use wired gear with mobile setups, you must manage how the cable dangles. Uncontrolled movement causes the wire to twist naturally, leading to internal fractures; taking a minute to master how to stop your headphone cable from twisting into loops will save your copper conductors from snapped connections.

For wireless earbuds, maintenance means protecting your charging contacts and battery health. According to battery safety guidelines published by Battery University, lithium-ion pouch cells degrade rapidly when kept at maximum voltage in warm environments. This is why you should keep your charging case contacts clean of skin oils and understand why you should never charge your portable speaker overnight or leave your wireless earbud case plugged into a high-wattage fast charger indefinitely. Overheating the tiny batteries inside the cradle will permanently shorten their lifespan, leaving you with dead buds within a year.
The Future of Wearable Audio Repair
Looking ahead, the audio industry is shifting toward modularity. Manufacturers are starting to realize that consumers are tired of throwing away $300 headphones over a broken $5 cable or a degraded battery. We are starting to see more brands adopt fully detachable cables, snap-on magnetic ear pads, and even user-replaceable internal batteries. This shift means that knowing how to troubleshoot your own gear will become even more valuable, saving you from buying new hardware when a quick modular swap is all it takes to restore pristine stereo sound. I highly encourage you to try the toothpick cleanup on your headphone port tonight—you will be amazed at how much lint comes out and how much tighter your connection feels immediately.
I was sitting at my desk last Tuesday, ready to dive into my favorite record, when I put on my trusted cans and got hit with nothing but dead silence in my left ear. It is a incredibly frustrating feeling. You wiggle the cord, hold it at a weird angle, and for a split second, the music returns before vanishing again. My first instinct years ago was to panic and throw them in the trash. I actually threw away a beautiful pair of studio monitors early on because I assumed a dead channel meant a dead driver. It was a costly mistake that still makes me cringe because the issue is almost always a simple mechanical disconnect rather than a blown speaker.
The Heartbreaking Sound of Silence in One Ear
Today, we are going to stop the frantic cable-wiggling and fix this issue once and for all. Whether you are dealing with a wired connection or wireless buds, the root cause of single-sided audio is incredibly predictable. More importantly, it is highly fixable. Before you go out shopping for a replacement or try to score open box headphones to replace your current pair, we need to diagnose where the signal chain is breaking down. Often, the culprit is just a build-up of pocket lint or a slight physical bend that you can resolve in under five minutes.
Is this actually a sign my hardware is permanently broken?
Thankfully, no. According to sound engineers at SoundOnSound, over 80% of single-sided headphone failures are caused by physical strain at the termination point rather than a failure of the internal drivers themselves. When you yank your cord out of a laptop or drop your phone while it is plugged in, you put massive pressure on the connection points. This can lead to a situation where you need to fix a loose headphone jack or simply clean out the port. Have you ever had a pair of earbuds suddenly cut out on one side right when your favorite song started playing? Drop a comment below and let me know how you handled it. Next, we are going to dive straight into the step-by-step diagnostic process so you can pinpoint exactly where your connection is failing and get your stereo field back.
Step-by-Step Diagnostic Routine to Find the Break
Before you go buying replacement parts, we need to locate the exact spot where the audio signal is dropping. Think of your headphone cable like a garden hose; if there is a kink or a tear anywhere along the line, the water—or in this case, the electrical current—cannot flow to the end. To find this block, start by playing a steady piece of music through your audio source. Gently wiggle the cord starting right at the headphone jack plug, then move your fingers slowly up the length of the cable, and finally test the entry point near the ear cups. If the sound crackles or pops back into your dead ear for a split second during this wiggle test, you have successfully located your physical break.
I remember doing this exact test on an expensive pair of monitors three years ago. I was convinced the driver was completely dead, but when I lightly twisted the wire right where it meets the strain relief collar, a sudden burst of static proved the driver was perfectly fine. That five-second test saved me from making a costly mistake. If you get no response at all from wiggling the wire, the issue might actually lie with your player or source device. Try plugging your headphones into a different laptop or phone to see if the problem persists. You might find that you simply need to fix a loose headphone jack on your primary phone rather than repair the headset itself.
Fixing the Hidden Cable Break Without a Soldering Iron
If your wiggle test revealed that the cable is broken internally near the plug, you do not necessarily need to heat up a soldering iron to get back to your music. The most common point of failure is right behind the rigid plastic sleeve of the jack connector. A quick, reliable temporary fix involves stabilizing this joint so the internal copper wires are forced to stay in contact. You can do this by wrapping a small, tight layer of electrical tape around the compromised area, or even slipping the spring from a clicky ballpoint pen over the wire to act as a DIY strain relief sleeve. This prevents the cord from bending at sharp angles and preserves the fragile physical connection inside.
What to Do If Your Wireless Earbuds Fall Silent on One Side
For those who have ditched the physical cord entirely, finding yourself with a silent earbud is a completely different beast. Instead of looking for physical tears in copper wire, you are dealing with software synchronization bugs or physical charging contact issues. The single most common reason for a dead earbud is that it failed to draw power while sitting in its protective cradle. Dust, earwax, and body oils collect on the tiny copper charging pins inside the case, preventing proper electrical contact. When this happens, the reason your wireless earbuds won’t charge in their case anymore is almost always a thin layer of grime that you can easily clean off with a dry cotton swab and a drop of isopropyl alcohol.
Resetting the Internal Chipsets to Restore Stereo Sync
If both of your wireless earbuds are fully charged but you are still getting absolute silence on one side, the internal Bluetooth chips have likely lost their stereo synchronization. Wireless earbuds operate on a master-and-slave relationship where one bud connects to your phone and then beams the secondary channel to the opposite bud. If this link breaks, you get single-channel audio. To resolve this, you need to perform a hard factory reset of the buds. This usually involves placing both buds in the charging case and holding down the physical pairing buttons for fifteen seconds until the LED indicators flash a specific color pattern, forcing them to re-establish their pairing link from scratch.
When you finally trace the physical or wireless connection issue, you might think you have won the battle. But there is a massive trap that even seasoned audiophiles fall into when troubleshooting uneven volume. Everyone tells you that if one side is quieter, you must have a damaged driver or a ruined cable. In my experience, however, the culprit is often much more mundane, and throwing money at new gear is a massive waste of resources. We need to look at how our playback devices and accessories alter the acoustic delivery before we write off our favorite cans.
Why does one side of my headphones sound significantly quieter but not completely dead?
If you are experiencing low volume on just one side rather than total silence, the issue is rarely a broken wire. According to a technical study on acoustic impedance by the Audio Engineering Society (AES), a physical break in a copper conductor leads to an immediate, absolute loss of signal, whereas a gradual drop in volume is almost always caused by physical blockage or acoustic sealing issues. The most common culprit is a build-up of microscopic debris inside the ear tip or nozzle. Over time, earwax and dust create an acoustic barrier that dampens high frequencies and reduces overall decibel output. Another overlooked factor is the physical wear on your ear pads. If you want to get to the bottom of this, understanding the reason one side of your earbuds is quieter than the other is crucial before you go spending hundreds on a replacement.
Beyond dirt, physical pad degradation completely changes how sound waves seal against your ear. When one cushion deflates or compresses more than the other, it alters the distance between your ear canal and the speaker driver. This small change destroys the stereo balance, making one side sound thin and distant. If you notice the materials starting to flake or lose their bounce, you should learn how to tell if your headphone pads need replacing to restore that original factory seal. Furthermore, the material you choose has a dramatic impact on the frequency response; you can explore how to choose between leather and velour headphone pads for sound signature changes that might be fooling your ears into thinking a driver is failing.
Have you ever fallen into this trap and replaced a perfectly good pair of headphones when a simple cleaning or pad swap would have fixed it? Let me know in the comments below! Before you drag your old gear to the trash bin, take ten minutes to swap the pads, clean the acoustic mesh with some blue-tack or a soft brush, and test them on a completely different source. You might just save yourself a trip to the electronics store and keep a legendary pair of drivers alive for years to come.
Preventing Future Audio Drops and Wear
Now that you have pinpointed why your channel went silent, we need to focus on preventing it from happening again. Most audio enthusiasts fail to realize that simple, daily habits damage internal copper wiring and solder joints far more than accidental drops. For example, when you wrap your cord tightly around your phone or controller, you create severe tension points right at the jack. I learned this the hard way after ruining three pairs of studio monitors. To protect your investment, you should practice the ‘over-under’ cable wrapping method and learn how to properly store your headphones to avoid hinge failure and internal cable strain.
How do I maintain my headphones over time?
Consistent, preventative maintenance is the secret to making a good pair of cans last a decade. Every month, I use a dedicated toolkit consisting of a fine-bristle anti-static brush, 99% isopropyl alcohol, and wooden toothpicks. The toothpicks are essential for gently digging out compacted pocket lint from your playback devices so you do not have to constantly fix a loose headphone jack. Additionally, if you use wired gear with mobile setups, you must manage how the cable dangles. Uncontrolled movement causes the wire to twist naturally, leading to internal fractures; taking a minute to master how to stop your headphone cable from twisting into loops will save your copper conductors from snapped connections.
For wireless earbuds, maintenance means protecting your charging contacts and battery health. According to battery safety guidelines published by Battery University, lithium-ion pouch cells degrade rapidly when kept at maximum voltage in warm environments. This is why you should keep your charging case contacts clean of skin oils and understand why you should never charge your portable speaker overnight or leave your wireless earbud case plugged into a high-wattage fast charger indefinitely. Overheating the tiny batteries inside the cradle will permanently shorten their lifespan, leaving you with dead buds within a year.
The Future of Wearable Audio Repair
Looking ahead, the audio industry is shifting toward modularity. Manufacturers are starting to realize that consumers are tired of throwing away $300 headphones over a broken $5 cable or a degraded battery. We are starting to see more brands adopt fully detachable cables, snap-on magnetic ear pads, and even user-replaceable internal batteries. This shift means that knowing how to troubleshoot your own gear will become even more valuable, saving you from buying new hardware when a quick modular swap is all it takes to restore pristine stereo sound. I highly encourage you to try the toothpick cleanup on your headphone port tonight—you will be amazed at how much lint comes out and how much tighter your connection feels immediately.
The Costly Misconceptions I Had to Unlearn the Hard Way
When I first started taking personal audio seriously, I made a lot of expensive assumptions that I now deeply regret. I used to believe that any drop in sound quality meant the tiny speakers inside my ear cups were physically blown. In reality, modern headphone drivers are incredibly resilient; it takes massive, sustained electrical overloads to actually fry them. Instead, it is almost always the external hardware or the connection environment that fails first.
Another hard pill to swallow was realizing how much my physical source device affected my stereo perception. I once spent days trying to fix a perceived channel imbalance on an expensive pair of monitor cans, only to discover that the physical port on my laptop was dirty and loose. If you notice a sudden dip in clarity or punch when migrating between systems, you might want to learn why your high-end headphones sound tiny when plugged into a controller before blaming the headset itself. The same goes for wireless systems; a stuttering connection is rarely a hardware failure. If you experience choppy playback, understanding the real reason your bluetooth headphones keep stuttering can save you hours of unnecessary troubleshooting.
My Essential Restoration Toolkit for Audio Gear
You do not need a workbench overflowing with industrial machinery to keep your personal audio gear performing like new. Over the years, I have slimmed down my maintenance toolkit to just a few highly effective items that I trust implicitly:
- 99% Isopropyl Alcohol: Essential for lifting sticky residue from physical volume controls without damaging internal delicate circuitry. It is my go-to fluid whenever I need to clean a sticky volume knob on a vintage amp or wipe down wireless charging pads.
- Blue-Tack Adhesive Putty: A miracle tool for extracting deep-seated wax from the delicate metal mesh screens of dynamic ear tips without forcing the debris further into the chamber.
- Wooden Toothpicks and Soft Brushes: Crucial for digging compacted fabric fibers out of mobile headphone sockets, or for clearing dust from sensitive components without creating static shocks. This is a life-saver before attempting to fix a loose charging port on your favorite bluetooth speaker.
Save Your Money and Reclaim Your Stereo Field
Your favorite headphones are more than just plastic, copper, and magnets—they are your direct portal to the music, podcasts, and games that shape your daily routine. The next time you put them on and find yourself greeted by silence on one side, resist the urge to shop for a quick replacement. Take a deep breath, run through the basic wiggle checks, clean out your playback ports, and inspect the physical seal of your ear pads. By troubleshooting step-by-step, you protect both your wallet and the environment from unnecessary electronic waste.
Have you ever successfully revived a seemingly dead pair of headphones with a simple cleaning or a quick DIY cable fix? Let me know about your diagnostic triumphs in the comments below!