
I remember standing in the middle of a big-box electronics store, staring at a sleek, $500 soundbar that promised ‘integrated deep bass.’ No extra boxes, no messy wires across the floor, just one beautiful slab of plastic and mesh. I bought the marketing hook, line, and sinker. I took it home, fired up an action sequence, and felt… nothing. My ‘premium’ audio upgrade sounded like a slightly louder version of my TV speakers. It was a hollow, thin experience that left me wondering where the cinematic magic had gone. That day, I learned a hard lesson that I want to save you from today: physics doesn’t care about your minimalist aesthetic. If you want sound that you can actually feel in your chest, you simply cannot skip the dedicated subwoofer. Today, we are going to dive into why those ‘all-in-one’ solutions almost always fail and how adding a separate sub fixes the most common audio frustrations.
Stop Believing the Marketing Lies About Integrated Bass
I made the mistake of thinking technology had somehow bypassed the laws of nature. It hasn’t. Most soundbars are only about two or three inches deep. To create low-frequency sounds—the kind that make explosions rumble and bass guitars growl—you need to move a massive amount of air. Tiny drivers inside a slim bar just aren’t physically capable of that displacement. When a bar tries to do everything, it usually results in the truth about why your soundbar dialogue is still muddy because the small speakers are struggling to play deep notes and clear voices at the same time. I spent weeks tweaking settings, convinced I could fix it with software, but you can’t EQ your way out of a hardware deficit. This is especially noticeable if your soundbar sounds thin in a room with high ceilings, where the sound just gets lost in the ether.
Can a single bar really do it all?
The short answer is no. While some high-end bars use ‘passive radiators’ to simulate bass, they lack the ‘oomph’ of a dedicated power source. According to research on acoustic physics, low-frequency sound waves at 20Hz are approximately 56 feet long; trying to produce that wave from a 2-inch driver is like trying to fan a campfire with a postage stamp. Without a dedicated cabinet and a massive magnet to move that air, you’re only getting half the story of your favorite movies. Have you ever felt like your ‘high-end’ soundbar was still missing that ‘wow’ factor despite the price tag? You aren’t alone, and it’s likely because that separate black box on the floor is missing.
Find the Sweet Spot with the Subwoofer Crawl
I used to think that as long as the subwoofer was on the floor, it was doing its job. I tucked my first one behind an armchair because it was ugly, and for months, the bass sounded like a dull thud happening in another room. The ‘Subwoofer Crawl’ is the industry secret to fixing this. You place the subwoofer exactly where you usually sit—right on the couch—play a bass-heavy track, and then literally crawl around the room on your hands and knees. Where the bass sounds the tightest and cleanest to your ears is where the subwoofer should live. Think of your room like a giant musical instrument; the walls reflect sound, and in some spots, those reflections kill the bass while in others, they double it up. By putting the sub on your seat and crawling, you are essentially swapping places with the speaker to find the peak performance zone. The mistake you’re making when positioning your subwoofer is often just putting it where it looks best, not where it sounds best. 
Set Your Crossover and Stop the Mud
Once the box is in place, you need to tell your soundbar when to stop trying to play bass. This is called the crossover frequency. It is like a kitchen where the chef is trying to chop vegetables while also taking out the heavy trash. He is going to be slow and messy. When you add a dedicated person to handle the heavy lifting, the chef can focus on precision. If your soundbar is trying to play 60Hz while the subwoofer is also playing 60Hz, they overlap and create a boomy, messy ‘hump’ in the sound. For most setups, setting this to 80Hz is the magic number. It acts like a perfect hand-off in a relay race. If you have tiny speakers, you might need to adjust the best crossover frequency for small satellite home theater speakers to be a bit higher, around 100Hz or 120Hz, to prevent them from distorting under the pressure of low notes.
Sync the Timing So Bass Hits the Right Way
Have you ever noticed that sometimes the bass feels like it is slightly ‘behind’ the rest of the music? This is a phase issue. Because sound waves take time to travel, and because your sub and bar are at different distances from your ears, the waves can actually cancel each other out, leaving you with a thin sound despite having a massive driver. Most subwoofers have a ‘Phase’ switch, usually toggling between 0 and 180 degrees. While sitting in your main chair, have someone flip it back and forth; whichever position sounds louder and punchier is the correct one for your specific room geometry. Learning how to match your subwoofer phase with your main speakers ensures the air is pushing toward you at the exact same moment across the entire frequency range.
Physical Cables Fix the Wireless Headache
Modern subs often connect via Bluetooth or 2.4GHz wireless, which is great for a minimalist look but can be a nightmare for reliability. I once missed the entire climactic explosion in a movie because my neighbor’s router or my own microwave interfered with the signal right at the peak moment. If your sub supports it, use a dedicated RCA cable. It eliminates digital lag and ensures why your wireless sub keeps disconnecting from the soundbar never becomes a frustration during your Friday night movie marathon. A physical connection is the only way to guarantee that the signal remains uncompressed and instantaneous.While we are on the subject of hardware, let’s tackle the biggest myth in the industry: that you need one massive, room-shaking subwoofer to get the best experience. I used to believe this until I actually measured my room’s response with a calibrated microphone. I found that no matter where I put a single 15-inch driver, I had ‘dead zones’ where the bass completely vanished. This is why why two small subwoofers are better than one massive driver. Two smaller subs can be placed strategically to cancel out those pesky room modes, providing a smooth, even response for every seat on the couch rather than just one sweet spot. Research conducted by audio legend Dr. Floyd Toole at Harman International has shown that multiple subwoofers can significantly reduce the variation in bass response across different listening positions.
Give Your Floorstanding Speakers Room to Breathe
Another trap I see people fall into is the ‘aesthetic’ placement mistake. They buy beautiful towers and shove them right into the corners to keep the room looking tidy. This is a recipe for boomy, indistinct sound that lacks any real definition. I learned the hard way that why your floorstanding speakers need more breathing room from the wall is a matter of physics, not just a suggestion. When speakers are too close to boundaries, the low-frequency energy reflects back and interferes with the direct sound, creating a ‘muddy’ hump in the lower-midrange. If your room still sounds a bit too sharp or aggressive after moving them, learning how to use a rug to stop your speakers from sounding harsh is one of the most effective ‘analog’ fixes you can implement to tame those high-frequency floor reflections. 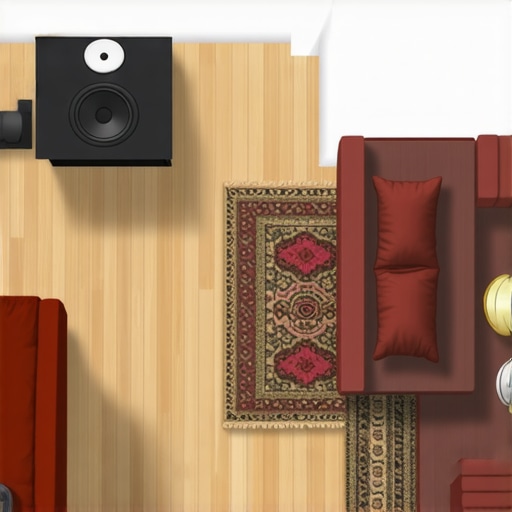
Does the ‘break-in’ period actually change the sound quality?
This is the ultimate debate among audiophiles that often confuses newcomers. Some swear their speakers only started singing after 100 hours of constant use, while others call it pure placebo. The truth about speaker break-in periods is actually found in the mechanical suspension (the spider and surround) of the driver. While there is a measurable change in a speaker’s resonant frequency as the materials loosen up during the first few hours of use, the difference is often so subtle that our brains ‘break in’ to the new sound signature much faster than the hardware actually changes. Most modern manufacturers pre-test drivers, meaning the most significant mechanical shifts have often already occurred before you even open the box. Don’t let a salesperson convince you that a bad-sounding speaker will magically become amazing after a month of ‘burning in.’ It should sound 95% of its best right out of the box. Have you ever fallen into this trap or noticed a massive shift in sound after a few weeks? Let me know in the comments.
Protect Your Gear From Stealthy Signal Killers
I’ve spent thousands on equipment only to have a fifty-cent piece of copper wire ruin the entire experience. Once, I spent an entire Saturday morning trying to figure out why my left channel sounded ‘crunchy,’ only to realize a single stray strand of wire was touching the chassis. This is why I always keep a multimeter in my drawer. Learning how to use a multimeter to find a short in your speaker wires isn’t just for engineers; it’s the only way to prove your cables aren’t bleeding signal into the void. If you’re running older gear, you also need to keep an eye on the internals. I’ve seen beautiful vintage amps destroyed because someone didn’t know how to tell if your speaker capacitors are starting to leak. Catching a bulging cap early costs a few dollars; waiting until it pops can cost you the whole motherboard. 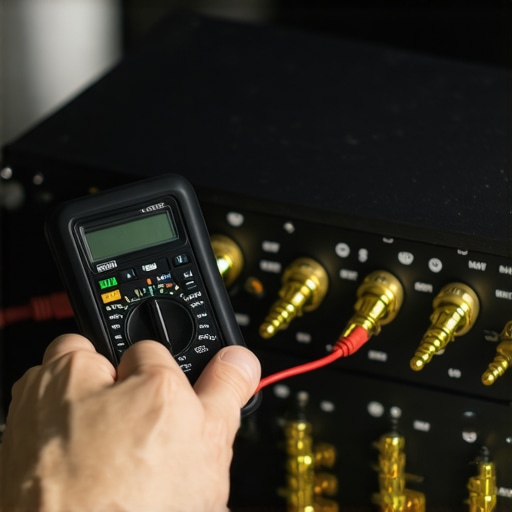
Don’t Kill Your Tweeters With Canned Air
When it comes to cleaning, most people are far too aggressive. I’ve seen people take a vacuum or compressed air to a dust-covered silk dome tweeter, only to watch the delicate fabric get sucked in or shredded. It’s painful to watch. This is why you should never use compressed air to clean a silk dome tweeter. Instead, use a very soft makeup brush or a specialized detailing brush. If your connections are looking a bit dull, skip the harsh chemicals. Knowing how to clean gold-plated connectors without ruining the finish involves little more than high-purity isopropyl alcohol and a lint-free swab. This keeps the resistance low and ensures your signal doesn’t degrade over months of humidity and exposure.
How do I maintain my system to ensure peak performance for years?
Maintenance isn’t just about cleaning; it’s about checking the health of the hardware. Every six months, I pull my amplifier out and check for heat discoloration on the vents. If you notice one side of your amp is significantly hotter than the other, you might be facing a bias issue. This is a common culprit when you need to how to fix channel imbalance on a vintage stereo amplifier. I also recommend checking your cable terminations regularly. Screw terminals can loosen over time due to the subtle vibrations of the speakers themselves. A quick quarter-turn with a screwdriver every year can prevent a sudden drop in volume or a total signal loss.
The Future of Your Living Room’s Acoustics
Looking ahead, the biggest shift I see isn’t in better speakers, but in smarter rooms. We are moving toward a world where ‘Auto-EQ’ isn’t just a gimmick on a cheap receiver but a sophisticated AI-driven process. According to the technical documentation for Room EQ Wizard (REW), the ‘Schroeder frequency’—the point where your room transitions from being a resonator to a reflector—is unique to every space. I predict that within five years, even budget soundbars will use built-in microphones to map these transition points in real-time, adjusting the output second-by-second to match your furniture layout. For now, the most advanced thing you can do is buy a calibrated mic and measure your own space to understand where the physics are working against you. Take five minutes today to check your speaker wire connections—tighten those terminals and make sure no stray strands are touching the back of your amp. Your ears (and your power supply) will thank you.
The Sound Mistakes That Taught Me the Most
Looking back at my first ‘all-in-one’ purchase, the biggest lesson wasn’t about price—it was about respect for physics. I tried to force a thin bar to behave like a grand orchestra, and I failed. Now, I tell everyone to stop being afraid of that extra box. If your current amp is older, don’t let it stop you; learning how to wire a subwoofer to a receiver with no sub out port changed the way I look at vintage gear. I also realized that sound isn’t just about the speakers; it’s about the air between them. I’ve spent years hunting for the best home audio deals, but the real ‘deal’ was finally understanding how to manage my room’s acoustics rather than just buying more power.
Resources to Take Your Setup to the Next Level
If you want to move beyond the basics, you need a few specialized tools in your belt. First, grab a measurement mic and the REW (Room EQ Wizard) software; it’s free and will reveal more about your room than your ears ever could. Second, never underestimate the power of fabric. I constantly remind people why you should use a rug to fix a bright sounding room because it’s often more effective than a $1,000 processor upgrade. Finally, keep a guide handy for niche setups, such as how to set up a 2-1 system for the ultimate gaming audio, so you don’t over-complicate your signal chain.
#IMAGE_PLACEHOLDER_E#
Stop Chasing Specs and Start Feeling the Music
At the end of the day, your home audio system should serve your emotions, not just your technical curiosity. Whether you are dimming the bulbs because you’ve learned why your home theater sounds better with the lights off or you’re finally feeling that chest-thump from a properly placed sub, the goal is to disappear into the story. Don’t be afraid to experiment, move your furniture, or swap a cable if it means getting closer to that ‘live’ feeling. Your perfect sound is waiting in the physics of your own living room—you just have to give it the space to breathe. What was the one piece of equipment that finally made your system ‘click’ for you? Let me know in the comments below!