
I was sitting in my living room, cold drink in hand, ready to let the deep bass of a classic rock track wash over me. Then it happened. A sharp, plastic-on-metal ‘thwack’ that made my stomach drop into my shoes. I just knew I’d pushed my floorstanders too far during my last cleaning session. It is a gut-wrenching feeling, especially when you have invested your hard-earned cash into a setup that usually brings you joy. But after twenty minutes of frantic cable-checking and sweating, I realized it was just a loose screw on a nearby lamp vibrating in sympathy with the music. We have all been there—that instant wave of panic that your expensive audio gear is destined for the landfill. If you have ever wondered how to fix a buzzing sound in your portable speaker at high volumes, you know that the line between a broken driver and a loose piece of trim is incredibly thin. Today, I am going to help you play detective. We are going to figure out if your speakers are actually dead or if they are just throwing a tantrum because something nearby is loose. I have wasted hundreds of dollars replacing gear that was not actually broken early in my journey, and I do not want you to make the same mistake. Sometimes, what sounds like a terminal failure is actually just why your car door speakers rattle even at low volume because of a single loose plastic clip.
Stop Panic-Buying New Speakers Before Reading This
The truth is that a ‘blown’ speaker is a very specific technical failure, yet we often use the term as a catch-all for any sound that resembles garbage. A truly blown speaker usually means the voice coil has melted, the spider has torn, or the surround has completely disintegrated. However, a lot of what we hear—that annoying vibration, the ‘fuzz,’ or the sudden loss of clarity—is frequently mechanical and entirely external to the speaker’s internal health. I remember once tearing apart a vintage setup because I thought my vintage speakers were losing their punch due to a blown cone. I was devastated until I found out the speaker grill was just rattling against the frame. According to researchers at the Audio Engineering Society (AES), listeners often struggle to differentiate between non-linear distortion from the speaker itself and ‘buzz, squeak, and rattle’ (BSR) noises caused by the room or the speaker cabinet. Before you pull out your credit card for a replacement, you must verify the source of the noise. Have you ever been convinced your gear was broken only to find out it was something totally unrelated, like a loose picture frame? Tell me your most embarrassing ‘false alarm’ in the comments below.
Wait, does my speaker really have to go to the landfill?
This is the big fear, isn’t it? If the speaker really is blown, you are likely worried about the cost of a professional recone versus the price of just buying a brand-new pair. I used to think everything in the audio world was disposable once it started making a weird noise. I once threw away a perfectly good pair of monitors because they crackled incessantly, not realizing it was just how to fix a scratchy volume dial with a five-minute cleaning. The reality is that if the rattle is coming from inside the cabinet, it might just be a loose internal brace or even how to tell if your speakers capacitor is starting to fail, which are both much cheaper fixes than a full driver replacement. We are going to walk through the physical tests you can do right now to find the culprit and keep your gear singing.
Start With Your Eyes Not Your Ears
Most of the time, a speaker tells you it is dying before you even plug it in. I have seen people spend hours troubleshooting software when the problem was literally staring them in the face. Grab a flashlight and look at the ‘surround’—that rubber or foam ring connecting the cone to the metal frame. If it is cracked, dry-rotted, or has a hole, that is your rattling culprit. While you are there, use the trick to removing dog hair from speaker grilles safely to get a clear view of the driver. A tiny tear might not kill the sound, but it will definitely create a nasty ‘fuzz’ at higher volumes.
Give the Cone a Gentle Push
This is the most critical manual test you can perform. Think of your speaker driver like a piston in a car engine; it needs to move back and forth perfectly straight. With the power off, place your fingers evenly around the center dust cap and apply very light, even pressure. It should move smoothly and silently. If you feel any resistance or hear a ‘scritch-scratch’ sound, the voice coil is likely rubbing against the magnet. This usually happens if the speaker was overheated or dropped. Last summer, I was convinced my favorite bookshelf speakers were toast because of a weird clicking noise. I even started looking up how to tell if your speakers capacitor is starting to fail. It turned out to be a loose banana plug rattling against the back plate. Always check the physical movement first. 
Rule Out the Cables Before You Blame the Driver
Before you declare the driver dead, you have to isolate it. I have seen dozens of ‘broken’ speakers that were actually victims of a bad signal chain. Swap the left and right speaker wires at the back of your receiver. If the noise moves to the other speaker, your speaker is fine—your amp or cable is the problem. This is especially true in vehicles; you might find why your car speakers cut out when you hit a bump is just a loose spade connector and not a blown voice coil. If you are dealing with a sealed enclosure and hear a whistle, try the simple paper test for finding air leaks in your speaker cabinet to see if air is escaping through a bad seal rather than a broken driver.
The 9-Volt Battery Trick for Instant Feedback
If you are getting no sound at all, there is a ‘quick and dirty’ way to check if the speaker’s internal wiring is still intact. Take a small 9-volt or AA battery and briefly touch the speaker wires to the battery terminals. You should hear a distinct ‘pop’ and see the cone move. If it moves out, the polarity is correct; if it moves in, you need to swap the wires. This is essentially how to tell if your speakers are out of phase in 30 seconds. If there is no movement and no pop, the voice coil is likely ‘open’ or burned out, and it is time to look for a replacement. This test helps you differentiate between a dead driver and a situation where why your bluetooth speaker sounds distorted at 80 volume because of digital clipping rather than physical failure.Most enthusiasts believe that ‘blowing’ a speaker is always a result of too much volume. While cranking the dial to eleven certainly does not help, the silent killer is actually ‘clipping’ from an underpowered amplifier. I used to think I was playing it safe by pairing high-end towers with a budget receiver, but that is exactly why your bookshelf speakers need more power than you think. When an amp runs out of juice, it stops producing a smooth sine wave and starts sending ‘squared-off’ signals that mimic direct current. This generates massive amounts of heat that the tiny wire in a tweeter simply cannot dissipate. In fact, research published by the Audio Engineering Society (AES) indicates that thermal failure in high-frequency drivers is significantly more common when using an amplifier that is constantly driven into clipping. If your high-end setup starts sounding ‘crunchy’ or loses its sparkle, you might need to learn how to spot a blown tweeter before it ruins your crossover. This happens because as the tweeter fails, it can create a short circuit that takes the rest of the internal electronics down with it.
More Power is Actually Safer for Your Tweeters
It sounds counterintuitive, but having an amplifier with ‘headroom’—extra power that you never actually use—is the best insurance policy for your gear. When you have enough headroom, the signal stays clean even during loud transients, like a sudden drum hit or an explosion in a movie. If you are unsure if your current setup is up to the task, you should investigate how to tell if your amplifier has enough headroom for your speakers before you upgrade your drivers. 
Can You Actually Hear the Difference Between Clipping and Thermal Distortion?
Distinguishing between an overdriven amplifier and a failing speaker cone requires a disciplined ear. Clipping often sounds like a harsh, metallic ‘sizzle’ on top of the vocals, whereas a physically damaged driver usually produces a mechanical ‘clack’ or a consistent rasp. One of the biggest ‘oops’ factors I see in the field is people ignoring the physical warning signs of a failing component because they assume the speaker is just ‘breaking in.’ If you ever smell a faint, sweet, or ozone-like scent near your equipment, stop immediately. You need to know how to fix a car subwoofer that smells like it is burning because that odor is literally the adhesive on your voice coil vaporizing. Once that glue is gone, the coil will warp and eventually seize.
Don’t Ignore the ‘Magic Smoke’ Warnings
I have seen many hobbyists push through the warning signs only to have their gear go into a death spiral. If you find why your receivers protection mode keeps triggering at high volume, it is not a suggestion—it is a final warning from the manufacturer that your impedance matching is wrong or your hardware is dangerously overheating. Sometimes the fix is as simple as airflow; for instance, why your bookshelf speakers sound better when you move them off the desk is often related to reducing early reflections and allowing the cabinet to breathe properly. Have you ever fallen into this trap and pushed your gear until it smelled like a campfire? Let me know in the comments below.
I’ve learned the hard way that a little bit of ‘preventative medicine’ goes a long way. My audio toolkit always has a can of DeoxIT D5 in it. If you’ve ever dealt with a crackly knob, you need to know how to fix a scratchy volume dial with electrical contact cleaner before the oxidation ruins the signal path permanently. It’s not just about the knobs, though; I also use it on my RCA terminals to ensure the best possible connection. Another pro-tip for the long haul is to keep an eye on your rubber. If you live in a dry climate, how to clean sticky speaker surrounds without damaging the rubber is a skill that will save your vintage towers from an early grave. Even simple things matter, like knowing why your headphone pads are flaking and how to prevent it by wiping them down after a long listening session to remove skin oils.
How do I keep my sound system performing like day one?
Maintaining audio gear is less about ‘fixing’ things and more about managing the environment. I religiously check my connections twice a year. You would be surprised how much the reason your expensive receiver makes a clicking sound when it starts can sometimes be traced back to a slightly loose wire triggering a protection relay. I also suggest using the trick to removing dog hair from speaker grilles safely because dust and hair buildup actually change the acoustic transparency of the fabric over time. If you’re serious about your low-end, you already know the reason your speaker stands need to be filled with sand is to kill resonance, but don’t forget to check those seals; occasionally running the simple paper test for finding air leaks in your speaker cabinet can alert you to drying gaskets before they leak enough to ruin your bass response.
The Cheap Tool That Saves Expensive Gear
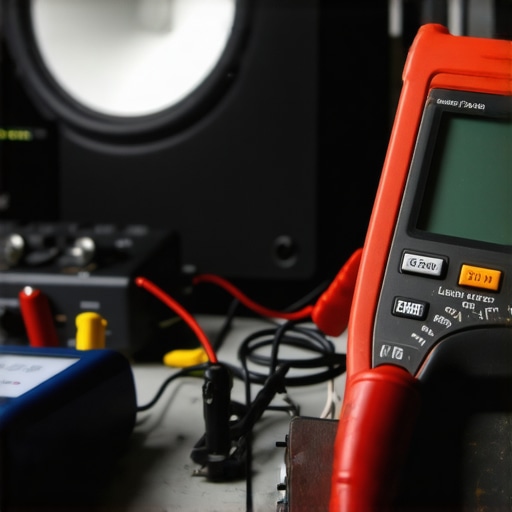
One tool I cannot live without is a simple digital multimeter. I use it to verify my wiring before I ever turn the power on. This is vital if you are trying to figure out how to match your car subs impedance to your amplifiers output. A wrong reading here can fry an amp in minutes. I also recommend getting comfortable with room measurement software. As Dr. Floyd Toole points out in his seminal work ‘Sound Reproduction: The Acoustics and Psychoacoustics of Loudspeakers and Rooms,’ the room is the final component of every audio system, often contributing more to the final sound than the speakers themselves. In the coming years, I expect to see massive shifts toward ‘Active’ correction where even entry-level speakers have built-in DSP that monitors the health of the driver in real-time.
Focus on Comfort and Grounding as You Scale
If you’re moving from a basic setup to something more serious, pay attention to the mechanical noise of your equipment. For instance, how to stop your high-end headphones from creaking when you move often involves just a tiny drop of specialized dry lubricant on the hinges. In car audio, the stakes are even higher; you need to know how to properly ground a car amplifier to eliminate engine hum or you’ll never hear the true potential of your components over the alternator whine. Scaling your system isn’t always about buying bigger speakers; sometimes it’s about making sure your existing gear isn’t fighting itself. If your head is literally hurting, check why your headphones feel tight and the safe way to stretch them to improve your long-term comfort. I want you to go grab your smartphone right now and learn how to use your phone to measure your rooms frequency response. It’s the single most effective way to see exactly what your ears might be missing.
I’ve spent years chasing the ‘perfect’ sound, only to realize that sometimes the solution was a five-dollar fix rather than a thousand-dollar upgrade. One of the biggest shifts in my thinking was realizing that environment is everything. For example, if you find your sound lacking body, you might discover why your portable speaker sounds better when placed in a corner just by utilizing boundary loading. I also learned the hard way that leaving gear plugged in constantly isn’t always helpful; understanding the mistake that kills your portable speaker battery life saved my travel rig from an early death. Most importantly, don’t rush to replace components. You would be shocked to learn why your cars factory speakers sound better than your new cheap ones when the aftermarket replacements are poorly matched to the existing power source.
What I Wish Someone Had Told Me Before I Tossed My First Pair of Towers
Experience is the best teacher, but in the audio world, that education can be expensive. Here are the lightbulb moments that changed how I approach speaker repairs:
- Volume isn’t the only metric. Distorted sound at 50% volume is often an EQ or signal issue, not a physical hardware failure.
- Mechanical noise is a trickster. Always touch the cabinet; if the rattle stops when you press your hand against the wood, the driver is fine and the seal is failing.
- Impedance matching is non-negotiable. I once fried a tweeter because I didn’t realize my amp was pushing a 4-ohm load into an 8-ohm rated crossover.
The Diagnostic Tools That Live in My Speaker Repair Kit
If you want to move from a casual listener to a true audio detective, you need the right gear in your cabinet. I always keep a digital multimeter nearby to check for voice coil continuity before I ever take a driver out of its cabinet. I also highly recommend checking out The Loudspeaker Design Cookbook by Vance Dickason; it’s the bible for anyone who wants to understand why drivers fail. For those struggling with physical vibrations, learning how to fix a subwoofer that is vibrating your furniture with simple isolation feet can change your entire home theater experience. Finally, if you are struggling with your TV setup, you should look into how to get clear movie dialogue without a dedicated center speaker through phantom center imaging settings.
#IMAGE_PLACEHOLDER_E#
Trust Your Ears and Stay Curious
At the end of the day, audio is about the joy of the experience, not just the technical perfection of the hardware. Don’t let a little rattle or a temporary failure discourage you from enjoying your music. Most of the time, knowing how to fix a buzzing sound in your portable speaker at high volumes is just the first step in becoming more connected to how your gear actually works. Keep listening, keep tweaking, and don’t be afraid to pull out the screwdriver when things sound off. What is the strangest thing you’ve ever found rattling inside your speaker cabinet? Let me know in the comments below!