
I remember the exact moment I realized my prized 1980s mixing board wasn’t just vintage; it was crusty. I had spent three hours setting up microphones for a local band, and as soon as I nudged the master fader for the final mix, it sounded like someone was eating potato chips directly into the pre-amp. That awful, sandpaper-on-glass crackle is enough to make any audio enthusiast weep. It wasn’t just a minor annoyance; it was literally destroying the signal path. I almost threw the whole unit on the curb that night, thinking the circuits were fried. But as I’ve learned over the years, usually, it’s not a hardware death sentence—it’s just the accumulation of forty years of dust, hair, and oxidation.
Stop Cringing at That Gritty Audio Noise
We’ve all been there. You score a beautiful vintage receiver or an old-school mixer at a yard sale, and it looks mint, but the second you move a slider, your speakers scream in agony. If you’ve ever wondered why your vintage receiver makes a loud hum with no music playing, you know that old electronics require a bit of TLC. Fixing a scratchy fader is about restoring the physical connection between the wiper and the resistive strip inside the component. It’s a tactile, satisfying job that brings your gear back to life without costing a fortune. Today, I’m going to show you exactly how to silence those ghosts in the machine so you can get back to clean, buttery-smooth transitions. Whether you are dealing with a console or just trying to fix a scratchy volume knob on an old amp, the mechanics of grime are surprisingly similar.
Is it actually safe to spray chemicals inside my vintage gear?
This is where I tell you about my biggest rookie mistake. Early on, I thought all lubricants were created equal. I grabbed a can of standard WD-40 from the garage and hosed down a beautiful Marantz fader. It worked for about ten minutes before it turned into a sticky, dust-attracting sludge that permanently ruined the component. Don’t do that. You need a specialized electrical contact cleaner. Professional technicians almost exclusively use products like DeoxIT because they chemically remove oxidation without leaving a conductive residue that shorts out your board. In fact, industry consensus from restoration experts at sites like AudioKarma suggests that using the wrong solvent is the fastest way to turn a $500 mixer into a boat anchor. Much like how vintage speakers lose their punch over time due to physical wear, faders require the right chemistry to stay functional. Have you ever had a piece of gear you loved start crackling so bad you just stopped using it? I want to hear about your noisy nightmares because, trust me, I’ve likely lived through them too. We are going to dive into the surgical precision required to clean these components without making a mess, ensuring your vintage treasure sounds as good as the day it left the factory.
Strip it Down to the Circuit Board
To actually fix the problem, you have to stop spraying cleaner onto the faceplate. I once spent an hour dousing the top of a Soundcraft board with solvent, only to realize the liquid was just pooling on the plastic and never touching the resistive strip. You must open the chassis. Most mixers require removing the bottom plate or the individual channel strips. Before you touch a single screw, ensure the unit is unplugged to avoid any nasty shocks. Once you are inside, you will see the long, rectangular metal housings of the faders. This is where the magic happens. While you are in there, it is a good time to check other components, as knowing how to tell if your speakers capacitor is starting to fail can save you a second trip inside the guts of your gear. If you see white crusty buildup or green oxidation on the solder joints, you have found the culprit.
Aim for the Gaps Not the Surface
The goal is to get the cleaner inside the fader housing where the wiper makes contact with the carbon track. Use the thin straw that comes with your electrical contact cleaner. Insert it into the small openings at either end of the fader or the long slot where the lever moves. A quick, half-second burst is all you need. Do not flood it. You are trying to dissolve the oxidation, not wash it away with a fire hose. If you have ever wondered how to fix a scratchy volume dial with electrical contact cleaner, the principle is identical here: the chemical does the heavy lifting by breaking down the non-conductive layer of grime that has built up over years of use.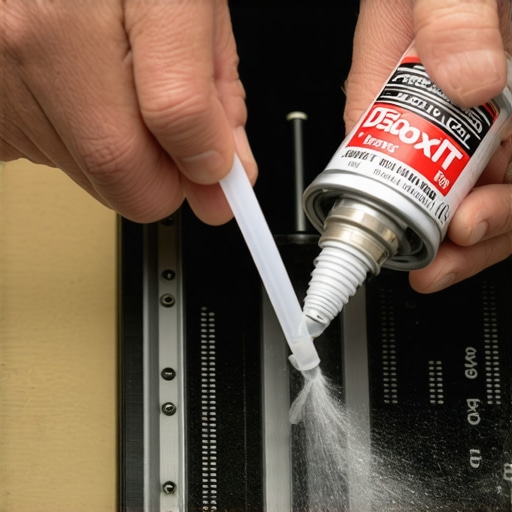
The Fifty Stroke Rule for Clean Audio
Immediately after spraying, you need to move that fader up and down rapidly. I call this the fifty-stroke rule. Move it from 0 to 100 at least fifty times. This mechanical action uses the internal wiper as a scraper, helping the chemical scrub the resistive strip clean. If you just spray and let it sit, the gunk will just settle back down once the solvent evaporates. This physical workout is the same technique I use when I fix a scratchy volume knob on an old amp. You will actually feel the fader start to glide more smoothly as the friction-causing dust disappears. If the fader still feels ‘gritty’ or jumpy after this, it might be a sign of physical wear rather than just dirt, similar to how to tell if your speaker is actually blown or just rattling due to a loose internal component.
Dry it Out Before Powering Up
Patience is your best friend here. Even though high-quality contact cleaners evaporate quickly, trapped moisture can cause a short if you rush the process. I usually wait at least twenty minutes before even thinking about plugging the mixer back in. Use this time to blow out the rest of the dust from the circuit board with a very low-pressure air puffer—not high-pressure canned air, which can actually lodge debris deeper into the components. This meticulous approach is how you prevent the issues where a vintage receiver makes a loud hum with no music playing because of a dirty ground connection. Clean, dry, and debris-free is the only way to ensure your signal path remains pristine for your next recording session.Most people think that if a little cleaner is good, a whole can is better. This is the ‘more is more’ fallacy that kills vintage gear. If you saturate the fader, you are not just cleaning it; you are inviting the next ten years of airborne dust to glue itself to the internal components. I have seen beautiful boards ruined because a well-meaning owner turned the internal chassis into a sticky marshland of solvent. You have likely heard people swear by ‘burning in’ their equipment for hundreds of hours. While I love a good ritual, the truth about speaker break-in periods is that the physical changes are usually negligible after the first few minutes of use. A famous technical study by the engineering team at SoundStage! showed that while Thiele/Small parameters do shift slightly as a driver’s spider loosens, it is rarely enough to be audible to the human ear once the cabinet is sealed. We often mistake our ears ‘getting used’ to a new sound profile for the equipment actually changing. This psychological bias is everywhere in audio restoration and purchasing. For instance, many audiophiles spend thousands on external digital converters only to find that why your high-end DAC sounds exactly like your laptops headphone jack comes down to the fact that modern chips are already incredibly efficient. The real gains in your signal chain are usually found in physics and acoustics rather than expensive silver-plated cables. For example, understanding why your bookshelf speakers sound better when you move them off the desk will do more for your stereo image than any $500 ‘audiophile’ power cord ever could. Decoupling and proper placement beat boutique components every single day.
Why does my fader still crackle after a deep clean?
Sometimes, cleaning doesn’t work because you aren’t fighting dirt—you are fighting the ‘death of a thousand cuts’ on the resistive strip. Every time you move a fader, a tiny amount of the carbon track is physically scraped away by the wiper. After forty years of heavy use in a smoky studio or a dusty basement, there might simply be no conductive material left for the wiper to touch. 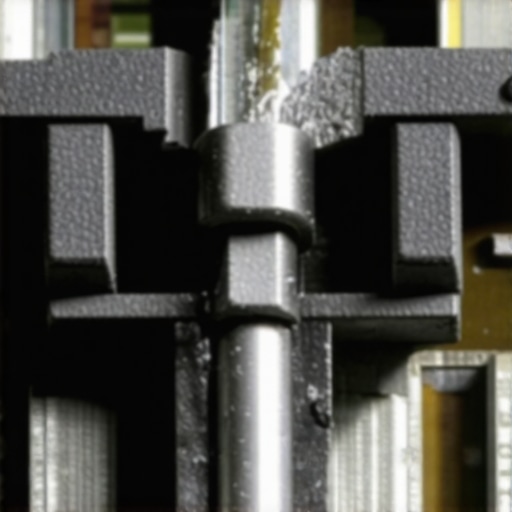 This is why it is vital to know the secret to choosing the right ohm rating for your amp when replacing parts, as a worn-out potentiometer might read a completely different resistance than it did when it left the factory in 1978. If you have reached this stage, no amount of chemical solvent will help; you are looking at a full component replacement. Have you ever spent hours meticulously cleaning a piece of gear only to realize the hardware was physically toast? Let me know in the comments—I need to know I am not the only one who has wasted a Saturday on a lost cause.
Keep Your Gear Breathing for Decades
Once you have conquered the immediate crackle of a dusty fader, the real work begins: keeping it from coming back. I have spent years refining a maintenance kit that goes beyond just a can of solvent. For my daily drivers, I use a combination of microfiber cloths and a very specific sequence of physical checks. For instance, I’ve found that knowing how to clean your headphone ear pads without ruining the leather is just as important as internal electronics care; skin oils are incredibly corrosive over long periods. I also recommend keeping a log of when you last serviced your gear. If you notice why your vintage amp gets hot even when you arent playing music, it’s a red flag that your internal components are struggling, and no amount of fader cleaning will fix a failing power transformer.
How do I maintain my expensive audio equipment over time?
Consistency is more important than deep-cleaning marathons. I suggest a quarterly ‘audio health check.’ This involves a visual inspection of all connections and a quick ‘exercise’ of every knob and slider on your board. If you are dealing with speakers rather than mixers, you should be checking the physical integrity of the drivers. I’ve actually seen people use how to fix a speaker cone with a simple coffee filter as a temporary patch, but the goal is to prevent that dry rot from happening in the first place by keeping your room at a stable humidity. According to the Audio Engineering Society (AES) standard AES17, even microscopic variations in contact resistance can introduce measurable harmonic distortion, which is why I use a tiny drop of DeoxIT Gold on my patch bay connections twice a year. It creates a molecular bond that seals out the oxygen that causes that dreaded green oxidation.
The Phone in Your Pocket is Actually a Pro Measurement Mic
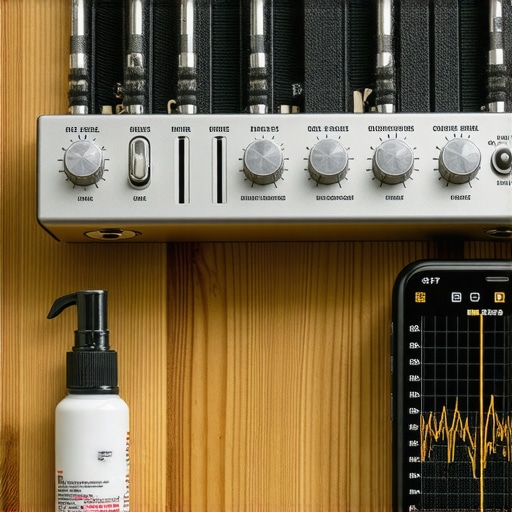
You don’t need a $1,000 calibrated microphone to scale your setup and find out why it doesn’t sound ‘right.’ One of the most powerful moves you can make is learning how to use your phone to measure your rooms frequency response. I use an app called Spectroid to see where my room is eating my bass or exaggerating my highs. It is the trick to making cheap bookshelf speakers sound expensive—once you see the visual data of your room’s acoustics, you can move a chair or a rug and watch the response flatten out in real-time. This kind of data-driven maintenance ensures that your perfectly cleaned mixer is actually outputting into a space that can handle the fidelity.
Where the Audio World is Heading
The future of audio maintenance is moving toward self-diagnostic hardware. We are already seeing high-end amplifiers that can detect ‘leakage’ in capacitors before they pop, and soundbars that use AI to recalibrate when they detect a change in the room’s furniture. However, for those of us who love the tactile feel of an old-school fader, the ‘scaling’ of our hobby involves moving toward better integration between the old and new. I predict we will see more ‘smart’ contact cleaners that change color when oxidation is fully neutralized. For now, my best advice is to stop guessing. Take ten minutes this weekend to map your room with your phone—it is the single fastest way to identify why your audio feels ‘off’ without spending a cent on new equipment. It will give you a baseline for your system’s performance that is far more valuable than any marketing hype.
Hard-Won Truths from My Mixing Desk Trenches
After decades of peering into the guts of analog consoles, I have realized that the mechanical feel of a fader is just as important as the electrical signal it carries. If a fader feels ‘gritty’ but doesn’t crackle, it likely needs a dry lubricant rather than a cleaner. One mistake I see often is technicians assuming every noise is dirt. Sometimes, the ‘scratch’ you hear is actually a DC voltage leak from a failing capacitor elsewhere in the circuit. If you have cleaned the fader and the noise persists, it is time to look at the signal path as a whole. You should also verify your system’s phasing, as knowing how to tell if your speakers are out of phase in 30 seconds can help rule out other audio artifacts that mimic scratchy hardware noise. Finally, remember that cleaning is a preventative measure. Don’t wait for the crackle to start; a quick blast of air every few months keeps the dust from settling in the first place.
My Trusted Arsenal for Audio Restoration
Building a maintenance kit is a rite of passage for any serious audio engineer. My personal toolkit always includes DeoxIT D5 for general cleaning and DeoxIT FaderLube specifically for the plastic-on-plastic friction found in modern faders. I also highly recommend bookmarking Hi-Fi Engine for vintage service manuals; having the original schematics is invaluable when you are deep inside a chassis. For those looking to optimize their entire listening environment once the mixer is silent, I suggest learning the trick to making cheap bookshelf speakers sound expensive through better isolation and placement. Additionally, investing in a high-quality set of jeweler’s screwdrivers will prevent you from stripping the soft brass screws often found on vintage Japanese gear. I trust these tools because they have saved me thousands in professional repair bills over the years.
Give Your Mixing Console the Second Life It Deserves
There is a profound sense of satisfaction that comes from sliding a fader and hearing nothing but the music. Restoring your gear is more than just a chore; it is an act of preservation for the tools that capture our creativity. When you take the time to learn how to fix a scratchy volume fader on a professional mixer, you are gaining a skill that most modern producers completely lack. This hands-on approach connects you to the physics of sound in a way that software plugins never can. Don’t let a little oxidation stand between you and a perfect mix. Grab your contact cleaner, open up that chassis, and bring your equipment back to its former glory. If you find that your desk still has some background interference after cleaning, you might want to look into how to get rid of ground loop hum in your audio setup to ensure your noise floor is truly as low as it can be. What’s the oldest piece of gear you’ve successfully brought back from the dead? Let me know in the comments below!